
Building a pattern of a male vest with your own hands.
Long ago vests were an integral partthe composition of the official classical troika: pants, jacket and vest. Other options were not initially considered. But the last decades have significantly changed the idea of the men's fashion and vest, as an independent clothing item. 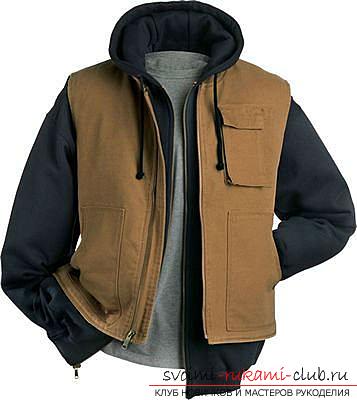 Lovers of self-expression and beautiful clothes withjoyfully picked up the tendency to use a jacket as an independent element of clothing. Now the men's vest rightfully can be called a classic, which will always be relevant regardless of the season and changing trends. A waistcoat will always help create the image of a single-minded, independent person, and office employees increasingly began to choose a minimalistic and more comfortable combination of a waistcoat with trousers. Many people choose vests for themselves, because they give comfort and create their own unique style, even with a minimal set of clothes. But remember that before you put on a vest, you need to choose the perfect variation for yourself. If you want to create a universal image, then your waistcoat will be a classic cut of neutral tones, such as black, gray, olive, brown, etc. Add jeans, a turtleneck and boots - so you can safely go to a meeting with friends. At work, you can choose the combination of a jacket with a vest. Experiment with your appearance and clothes, and the vest will add to your appearance freshness, attractiveness and charisma. As for the pattern of the classic men's vest, it is not so difficult to build. The basis of our pattern should be added 4.5 cm to the half-brow of the breast; for our modelka the increase will also be 10 cm in general. On both halves of the contours of the shoulder sections, draw vertical lines of cuts to the bottom of the product (this is done to increase the width of both parts). Taking into account the fact that the width of the finished product is corrected with a cord in the lower cut, there are no tucks in the waistcoat. Next, you need to expand the details along the line of future cuts. At 0.5 cm from the contour of the shelf you need to build a new line of this shelf. At 0.5 cm from the contour of the back, we also mark a new line. Next, you need to extend the backrest and the shelf along the contours of the side cuts by 1 cm. Please note that increasing the width of the product at the bottom should go to nothing. Accordingly, the pattern should lift the shoulder line and extend it by 1 cm. Conduct the newly formed neckline according to the pattern of the vest pattern. Draw the coquette on the back. The trowel, intended for the relief of the blades, must be transferred to the side of the coquette. Extend downwards on 6,5 sm a line of a middle of a back. Carry out the contour of the bottom, transverse to the contour of the side cuts and the middle of the back. Next, measure the resulting contour of the side cut of the back from the contour of the waist to the bottom line. Then the received number should be measured on a line of a lateral cut of a shelf downwards from a contour of a waist. Then increase the segment of the side cut of the back by 1 cm. This segment should be measured from the waist line down the line of the middle of the shelf. Conduct a newly formed outline of the line of the bottom of our waistcoat. Next, mark on our shelf lines that will limit the wings, its value is 2.5 cm. If desired, you can draw pockets, etc. and the pattern of the men's vest is ready.
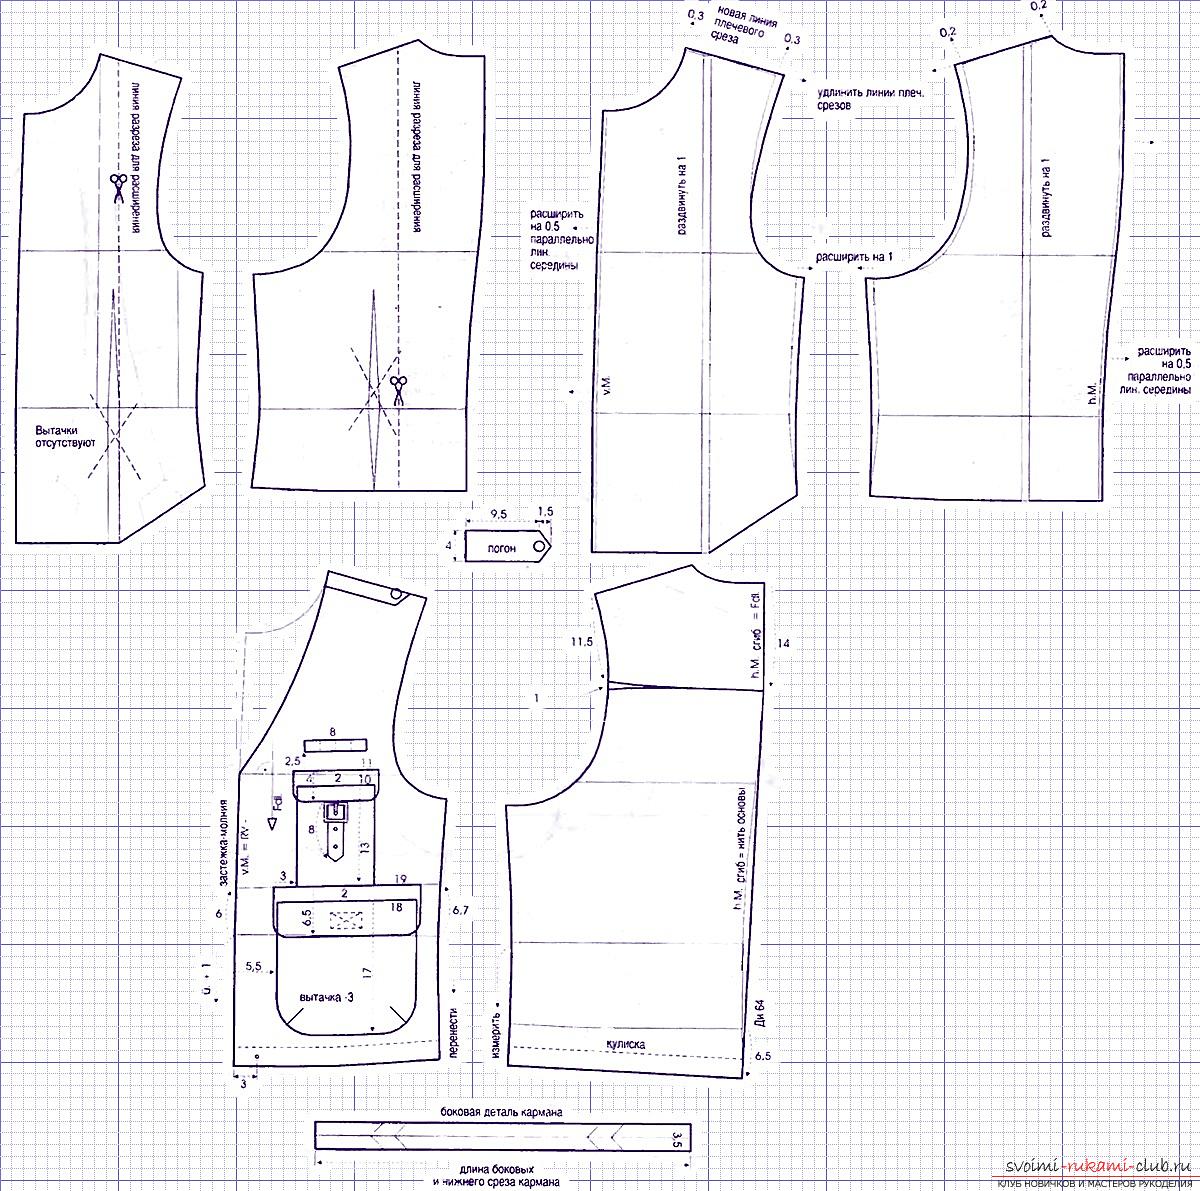
Comments
Related posts:
 Building a pattern of a dress-sundress with cuts will not be difficult, if you follow the description
 Basic construction of the pattern of a cap for newborns and sewing will make the work not difficult and fast
 Building a pattern and making lovers cats.
 Building a pattern of shoes for the doll and making them.
 Building a pattern of house slippers-moccasins.