Cat, cat, kitten - dry felting out of wool, master classes / Toys with own hands, patterns, video, MK
Only in the last 10 years the craftsmen of needleworkbegan to actively use wool for their own purposes. From wool, you get original jewelry and accessories, wonderful toys. Today you will learn how to pile a cat - a pet.
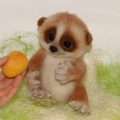
Add the cat wool
Master class from Elena Smirnova (http://utichka.livejournal.com/161597.html) 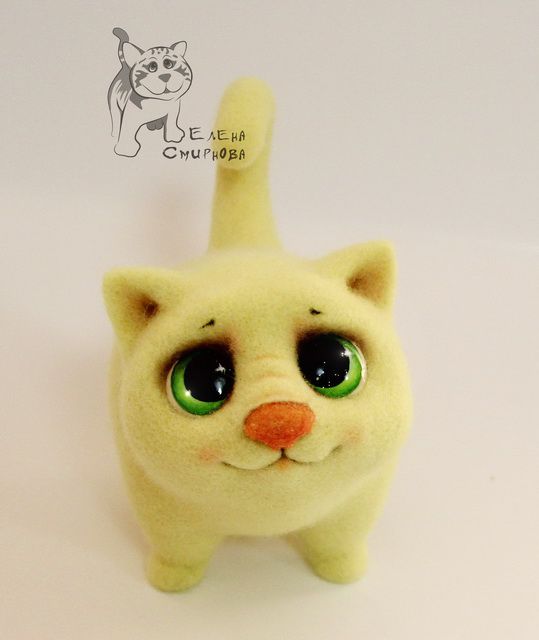 Usually the master class is designed for those who alreadyfamiliar with the basics of dry felting technique. Felting "Cat" requires the possession of the already acquired skills of filtering and the availability of the necessary working tools. But the method described below is suitable for those skilled workers who have not tried themselves in the creation of complex figurines. To make a cat out of wool, the following tools will be needed:
Tip: you can use any other instead of red hair. It all depends on what color you want the cat to end up with.
- From the wool for the filler, you need to roll a medium-sized oval shape, failing with a thick needle.
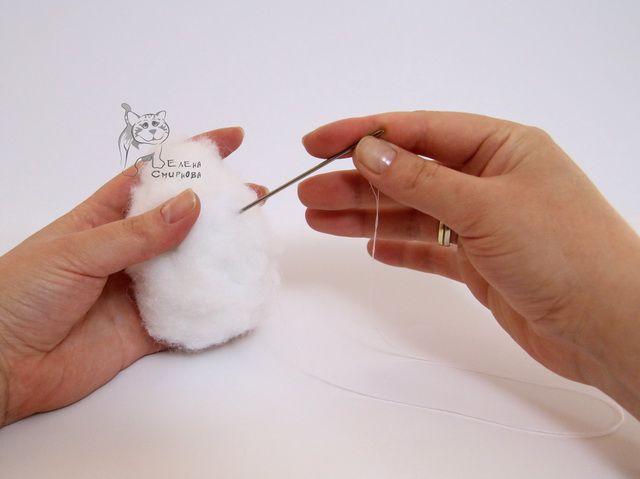
- The needle should be inserted sufficiently deep that the mold should be sealed from the middle, and the edge remains more loose for easier further work.
- In the same way, prepare a ball slightly smaller in size than the torso - for the head.
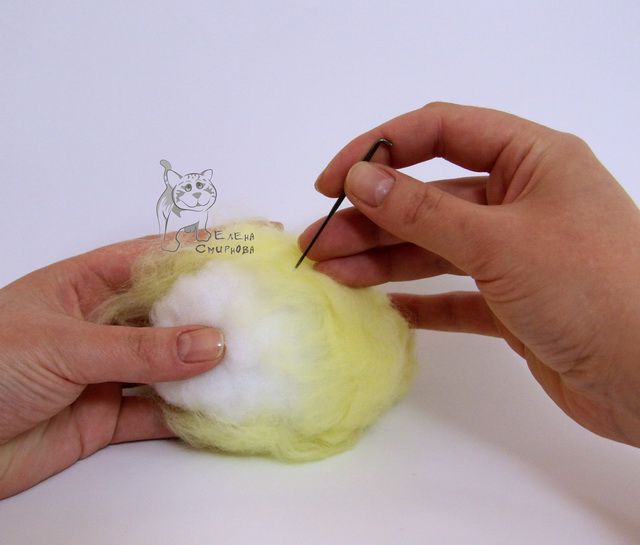
- To join the workpieces, attach them to each other and begin to stitch the needle, also deep enough to form a tight joint at the neck joint, and the edge remains softer for the time being.
- Gradually, small pieces of wool should be added to the joint to smooth the joint.
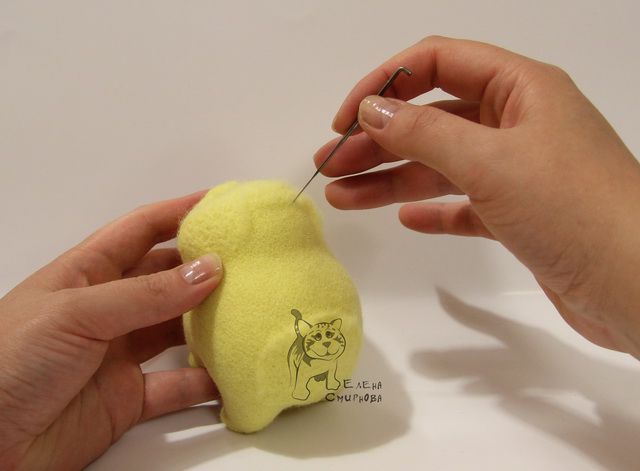
- While the fur is still soft enough, you need to work out the places of the eye sockets. To do this, you can map their places with a pencil or start typing with a needle on the eye, achieving maximum density.
- Gradually, small flat pieces of wool of the primary color are applied to the workpiece and are densely pinned to it with a needle No. 36. Particular attention should be paid to the junction points.
- After dry stitching of the main color, the eye sockets are carefully examined once more.
- Of the material of the primary color, form 2 small balls - these will be airplanes. Firmly attach them to the front part in the same way as the parts of the body were fastened together.

- Similarly, we form and attach the chin, cheeks, nape, forehead.
- With the help of the glue "Moment" we fix the eyes in the indentations, we work through the area around the eyes.
- We form 4 small elongated blanks from the filler and roll them into the main color. Gradually attach the paws already known method to the right places.
- Gradually, with the help of a needle, we form curved feet, "pierce" the pads on the paws.
- Similarly, from the filler we form the tail of the desired shape. If desired, you can flex your fingers during work.
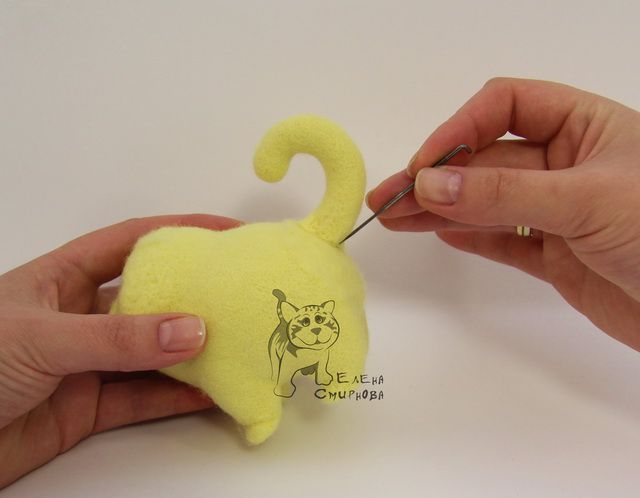
- Turn the tail of the main color and attach it to the toy.
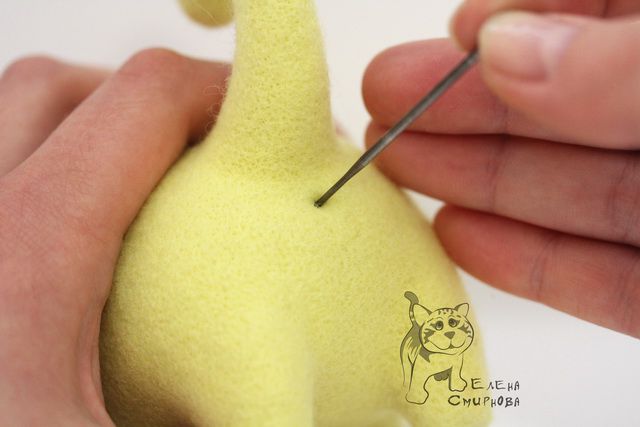
- Again, carefully handle all the necessary bends with a needle number 38: mouth, eye sockets, nose, paws. For naturalness and good mood, you can form a small hole-ass under the tail with a needle # 36.
- For the ears 2 identical parts of the wool of the primary color are placed on the dishwashing sponge and are worked through the needle No. 36 to the desired density.
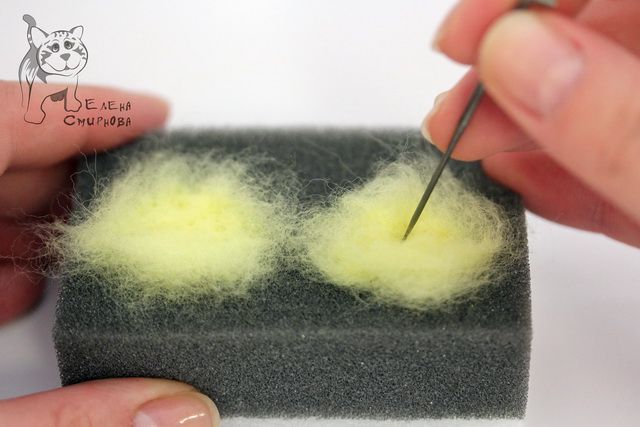
From time to time with this method of dry felting, pieces are turned over, otherwise they "fall" into the sponge.
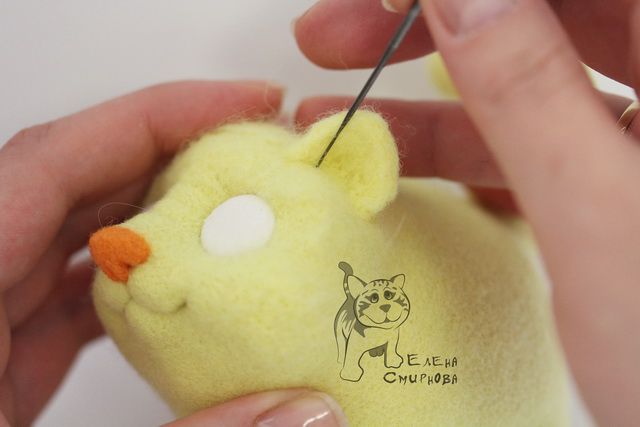
- With the needle No. 38, the protruding wool is neatly driven into the bulk of the eyelet for a neat appearance. We form the bend of the ears and put them to the head.

- For a better groove effect (for example, the mouth), carefully paint over with acrylic paint, and artistic pastel - nose, cheeks and paw pads.
- You can also add patterns or stripes over the cat's body if you want a minke whale.
- With the help of a backward needle, gradually pierce the surface of the cat to create the effect of living wool.
Now the cat is ready for fun and play!
Other options
Having mastered this technique of felting the kitten, you can try other ways of creating a toy, so that each animal turns out to be unique!
- Method number 1
For a more natural look, the kitten's body can bemake up not from 2 pieces, but from 3: the back of the trunk in the form of an oval of medium size, a larger ball for the head, and less for the joint (neck and front part of the trunk). In this case, it will be necessary to lengthen the front paws in relation to the rear and change their shape. In addition, you will have to work more joints. But the result is a real cute kitten!
- Method number 2
Some masters do not billet billetto a friend, but sewed. To do this, the prepared parts must be made denser, so that they are easier to process with threads. And joints should be carefully studied with the main color, so that the threads are not noticeable. This method is often used if the toy is prepared not for an exhibition, but for a gift to the baby. Threads make it stronger, and you can not be afraid that the kitten will fall apart in his hands.
Tips for taking notes
Finally, a few tips are left, which the dry-witted dry-witted masters shared. With their help, the kitten will turn out beautiful the first time and will delight your friends!
- To save material and finance, instead of wool for workpiece, you can use foam rubber or sintepon. In consistency, they resemble the initial material, take the desired shape and hold it well.
- An obligatory condition for the filler is its neutral color. This is necessary in order that it can be easily disguised with the help of the primary color.
- Eye can be made to the animal in many ways. In shops, ready-made eyes and blanks are sold for self-drawing, which are glued to the toy.
And you can try to bite your eyes yourself,using a different colored coat. Then on the front side you do not need to form eye sockets. Try to create something new every day. With each new toy you will have more experience and a good mood!
Comments
Related posts:
 Dry felting out of panda wool, master class / Toys with their own hands, patterns, video, MK
 Felting lamb master class / Toys with their own hands, patterns, video, MK
 Valentines with their own hands: 10 ideas and master classes / Toys with their own hands, patterns, video, MK
 Master classes: Angels from salted dough. Video / Toys with own hands, patterns, video, MK
 Hook the heart. Master classes. Scheme. Video / Toys with own hands, patterns, video, MK