
Chandeliers and lamps from plastic bottles: photos and mater classes - Kallibry
What kind of light do you like? Bright or muffled, warm or cold, and maybe you like the play of light or colorful lanterns? And how children love them! If you want to create a special light in the room or diversify the interior with an extraordinary lamp made of scrap materials - read the master classes on how to make the lamps from the bottles with your own hands. 
 If you thought that the lamp is made of plasticdo-it-yourself bottles will look too easy, then look at the photos in the workshops and see for yourself - it looks charming. All with amazement will wonder where you have such a designer lamp or chandelier, and only you will know how to make such a chandelier from plastic bottles with your own hands.
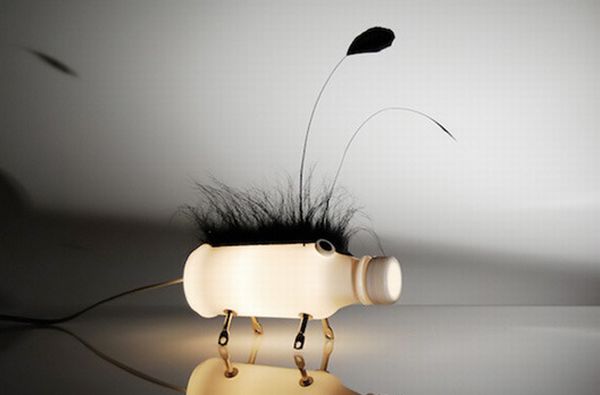

 The content of the article:
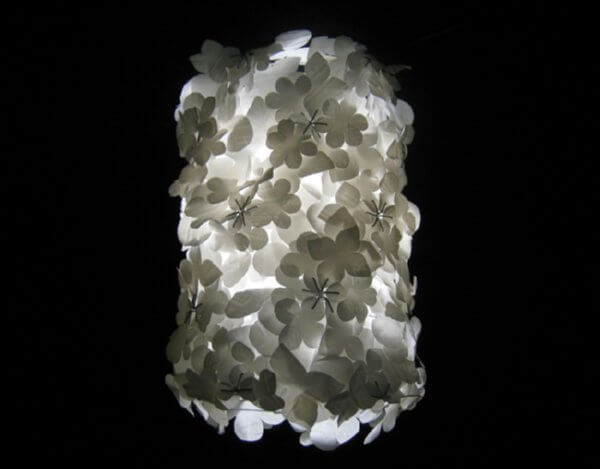
Master class number 1. Nightlight from a bottle
What could be simpler and more refined than the soft light streaming through the small petals of your lamp?  Materials and tools:
- transparent plastic bottles (bottles of any size will fit at your discretion);
- white paper (you can use paper more dense than usual - it will be better to keep the shape);
- flashlights or LED candles (for greater brightness);
- template or stencil drawing (you can download any one you like on the Internet);
- adhesive tape (white);
- scissors;
- machine for scrapbooking, paper knife or a special figured punch for cutting out patterns.
Manufacturing technology Step 1. Prepare the bottle. We will use 1- and 1.5-liter bottles - this is a flashlight frame. We remove from them all the labels and cut the necks with scissors. 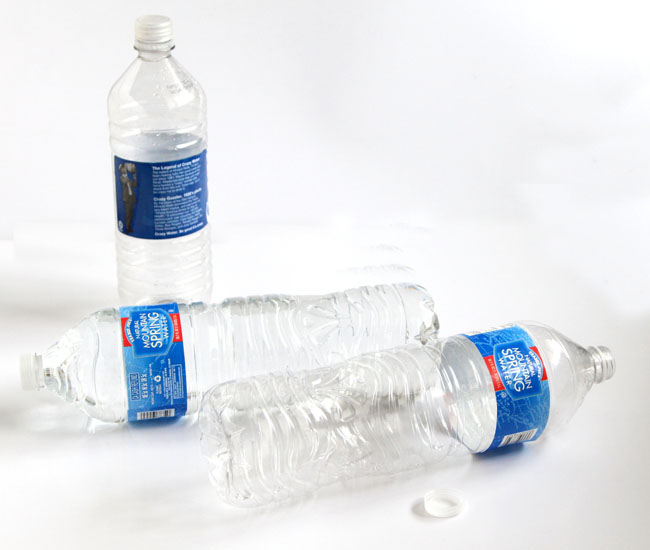 Step 2.
- Take a white sheet and wrap them a bottle. If any edges of the bottle stick out, they need to be cut off. The edges of the sheet should not come at each other - then the light will be uneven.
If you have a machine for scrapbooking, take a ready-made template and do everything according to the instructions. 
- If you do not have a special stencil machine, then put a white sheet on a flat surface, cover it with a stencil on top and link them with clips so that during the translation the drawing does not “go”.
- If you are confident in yourself, you can transfer the drawing from a stencil to a white sheet immediately with a paper knife.
If you use punches, first make a stencil pattern for night light, and then cut them. 
 Step 3. When you cut out all the desired patterns from paper, make your flashlight voluminous - gently bend the petals from the plane.
 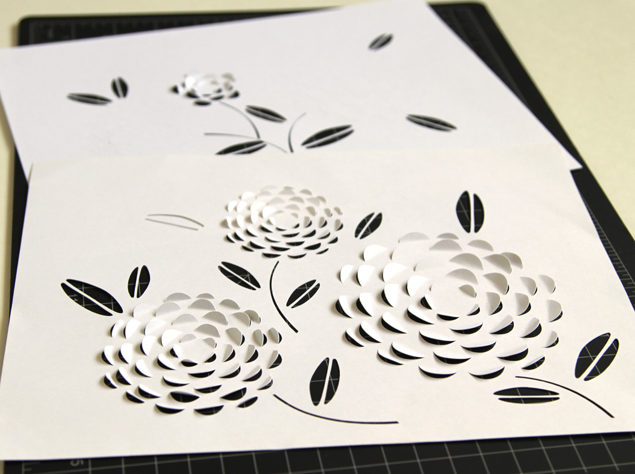 Step 4. Now glue the flashlight. We wrap the patterned sheet around the bottle, combine the edges and connect with white adhesive tape. Very thin strip, so that the place of gluing is not conspicuous.
  Step 5. Add the main element - put a flashlight or LED candle in the bottom of the bottle.
  Such an original, autonomous and safe night light is ready, now you can turn off the light and enjoy this soft romantic glow!

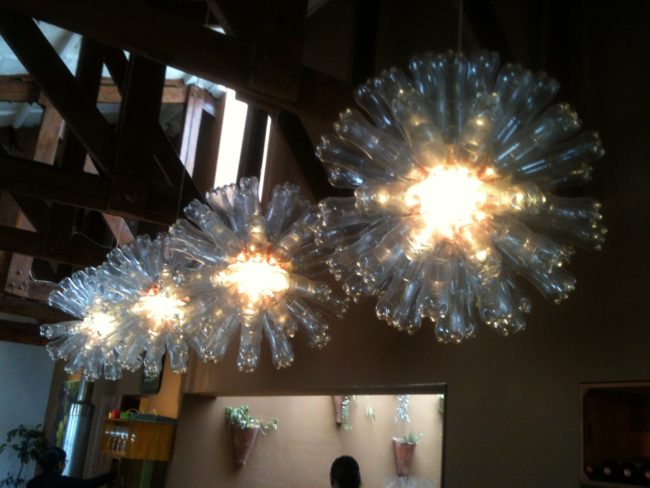
Master class number 2. A bottle chandelier
If you have ever been talking on the phoneIf you noticed how something was painted or cut into pieces, then look at how it can be used to create extremely original things, like this bottle chandelier. 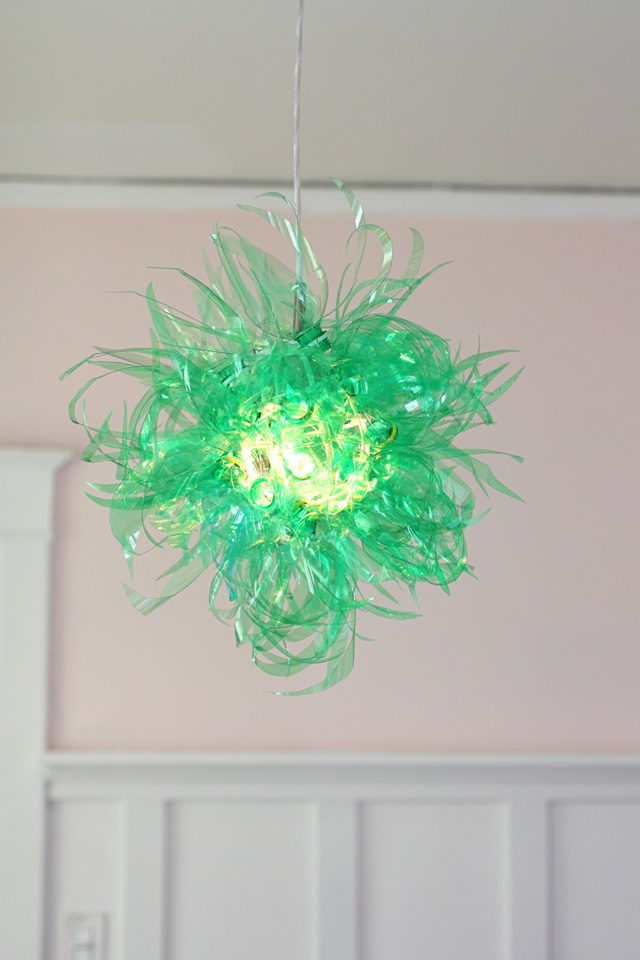 Materials and tools:
- 10 small plastic bottles (transparent, single or different colors);
- plastic frame for light bulbs (can be found in the hardware store where electrical goods are sold);
- screws (they can be in a set with a frame);
- 10 screeds;
- crosshead screwdriver;
- big scissors.
Technological process Step 1.
 The strips on the bottles can be extended in different directions - the more luxurious the lamp looks, the better. Step 2.
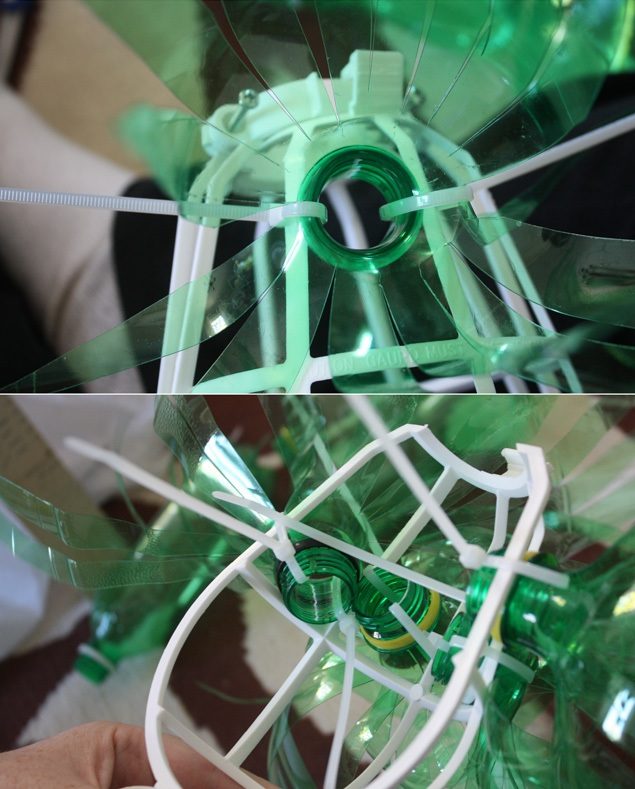 Step 3. Now you need to make sure that all axes of the frame are covered with bottles and when the lamp is ready, there will be no gaps. After that, you can trim the tendrils. Step 4. Soon the lamp will shine in all its beauty - insert a light bulb into the frame and hang it from the ceiling. Like a shaggy colored hedgehog or a blooming flower, it gives joy and a smile to everyone who pays attention to it.
These are the original - in this LESSON!
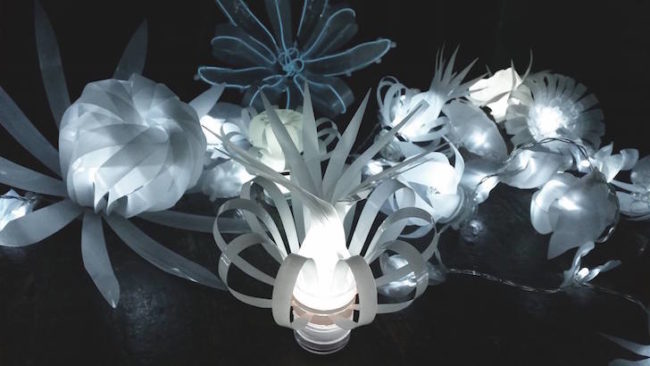
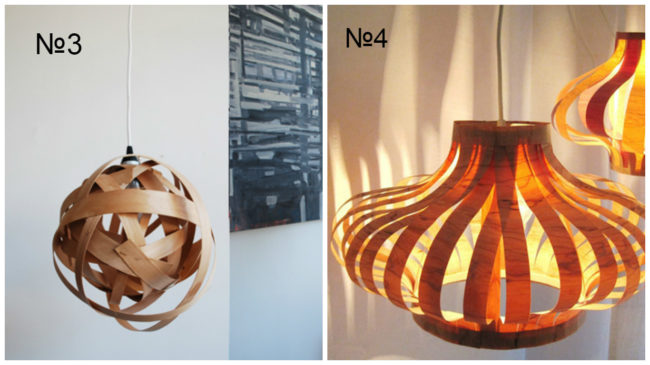
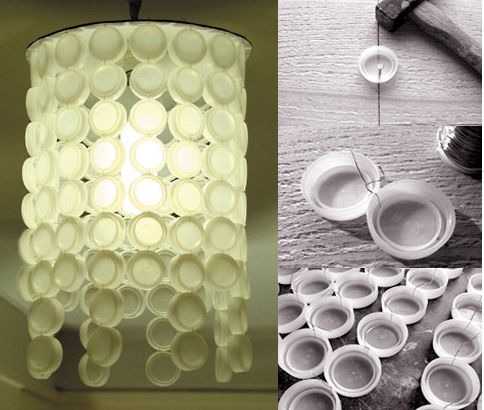
Master class number 3. Lamp - bright flowers
In addition to the chandelier or lamp that radiates itselflight, there is such an original solution as reflected light. And if you want to use it for your needs - you are here! This master class describes the wonderful idea of creating unusual light using colors from plastic bottles.  Materials and tools:
- many bottles of any colors and volumes;
- a knife or scissors;
- spray paints suitable for painting plastics (use combinations of your favorite colors);
- long bamboo sticks (or any other frame for the finished floral panel);
- old newspapers;
- wire (gold);
- awl or paperclip.
The process of assembling the lamp from the bottle Step 1. Prepare the bottle. All of them need to be washed well with covers, they will also come in handy. Remove labels from bottles and clean from traces of glue, if any.  Step 2.
 The size and shape of the petals is left to your discretion, cut the corners, make patterns - everything that the inner voice tells you.
  Step 3.

 After staining, when you have achieved the desiredcolors, lay flowers aside to dry so that they do not touch each other. Step 4. Take the bottoms of the bottles to make holes in them for fastening. We heat up the needle of the sewing or unbent tip of the clip on the fire - it will be so much easier to make holes in the plastic. We pierce the bottoms of the bottles in two places, like a button.
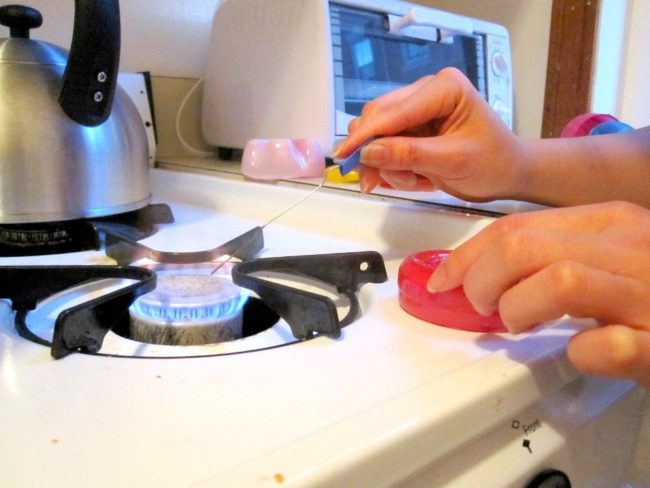
 Step 5. After the flowers, bottoms and corks have dried, we fasten them in different variations, here your imagination rules again! We thread the wire through the holes in the bottom and fasten it to the neck of the bottle. Corks are simply screwed on the bottle, and the wire can be screwed to the thread. This is necessary for coupling the entire composition. Step 6.

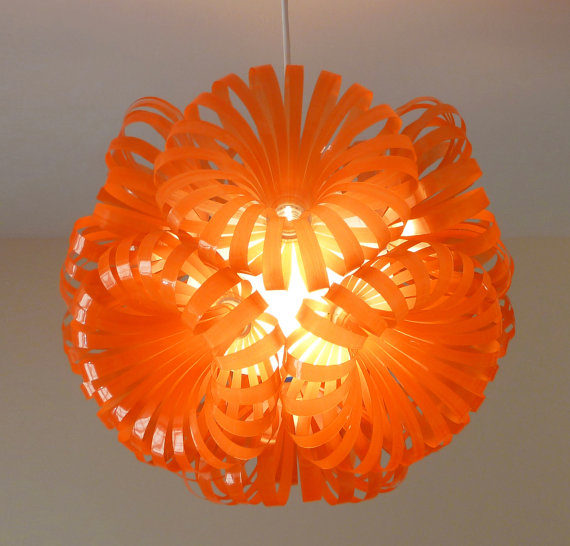
Master class number 4. Plastic flower chandelier
If you want to always watch in your homebright bouquets, then consider this non-standard option: a multi-colored flower chandelier made of plastic bottles, made by hand. See what happens, and you definitely will not pass by! 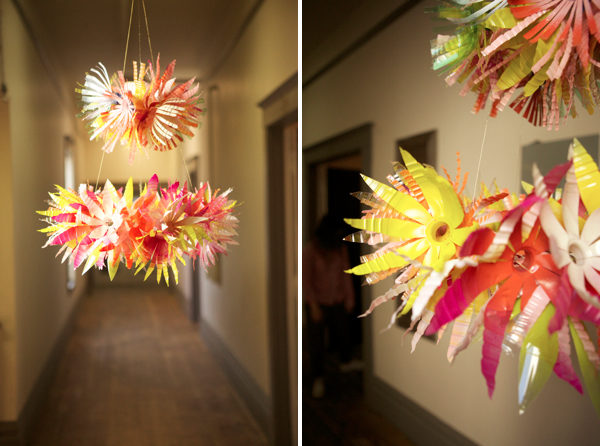 Materials and tools Plastic bottles (made of thin plastic, soft is best, they are the cheapest);
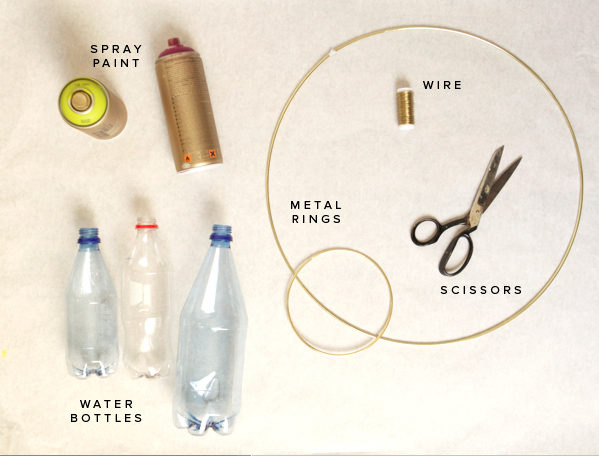
- spray paint of the same or different colors;
- 2 metal rings - big and small (you can buy in the shop for needlework);
- scissors,
- old newspapers;
- gloves;
- gold wire.
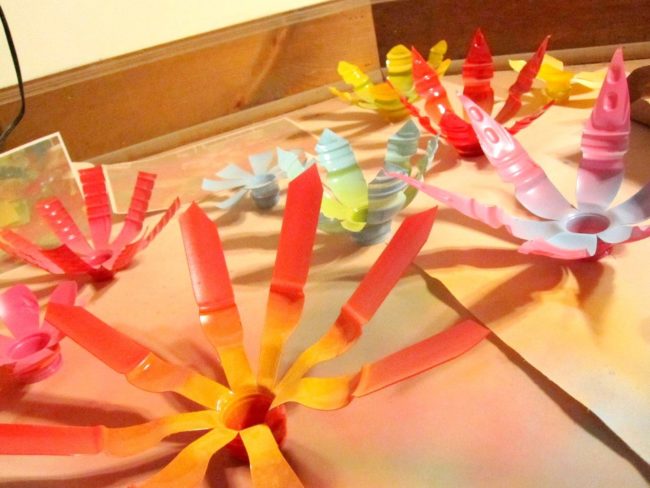
 Technology Step 1. Prepare the bottle. We will not need the caps from them. We cut the flat part of the bottles, i.e. almost cut it in half, as shown in the photo.
  Step 2. Cut the top of the bottle into strips about 1 cm wide to the neck. The strips do not have to be even and equal in length - these will be the petals of a flower, therefore you define the shape and length yourself.
 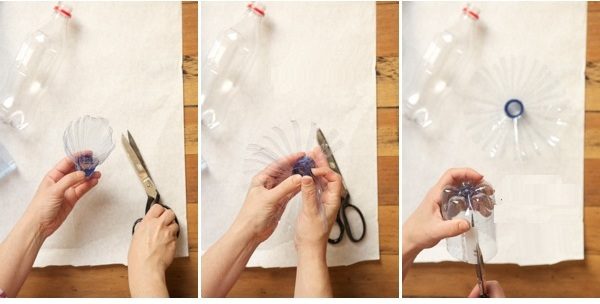 Also cut the bottom of the bottle. The only difference is that the core of the flower here will be the bottom of the bottle. We cut through all the bottles and turn the petals in different directions. Step 3.
 After staining, lay the flowers so that the paint is dry. Step 4.
- We turn to the manufacture of the chandelier itself. Take a hoop of smaller diameter, wire and flower. Threading the wire into the neck of the bottle and wrapping the hoop, we fix the flower on the frame.
- Then we take the second flower and do the same, tightly pressing it to the first. This is done so that the entire rim is filled with flowers for pomp.
 Step 5. Attaching flowers to the hoop of larger diameter. You can create unique compositions, mixing flowers of different colors and sizes at your discretion.
  Step 6.
Check the work - if you did everything right, then there should be no distortions.  It remains only to hang this chandelier in the most conspicuous place, and then all your guests and household will feel a bit of a holiday in the house at every glance at this creation!
  These are the little joys quietly penetrate intoYour life - bright crafts, like lamps or chandeliers with your own hands, made with a soul, every day then delight you and your loved ones. In addition, such original ideas can serve as a pleasant and memorable gift for one of your friends. Hurry to create!
Photo ideas of plastic bottle chandeliers
Look at some more lamp ideas - maybe something will catch your eye and you will do it for yourself. 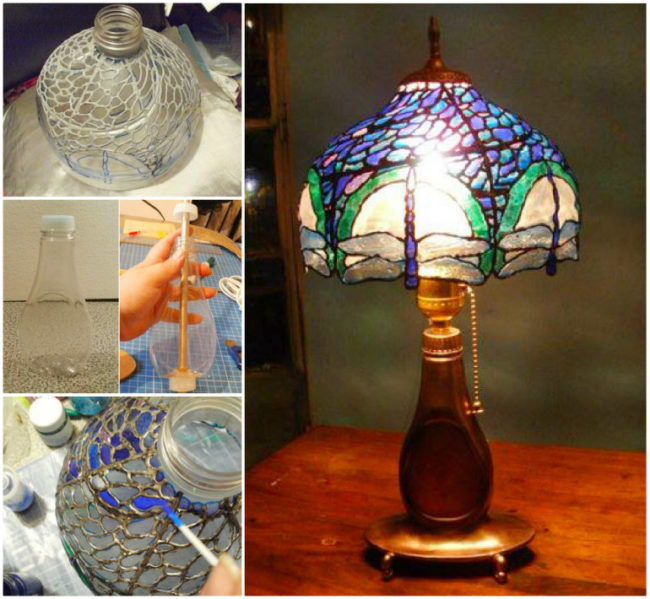


Comments
Related posts:
 Multicolored canopy of plastic bottles
 Crafts from plastic bottles with their own hands, how to make flowers from plastic bottles, cornflowers from plastic bottles, roses from bottles with their own hands.
 Crafts from plastic bottles, handmade for the garden with their own hands, how to make a palm from plastic bottles with their own hands, step-by-step instructions explaining the photo.
 Free master classes on creating colors from plastic bottles.
 How to make a palm from plastic bottles, a master class with a photo and a description of the work.