
Christmas tree made of paper with their own hands
 You can decorate the interior for the New Year holidaysquick and easy if you make your own original Christmas trees out of paper. Even a child will cope with this task, and you may well have a wonderful evening, folding cute Christmas trees - decorations for a table or a window sill.
In order to make such a Christmas tree out of paper, you will need:
a sheet of white paper; scissors; glue stick to make the final bonding of the figure (optional). Let's get started
Christmas tree made of paper: a master class
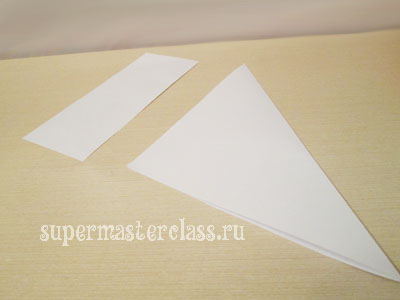
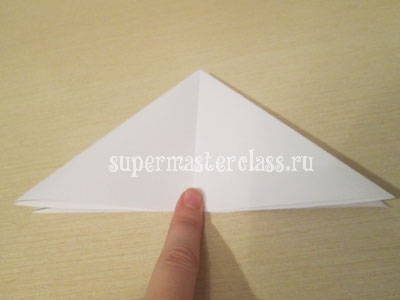
If you took a rectangular sheet for the Christmas treepaper, fold it "on a corner", as shown in the photo below, and cut off the excess part. If you have a square sheet, you do not have to cut anything - just fold it diagonally, aligning the opposite corners. 
 Then align the other two corners, folding the square once more diagonally.
 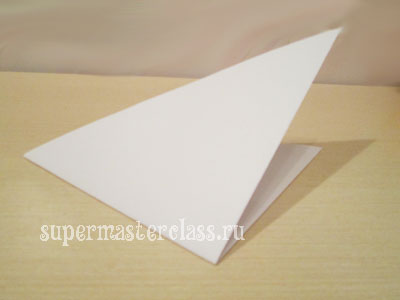 Expand the sheet of paper and fold it in half again, combining pairs of adjacent corners.
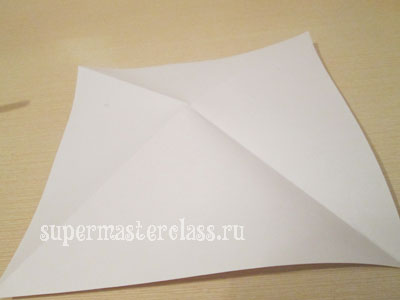
 And once again in half - get a square.
 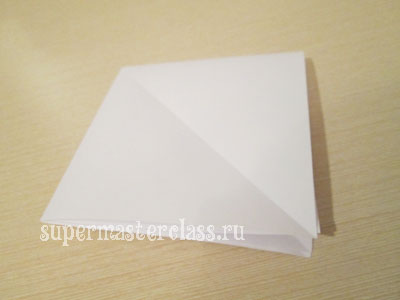 Again, unfold a sheet of paper and fold as shown in the photo below so that the two sides of the square “go” inside the shape.
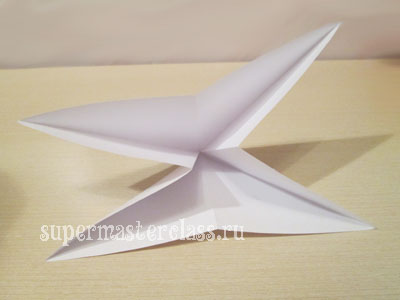
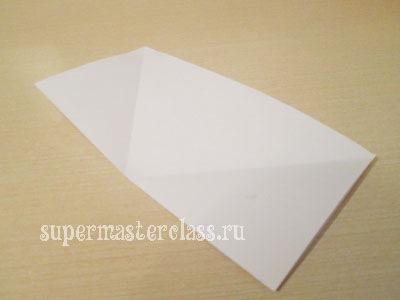
 To the right and left take the upper corner and lay it as shown in the next photo - down. Turn the figure over and do the same with the remaining pair of corners.
 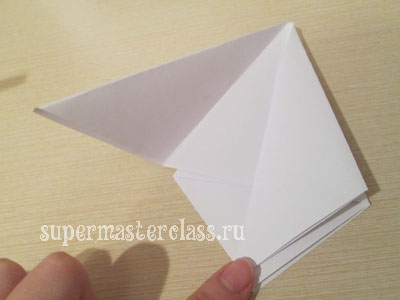 Expand a sheet of paper. We have a blank for the Christmas tree made of paper, divided by bends into 16 sectors.
 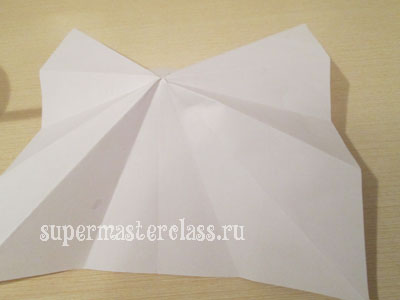 In fact, no matter how you will laysheet to get the right amount of sectors. You can simply fold the sheet diagonally and straight until the required number of folds is obtained. Now fold these sectors with folds, so that one fold is outer, the next one goes inside, then again outer, etc. Like this:
 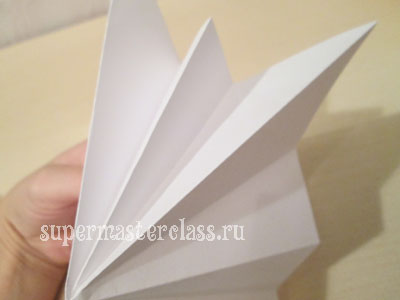 You see that there are extra "tails". Crop them.
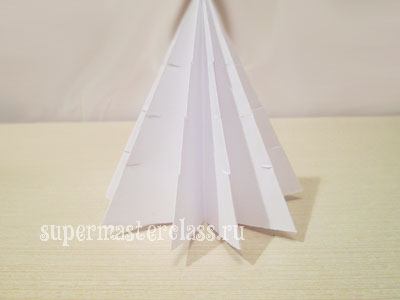
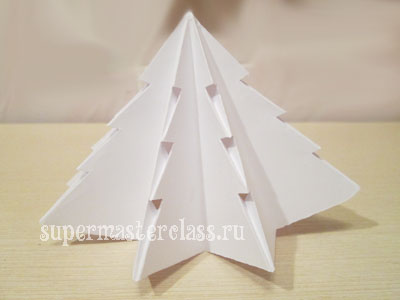
 The fir-tree volumetric "cone" is already ready.
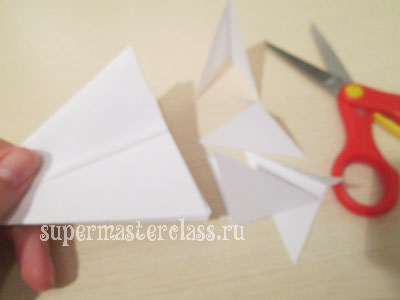
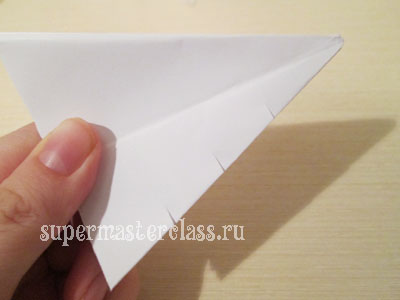
 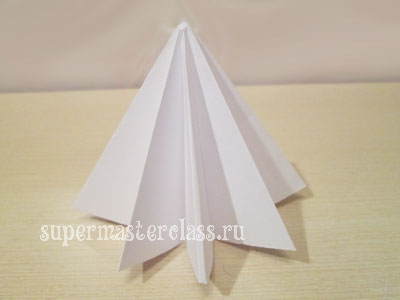 It remains to supply it with reliefs. To do this, we lay out our blank so that there are 4 folds on each side, and make cuts on each pile as shown in the photo. The cuts should not be deep, but it is desirable that they are the same on all the folds. Do the same for the second stack of paper folds.
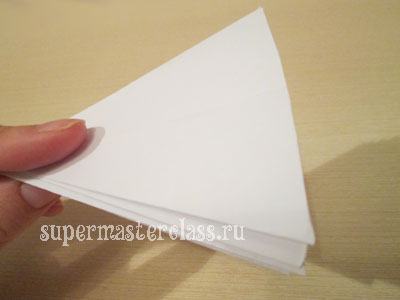
 From each incision we turn aside a corner.
 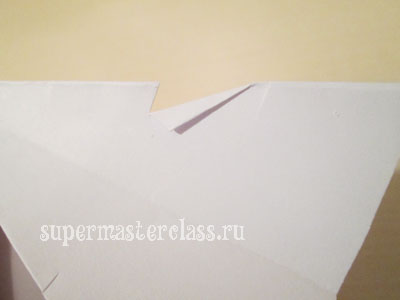 Then we straighten the fold, and fill the corner inside - like this:
  Do the same for each cut on our origami paper tree.
 As you can see, the Christmas tree is already standing, but still too divergent. In order for it to become even and slender, spread out the workpiece and walk along the bottom edge from the inside of the tree with glue-pencil.
 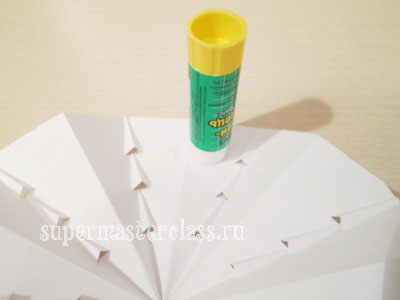 Squeeze the workpiece to glue.
  That's all, our beautiful handmade Christmas trees made of paper are ready to welcome the holiday and create a new year atmosphere in your home.
 Eva Casio specifically for the site Previous article: Next article:
Comments
Related posts:
 New Year's hand-made fir-tree made of corrugated paper for the 2015 Competition, hand-made articles of paper by the hands of the new year
 New Year's decor with their own hands, Christmas trees made of paper, how to make an original Christmas tree of paper with their own hands.
 Christmas tree made from paper, photos, ideas, master class / Toys with own hands, patterns, video, MK
 New Year tree with their own hands, a Christmas tree made of fabric, how to make a New Year tree with their own hands, a Christmas tree made of candy, master classes for making Christmas trees.
 Decorative Christmas tree made of paper and cardboard by own hands