Schemes, photos and a detailed description of how to tie the mats with your own hands crocheted.
The modern world is growingurbanistic. Our life is surrounded by concrete, glass and steel. Around office style flourishes - dry, formal and a bit faceless. And for work it's even good, nothing distracts and you can completely concentrate on your duties. It is quite another matter - it's a homeliness. After a hard day's work, I'd rather be in my native walls. That's where you can enjoy bright colors and unusual textures. However, very often neither beautiful fashionable furniture, nor made to order, designer drapery and accessories can not create a proper sense of comfort and comfort. Handicrafts, which are becoming more popular, will come to the rescue. Millions of people around the world mold, roll from felt, embroider and, of course, knit. To create a warm and pleasant atmosphere in the house, the products made by hands with the help of a hook are perfect. Even if you do everything according to ready-made schemes and recommendations, the thing crocheted will be unique. After all, you can take a thread of a different quality, shade, or thickness, or maybe use the original element of the decor. The product made independently will necessarily bring positive energy to the house and fill it with warmth and comfort. The role of such a thing fits perfectly with the rug. It can be small in size - for a hallway or a bathroom. Bright and warm - for the nursery. Elegant, taking place from wall to wall - for the living room. Knit rugs are better from thick threads, use hook number 4 and more. The composition of the yarn should be chosen based on the location of the rug. For the bathroom to take synthetic thread, not afraid of moisture, and for the bedroom or children's natural, containing wool or cotton. For starters, you can try to connect a very simple, and, nevertheless, a beautiful rug. Multicolored mat of motifs "Grandma's Square". 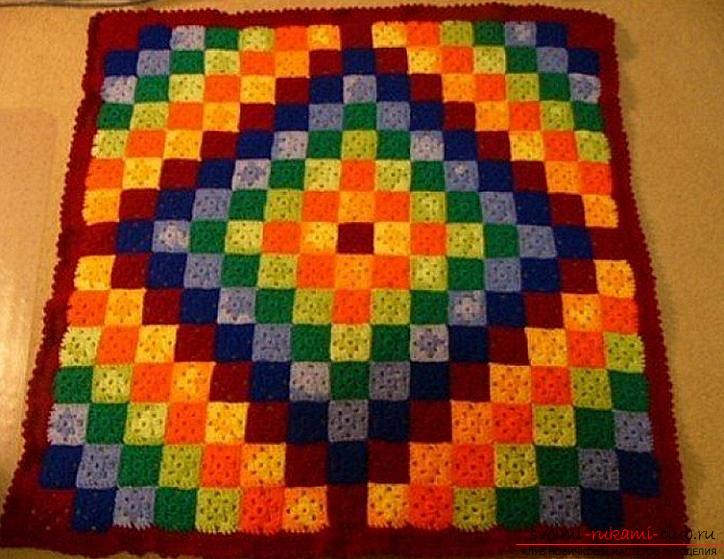
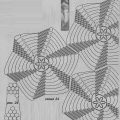
 Before you get started, you candraw a diagram of the arrangement of motifs of different colors to know how many squares of a particular color to knit. The rug does not need to be square or rectangular. Carpet-asterisk.
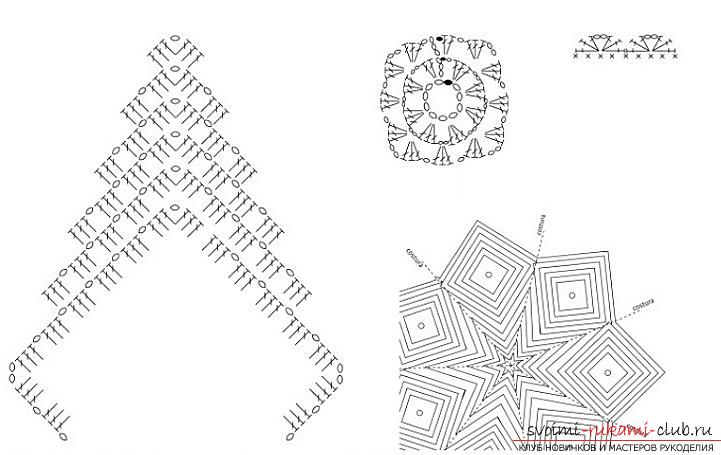
 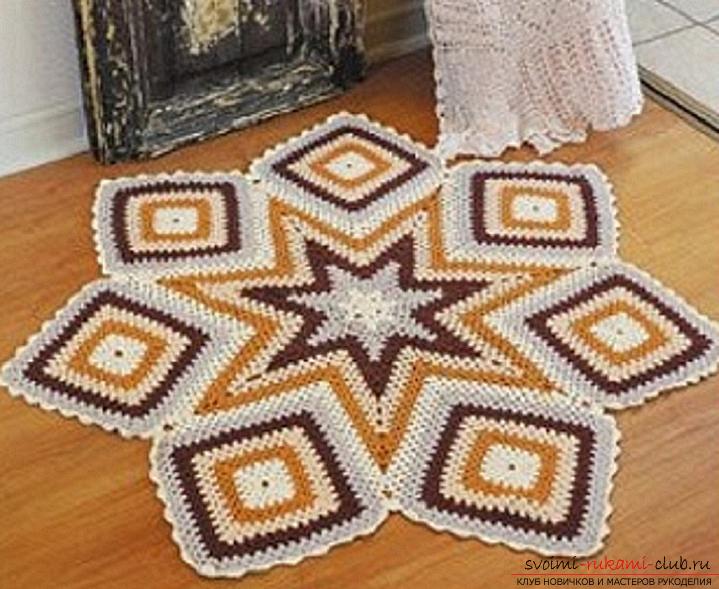 The basis (edge of the rug) can be tied to any,square scheme, the main thing is that the number of loops in the last row coincides with the number of loops of the connection scheme of the rays. By 23 on each side of the square.
 It is important not to forget to alternate colors. Beginners can tie each part separately, and then connect on the wrong side with a needle or connecting bars. A gentle mat for the little princess in the nursery.
 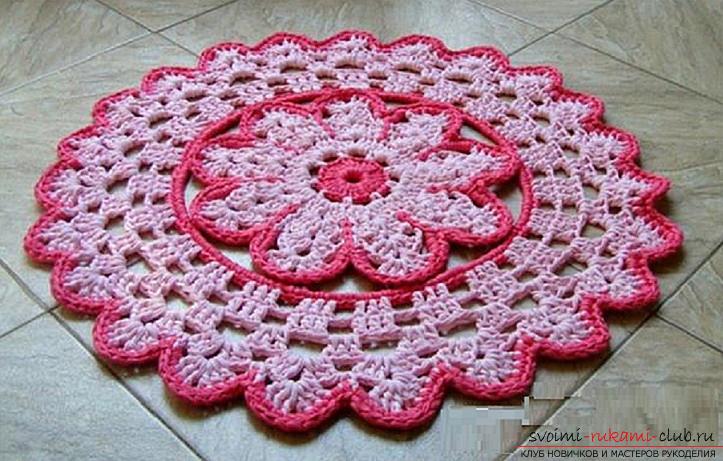 For the rug, two colors of light and dark pink are used. It is knit in a circle.
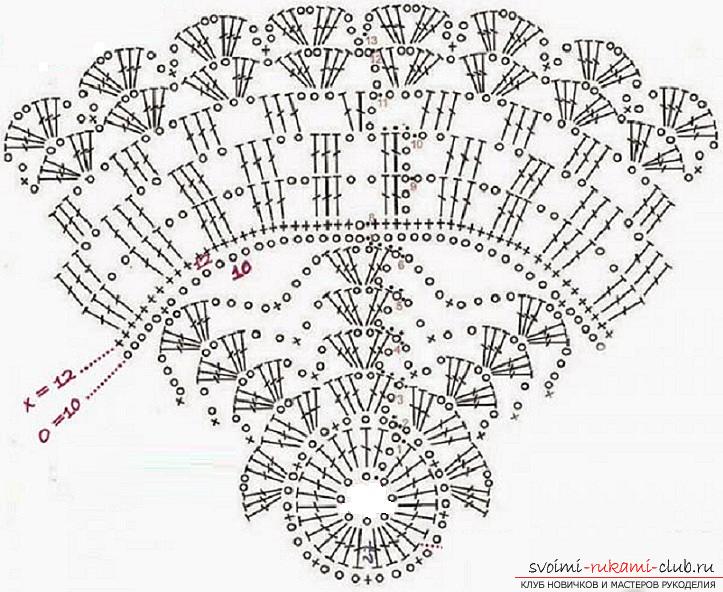 Knit further under the scheme up to 13 rows, alternating colors,as indicated in the photo. Fantasy needlewomen do not know the limit, and so the craftsmen create mats not only from threads. Wonderful, bright and practical products are obtained from scraps of fabric. To create such a rug any material you like is suitable, you just need to cut it into strips and sew it into one. To knit such rugs take the hook number 10 and more. A simple and cheerful round rag rug.
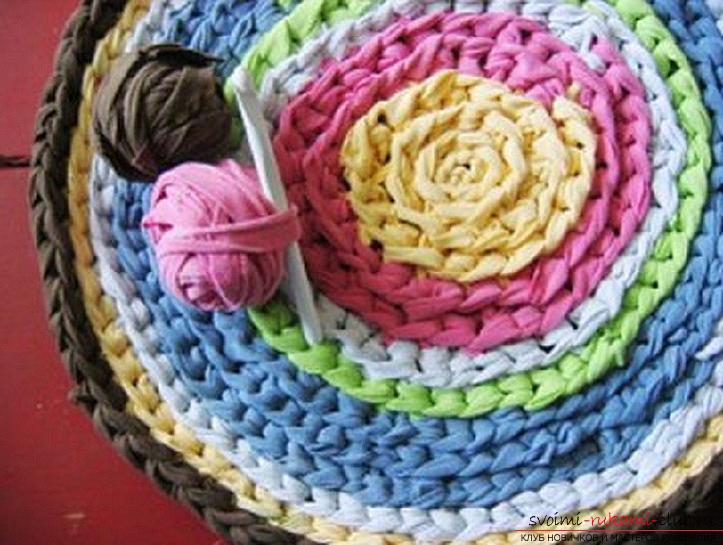
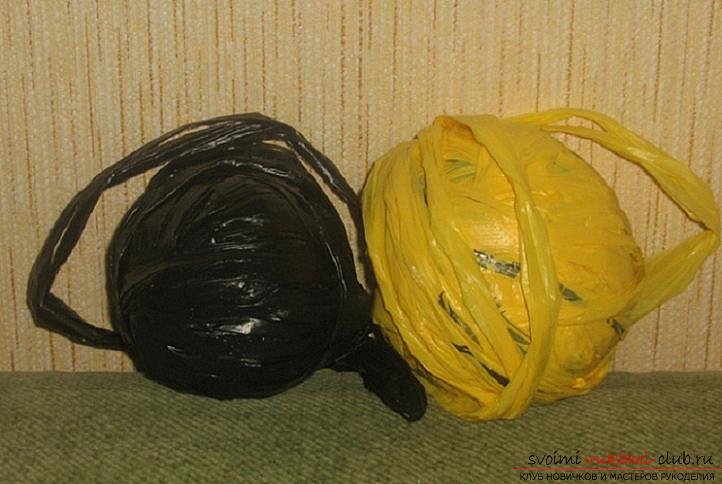
 In every house there is such, irreplaceable in the householdthing, like a plastic bag. They are not only convenient to bring shopping from stores or take out garbage, from plastic bags you can create a wonderful rug, for the hallway or bath. Mat made of polyethylene bags.
 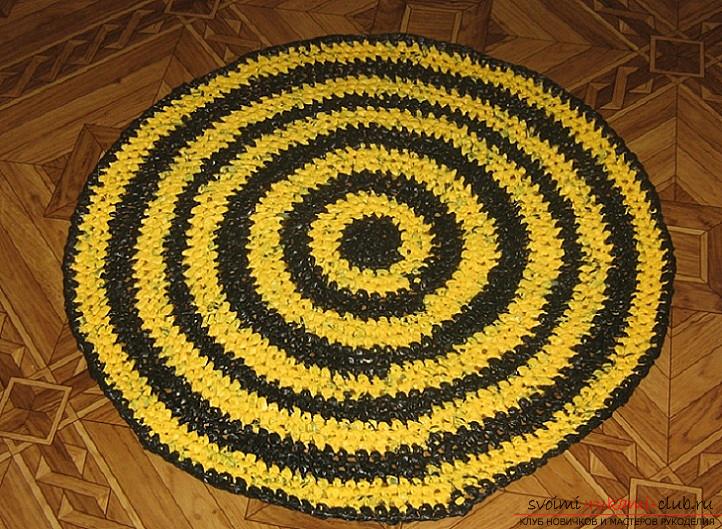 Prepare packages for knitting a rug simply:
- Fold the bags along several times;
- Cut them across the stripes (the thickness depends only on the imagination of the needlewoman);
- Expand the resulting strips (such large rings are obtained);
- Tie them together or glue, ironing a non-corrosive iron through the fabric;
- To coil into a ball.
Tie the mat itself on any scheme you like. It can be round or oval. Any, how to tell a fantasy.
Comments
Related posts:
 How to tie an oval napkin with your own hands crochet, charts, description and photos of products.
 How to crochet two delicate dresses with your own hands, patterns, patterns, detailed descriptions and photos of products
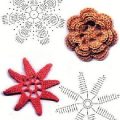 Schemes and a detailed description of how to crochet flowers by hand.
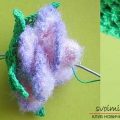 Schemes and a detailed description of how to connect a three-dimensional rose crochet with your own hands.
 How to tie a hook with your own hands, a scheme, a photo, a description of the work.