
The scheme for creating modular origami snowflakes from paper for beginners. Detailed master-class with photo
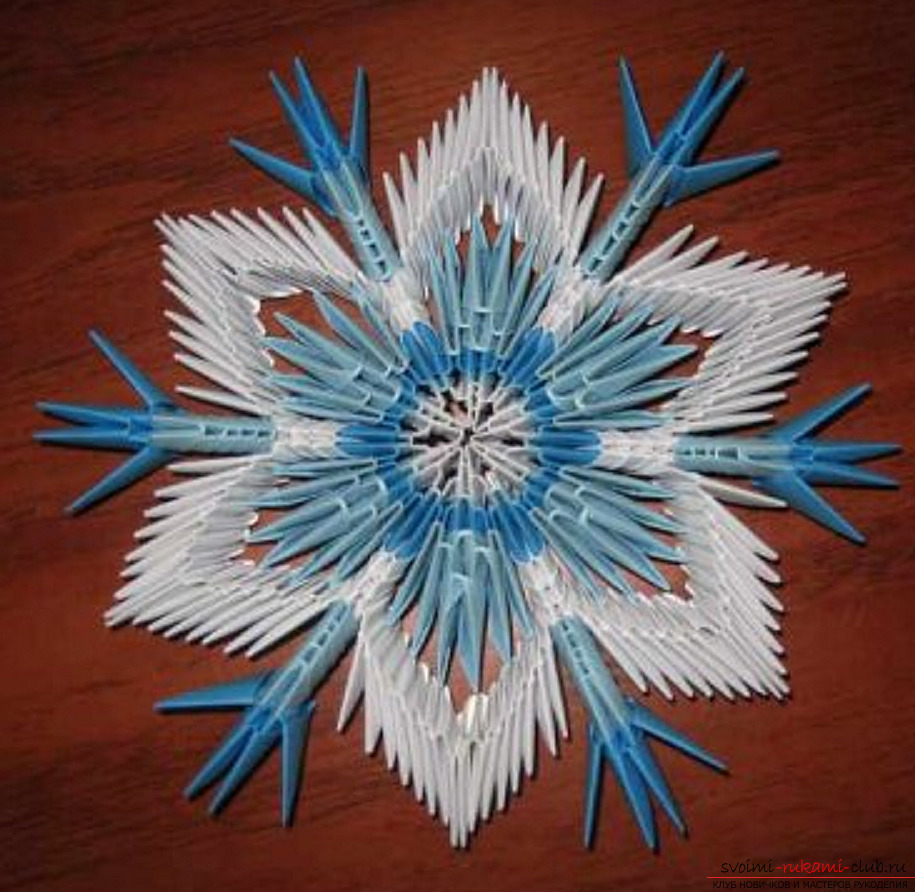 Snowflake is very fragile, which melts, not having timetouch the palm of your hand. But thanks to the origami, snowflakes, you can be long-blessed, if you will, all year round. Snowflakes made of paper, created with their own hands, will be a real Christmas decoration, they will exaggerate your home, add a touch of magic. They will be exquisite Christmas decorations. Also they can be presented as a New Year's souvenir to relatives and friends. How to make a snowflake? This is probably one of the easiest figurines collected by technology modular origami. A snowflake made of paper is made of triangular modules: light blue - 78, dark blue - 42, white - 150. The size of the modules 1/32 of the sheet A4. The first two rows of 6 modules of white color in each row are connected in a ring.
 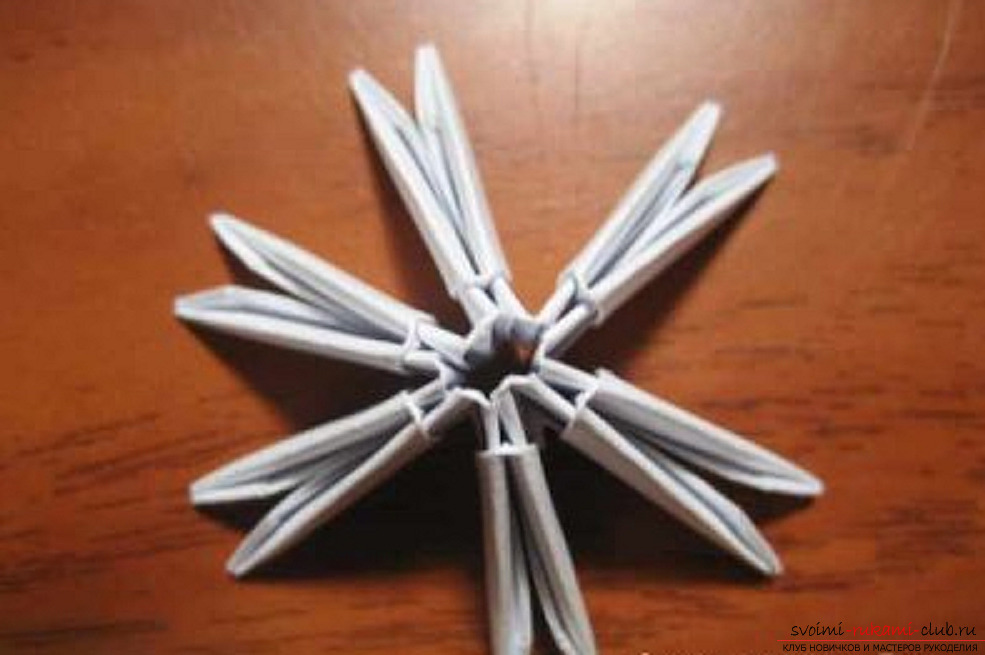 In the third row, we increase the number of modules by half, 12 modules in a row.
 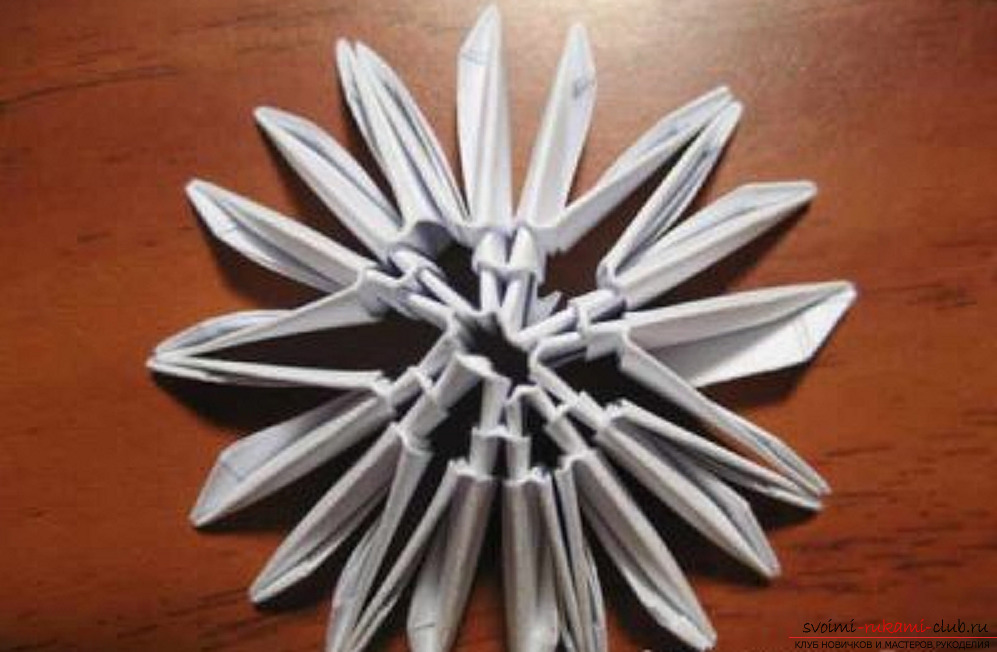 The fourth row contains 12 light-blue modules.
 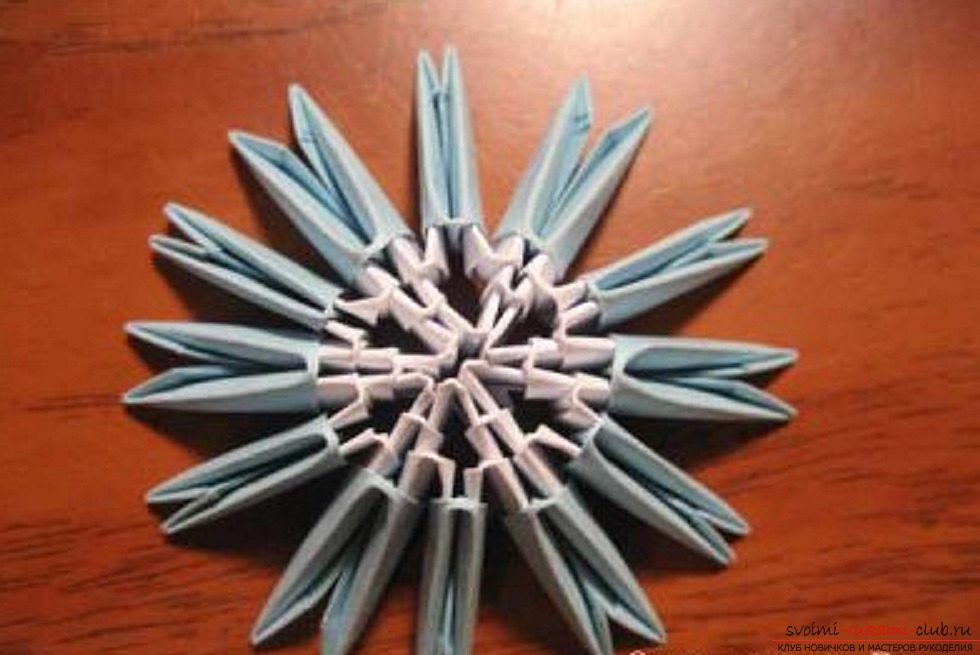 The fifth row - we increase the number of modules by half, 24 dark-blue modules in a row.
 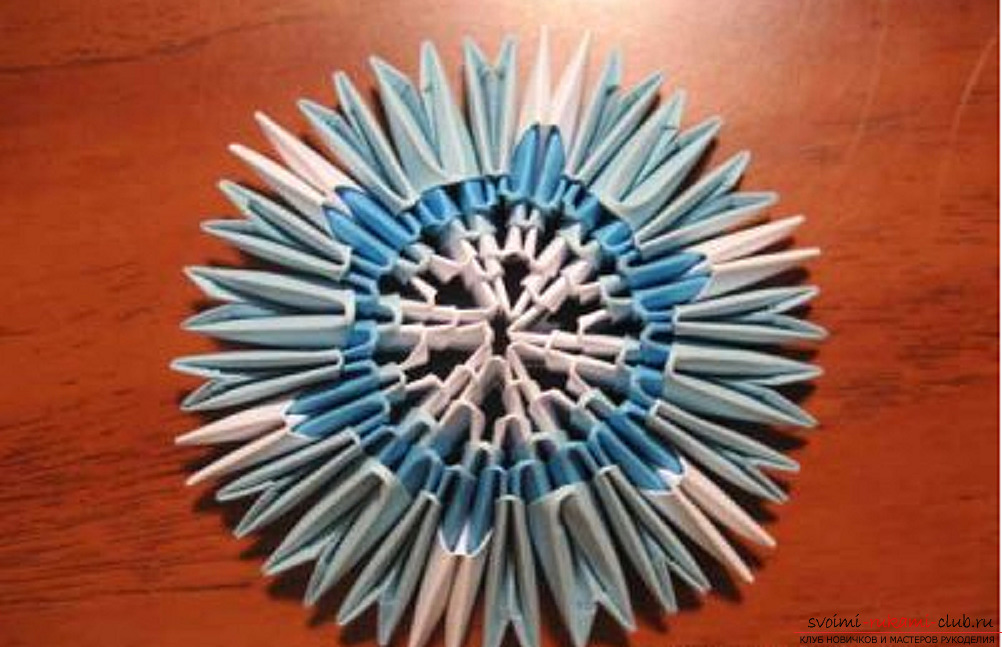 Sixth row - alternate modules by color - 3 light blue - 1 white and so on until the end of the row. White modules are put on the short side outwards - only 24 modules.
 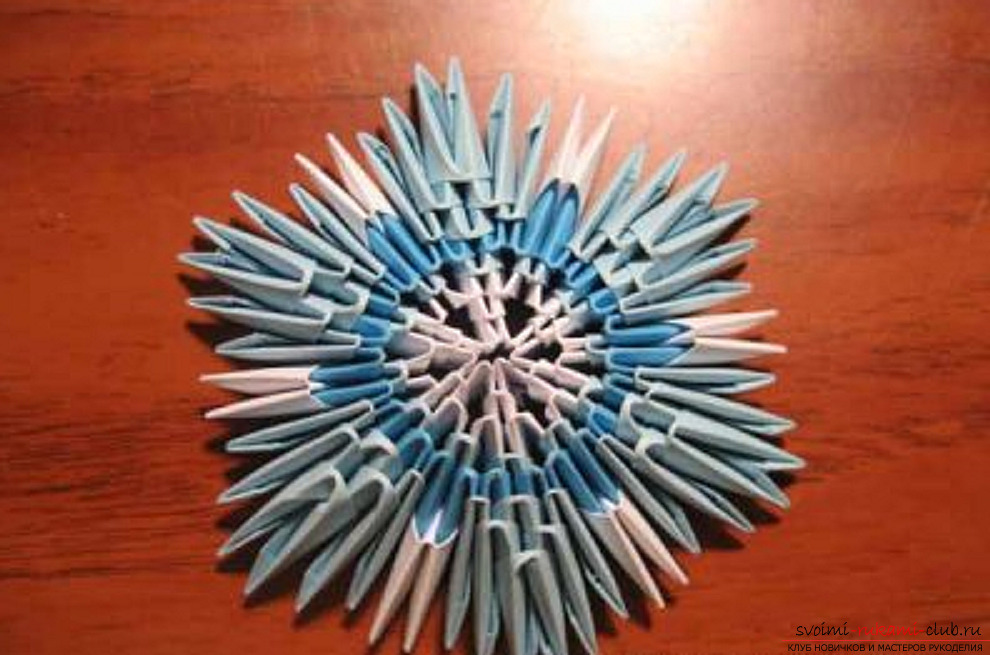 Now we collect only light blue modules, 6 fragments - see the photo below.
 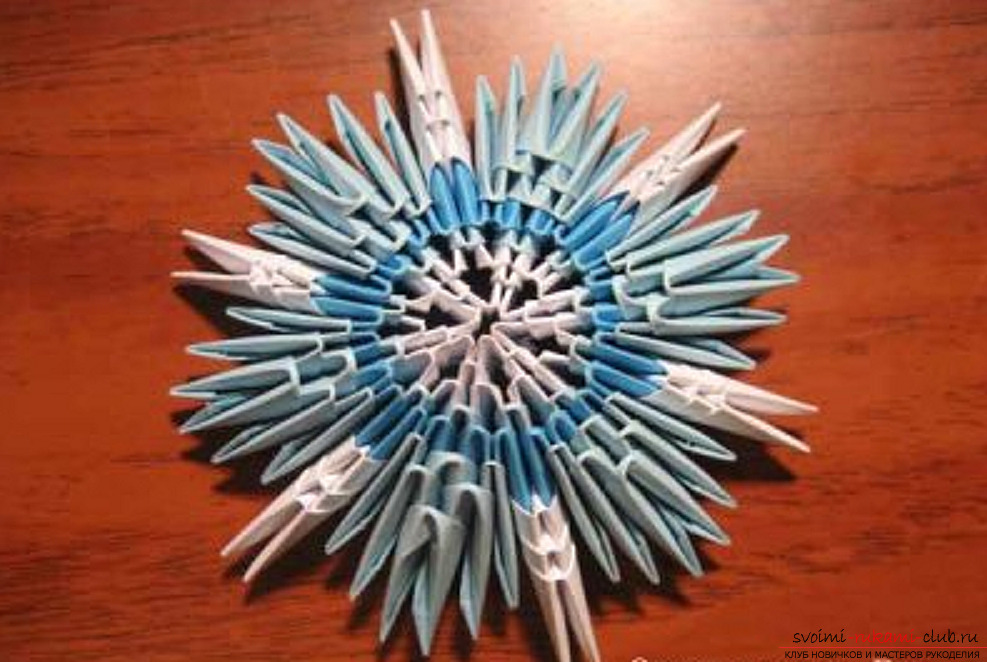 For each white module, we put on 2 more modules, also a short side outwards.
 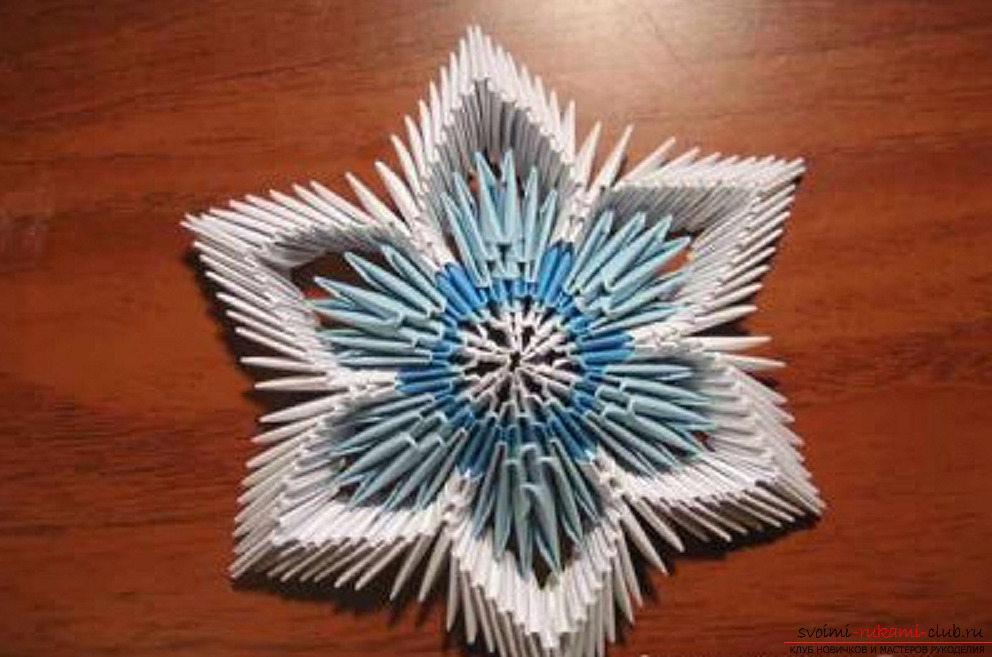 Let's start assembling arches from white modules. Each arch contains 17 modules. Modules are inserted one pile into each other. In total we collect 6 arches.
  Collect the rays for the snowflake: each ray of 5 light-blue modules on them is put on the short side outward of the 3 dark-blue modules. Each beam is inserted between the arches and a snowflake made of paper is ready!
 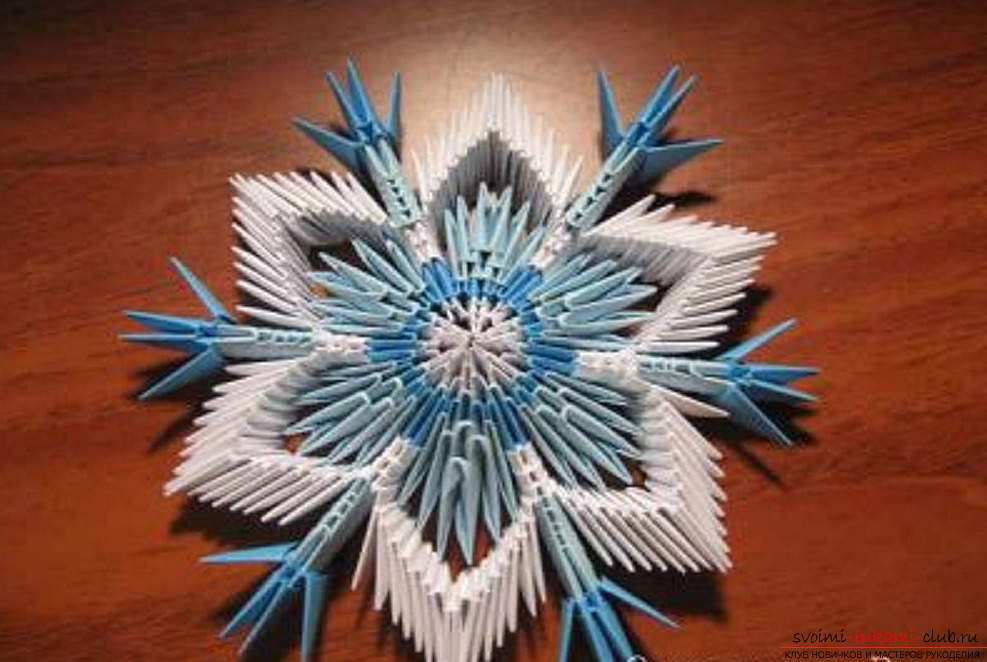 Here such voluminous snowflakes can be done quickly with their own hands. If you connect all of your fantasy, then even on the basis of one of this scheme you can come up with a variety of different snowflakes
Comments
Related posts:
 The scheme for creating a modular origami swan from paper for beginners. Detailed master-class with photo
 This detailed workshop of origami for children of 8 years will teach how to make an origami-mushroom from paper.
 This detailed master-class modular origami with step-by-step photos contains a scheme for assembling birch from paper.
 This detailed master class with a photo and description will teach you how to make origami for beginners - an origami-crown made of paper.
 This detailed master class with a photo and description will teach you how to make origami for beginners - an origami dog made of paper.