The scheme for creating a modular origami dragon from paper for beginners. Master class with photo
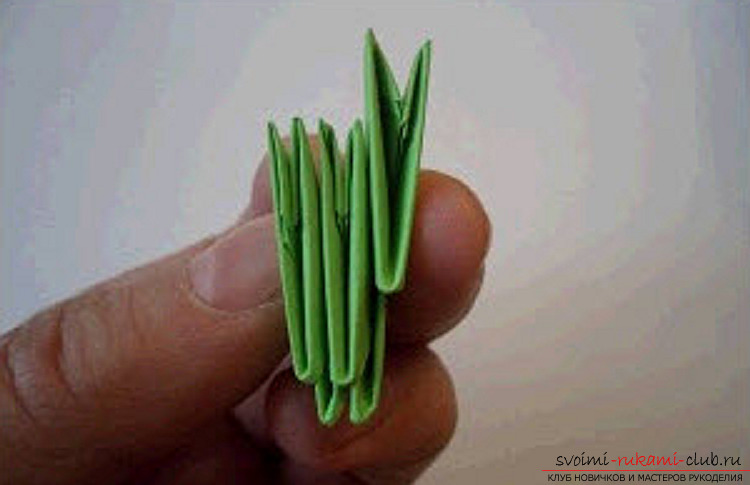
 Today we will talk about how the dragon is going toin the technique of modular origami from paper. Having a lot of free time and not knowing how to do it, it is worth paying attention to origami schemes, which conceal a surprisingly deep knowledge about not only the domain of paper ownership, but also the field of spatial thinking. Origami is perfect for lovers of quiet pastime. Only being a truly patient and attentive person can achieve significant heights in collecting origami. Before we begin to assemble the dragon origami, you need to select the paper that is suitable for the planned product. Typically for origami art is suitable typographic and drawing paper, writing and newspaper. You can use both velvet and shagreen paper, and even wallpaper or cardboard. But to create a dragon in a modular origami technique it is worth choosing a special paper for origami. Its difference is the ease of folding and the ability to perfectly hold folds, so that the finished product of an origami dragon will keep its shape long. In addition, such paper is sold in a variety of colors, so there will be no problems with choice, and the conceived article will be of the color you like. In addition to paper to create a dragon, we need a diagram. 1. We assemble a chain of modules, connecting them in this way:
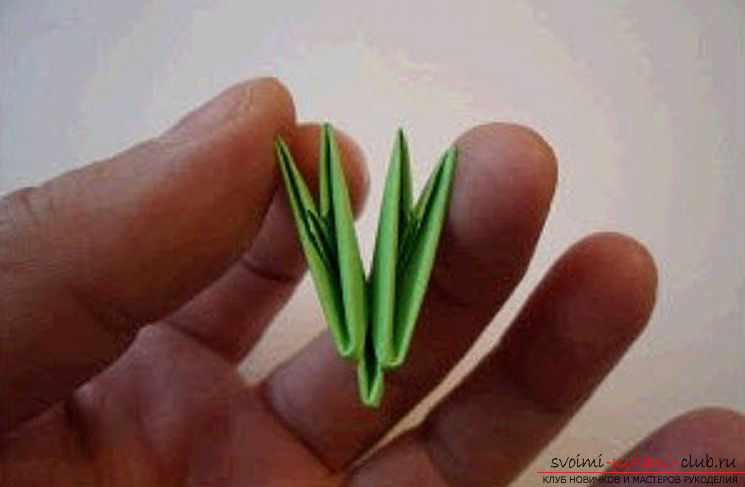
 2. In the obtained chain of modules, in the first row of which 9 modules, in the second 10 (8-green, 2-orange).
 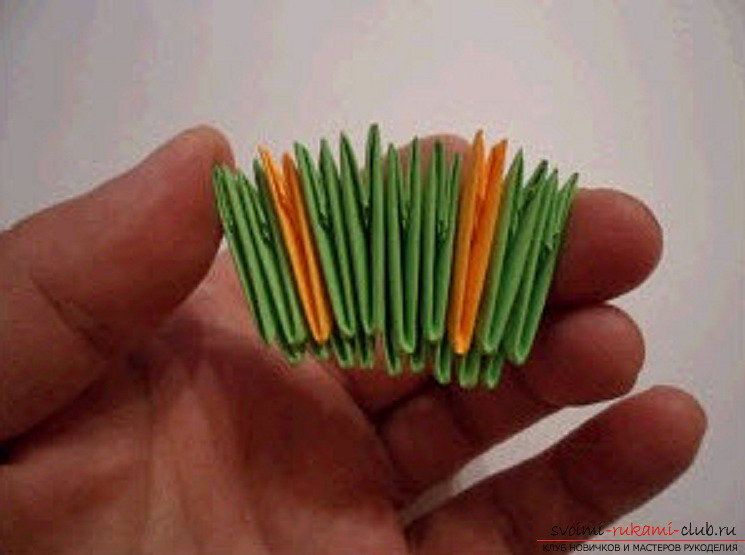 3. Then lay out the modules in color as shown in the picture.
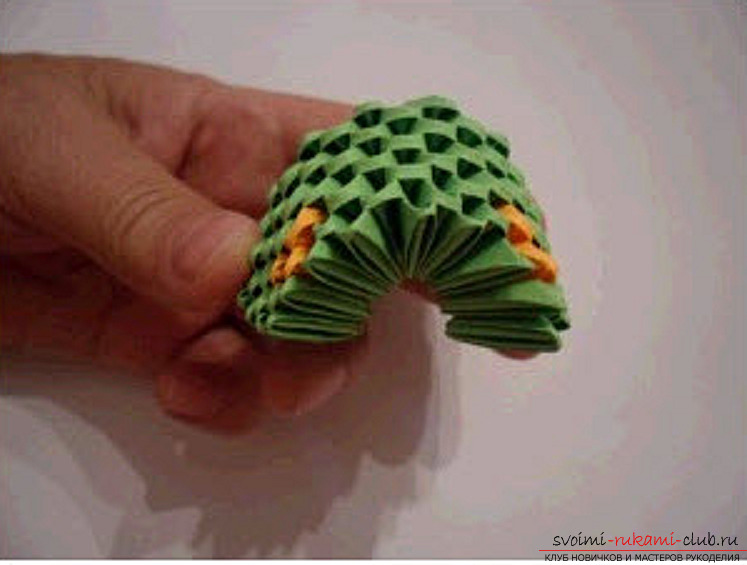
 4. In total, eight rows of modules were assembled.
 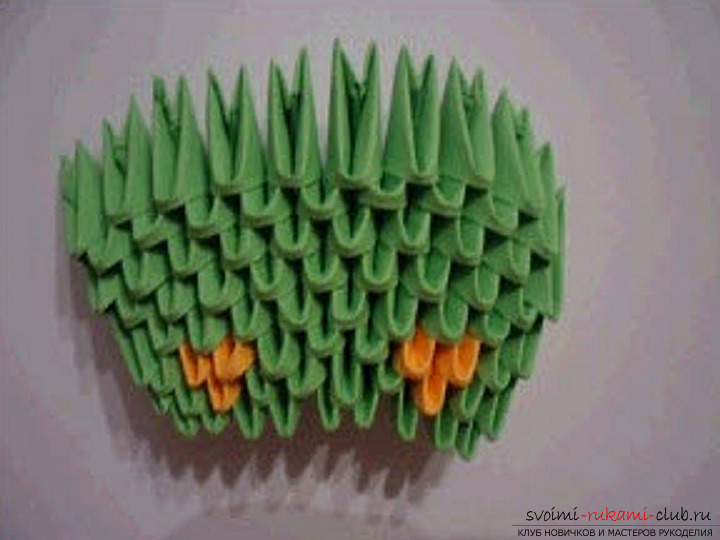 5. We bend the part, which turned out to be a semicircle.
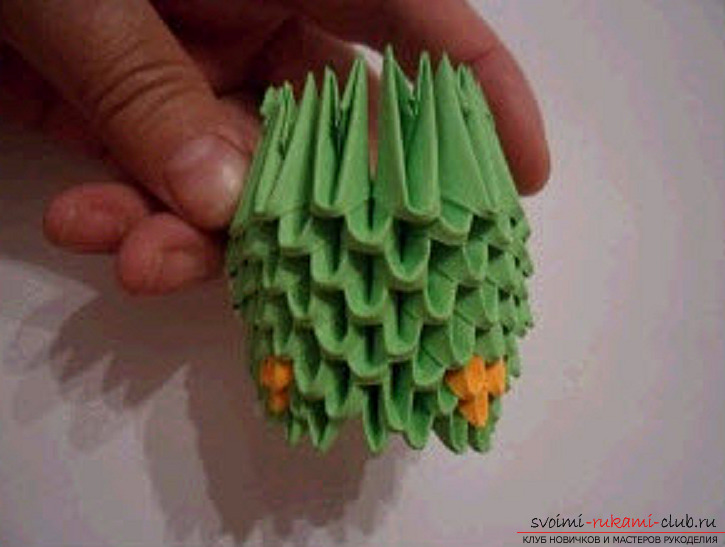
 6. Modules turn the right angle forward and collect another row.
 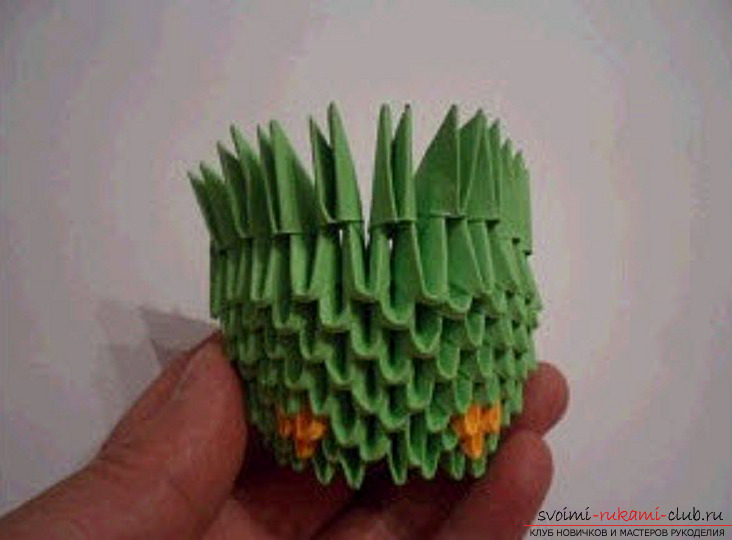 7. The last vertices of modules from behind are connected by a chain of two rows of modules (in the first row there are 10 modules, in the second row 9).
 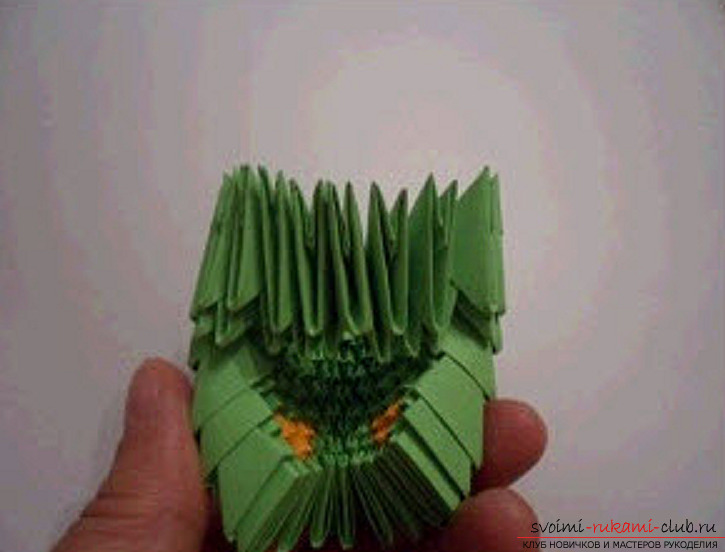 8. Then we lay out a row of modules. We turn them back to their original position.
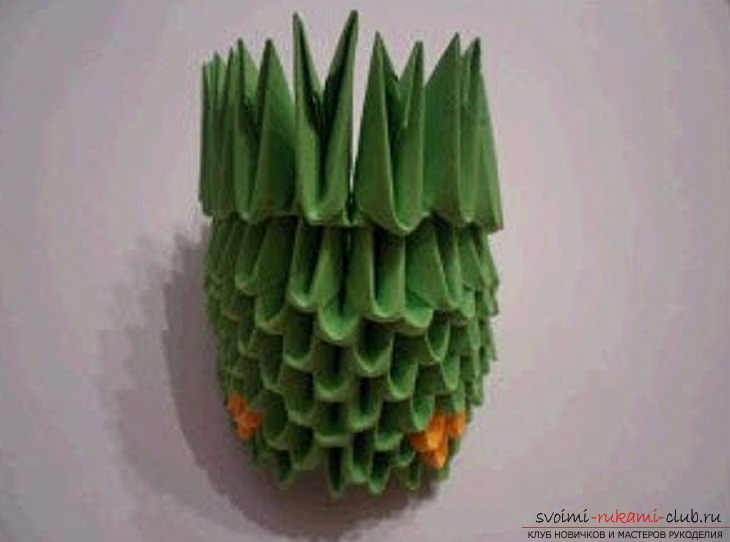
 9. Then put the modules in color.
 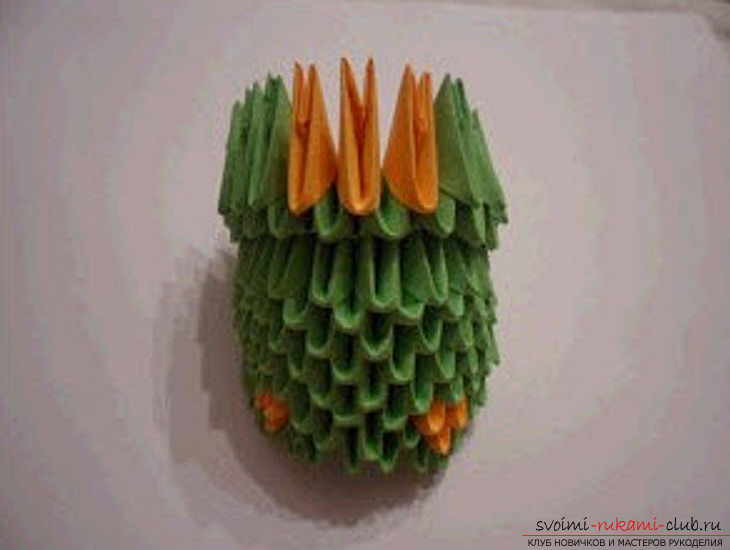 10.A is the rear view:
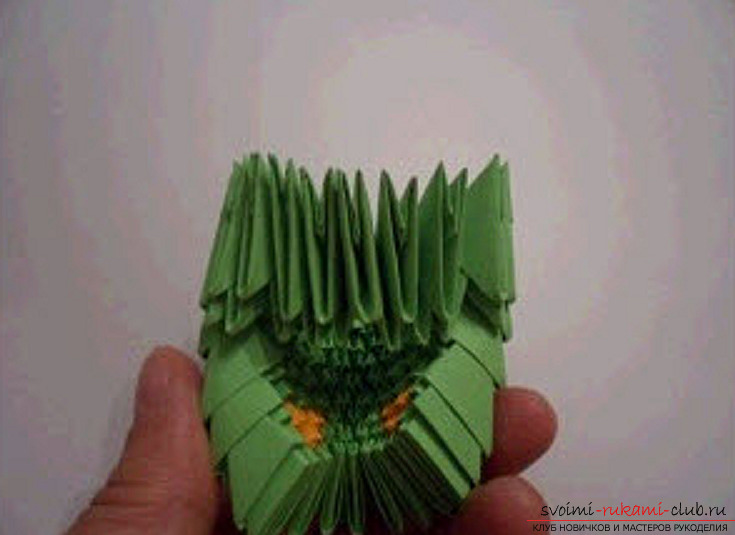
 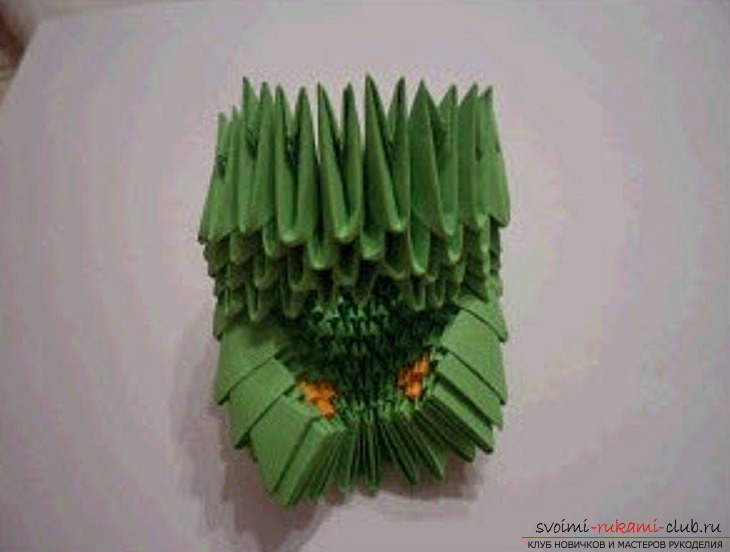 eleven.Again, the four central modules are turned right forward, from them 3 green modules on each side are assembled in the normal position, the remaining 9 modules (rear) are also at a right angle forward.
 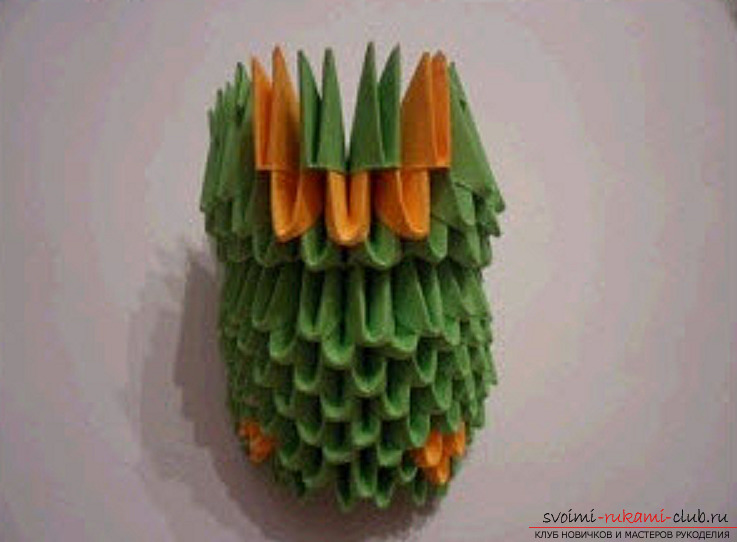 12. Rear view:
 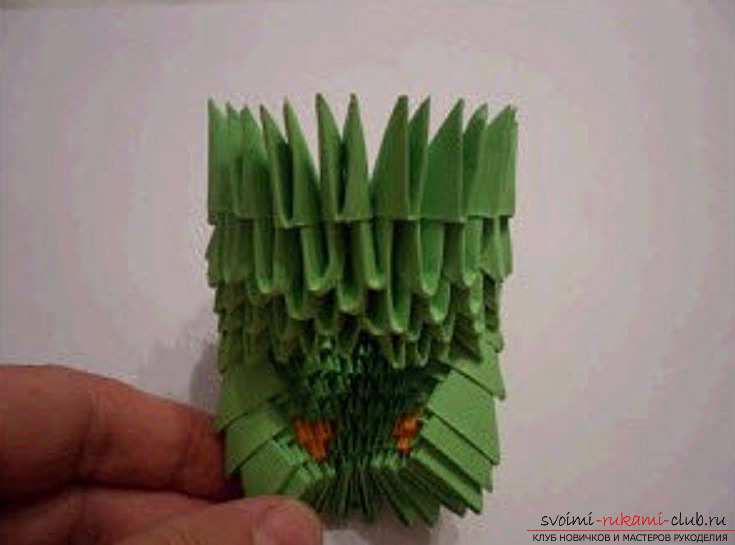 13.Then 7 central modules alternate in color, collecting them in the usual position.
 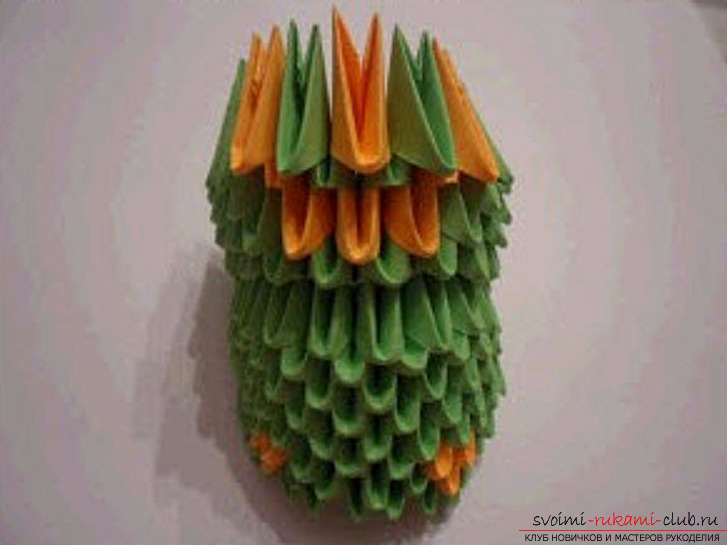 14. And from the back, each module in this row is dressed for 3 vertices, reducing the number of modules to 8 pieces. There are 15 modules in a row in this row.
 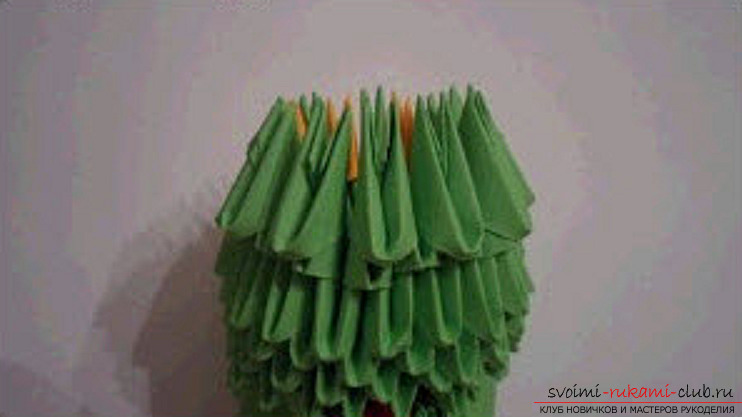 15. Then four green central modules, inverted at right angles to the front:
 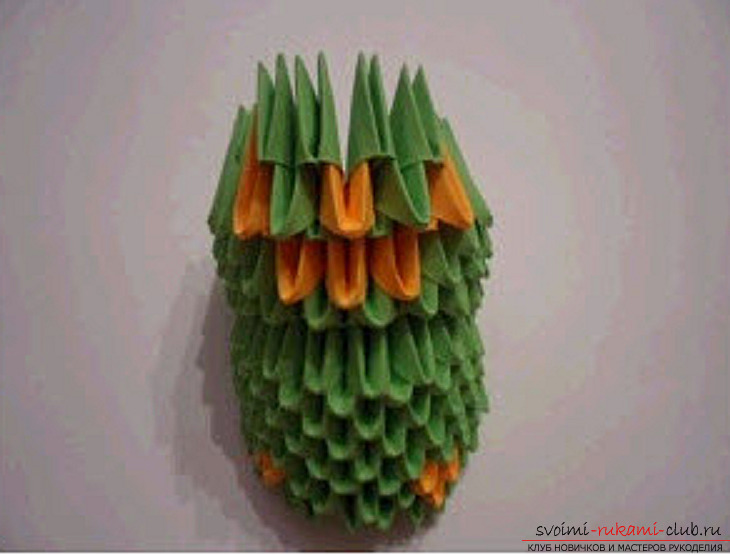 16.Then, these 4 central green modules rotated at a right angle forward, alternating with three modules laid out in the usual position in color: 1 green, 1 orange, 1 green. So we assemble 10 rows, we get a kind of comb.
 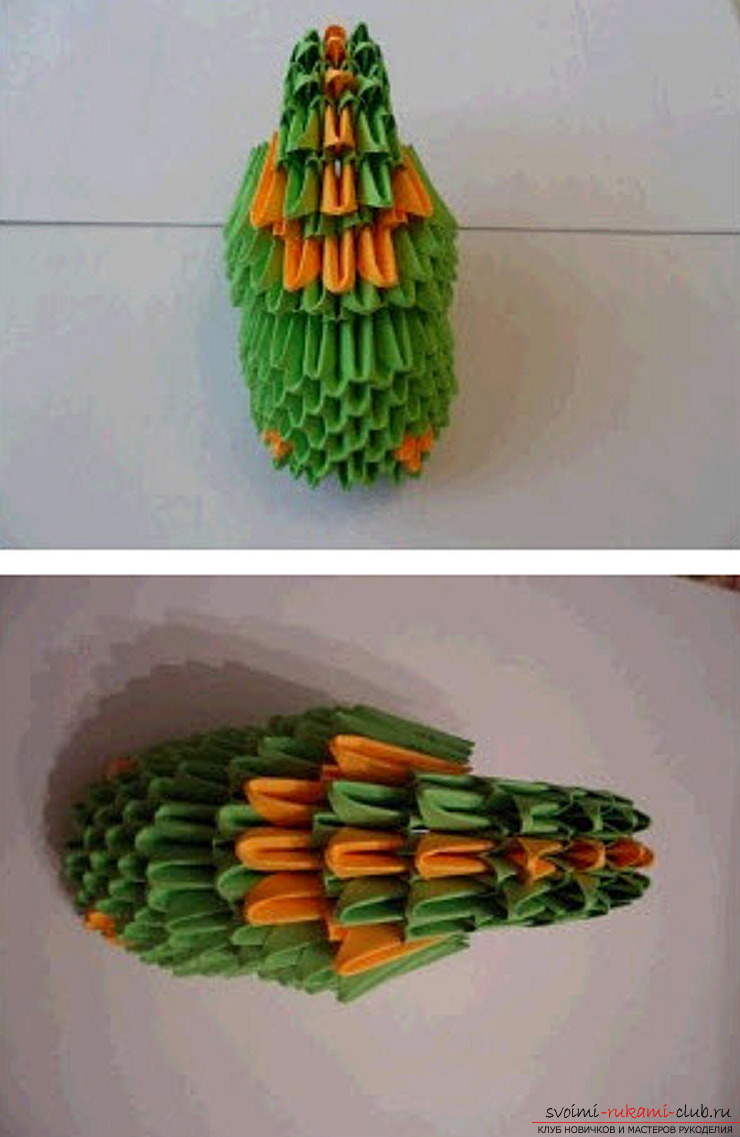 17. The next row (11 modules) is collected in the normal position from the rear, beginning from the ridge and ending at the ridge on the other side.
 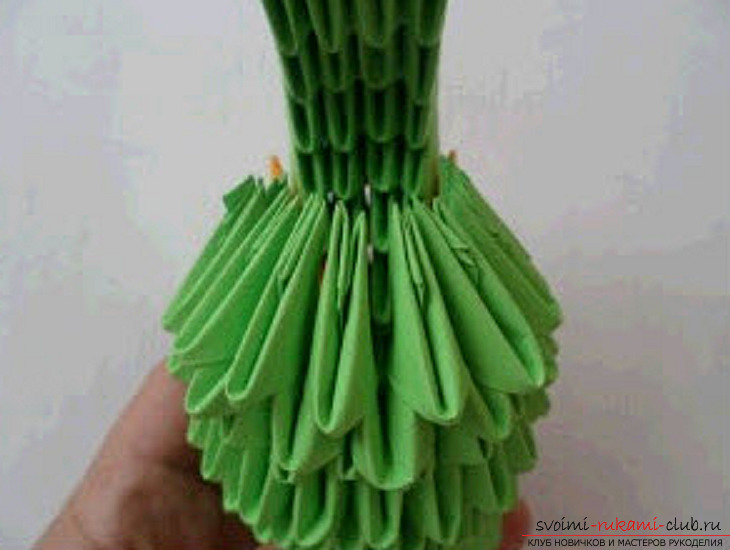 18. I put the comb down and past it to the lower modules, fixing it in this position.
 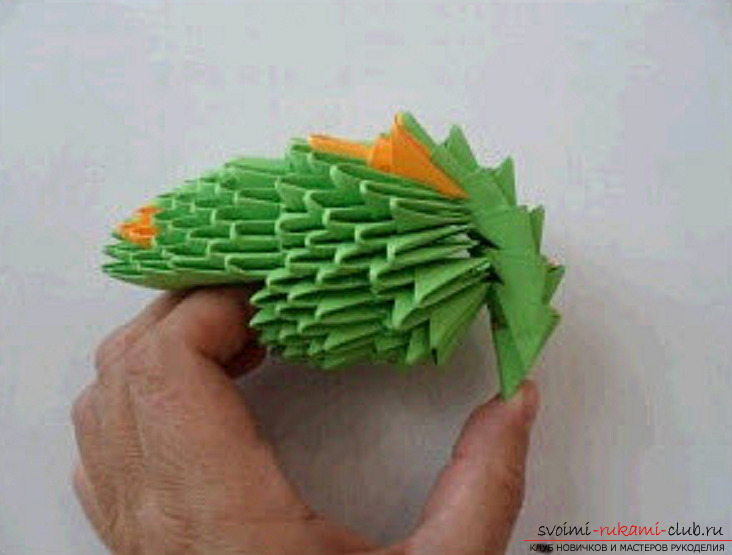 19.Find behind.
 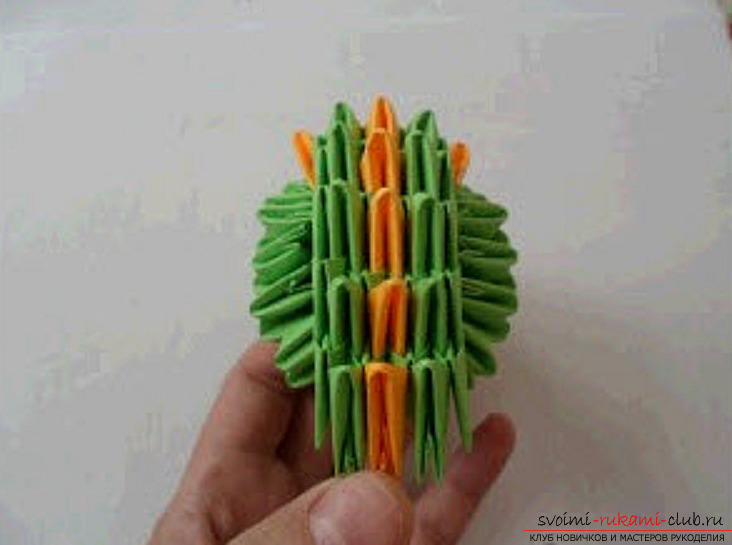 20. Begin to do the lower jaw. In the first row of the jaw 5 modules, in the second -4 modules (alternating in color)
 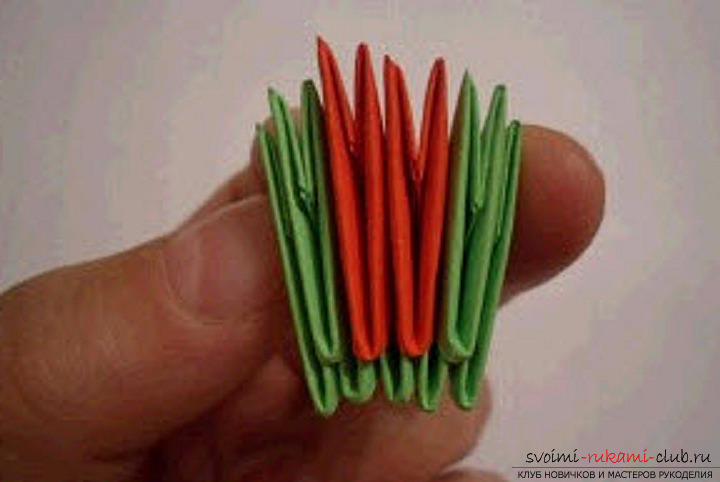 21. In the third again five, alternating in color of the module. The jaw is ready.
 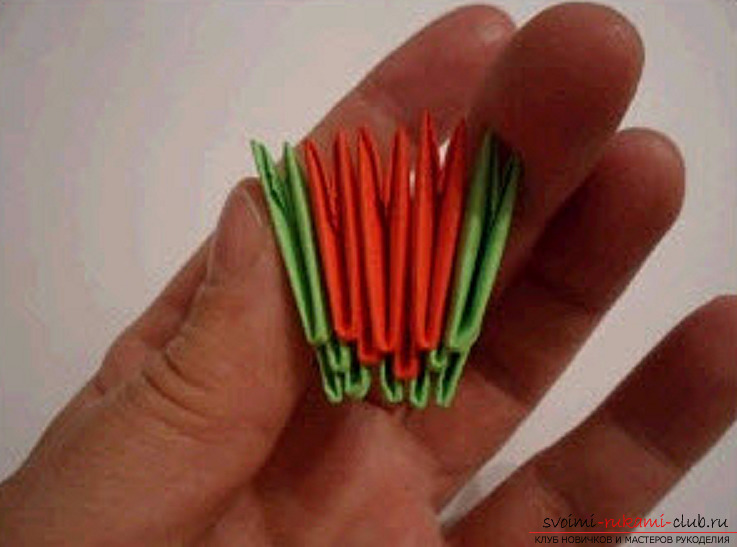 22. We put it in its place, paste it.
 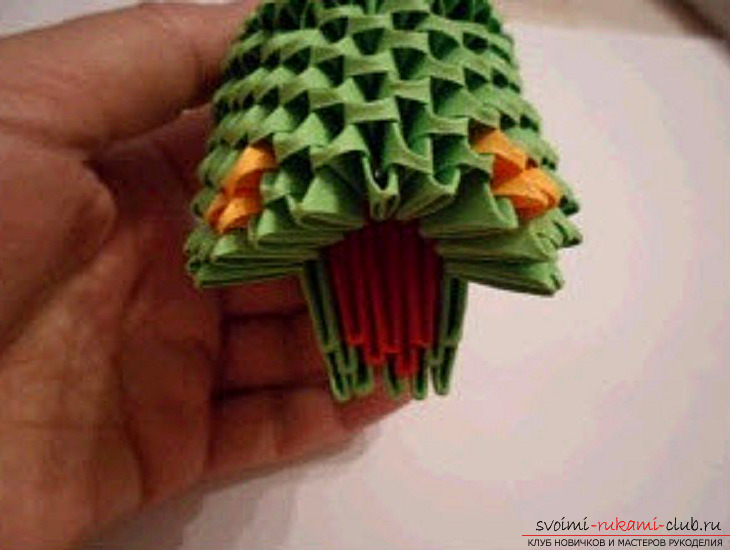 23. View from the side.
 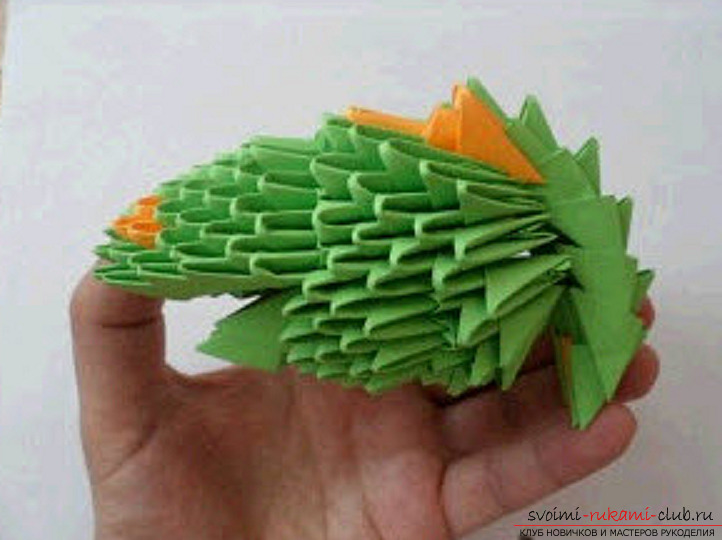 24. We use ready-made, bought in the store. Each eye is glued to the module. Then the modules are glued to the head with an adhesive thermo-pistol. The head is ready.
 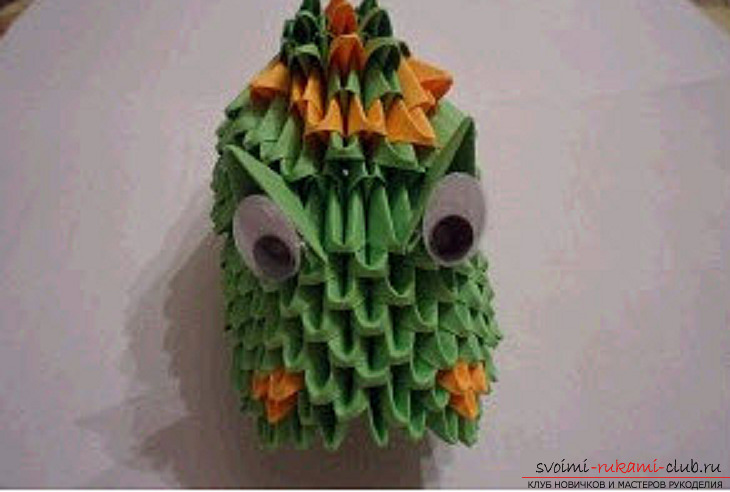 25. View from the side.
  26. From the red modules we collect the chain and close it in a circle. We get the basis for the trunk, consisting of two rows of modules of 26 modules in each row.
 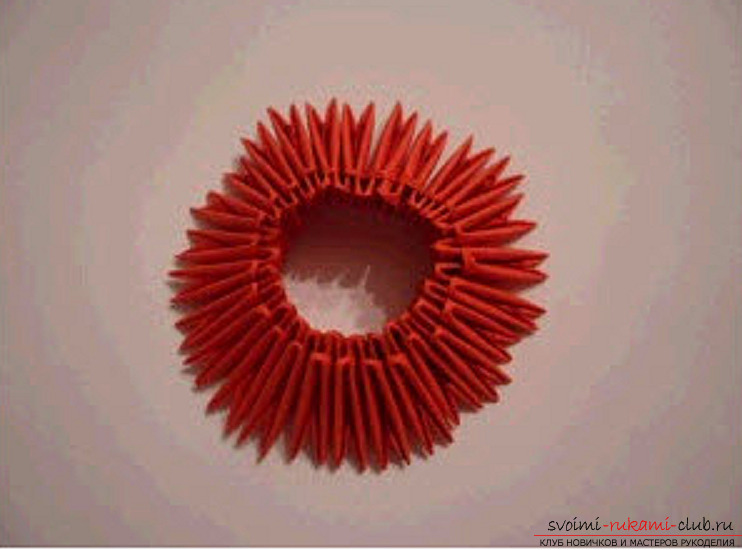 27.We accumulate two more series of modules.
 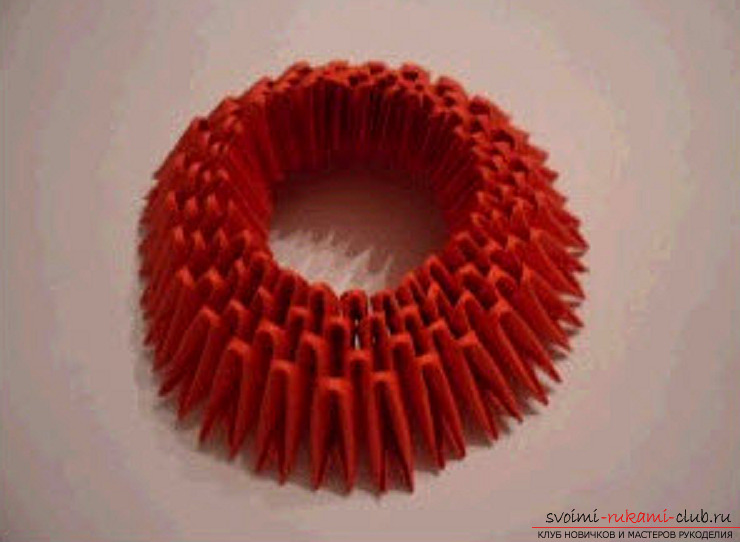 28.Delayem button, adding white modules.
 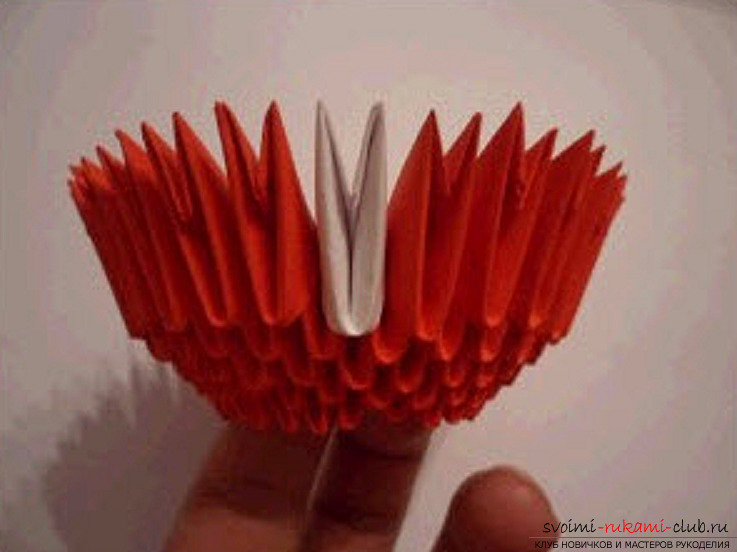 29.
29. 30.With the buttons, we collect a number of red modules.
 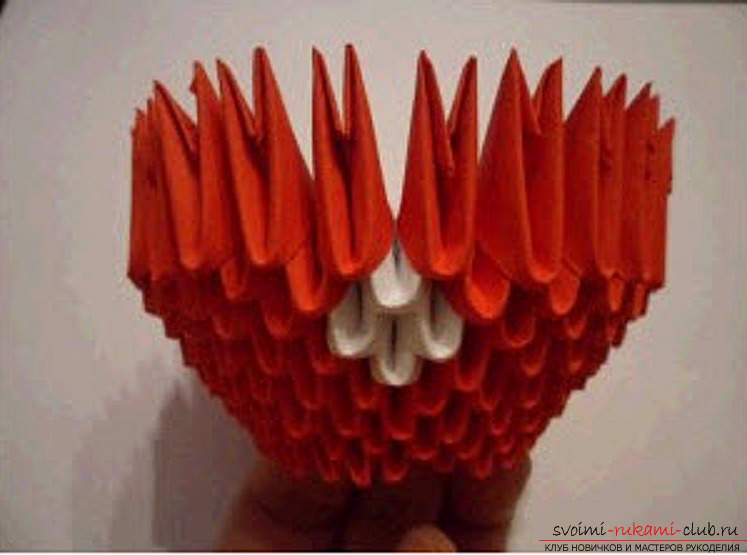 31.Delayem second button. And again we collect a number of red modules.
 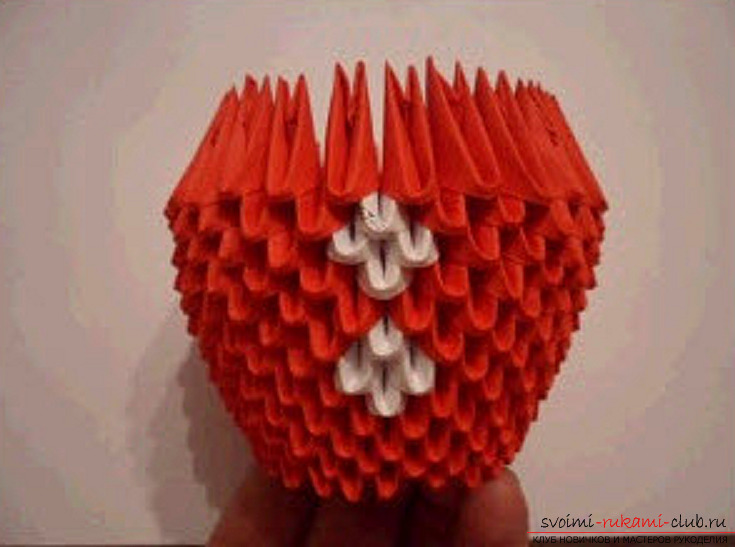 32.We gather the tie.
 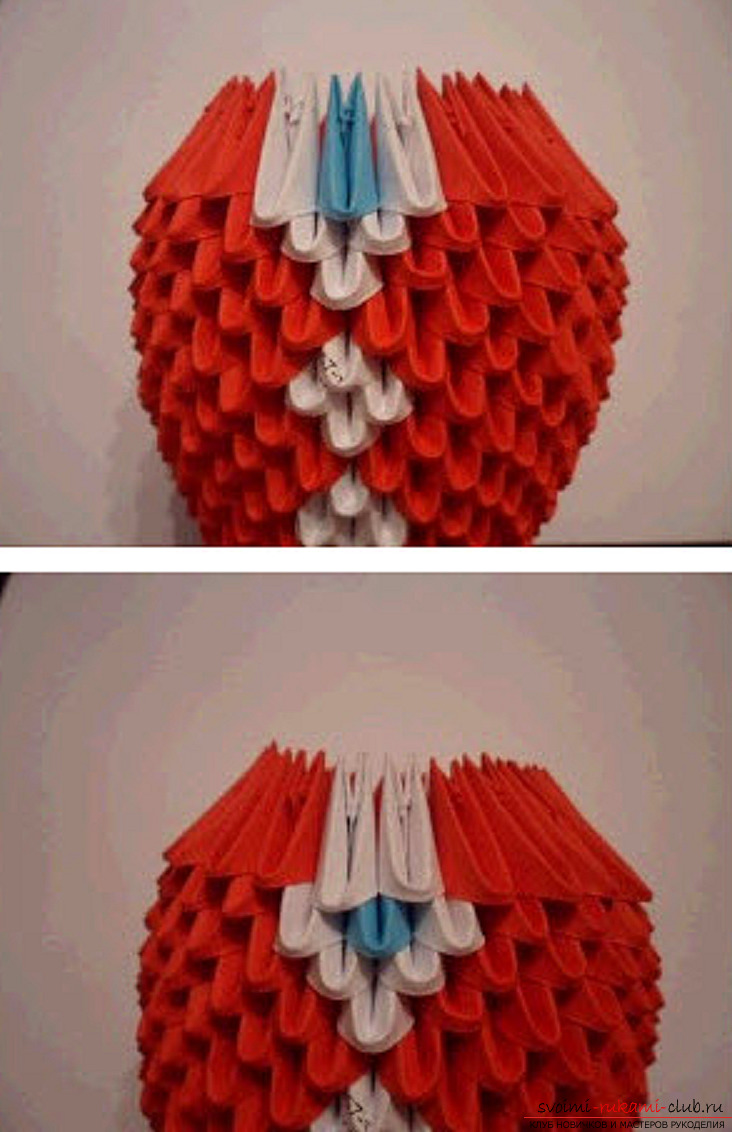 33.We turn the white modules straight forward and collect a number of white modules.
 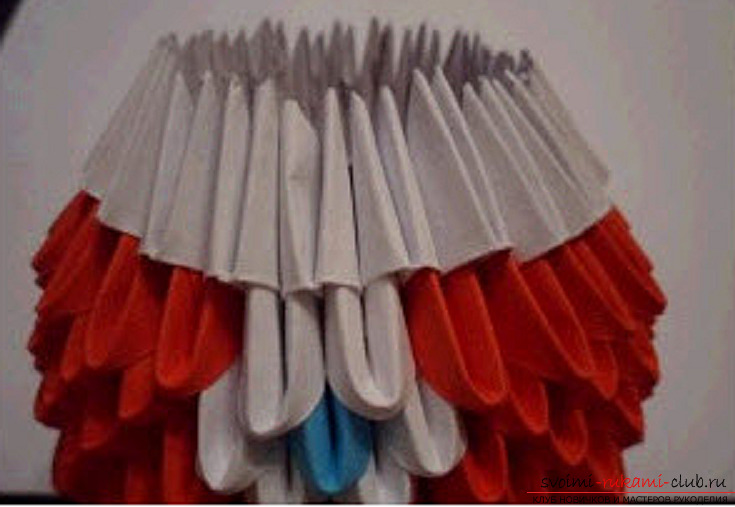 34. Further reduce the number of white modules to 18 pieces (put the module on 3 crowns)
 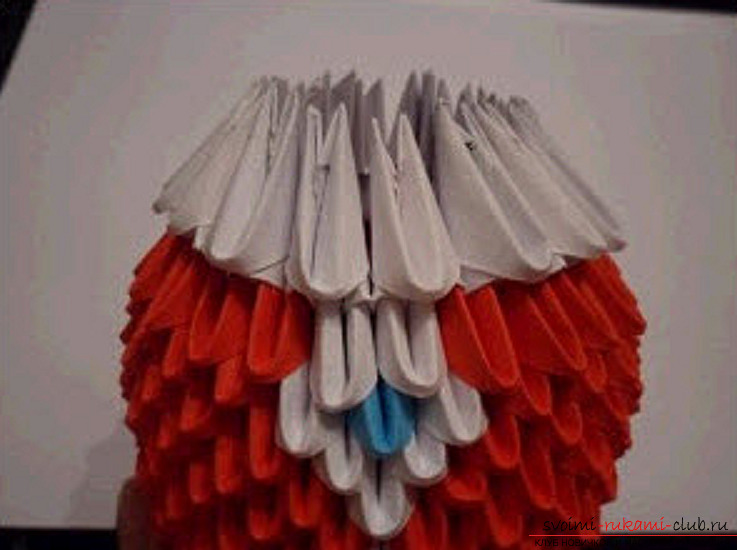 35. We assemble a number of white modules (18 pieces)
 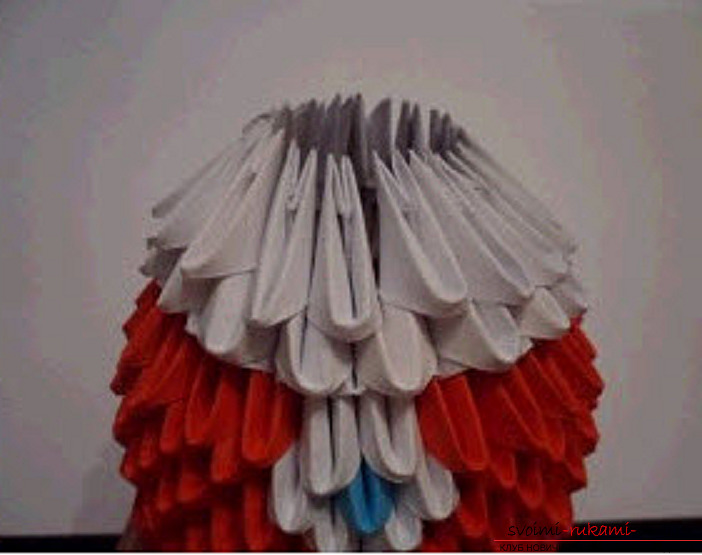 36. Now make the neck. Green modules turn the right angle forward and collect a row of 18 pieces.
 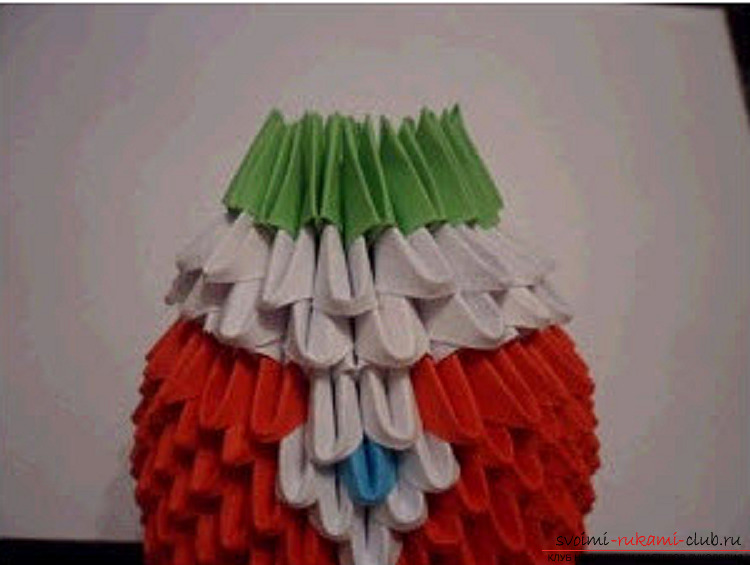 37. Thus, we collect only 5 rows of green modules of 18 pieces in each row.
 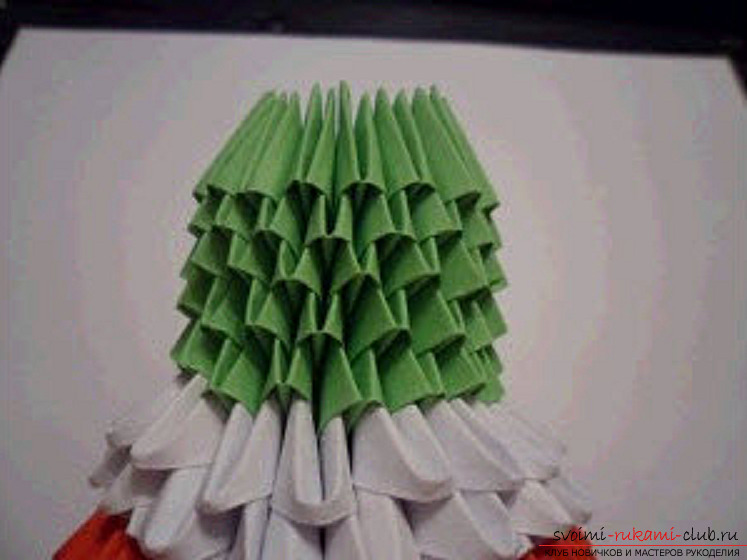 In the sixth row, we reduce the number of modules. There are 12 of them.
 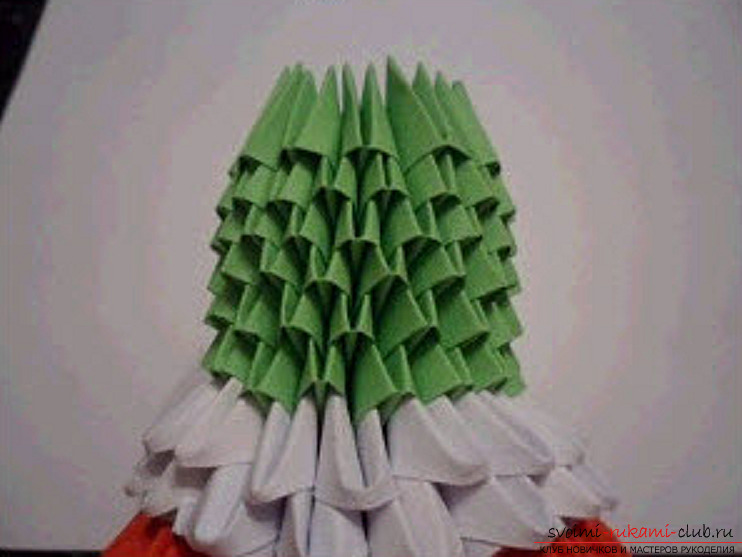 39. We assemble 3 more rows of modules of 12 pieces each. There are 8 rows in the neck.
 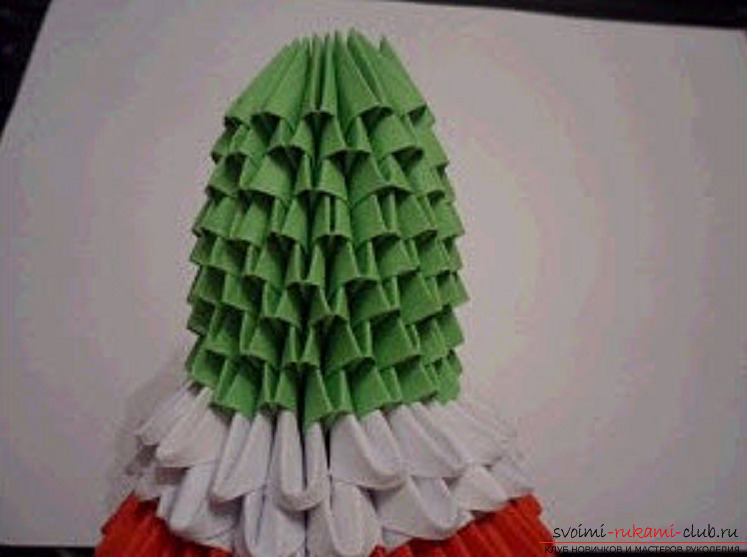 40. We make the lower legs, connecting the modules as follows.
 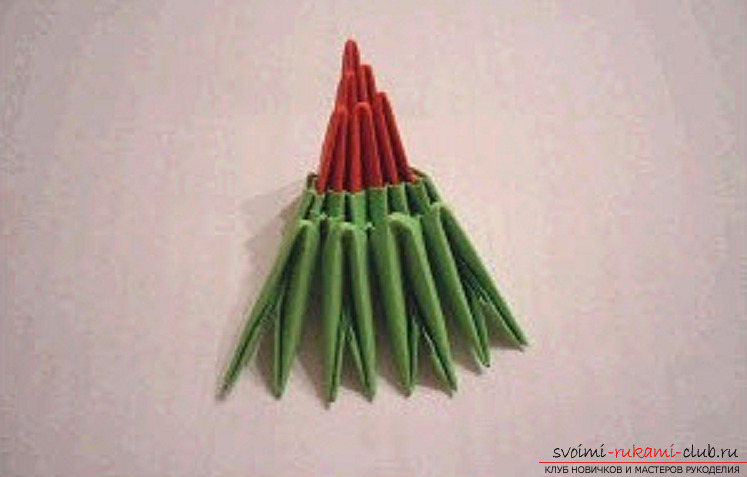 41. Insert the module in the pocket of the first module of the foot with a right angle up.
 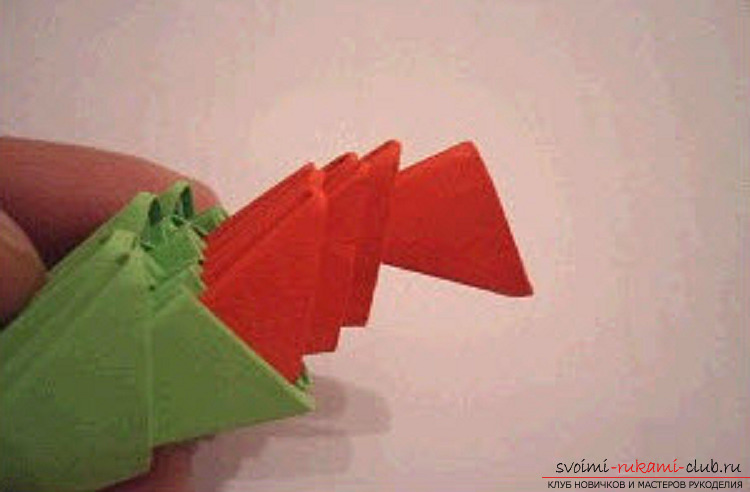 42. The lower legs are ready.
 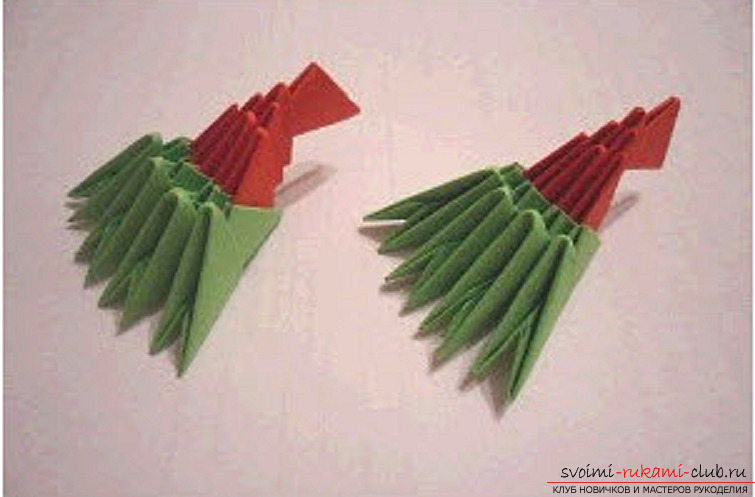 43. Similarly, with small changes, make the upper paws (see photo):
 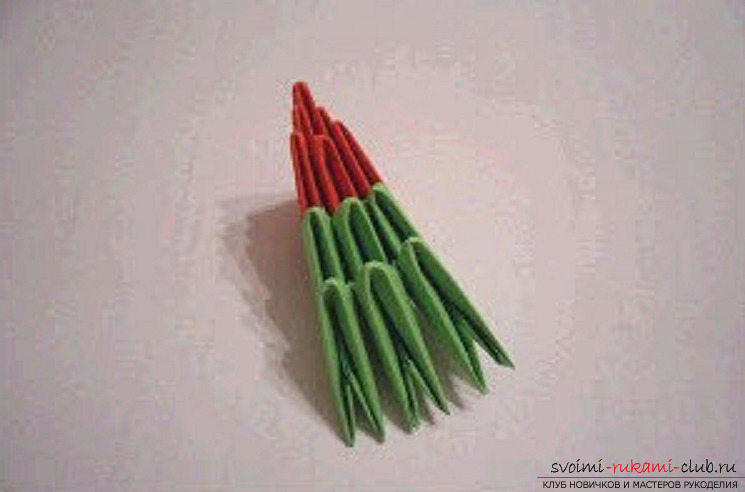 44. Insert the module in the pocket of the first module of the foot with a right angle up.
 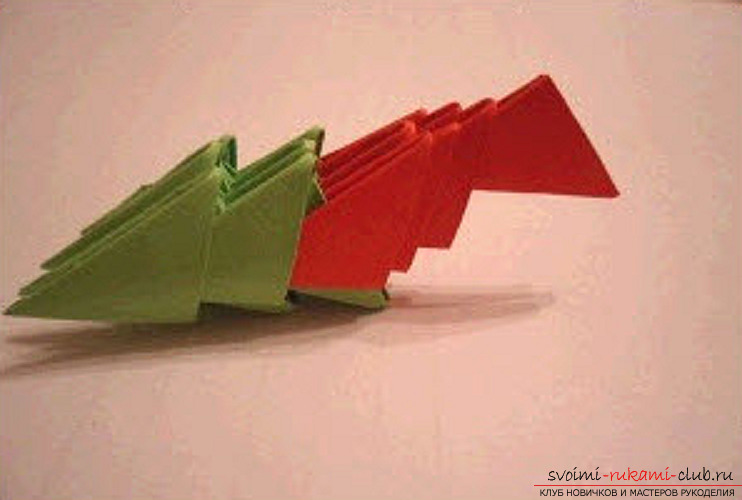 45.A put the module on it at a right angle downwards.
 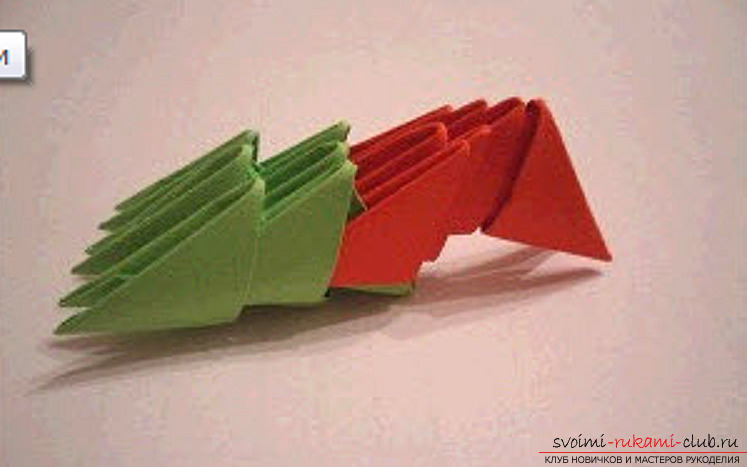 46The upper paws are ready.
 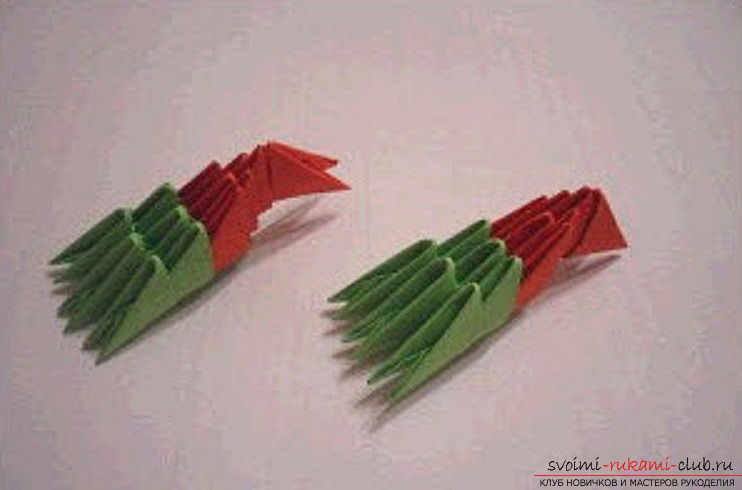 47. Begin to make wings, connecting the green modules as follows.
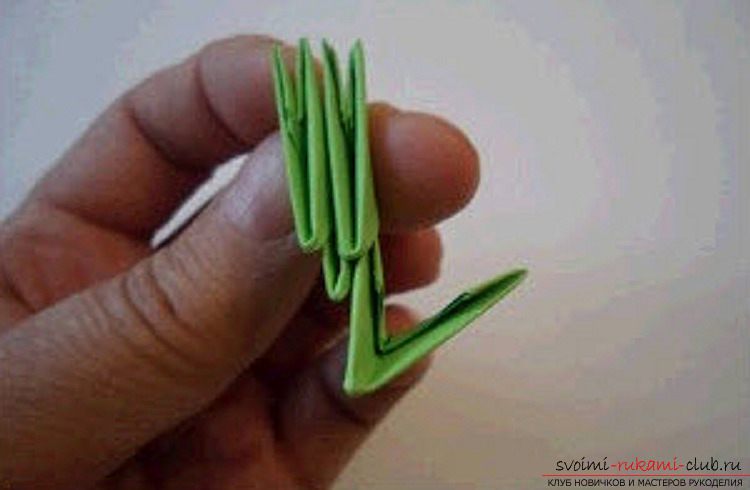
 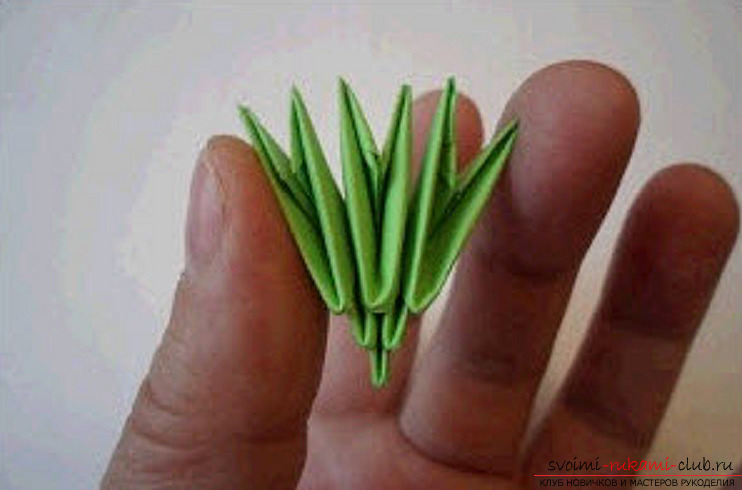 48. On the extreme tops of the modules on both sides, we build up 7 modules, putting each module on each other with one pile in a column.
 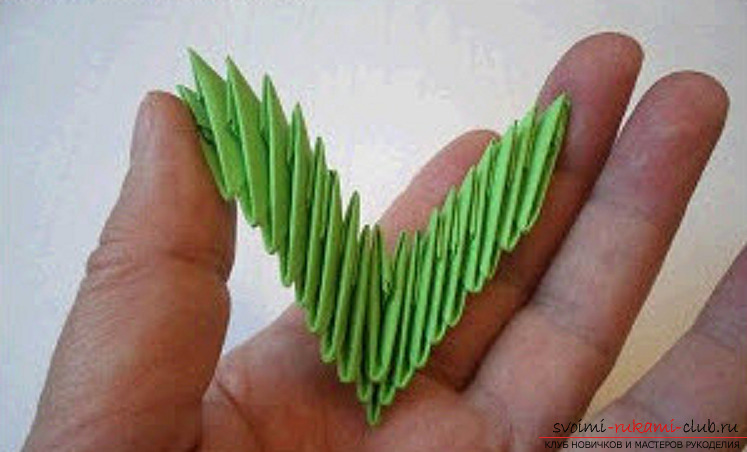 49. Further turn the modules forward at a right angle and collect a series of 8 modules on each side.
 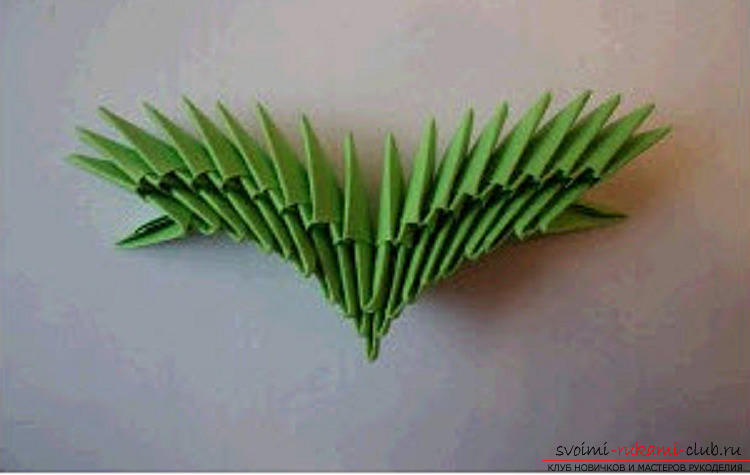 50. Central crowns are connected by a module.
  51. Next lay a number of modules on 7 pieces on each side.
 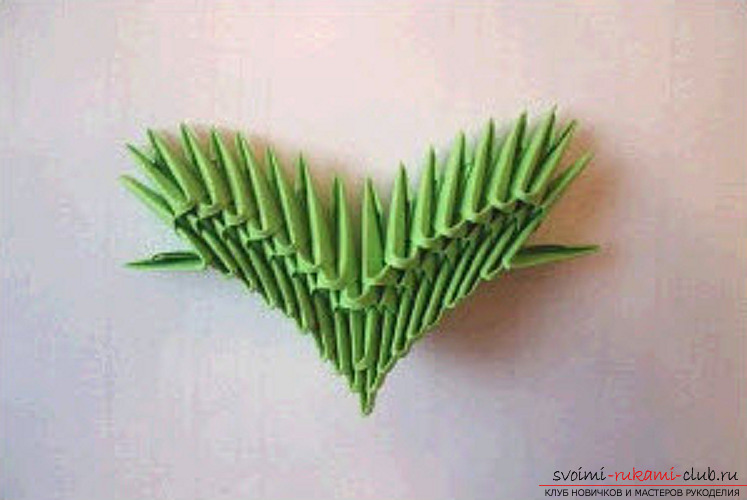 52. Once again, connect the central tops of the modules with the module inverted by a forward right angle.
 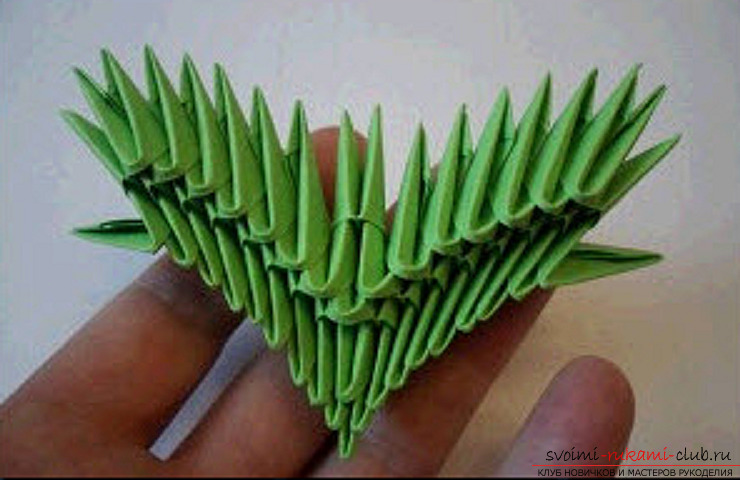 53. We assemble a number of modules in the same position for 6 pieces on each side. The wing is ready. Similarly we make the second wing.
 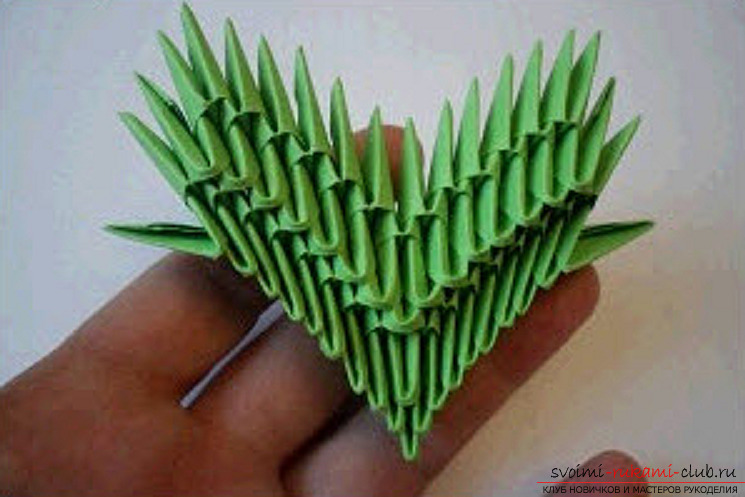 54. We are going to make a tail. We collect a chain of modules. In the first row there are 13 modules, in the second there are 12 modules.
  55. In the next row, turn the modules forward at a right angle and collect a series of 11 modules.
 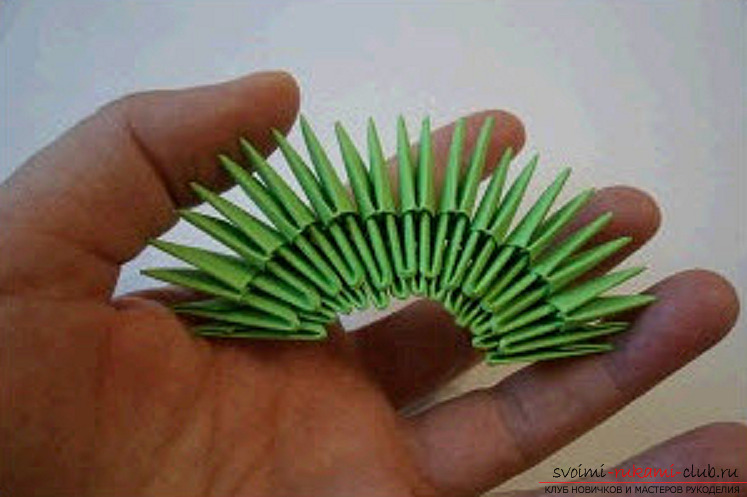 56. Then we will also alternate the rows of modules, changing their position and decreasing the number in each row by one module.
 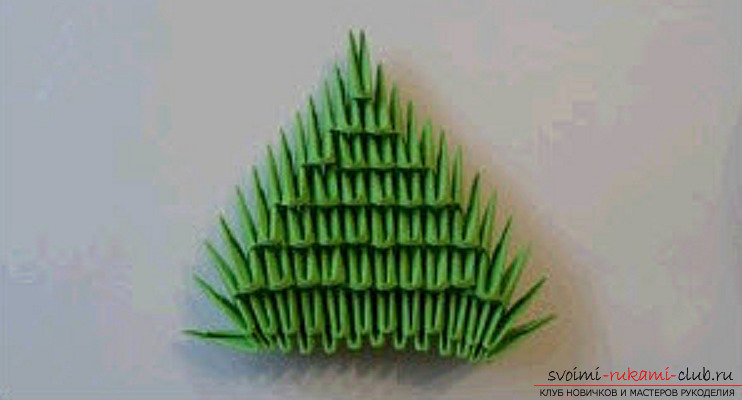 57. The tail is ready. Totally there are 14 rows in the tail. 58.Now let's talk about joining parts. If there is a thermo-gun, then without any problems we glue the paws, tail, wings and head with this simple device. If there is no adhesive thermo gun, you can attach the parts with a conventional toothpick. So break the toothpick in half. 59.One end we dip it into the glue and insert the winglet into the pocket of the central module. We let the glue dry. 60. Then, spread the glue sticking part of the toothpick and insert it between the modules on the back where it was supposed to attach the wing.
 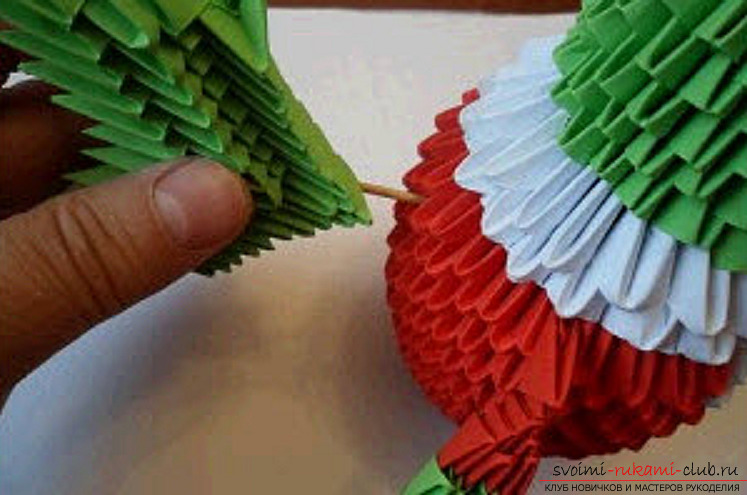 61. In the same way we attach the second wing.
 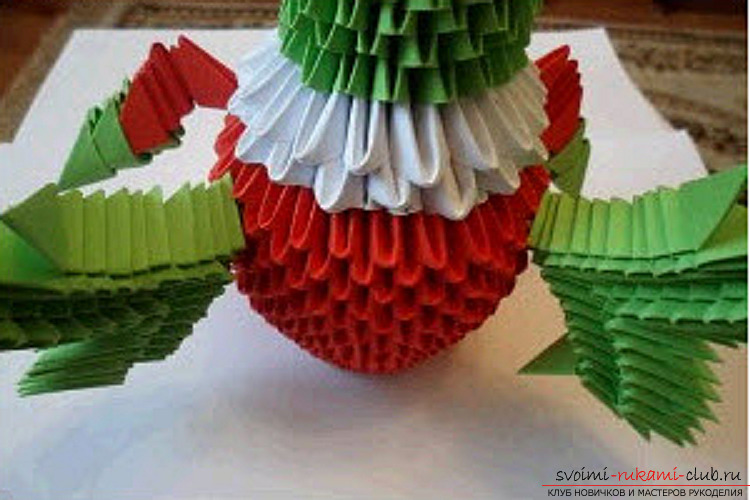 62. In the same way, we attach the tail and the lower legs, the head.
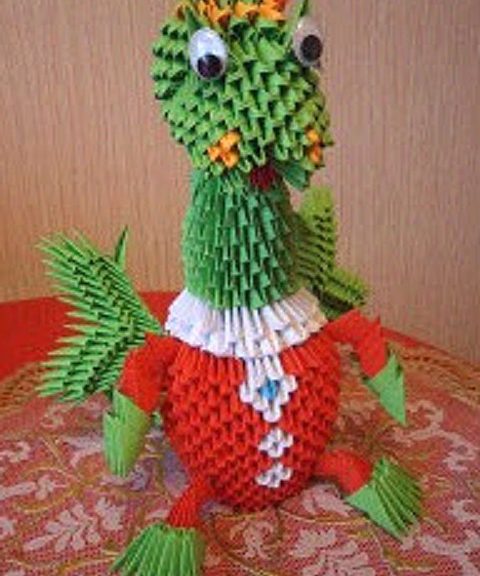
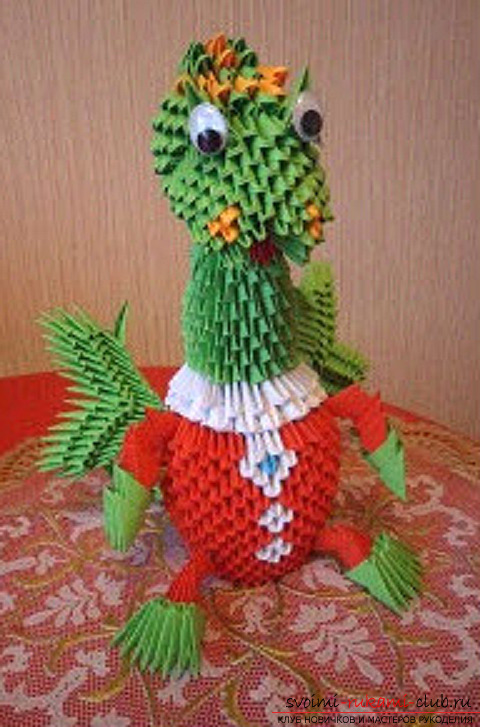
 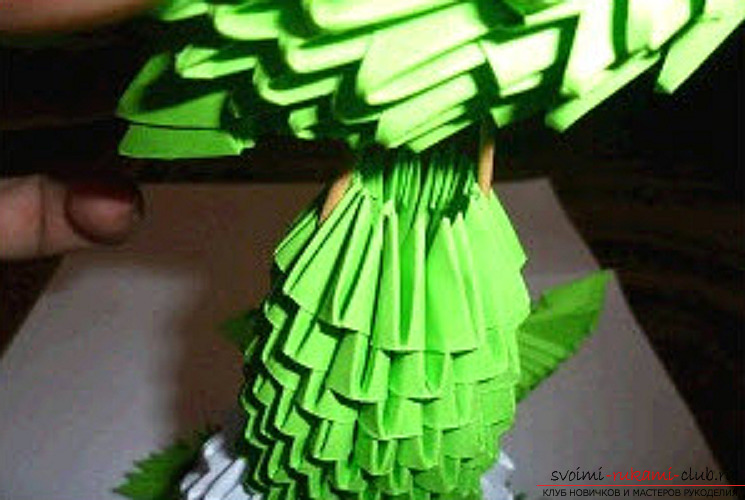 63.The upper hands are glued to the trunk.
 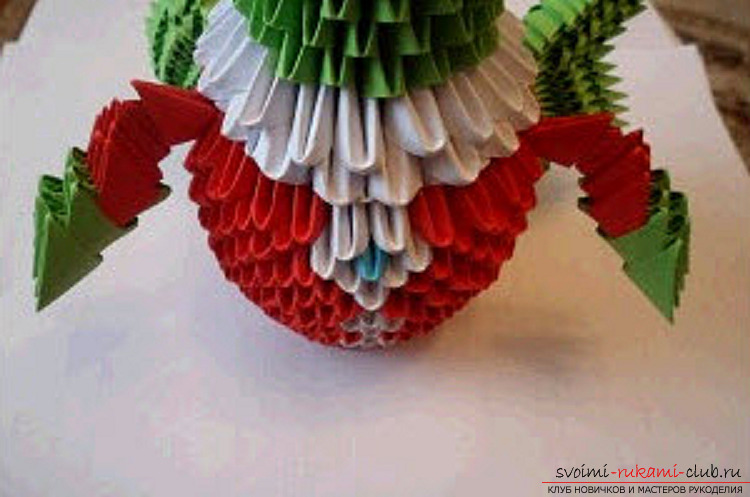 64. Our dragon is ready. Look: here it is in all its glory.
Comments
Related posts:
 The scheme for creating modular origami chamomile from paper for beginners. Master class with photo
 The scheme for creating a modular origami Snow Maiden from paper for beginners. Master class with photo
 The scheme for creating modular origami snowflakes from paper for beginners. Detailed master-class with photo
 The scheme for creating a modular origami swan from paper for beginners. Detailed master-class with photo