
The scheme for creating a modular origami snake from paper for beginners. Master class with photo
Modular origami snake is fairly simple inperformance. And if you are not new to this business, then easily supplement it with your ideas. The snake will be yellow-green, you can choose another, closer combination of colors for you. To make a snake in the technique of modular origami it will be required:
- 24 sheets of green paper,
- 6 sheets of yellow paper,
- a sheet of black paper,
- stationery knife,
- scissors
The first stage is the stage of collecting the modules. You will need to collect them: 372 green, 94 yellow and 2 black (eyes). If the snake does not seem to be long enough, it can easily be lengthened. But about this later. So, add the module. From one sheet, A4 format, you get 16 modules (when assembling some products you may need modules in size 1/32 or 1/8 sheet). To do this, the sheet or a stationery knife or scissors, as you prefer, cut first into 4 strips in length, and then each strip - into 4 parts. From each such part we collect the module. Bend in length in half. Bend it in half, unbend. We fold the airplane. Turn to the other side. Lower corners - up. The lower part is bent upward. We fold the module in half so that the pockets are outside. Each module has two corners and two pockets. The modules of one row are inserted into the pockets of the module of the other row. 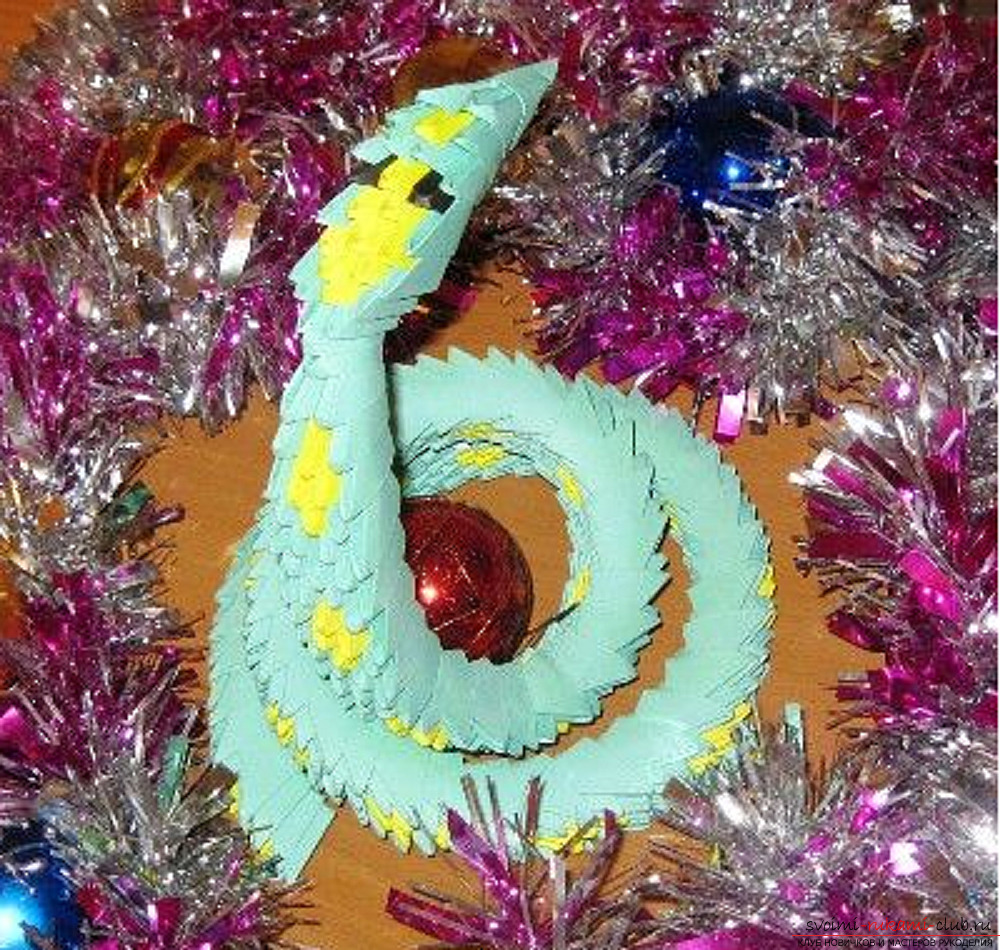 Let us turn to the snake. The first row is 1 green module, the second - 2 green modules. The pattern on the snake is yellow. The third row is 1 yellow module in the middle, from the edges to 1 green module. Fourth row: 2 yellow modules, 2 green ones. The fifth row is 1 yellow module, 2 green ones. The sixth row is 4 green modules. The seventh row is 3 green modules. The eighth row is 4 green modules. And the ninth row is performed as the third row. The tenth row - as the fourth, the eleventh - as the fifth. From the third to the eighth row - this is the motive, which should be repeated n-th number of times, that is, until you are satisfied with the length of the snake. This snake has this motif repeated 21 times. In short, do not advise the snake, it will not be interesting enough, you will get few rings. And a little longer you can do. Motive performed twice. Motive performed four times. After completing four motives, you can start folding the snake into a ring. This is done quite easily. We continue to add modular origami to Snake. Gradually, we twist the snake into rings. Closer to the head, that is somewhere in the place of 16-17 motives, we lift the trunk of the snake upward. The twenty-first motive is not fully reported. In the fourth row there are 2 green modules, instead of four. In the future, 2 and 1 green modules, instead of three and four. In the next row - 1 green module. This restriction we make to distinguish the head, so that it was more noticeable.
  Modular origami - snake assembly scheme: head Begin to add a head. The first row is 2 green modules.
 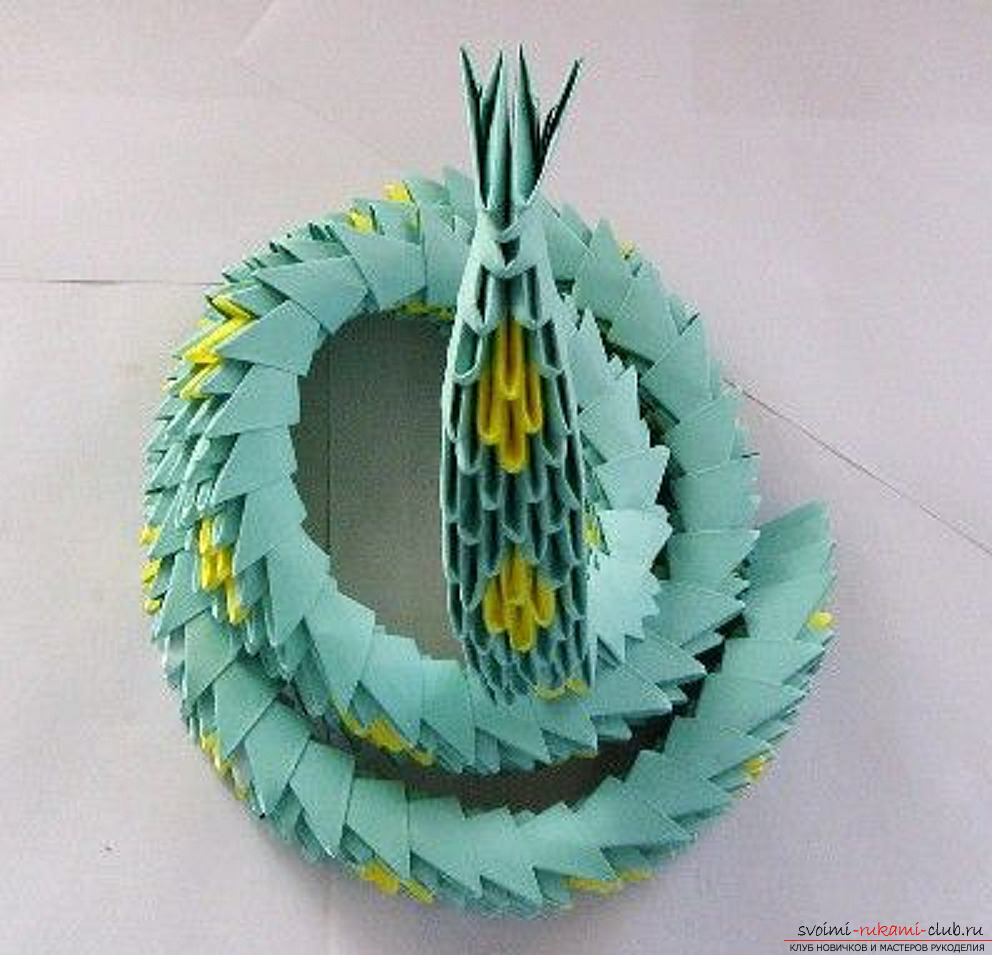 The second row is 1 yellow, 2 green modules.
  The third row is 2 yellow, 2 green modules.
  The fourth row is 3 yellow modules.
  The fifth row is 2 yellow, 2 green modules.
 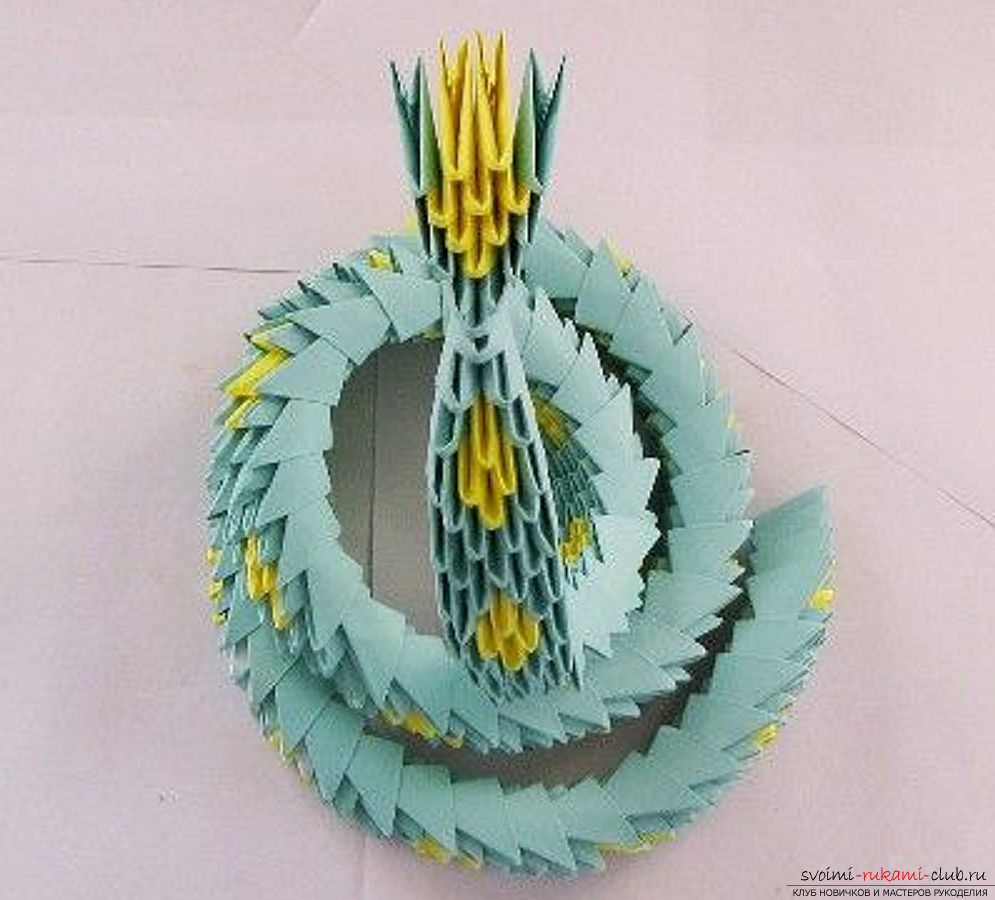 The sixth row. Eyes - 1 black module. 1 yellow.
 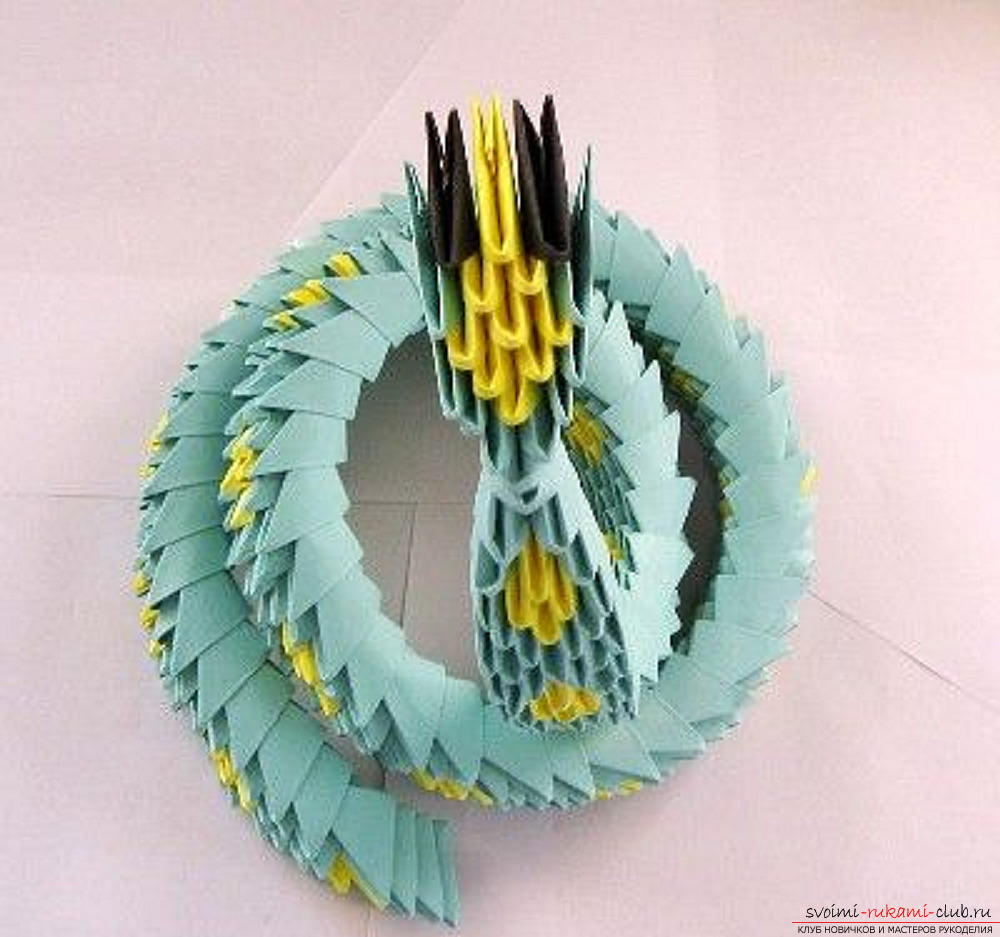 The seventh row. 4 green modules.
 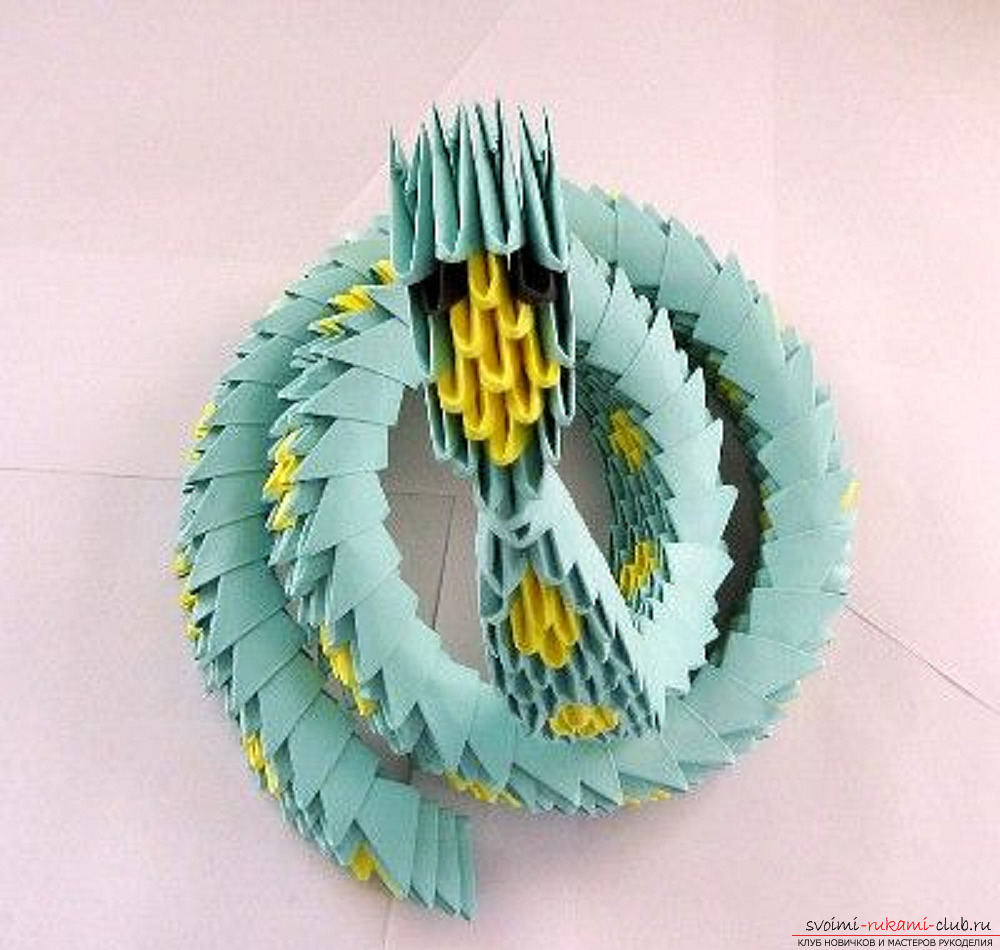 The eighth row. 1 yellow, 2 green modules.
 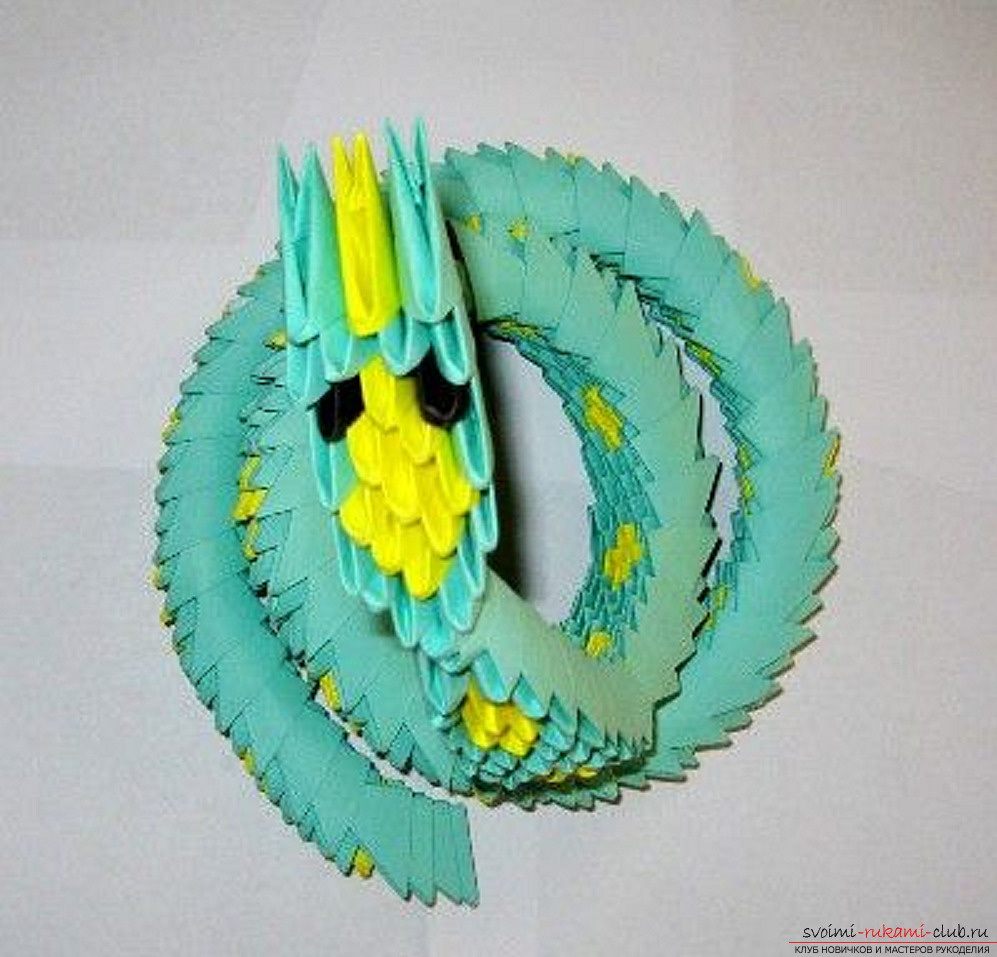 Ninth row. 2 green modules.
 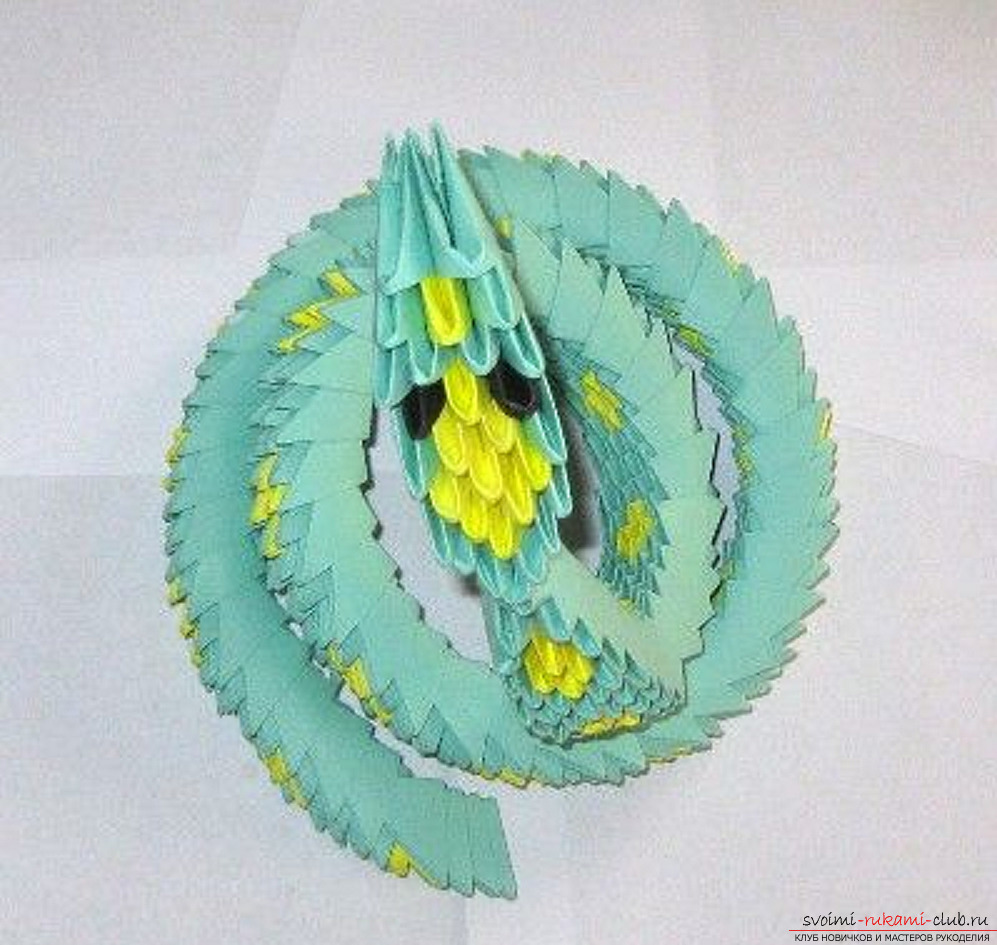 The tenth row of the head, the last one. 1 green module.
 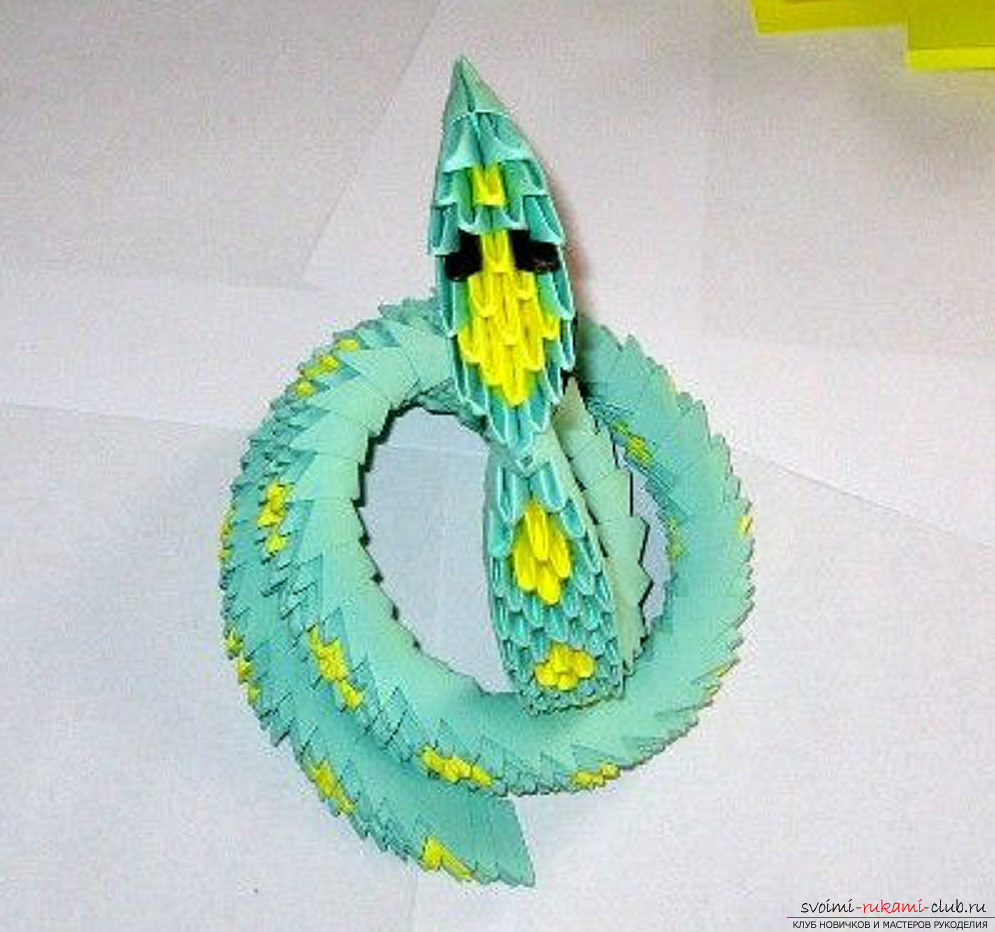 Finished modular origami snake in all its glory.
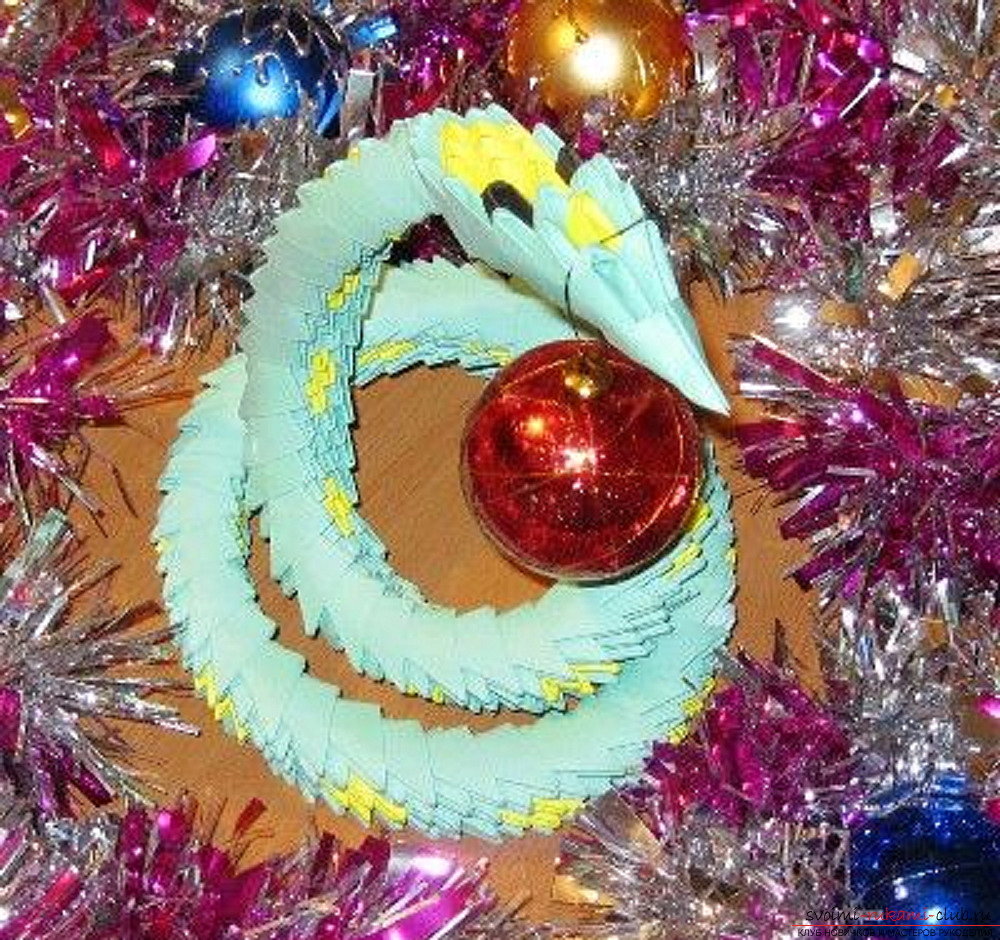
Comments
Related posts:
 The scheme for creating a modular origami dragon from paper for beginners. Master class with photo
 The scheme for creating modular origami chamomile from paper for beginners. Master class with photo
 The scheme for creating a modular origami Snow Maiden from paper for beginners. Master class with photo
 The scheme for creating modular origami snowflakes from paper for beginners. Detailed master-class with photo