Cross-stitch embroidery designs for cross-stitching, free cross-stitch patterns for embroideries, a master-class for embroidering pillows according to the scheme
Master-class on the creation of a needle bed-pillow withembroidered with a cross ornament Since ancient times, needlewomen embroidered decorated as details of the wardrobe, and other household items. Great interest in cross stitching can be justified by the fact that it requires the minimum number of tools and there is no need to master any special technologies, you just need to make sure that the thread is evenly tensioned during the embroidery process. 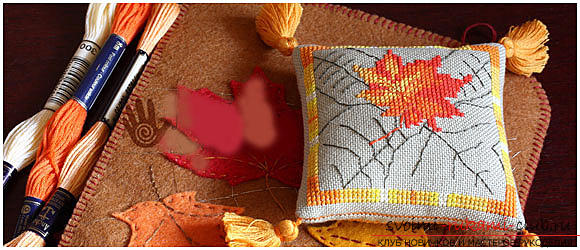 Our lesson is dedicated to creatingpillow-needle, which is decorated with cross stitch. After you decide on the pattern (it can be easily found on the Internet), you need to find the tool and materials for the job. Then we begin the preparatory stage.
 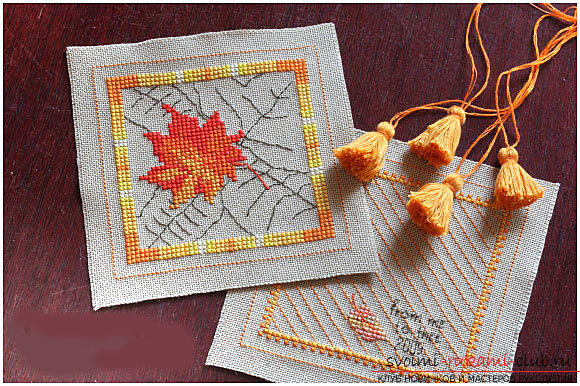 In the beginning, it is important to decide how theThe process of embroidery: only with the use of canvas or you intend to impose it on top of the fabric. If you chose the second option, then you need to sweep the canvas to the fabric basis using a stitch "stitch", and after the end of the embroidery, remove this seam (remove the threads of the canvas). The most popular for embroidery is threaded floss, which are folded in 2-3 times. Working thread must have a length of not more than fifty centimeters. In the case when the thread will be further, it can be confused and give you discomfort when embroidering. After we made the embroidery according to the scheme we liked, we continue to make the needle bed itself. To do this, take 2 squares of fabric, which is already decorated with embroidery and four brushes on a very long string. A brush can be made by yourself or bought in a specialized store. Square the entire perimeter of the seam ("back the needle"). Make sure that the stitch length is the same, and also to match the number of stitches. We attach brushes to the corners of the pillow on the front side.
 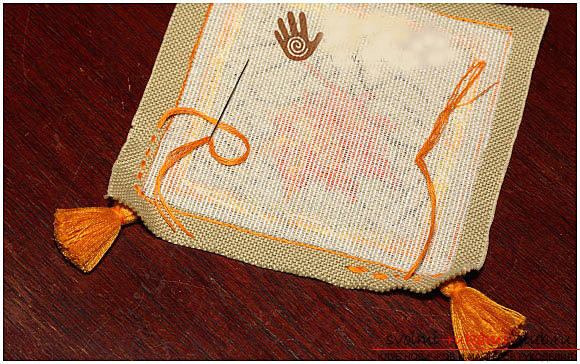 Brushes should be attached to the outer part of the squares (behind the seam, which runs along the perimeter). This site we will later remove inward products.
 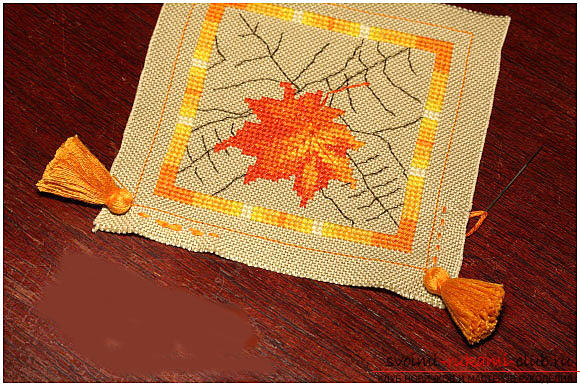 All four brushes are attached to the corners. The rear side is not involved. Next, we will join the seams before and the back side of the product. If you carefully made stitches along the perimeter ("back needle"), then this stage will not cause you difficulties. Elementary sewn on 2 parts with dense stitches.
 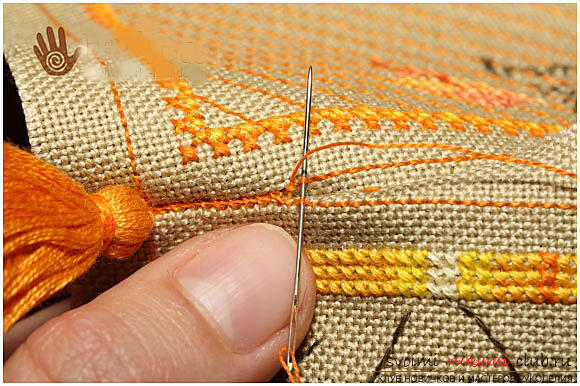 So, 1 part is ready. The corners should be turned inwards and stitched on the other side. It is not necessary to tighten the thread very tightly at the beginning of the work.
 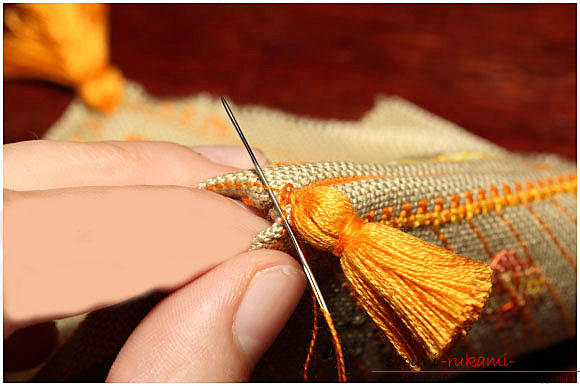 We make seven or ten stitches and only after that we need to pull for the main thread, as if for a lock.
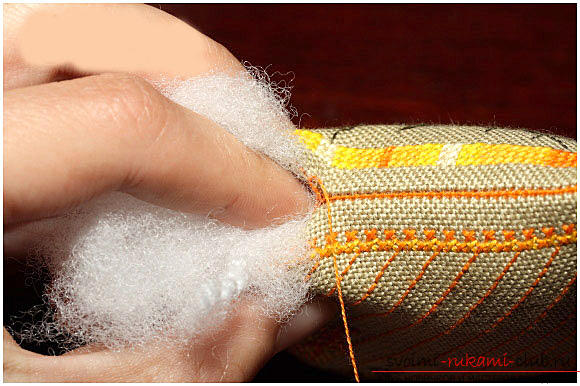
 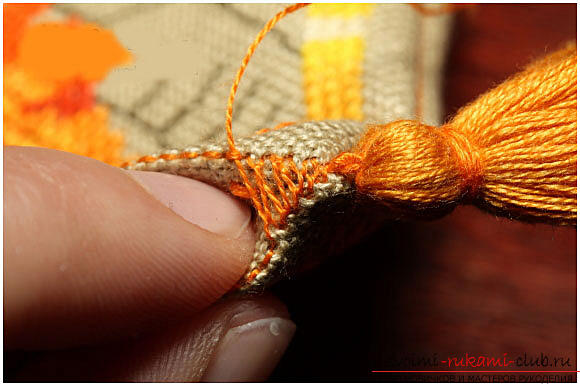 We connect all sides of our product. At the rear, you need to leave a small hole in the pair unprotected. Next, you need to stuff the pillow-bed. After that we make the closure of the hole.
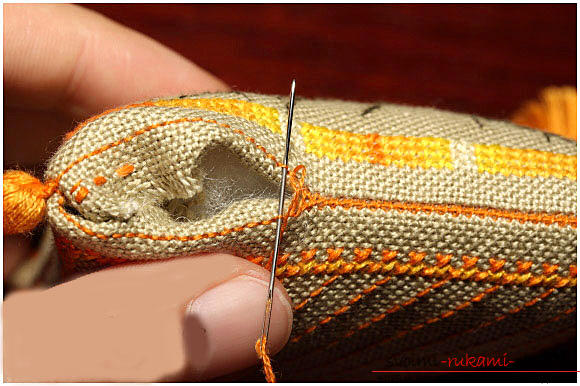
Comments
Related posts:
 Cross-stitch embroidery designs for embroideries, cross-stitch embroidery on roses, free cross-stitch patterns for embroideries, a masterclass for embroidering pillows with roses according to the scheme
 Cross-stitch embroidery designs for embroideries, butterfly embroidery, free cross-stitch patterns for embroideries, a master-class for embroidering pillows according to the scheme
 Schemes of embroidery of decorative pillows by a cross, embroidery of decorative pillows by a smooth surface, free schemes of an embroidery of pillows
 Embroidery schemes for decorative pillows with a cross, embroidery of decorative cushions, smooth embroidery, embroidering pillows with beads, embroidering pillows with ribbons, free embroidery schemes for pillows
 Lessons of cross-stitch embroidery, cross-stitch for beginners free of charge, cross-stitch patterns, free cross-stitch patterns