Scheme pattern from Burda magazine skirt in the floor of three flounces is very simple and is available for work
Pattern pattern from Burda magazine skirts to the floor ofthree flounces is very simple. It's a great option to sew a new, interesting product yourself, update your wardrobe. It will suit not only experienced craftsmen, but also beginning seamstresses-cutters. Even without using the original pattern proposed in the magazine, you can cut and sew this skirt model in just an hour. Burda magazine is known to needlewomen long enough. In it you can find a huge number of interesting patterns of fashion things, in particular such as skirts, which are simply necessary in the wardrobe of every girl or woman. For many, especially beginner needlewomen, working with patterns is a rather complicated process. Therefore, first of all, you should read the instructions that you see in the photo below. 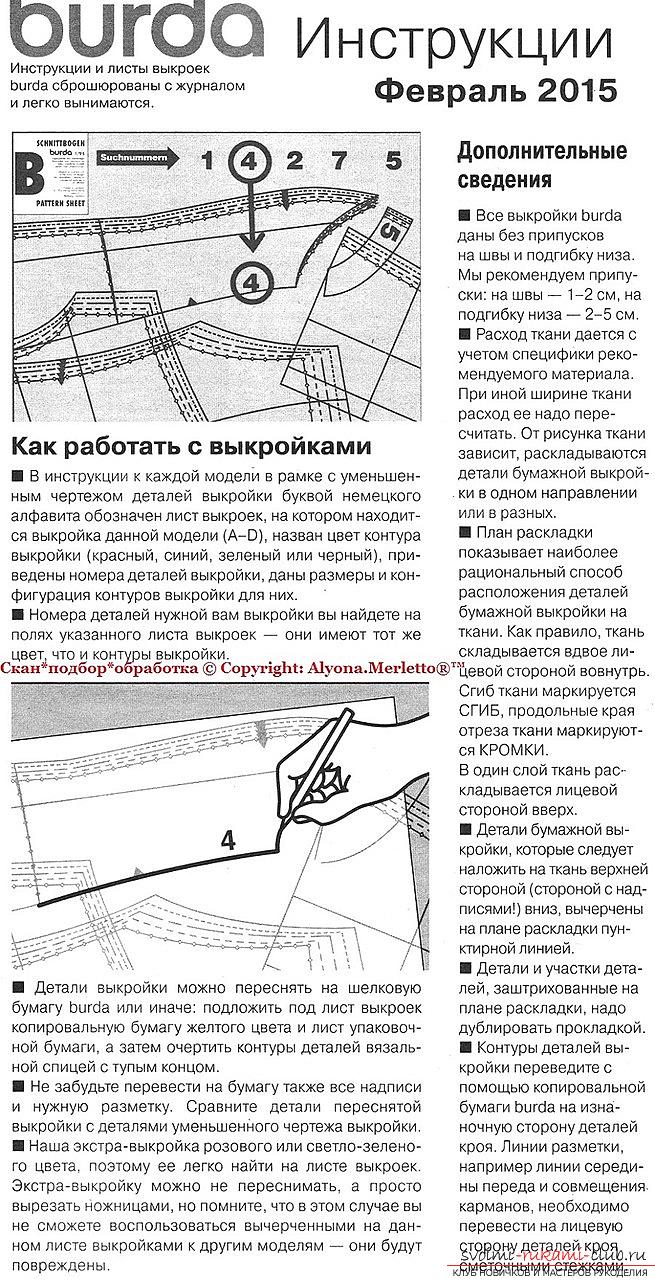 Construction of patterns and tailoring of any productbegins with the removal of measurements. It is the proper removal of them, and also the correspondence to the sizes, that will help you to decide on the version of the pattern of the product you need.
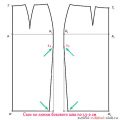
  In the photo you can see the information that will help you and in the process of taking measurements, and with a table of sizes corresponding to the sizes indicated on the patterns in Burda magazines.
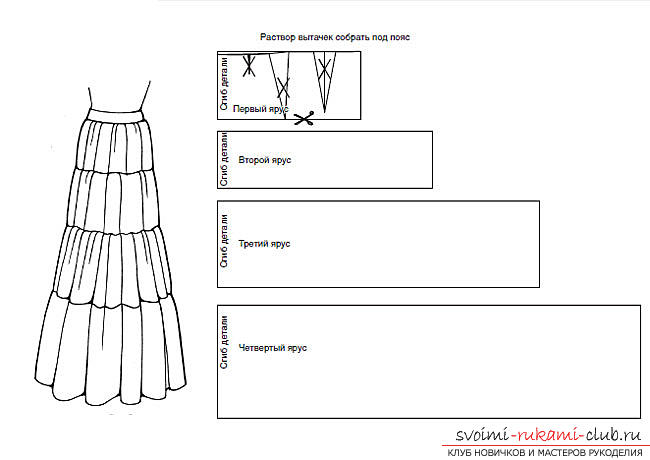
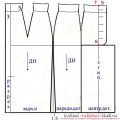
 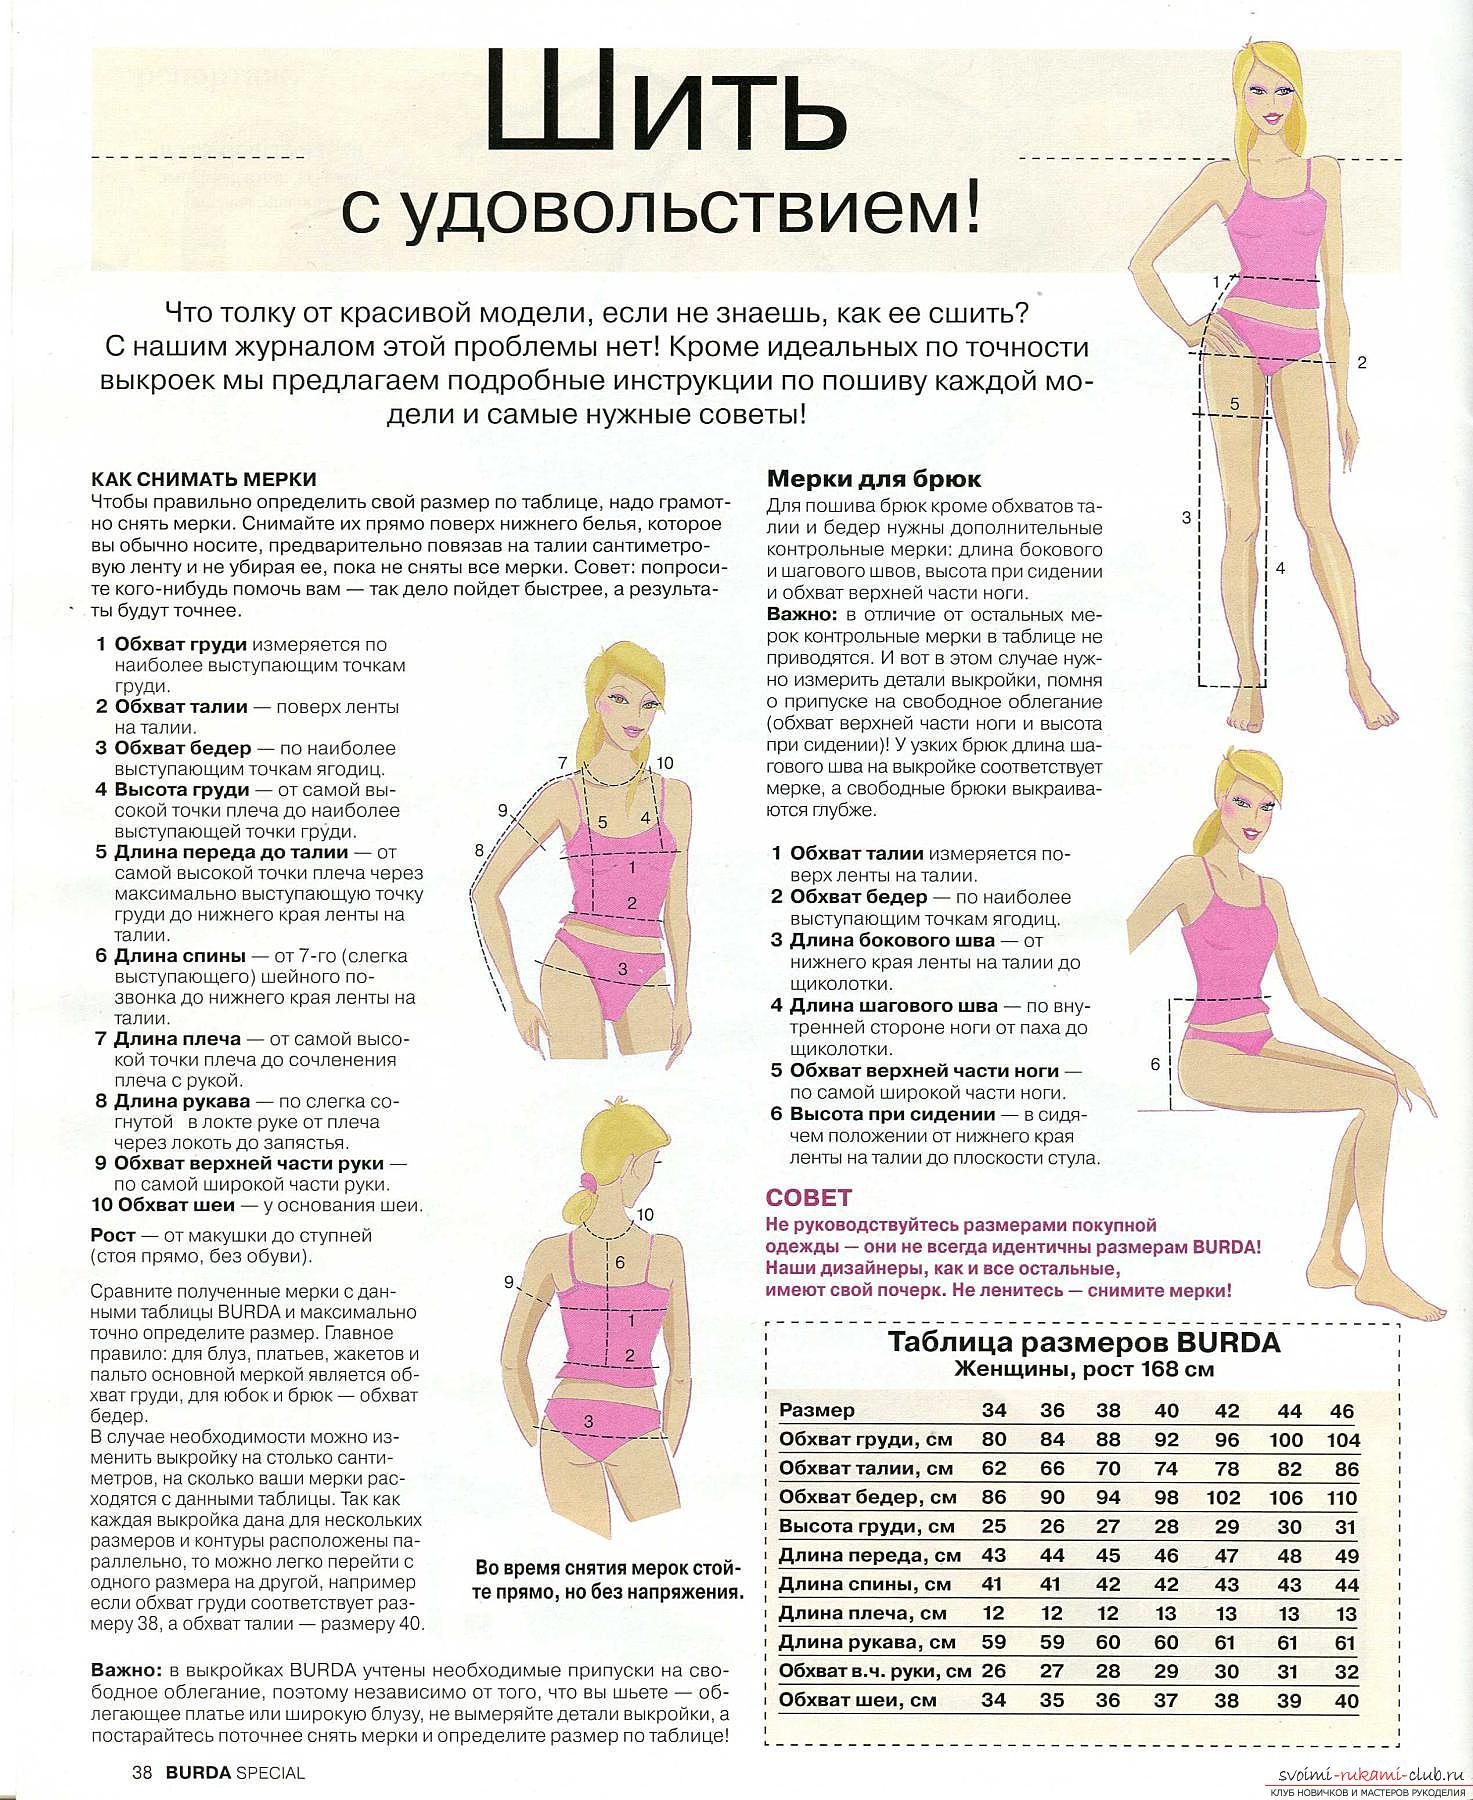 Today we offer you to sew yourselfone of the models of beautiful practical skirts, the pattern of which is proposed in the journal Burda. Although just such a skirt you can easily sew in just an hour - one and a half and without using a pattern. It's about a skirt with three frills. On the diagram you see a pattern designed for a product consisting of four shuttlecocks, but sewing them is almost identical, except for the number of parts (shuttlecocks).
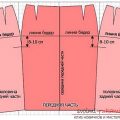
  Description of pattern patterns from Burda magazine skirts in the floor of three flounces Simulation of this product, we will beginfrom the pattern of the belt. To do this, be sure to take measurements - waist circumference. Now you need to draw a rectangle drawing, the length of which will correspond to the previously taken measurement with the addition of three centimeters (added to form the fastener). The width of this rectangle will be equal to eight centimeters. Important. Necessarily on all sides of the rectangle we make an increase - one centimeter. Now let's talk about the width of each individual frill. For this, there is a definite calculation formula, namely, the length of the entire skirt, according to your measurements, is divided into three. If, for example, the length of the product is one hundred and five centimeters, the width of all three defenses will have the same figure - one hundred and five divided by three equals thirty-five. We will cut out the first frill as follows. We have already decided on the width of each frill and got the same value for everyone. Proceeding from this, we draw a rectangle with the resulting width. The length of it will be calculated as follows - own measurement of waist circumference, multiplied by 1.4 - 1.7. The more the length of the frill is, the greater the splendor of the assembly. Building a pattern of the second frill. We make a drawing for a ruffle pattern. We need to draw a rectangle whose width will be the same as in the previous case, and its length will be calculated so - the length of the first part (frills) is multiplied by 1.6 - 1.7. Drawing the pattern of the third ruffle. As in the previous case, the width of the ruffle will be exactly the same. Therefore, we draw a rectangle with the same width as the previous rectangles. Concerning length, here too everything is as simple as possible. We take the length of the previous, second pattern (frills) and multiply by 1.6 - 1.7. Do not forget to make allowances on all patterns of frills on all sides, one centimeter. Now it's time to collect all the details in a single product, which we originally planned to sew with you - a skirt in the floor, consisting of three frills. First, pick up the upper cuts of each of the three frills. To do this, a line is laid along the length of the entire cut. The stitch should be wide enough - four millimeters. Then pull off the frill. Be sure to remember that as a result, the length of the first part must coincide with the waist circumference, the length of the next part should be equal to the length of the lower edge of the previous part, and the length of the top cut of the last frill should be identical to the length of the lower edge of the second part. It remains to first sweep away all the details among themselves, and then put them off. All allowances should be either processed with a zigzag line, or swept on the overlock. After the manipulations, we made a buckle, the role of which would be a secret zipper. It is sewn into the product along the seam from behind. Adapted belt, its outer side is strengthened with the help of windmills. We sew the belt to the product. Lower the edge of the skirt in the floor should be turned exactly one centimeter and a line. If you want, you can make lines on each frill, first from the top to the edge. Then make two lines below. The distance between them is half a centimeter. Do not forget to straighten the wrinkles on the product during this work.
Comments
Related posts:
 Interesting patterns of clothes for girls and boys of all ages from Burda magazine for mothers of needlewomen
 Pattern of a universal skirt - a pencil skirt is required in the work of each master
 Detailed construction of a pattern of a skirt with an overstated waist.
 Registration of a beautiful pencil skirt with your own hands - master class of a free pattern
 To learn how to build the basic pattern of a straight skirt, even a novice seamstress can easily