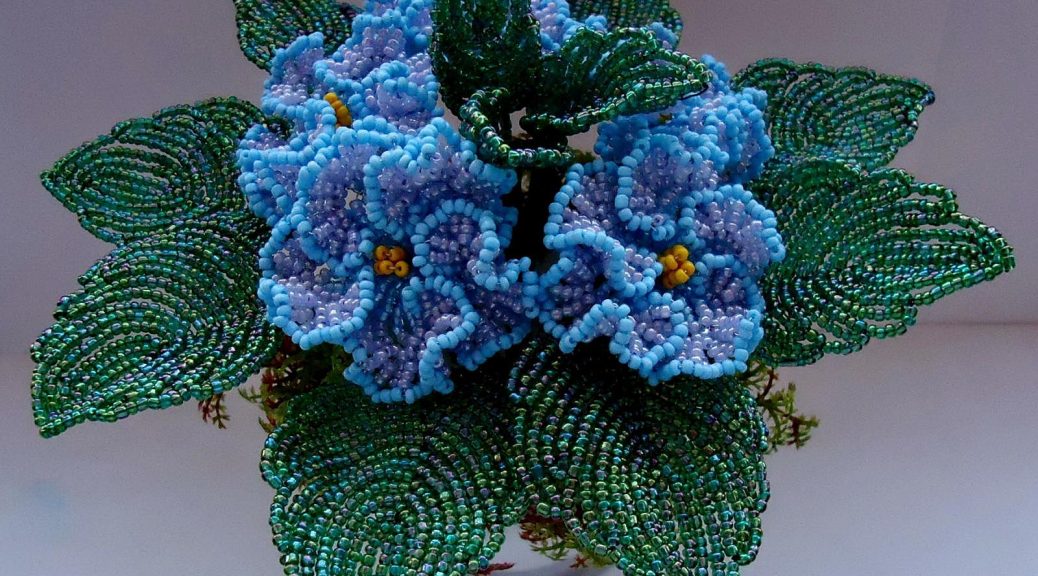
Schemes of weaving with beads - flower of violets with own hands, scheme for weaving
Beading includes a number ofopportunities to use. One such privilege is the decoration of your own home. A small vazonchik can become a real living part of your house, especially when it is made by yourself.
Schemes of weaving with beads - flower of violets with own hands, scheme for weaving
 Consider a very popular beadwork lesson, which will help us develop our own skills and create something unique for quality beading.
- We use variants of beads of dark and light color of violet shades, respectively matte and transparent coating.
- Also take the beads bright yellow.
- Take the beads of green color, matte coating of a dark shade, a transparent coating of light shade.
- Let's find the wire for the frame
- Scissors for working on materials
- Thread (green), thick
- A box for fastening a flower
- Alabaster or gypsum.
How to make flowers? 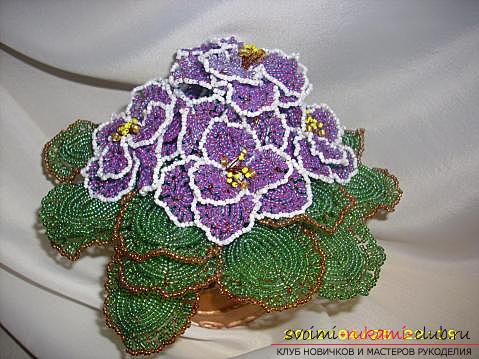 After all the materials are collected, we beginwork on a flower. We need to cut the wire by a piece by 50 mm. It is best to use this material in a diameter of 0.2 centimeter in diameter. Take the purple beads in dark colors, in an amount of 14 pieces. We string them on our wire. After that, place them in the middle of the wire. Further, with one end of the wire we pass the very first bead. We form a loop. After that - we put on purple beads of light shade in quantity of seven pieces. We also pass them through the other end, to the loop. Then, take the beads of light tone for 8 pieces and conduct the twisting of the wire. Then, we form a small petal. This will be a piece of our future violet.
 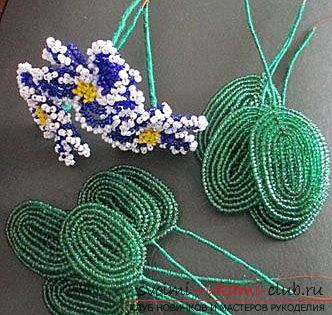 Next, continue to do the second part. To do this, you will need to repeat all the procedures for the first action. We form petals in an amount of 5 pieces. Next, make a small piece of wire, which is 2-3 beads of yellow color. We form a loop where both ends curl. After this, after the formation of the flower, it is necessary to attach to them the petals of violet color. Create leaflets for violets
 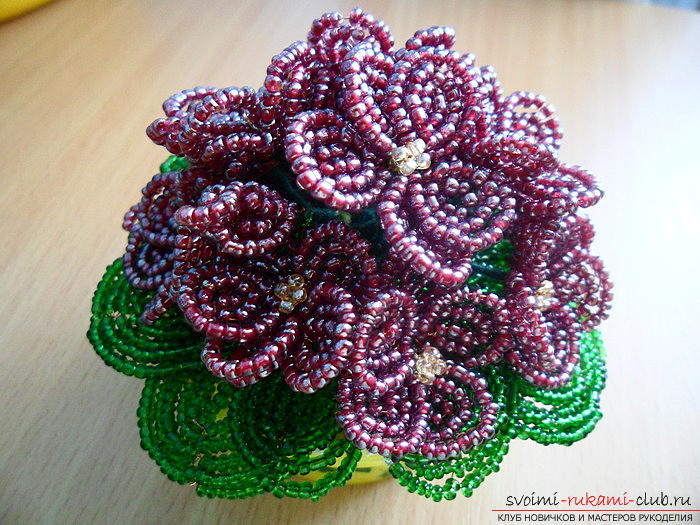 Next - working on the leaves. Here we take two different shades and mix together to make one composition. then, we dress each time in a random sense. We use a wire with a diameter and a thickness of 0.4 centimeters. The length of the trunk is 20 mm. After that, we make a loop at one end and string 7 pieces of beads there. Our foundation is ready. After this, from the loop it is necessary to retreat a smooth value of 140 mm. and screw a piece of wire with a thin trunk for a length of about 100 centimeters. 70% of the wire is filled with beads. Next, make a loop. The wire is located on the main thread-wire and twisted with beads in the number of seven pieces that were dressed in the beginning. We get the number 2. We do 11 more series like this. The sheet will be formed with two sides. In the front side, there should be no visible wire element. For the first and third rows, you can cut off the loop. After this action, it is necessary to twist the thread with the bead with the main wire, and then - to put beads on it. Then, bend to the bottom. The thirteenth row is formed. Such sheets should be formed in an amount of 6 pieces. The same is for small sheets. We make a stand for the flower and prepare it for the presentation!
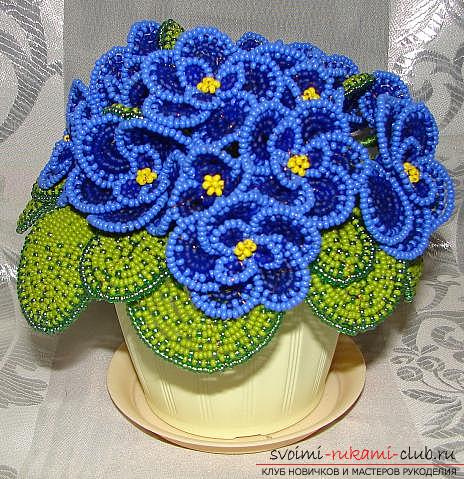
 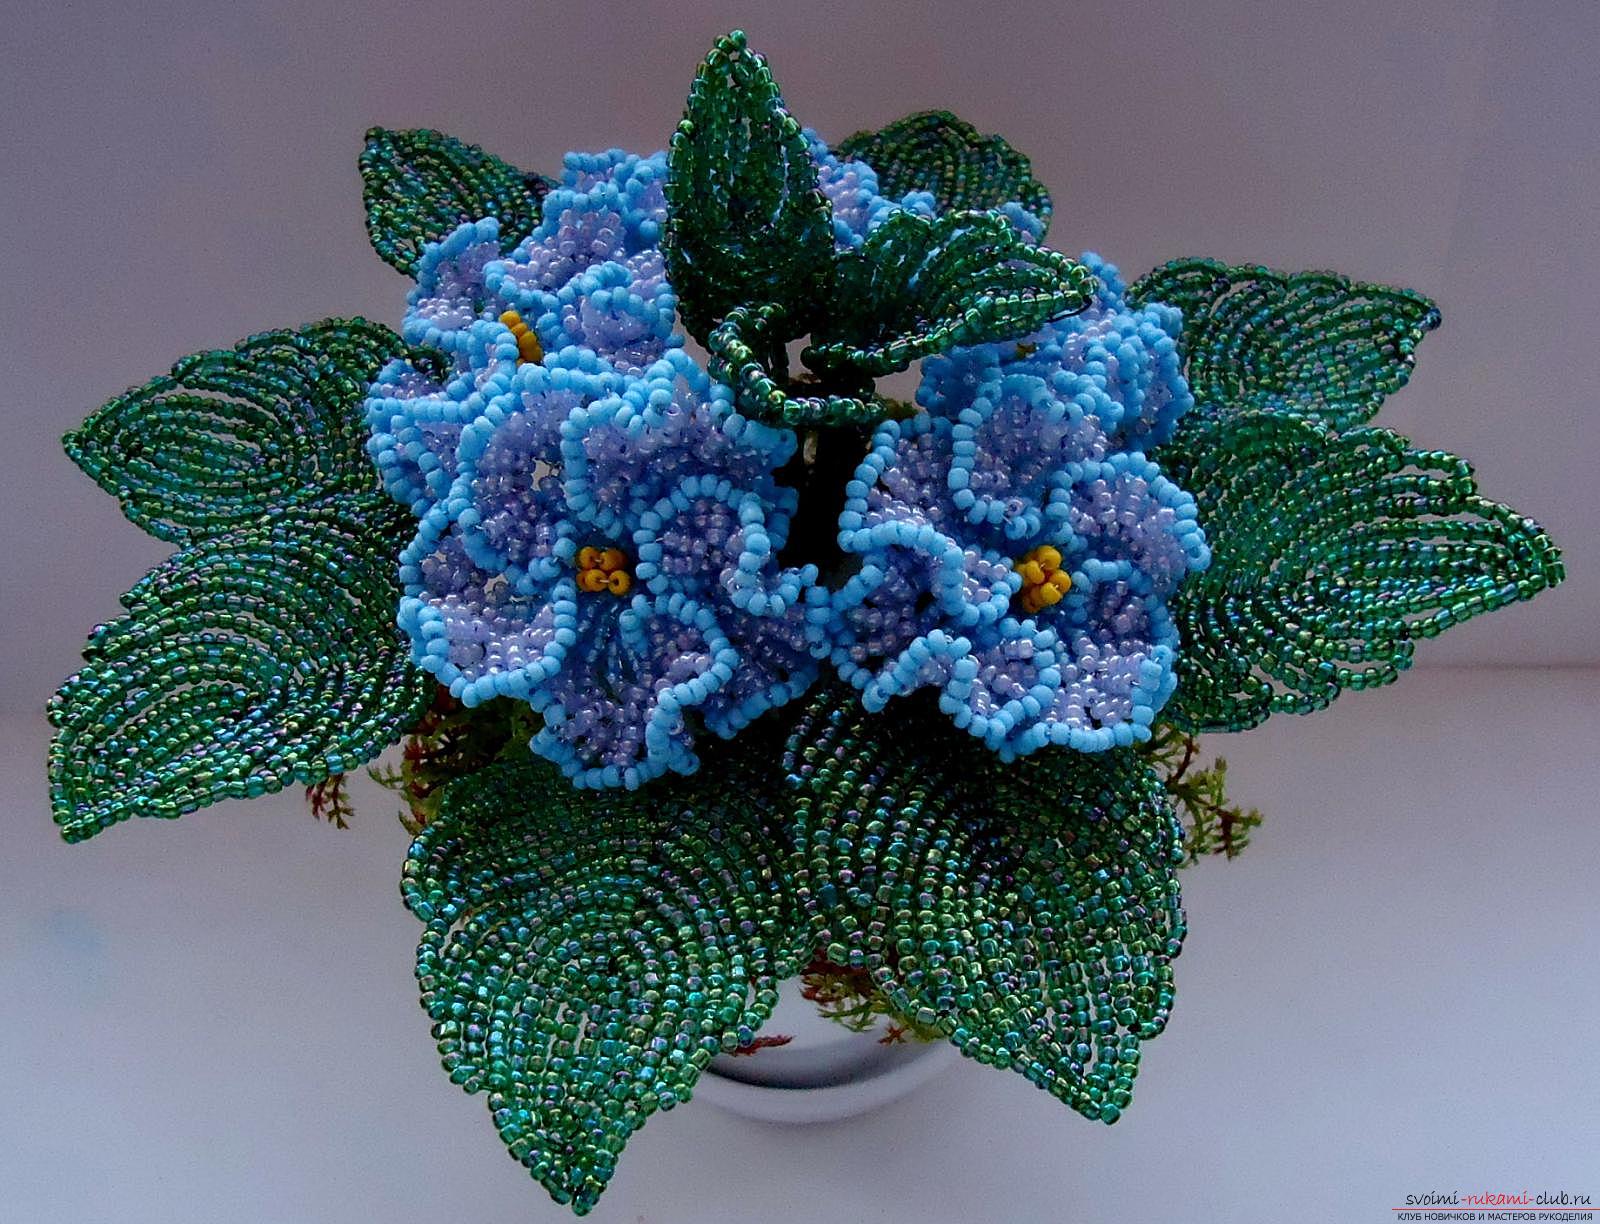 Our blanks are fully formed. We are preparing to create a full flower composition. In order to collect our flower, it is necessary to take and wrap the wire in green under the leaves, and under the violets - purple. This action must be done in a dense way, so that the distance is 3 centimeters. Then, we collect our flower and make a version of it "alive" from it. The base is fixed with twisting. We take a container and place our flower there, having previously added gypsum or alabaster to the mold. We fix and wait until the flower is fixed. The work is ready! Lesson in the video below!
Comments
Related posts:
 Animals from beads: lessons and patterns of weaving with their own hands (video)
 Grandfather frost from beads: schemes of weaving New Year's articles (scheme)
 Christmas bow with own hands - beading technique with our own hands and a master class
 Jasmine from beads: a scheme of weaving with our own hands (video)
 Embroidered bags with beads: decor by own hands (diagram and photo)