Knitting a circular napkin crochet for beginners - circular napkin with a pattern
Today we will discuss with you a detailed schemecrochet for beginners, which consists of a simple but very convenient circuit. In order to get started, you need to take all the necessary stuff. Yarn, which you will use in work, should be thick, but moderately. You can not get tangled inside the thread. Suitable is a half-wool yarn, or acrylic. 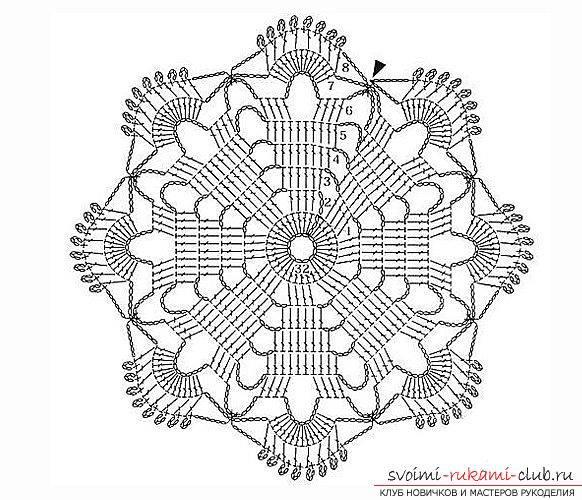 Napkin for the beginner Hook selects in accordancewith the thickness of your thread. A thin hook for a wide thread will complicate the task. A big hook for a normal thread will make the work very leaky. A regular napkin is made using hooks number 2 and 2.5.
  We work with the scheme.work with the scheme. We get acquainted with it and proceed. It is necessary to type a chain of air type loops. Hinges of air type will be designated as a small loop, or a circle - a small one. It is necessary to make 12 vols.
 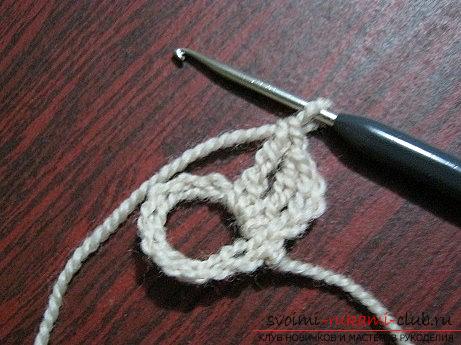 Next, you need to connect the last and the first loop using the semiauton technique. The ring will come out. The napkin must be knit along a circular basis, using one direction - from the right to the left.
 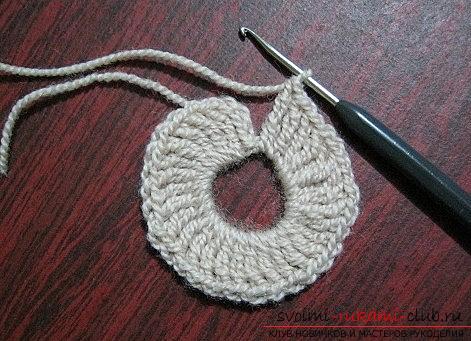 Next, we collect several air loops forIn order to raise the row. The number of loops is taken according to the scheme. We take three air-type loops for lifting. Next, we use two columns with nakidami. They are also present in the scheme in the form of a designation. Remember, in the future we will use it. For our scheme it is necessary to make a column (32 columns with two overlays). In our case, one column is already ready, we make 31 columns + 1 air loop, which we already have). The hook must be inserted inside the ring.
 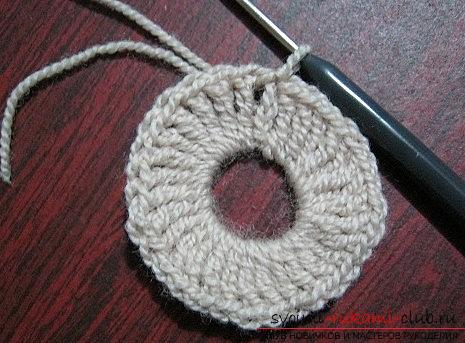 The last column must be connected using a chain of three air-type loops, which were recruited at the beginning of the row, secured with a half-column. How to make the second row?
 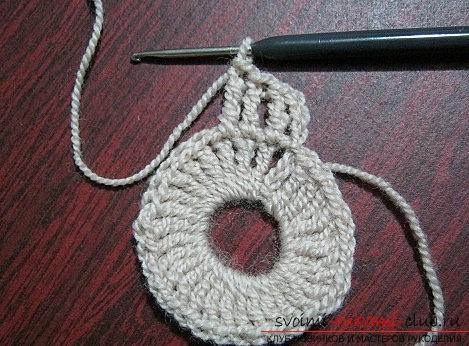 For the second row we make three air loopstype, then we form 4 columns with. 2 N. for each column in the previous row (for the beginning of the series it is necessary from the column, since instead of the first rows we have air loops). We continue further. The last and first loop is not required to connect. From the third row and the sixth row, we make air loops for the initial row, which perform not only lifting functions, but will also become part of the pattern due to the smooth transition of the rows.
 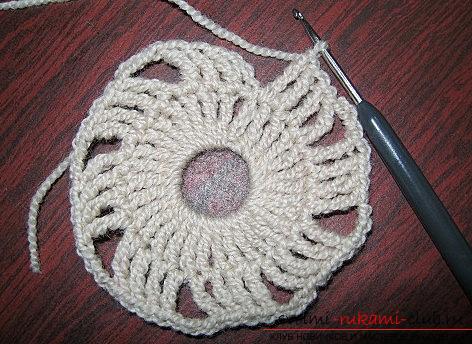 Work with subsequent series For the third rowwe make 4 loops of air type, then six columns for two nakida. Further, according to the scheme, the column is inserted into the base of the previous row, and in the first and 6th column it is necessary to knit by inserting a hook under the chain from the air-type loops in the previous row.
 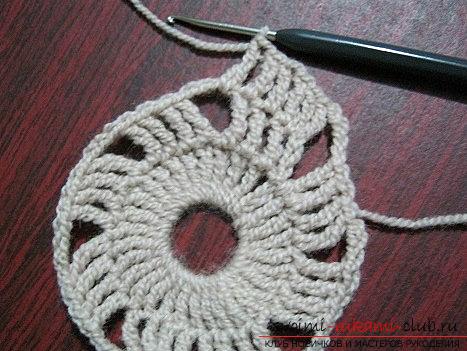 For the fourth row, it is necessary to alternateAir loops in the number of five pieces and eight columns per 2 cap. For the fifth row, you need to alternate the air hinges in the number of 9 pieces and 10 columns for 2 nakida.
 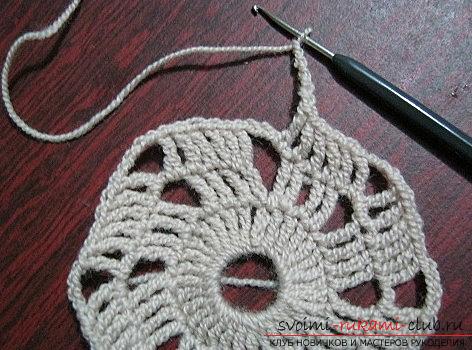 The sixth row is already more complicated. Here you need to rotate eleven air loops, and then use 4 columns with a crochet on 2, and then base them in a column for the previous row, after doing 11 air loops. After that, we need to skip the two columns in the previous row and associate the 4 columns with 2 overlays, and after - to use the last columns in the number of four, we use the repeat - repetition. The end of the row is closed by means of 5 air loops, then it is necessary to connect the loop with the help of an arc of the air loop, which is connected in a row (beginning) with a column without a cape.
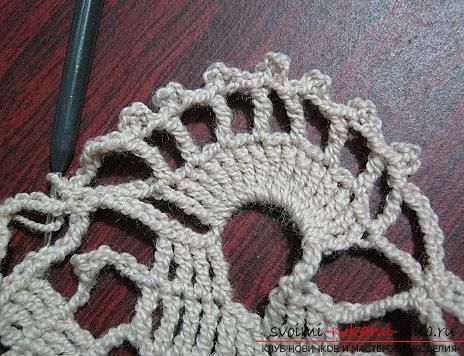
 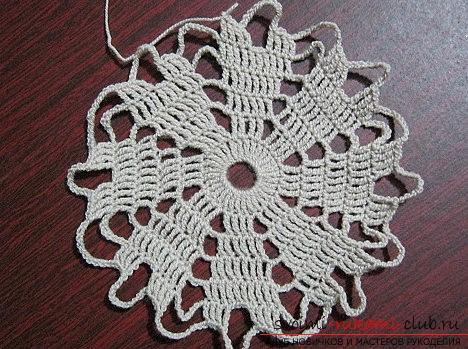 Finish our work on the napkin ForOn the seventh row, we make five air-type loops and 15 columns for 2 nakida, using the arches from the air loops for the previous row (the hook is inserted under the arch from the air-type loops). Then we make 5 air loops and a column without a cape using the "under arch" for the air loops in the previous row. Then we knit six air loops and after, we connect the beginning and end of the row using a column without a cape.
 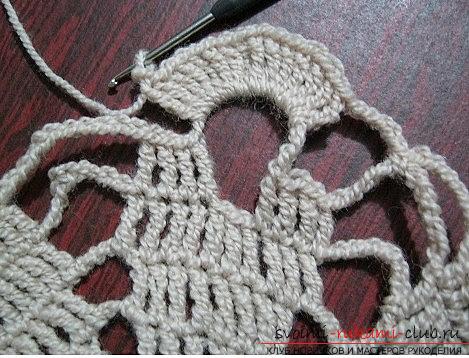 For the eighth row we make six loopsair type, then creates a column with two cloaks in order to base the beginning in the first column of the previous row. Next, we form a pico into four air-type loops (for this we need to connect the chain to four air loops, then the first and last loop must be connected together using a column without a cloak and get a small ring, a lump). Next, we form a column with two overlays for the base in the third column of the last row (for the second column of the past row we skip) and thus, according to the scheme. You should get 8 columns with the pico element next to them (between). Next, we make six air loops, then a column without a cape for the arch from the air loops in the sixth row. Next, you need to cut off the thread, fix it, for the inside end, the threads must be hidden, stretching the hook between the columns. Our work is over!
Comments
Related posts:
 How to make a pattern for beginners in the form of snowflakes - a lesson and a master class
 Fabulous crocheting crochet - crochet for beginners chart video tutorials
 Knitted easter egg - crochet for beginners chart video tutorials
 Knitting needles: the basics of needlework for Beginners
 Knitting from mohair: dignity of yarn and tips for beginners