
Lesson on creating a decorative mini dummy for costume jewelry with step-by-step recommendations and photos
Lovely stylish gizmos are certainly capable ofdecorate any interior and give it individuality and uniqueness. That is why today various figurines, figurines, textile dolls, photo frames, etc. are so popular. Particular preference is given to such things, made in the hand-made technique and this is not accidental, because in each such manual work the heat of the author's talented hands is preserved, as well as sincere love and unique positive energy, and if this thing is created by oneself, it becomes simple priceless road and close. Today we suggest you make one of these things together with us - it's a decorative mannequin that can become just an original decoration in your house, and also perform an additional function, for example, to serve as a comfortable needle bed for sewing needles and pins, or to perform in The role of the decorative holder for your decorations.
Materials and tools
So, to make such a mannequin with our own hands, we will need:
- thin tissue of corporal color;
- artificial or natural filler (sintepon, cotton wool);
- tan black and pink;
- satin ribbon pink color, width 1.5 cm;
- a few pearly pink beads;
- decorative crocheted flower crochet;
- wooden Chinese stick;
- wooden flat section for stand;
- sewing needle and thread;
- glue thermo gun;
- a sheet of white paper;
- A simple pencil;
- scissors.
Description of work
1.As usual, we start with the fact that we will draw a sketch of our future manikin on a sheet of white paper with a simple pencil. If it is difficult for you to make such a drawing yourself, you can use our sample or choose something suitable in the Internet resources. 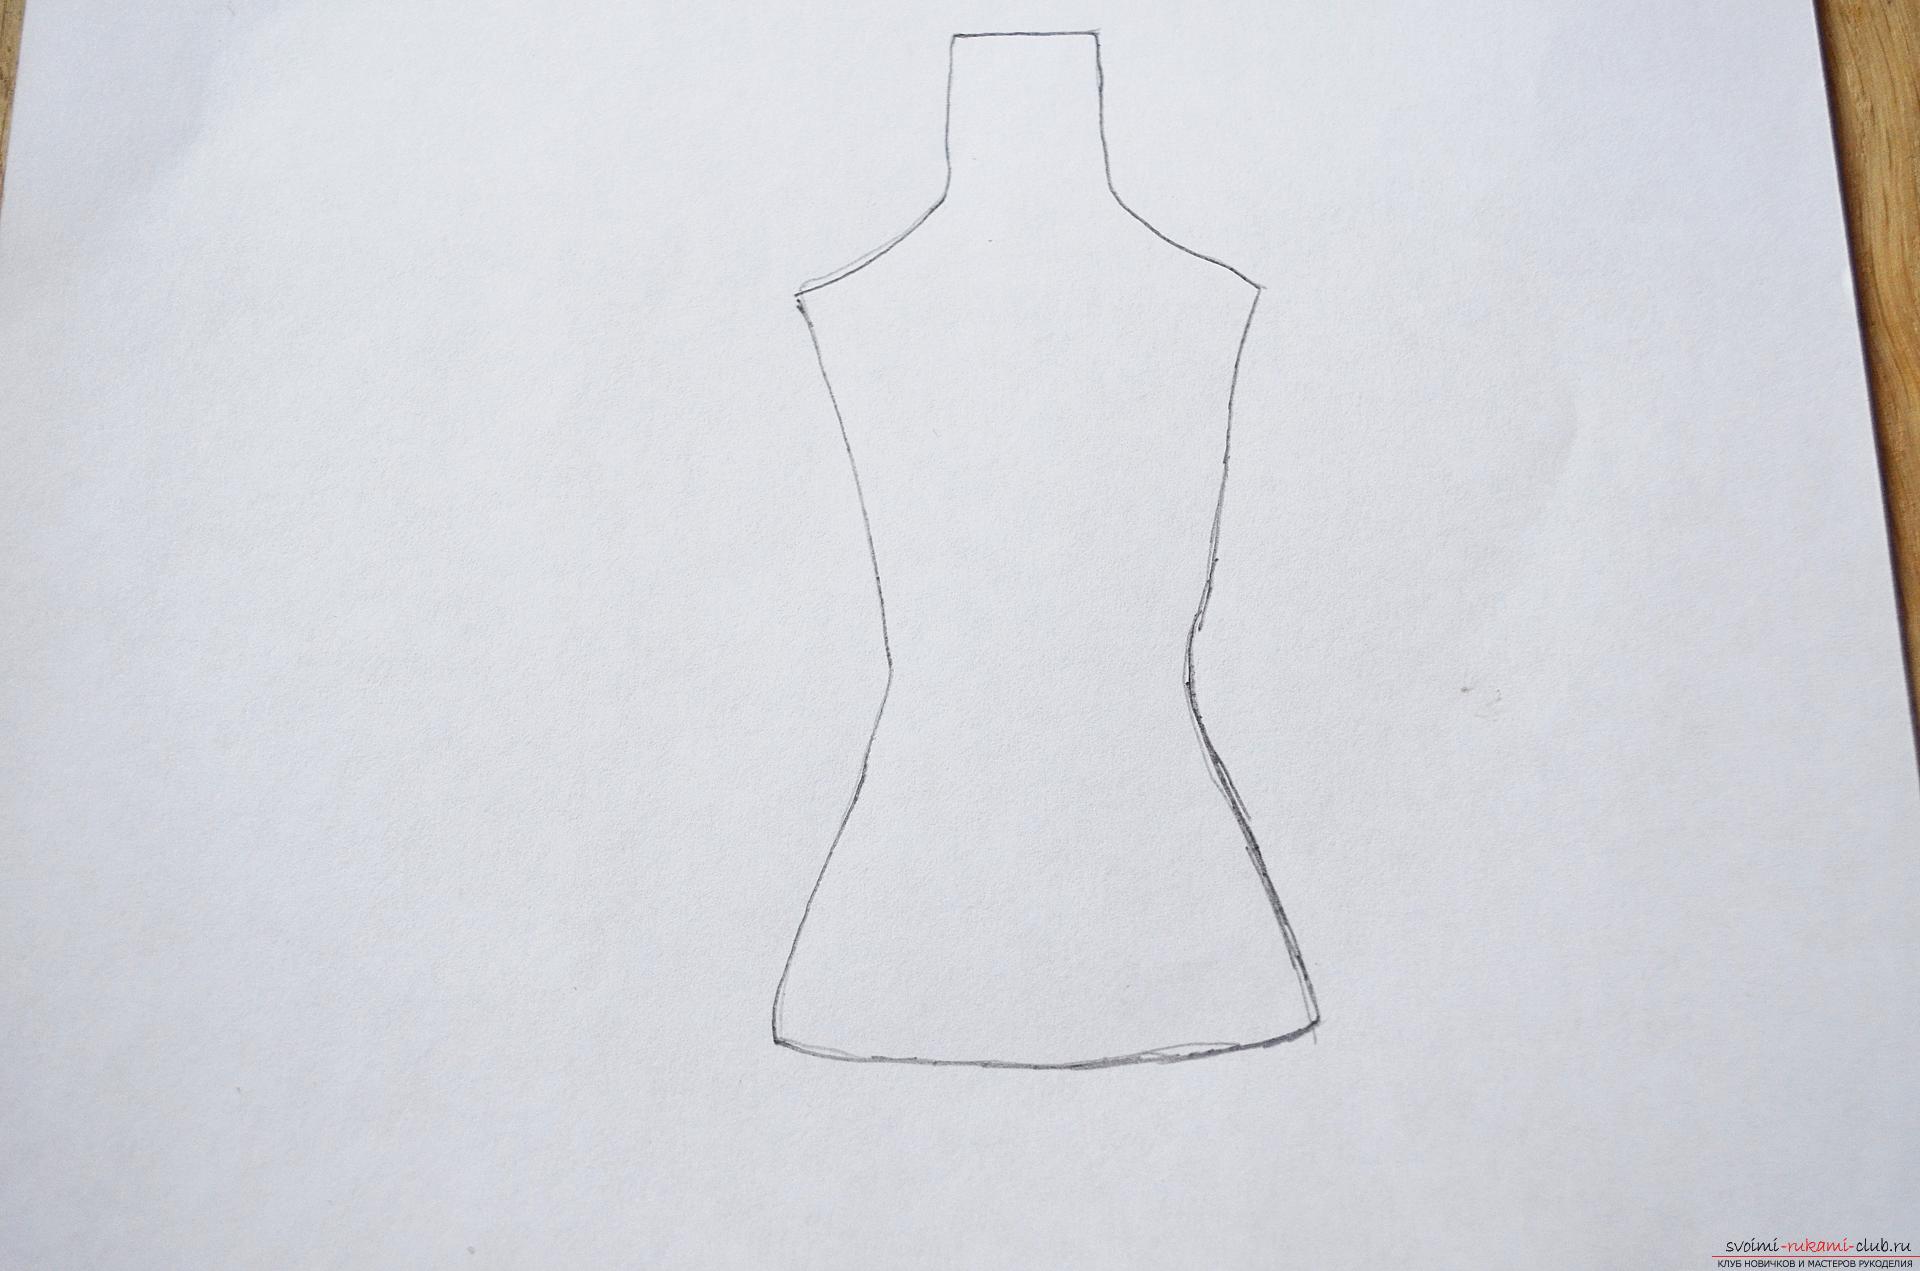 2. Next, make a sketch from the paper on the contour, and transfer it to the fabric previously folded twice the face inward.
 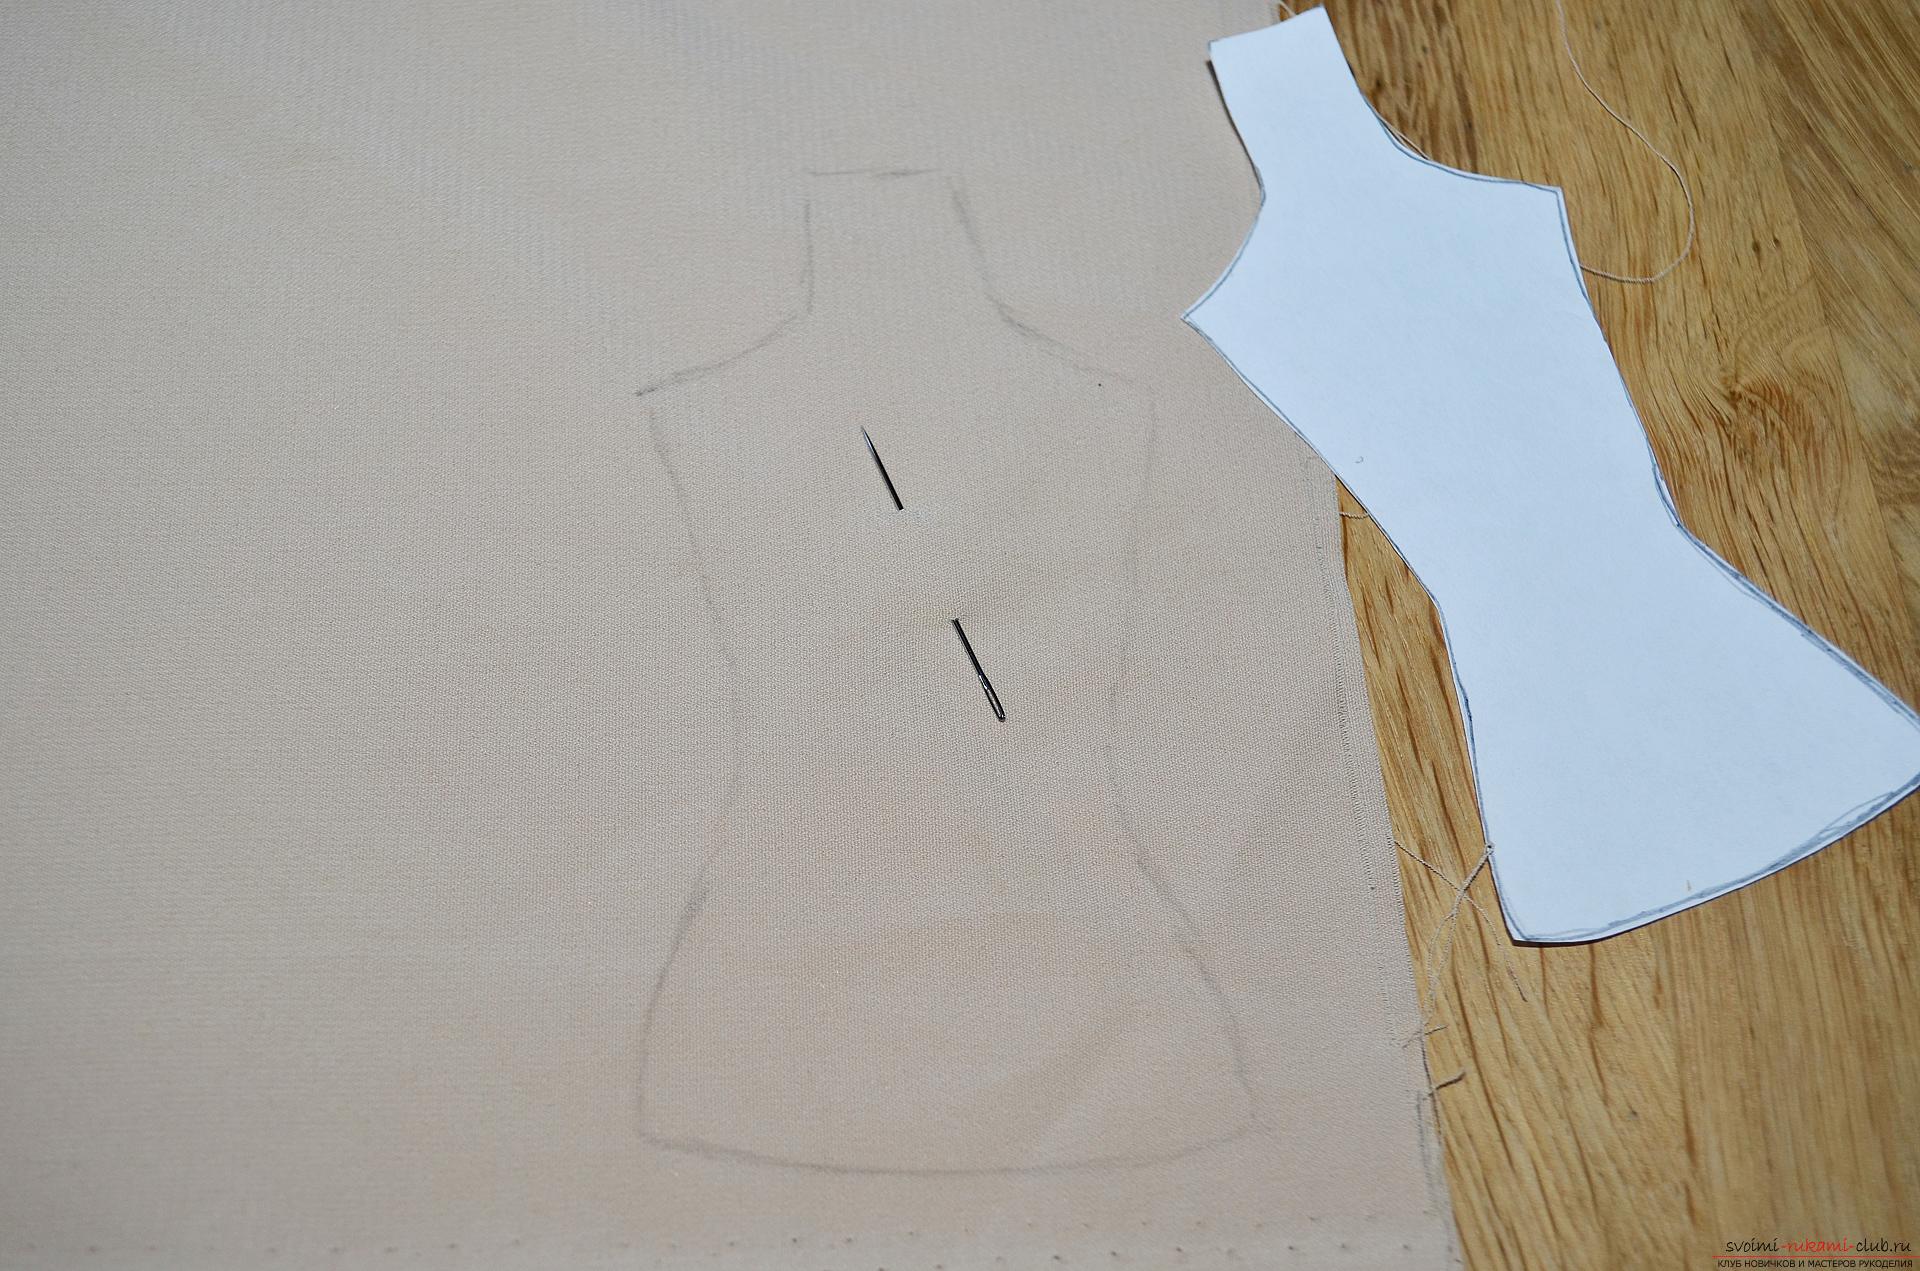 3.Cut the cut details together with the back sides upwards, so that all their edges ideally match and with the help of a needle with a thread of a suitable shade we sew them together. We use for this purpose a seam stitch through the top, we try to make stitches dense and small. Sewing only the two sides of the part. Also for these purposes you can use a sewing machine, this will greatly speed up the work, but we decided that our mannequin must be completely done by hand.
 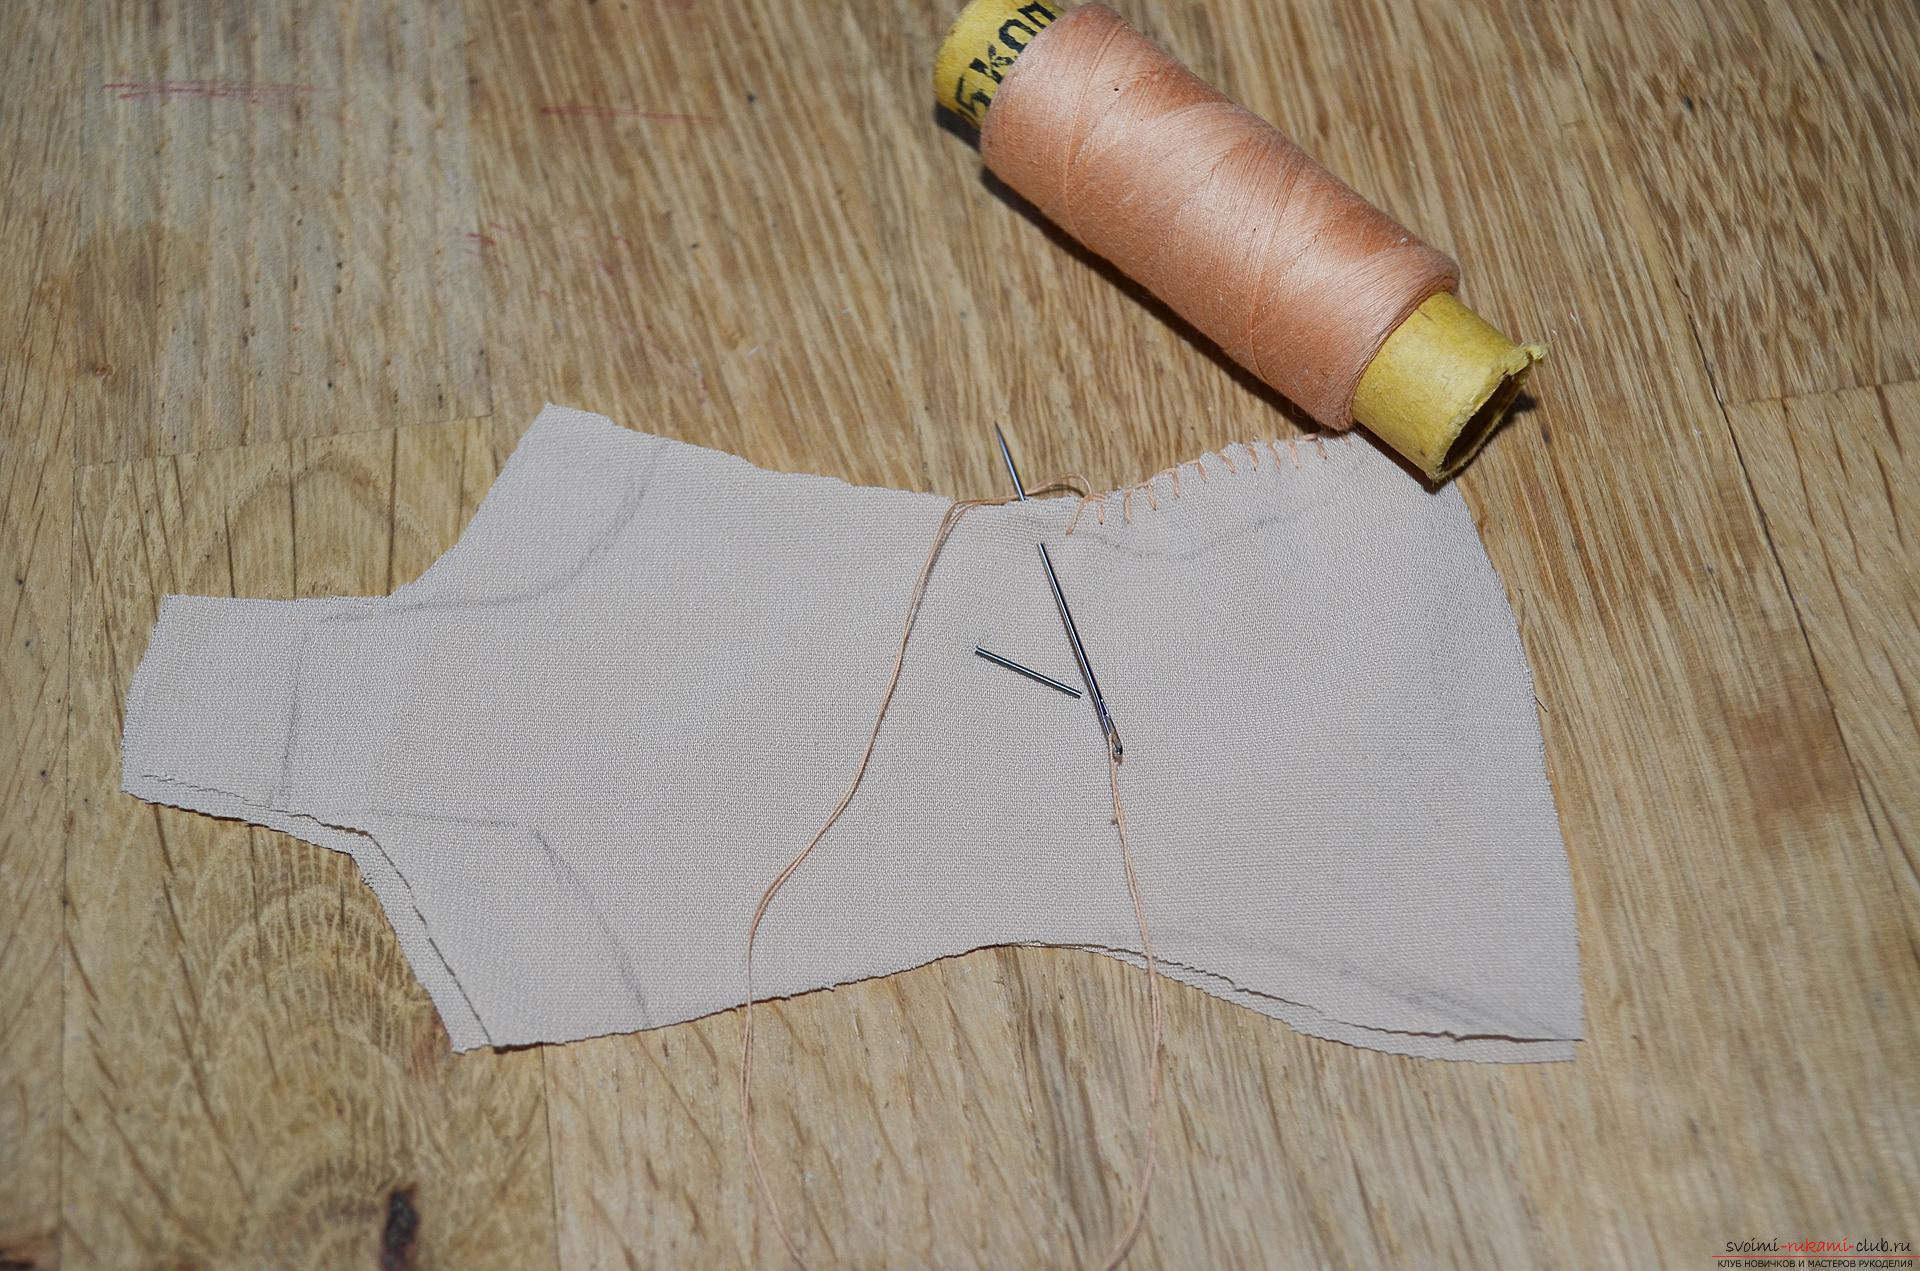 4.Through the remaining unshielded lower hole, we turn our part on the front side, straighten the bottleneck by helping ourselves with the usual pencil, then stuff the mannequin with a sintepon or cotton wool. Filler we try to place evenly, so that it gives the product the desired volume and shape.
 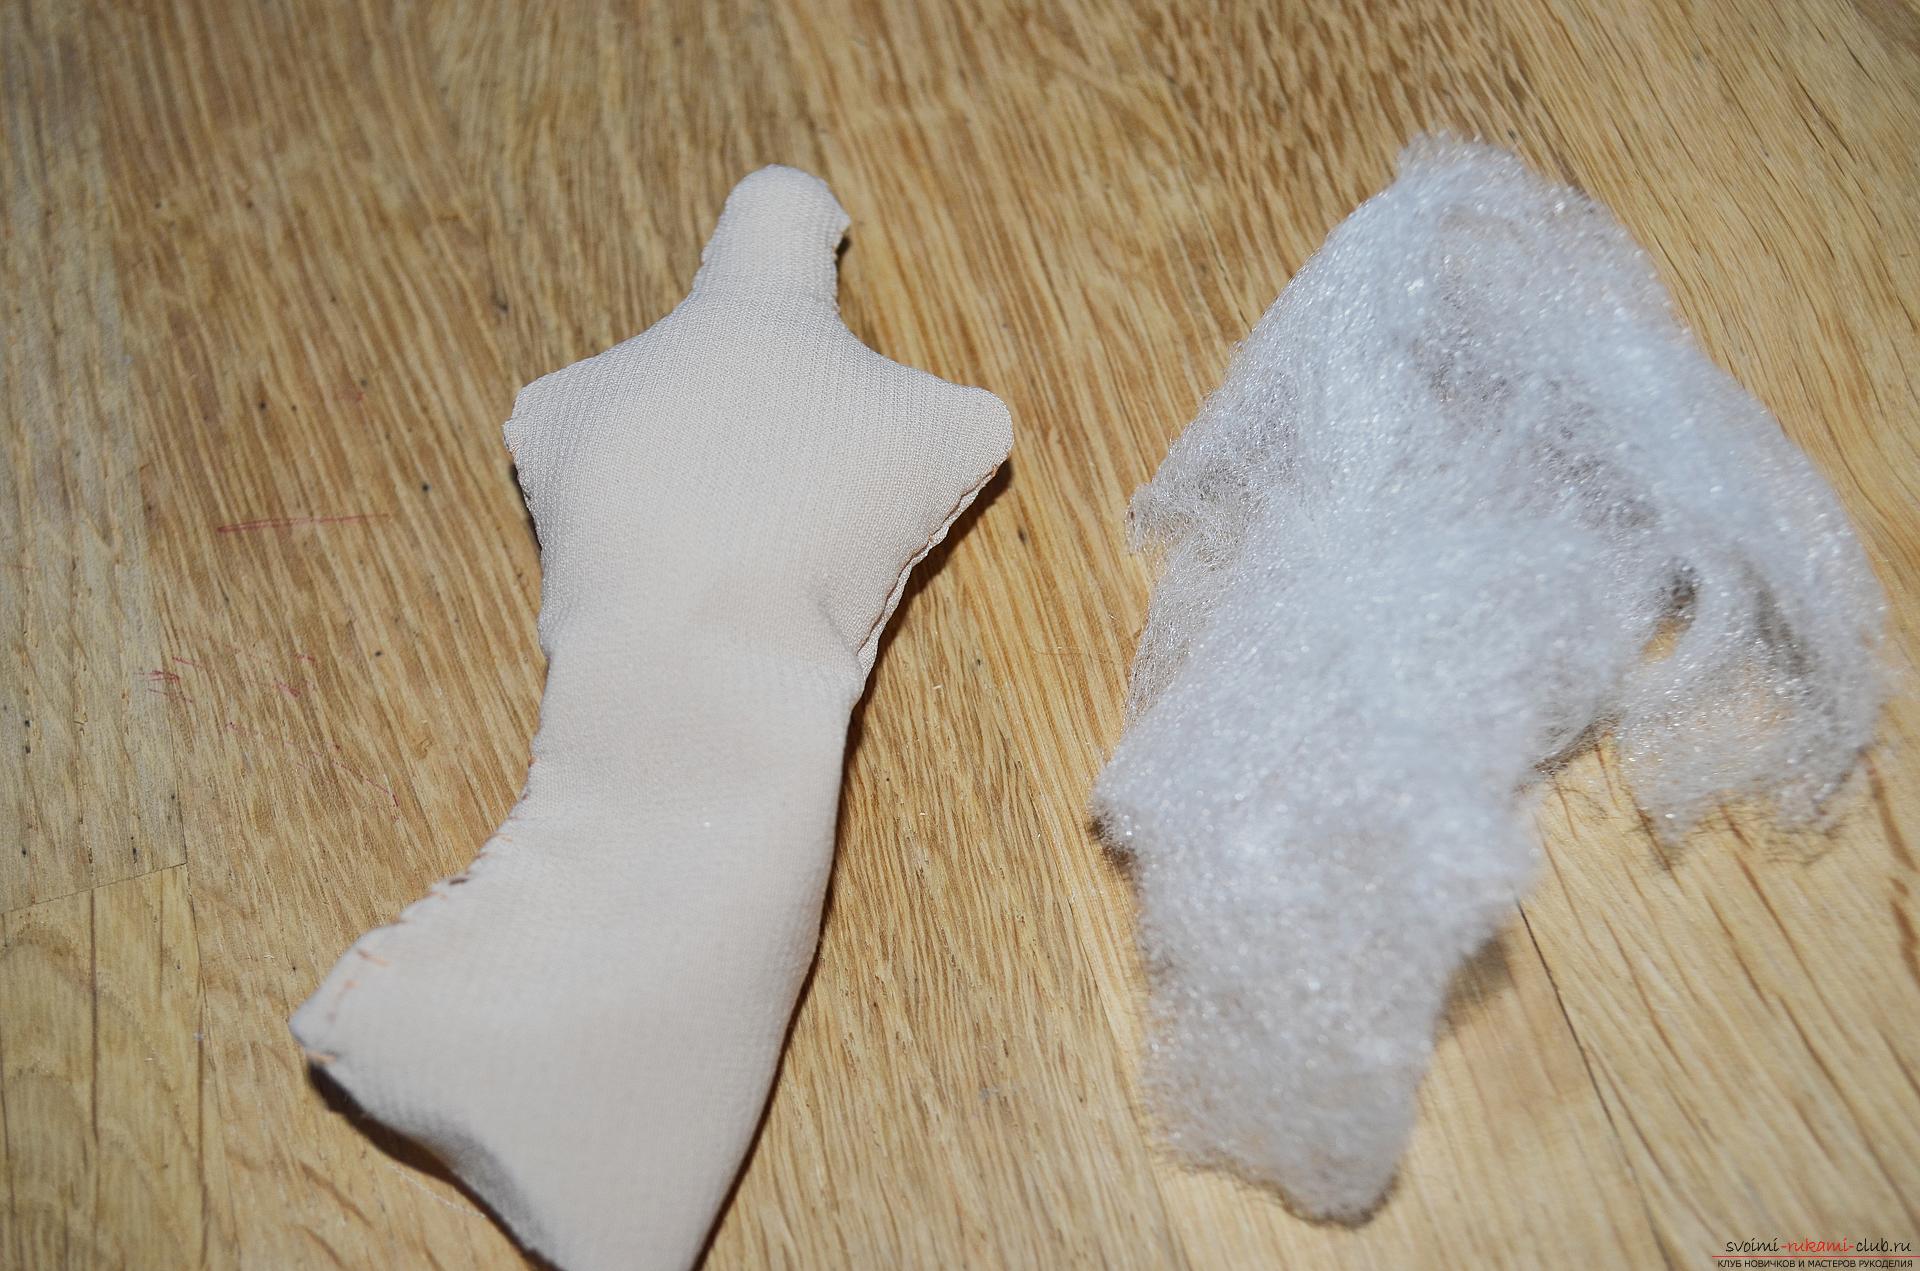 5.Then we insert into the mannequin with a blunt end, a wooden Chinese stick, so that it gives rigidity to the entire product from beginning to end. Then lower the fabric edge gently inward and sew the remaining hole also using small thick stitches of the suture seam.
 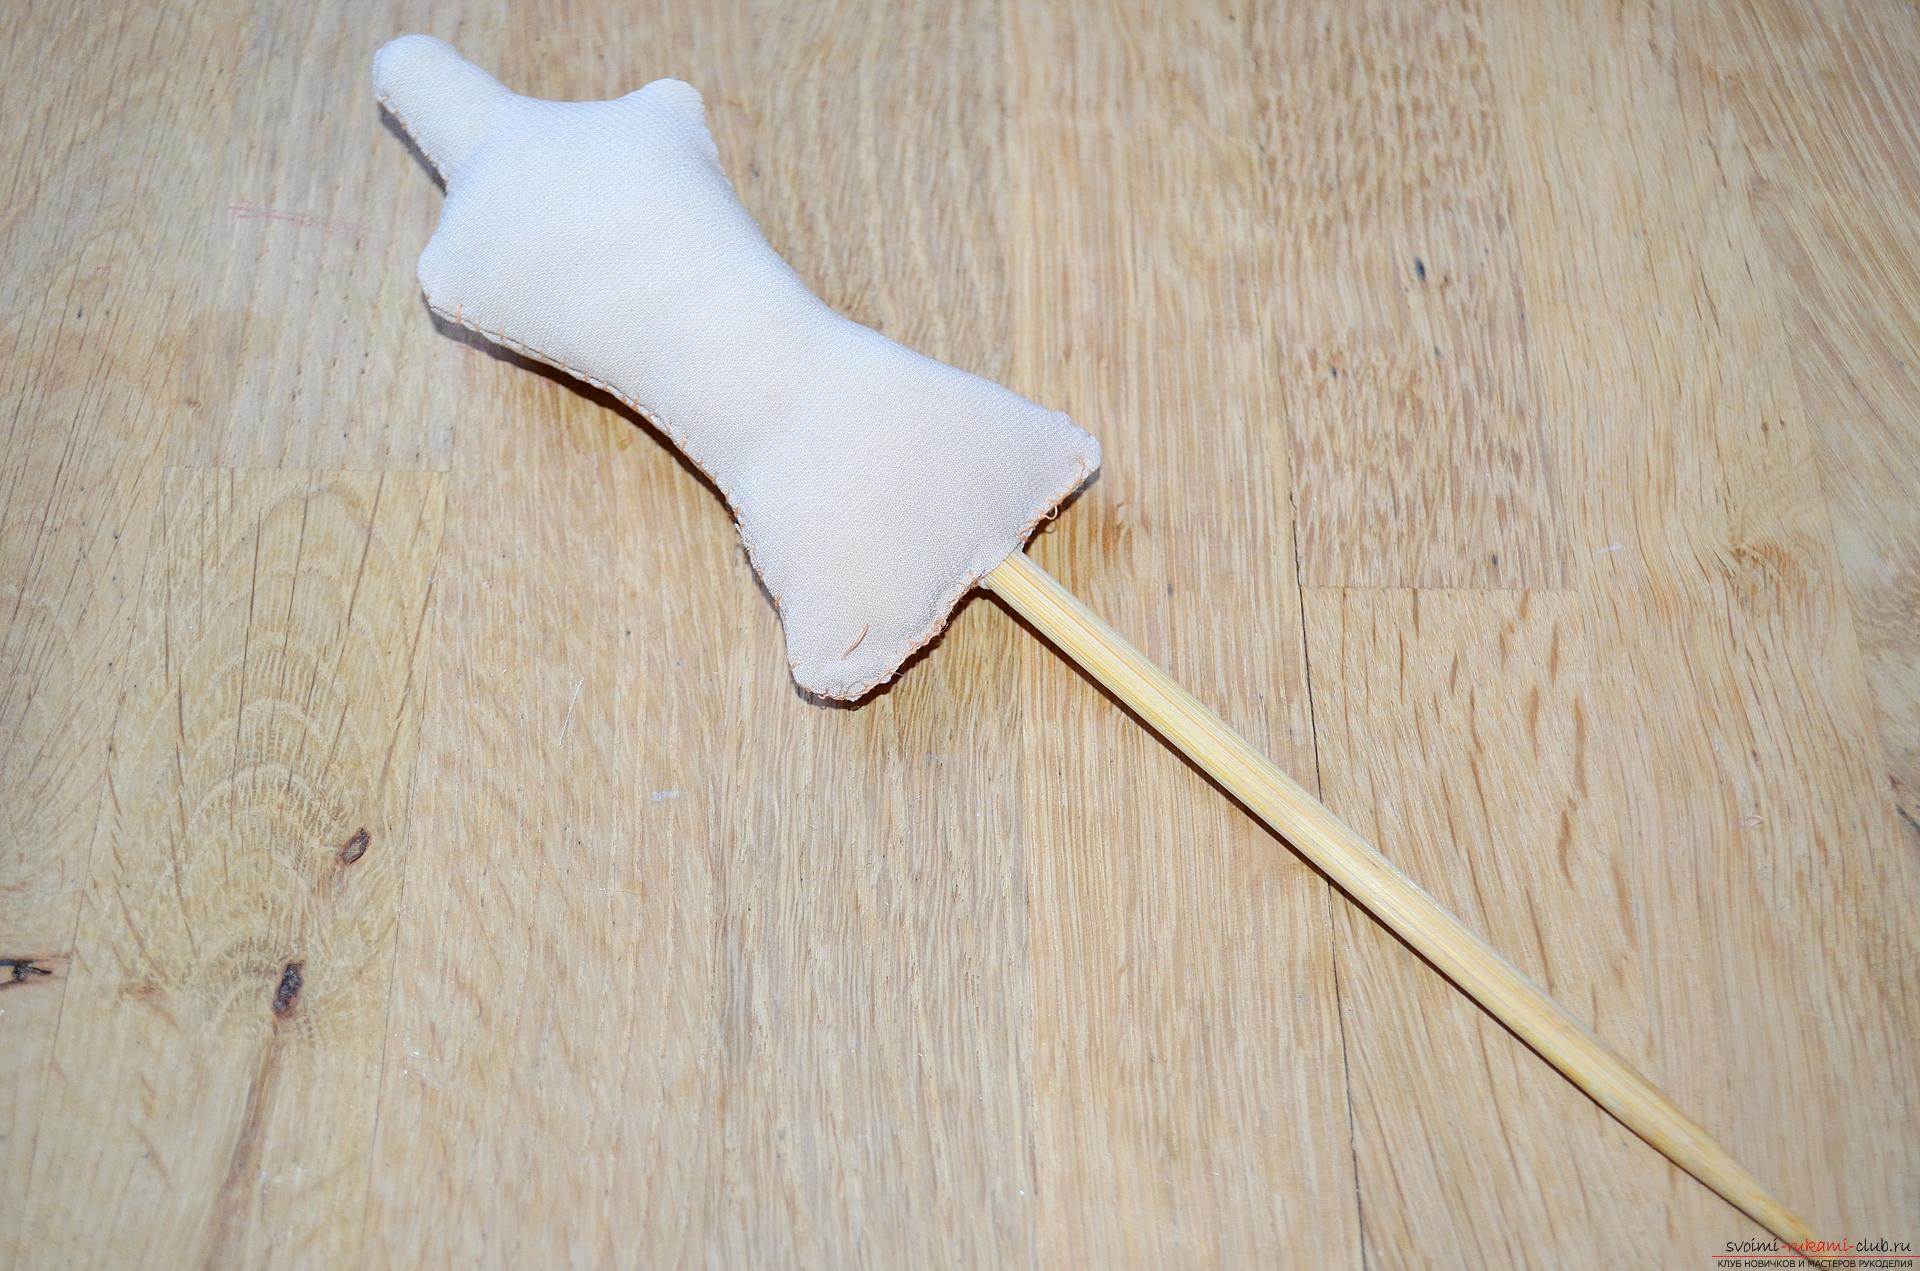 6.Dalee we will dress up our mannequin. Let's start with a lush multi-layered skirt, for this we need a tulle of black and pink hue. From pink tulips, we cut out a strip 20 cm wide and 40 cm long, and a black strip 10 cm wide and 40 cm long. The pink tulle is folded in length in half. From above on it we impose black and by means of a needle and a thread we take all three layers simultaneously, creating thereby magnificent a skirt-pack.
 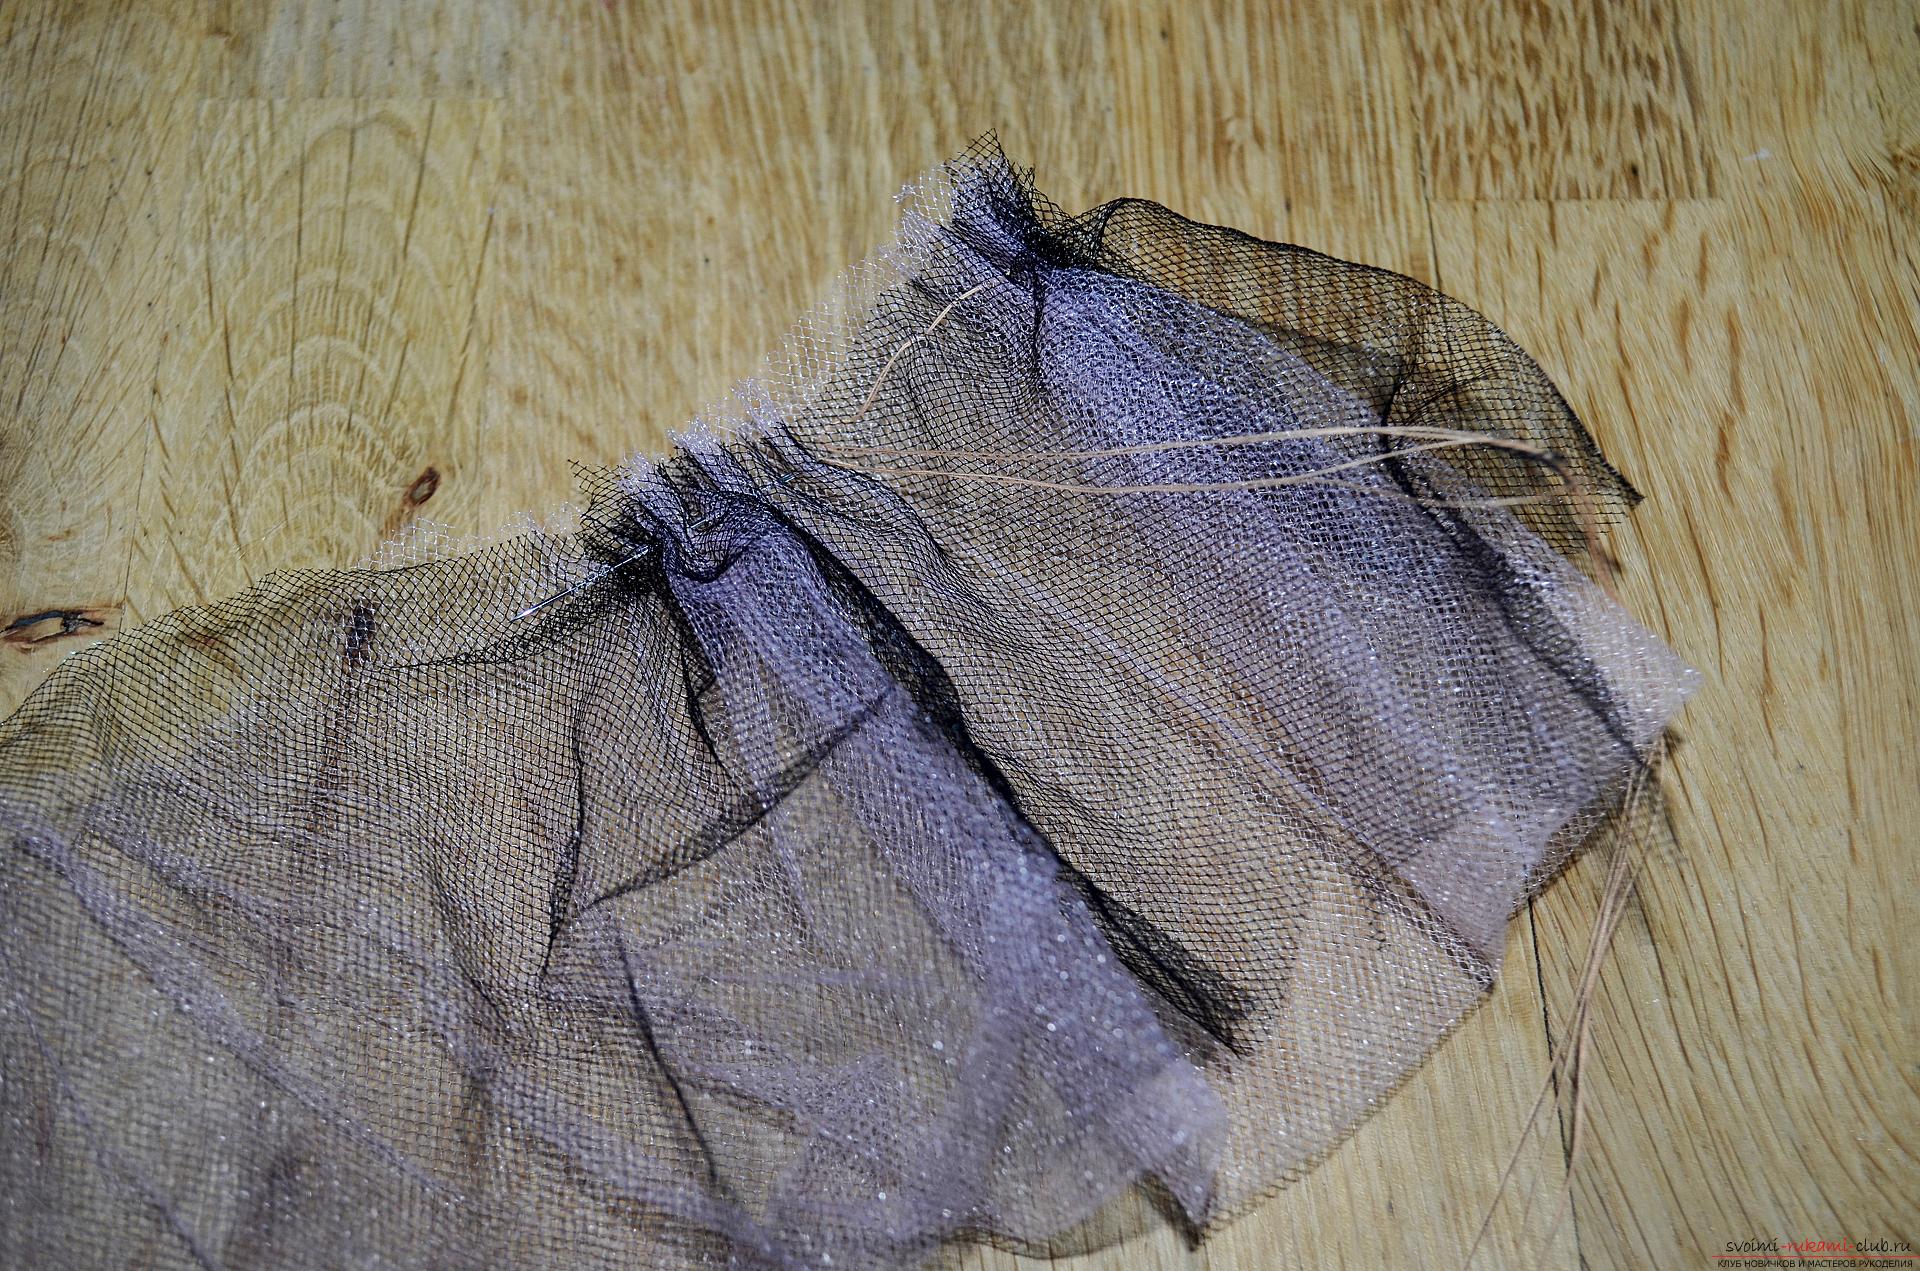 7. Wear a skirt on the dummy and sew on it in several places with the help of secret stitches.
 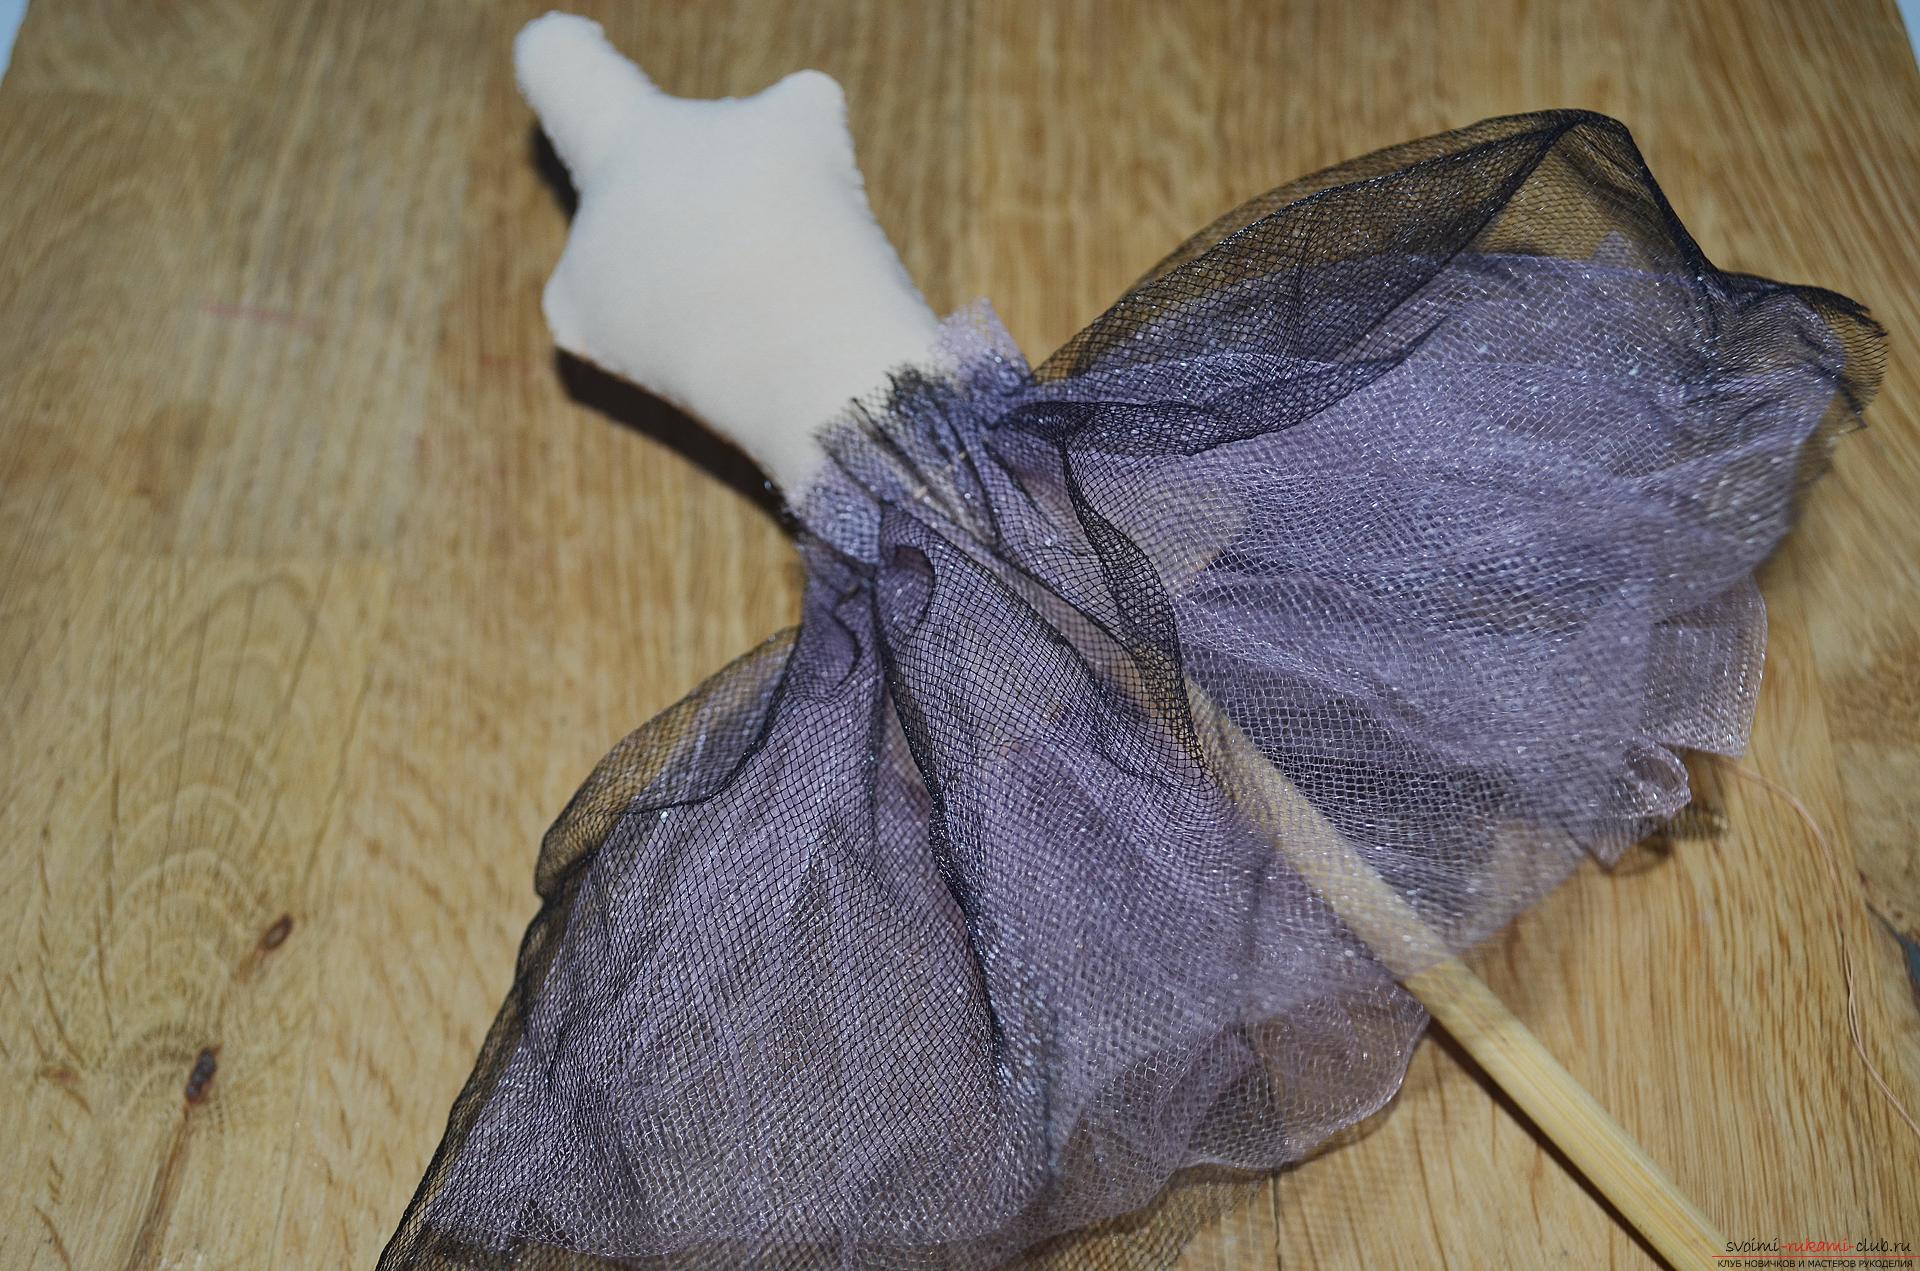 8. The upper part of the skirt, where the threads of the assembly are, mask using a satin ribbon of pink color, sew it in the form of a girdle.
 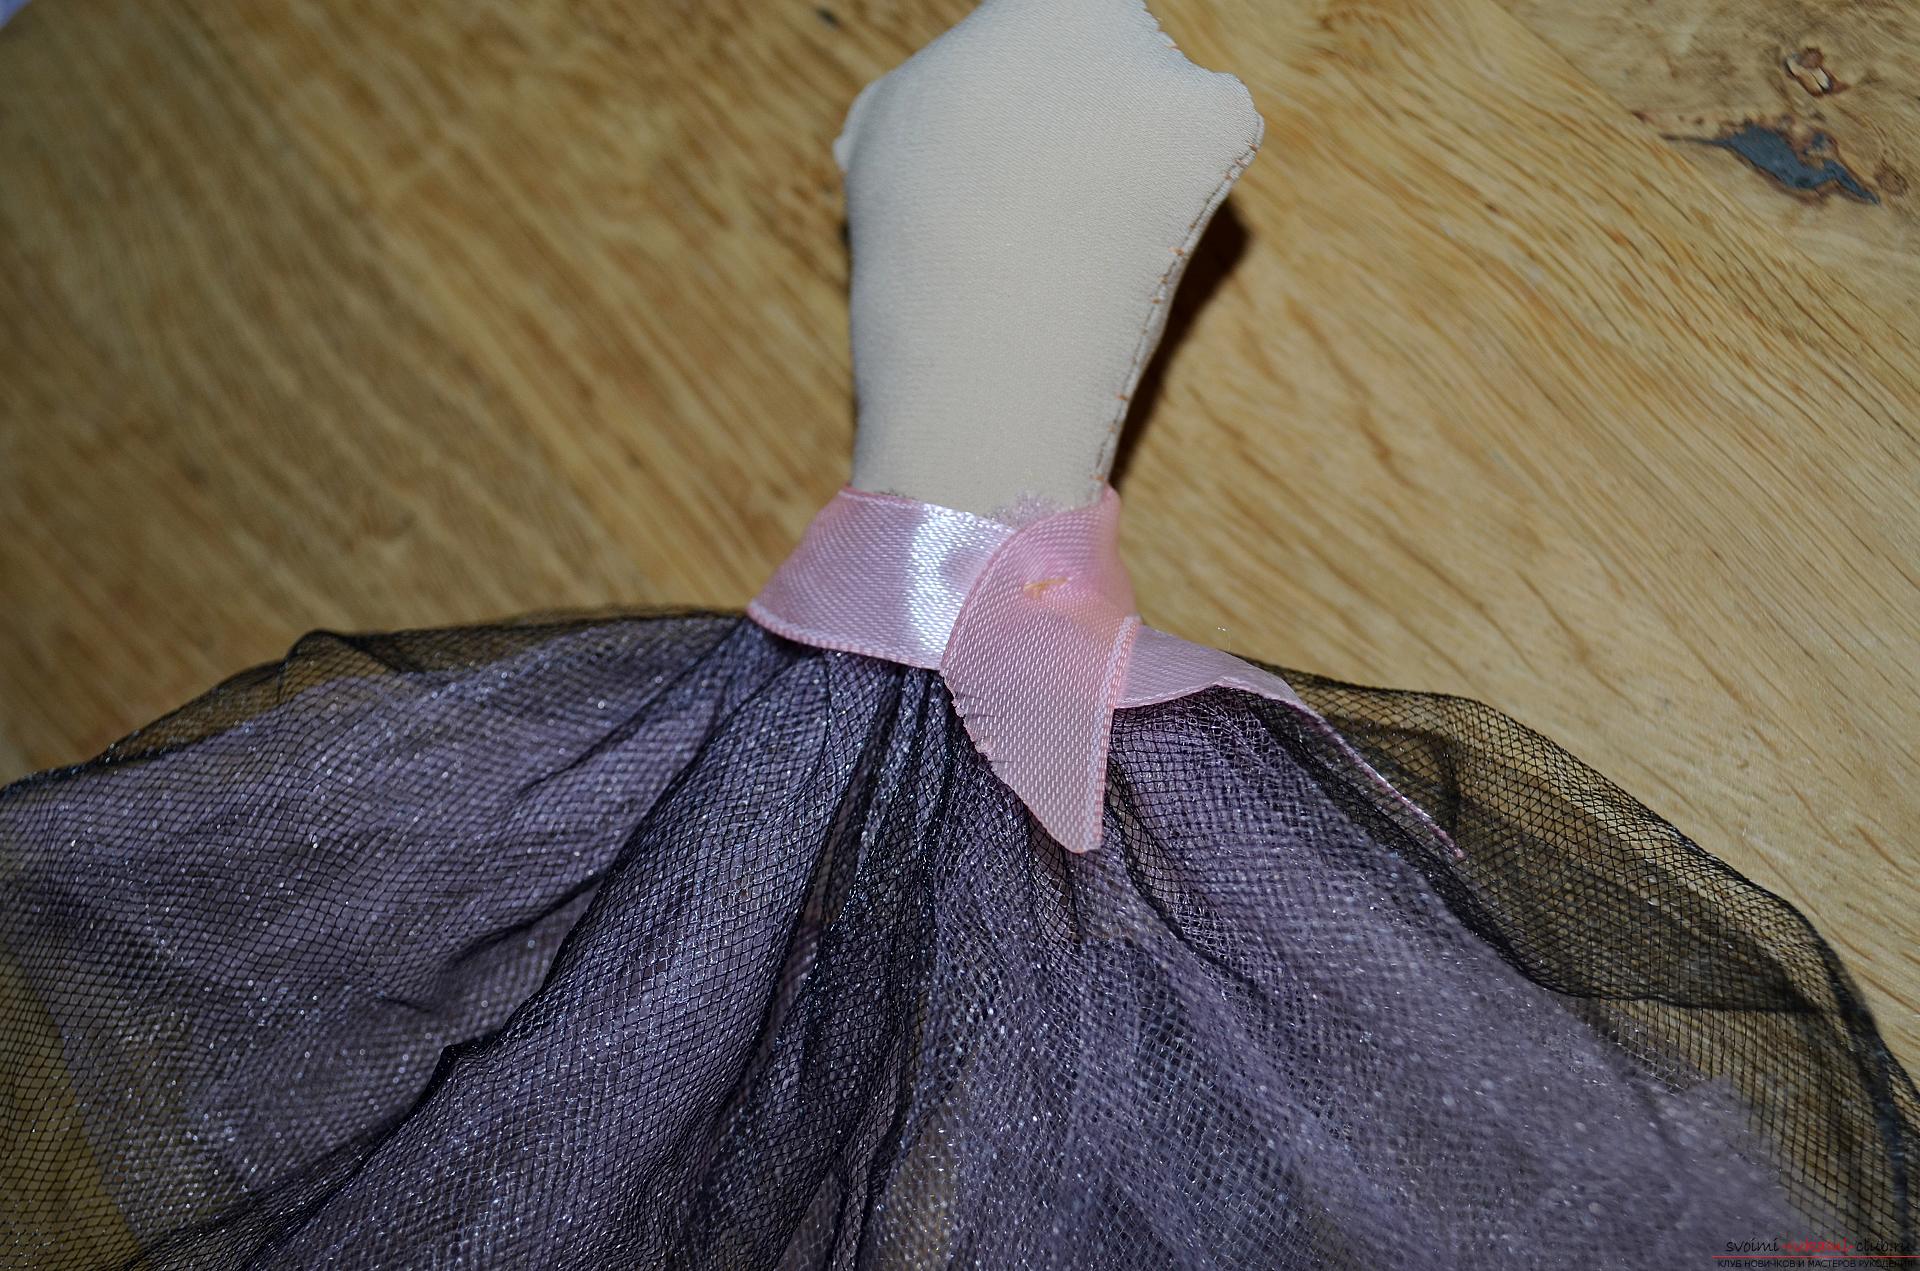 9.Dalee from the same pink ribbon form a small bow.
 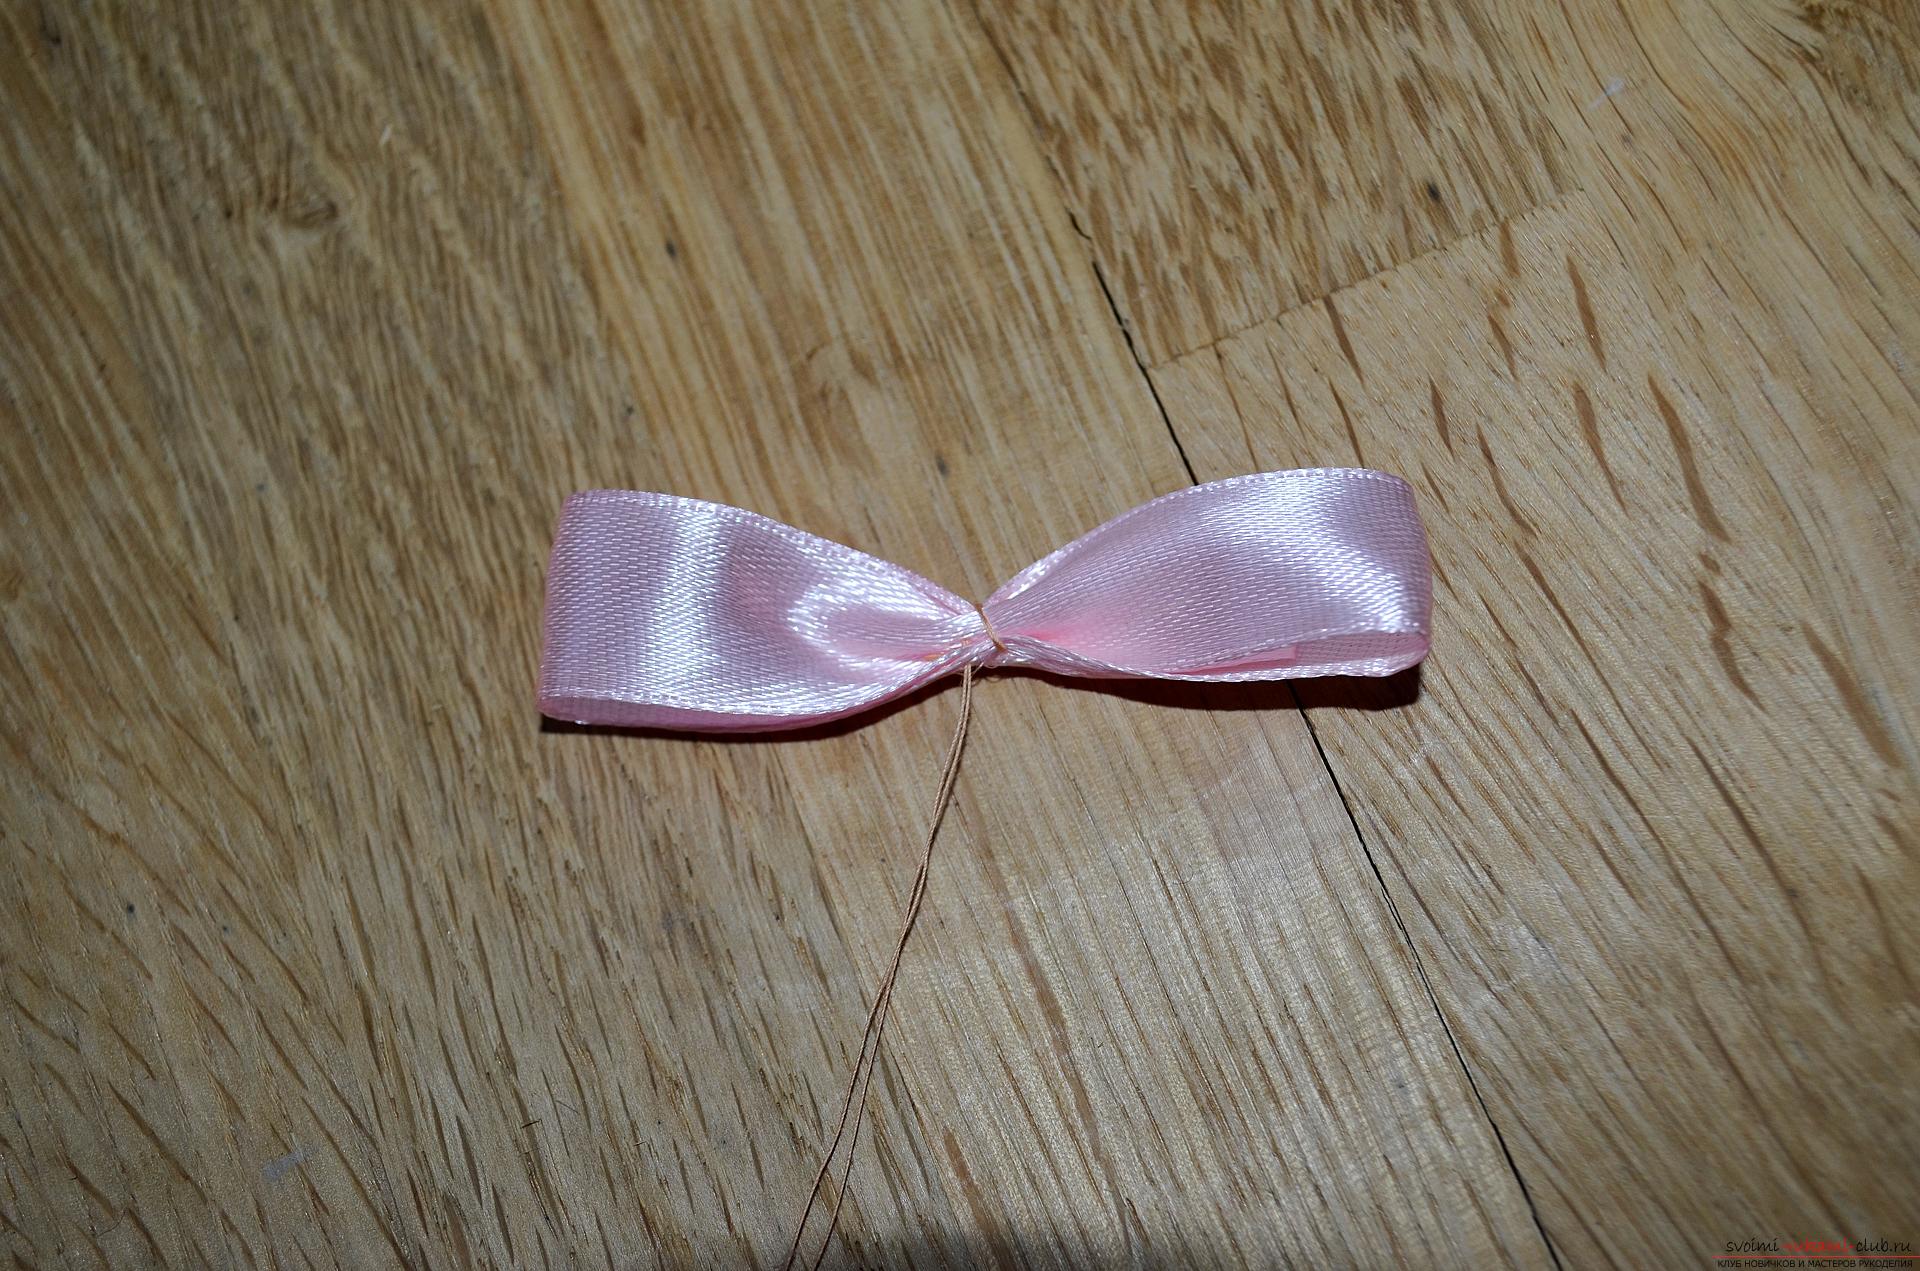 10. From above on the formed bow we sew the second same, only smaller size and we complement the composition with a small crocheted flower with a pearl pink bead in the center.
 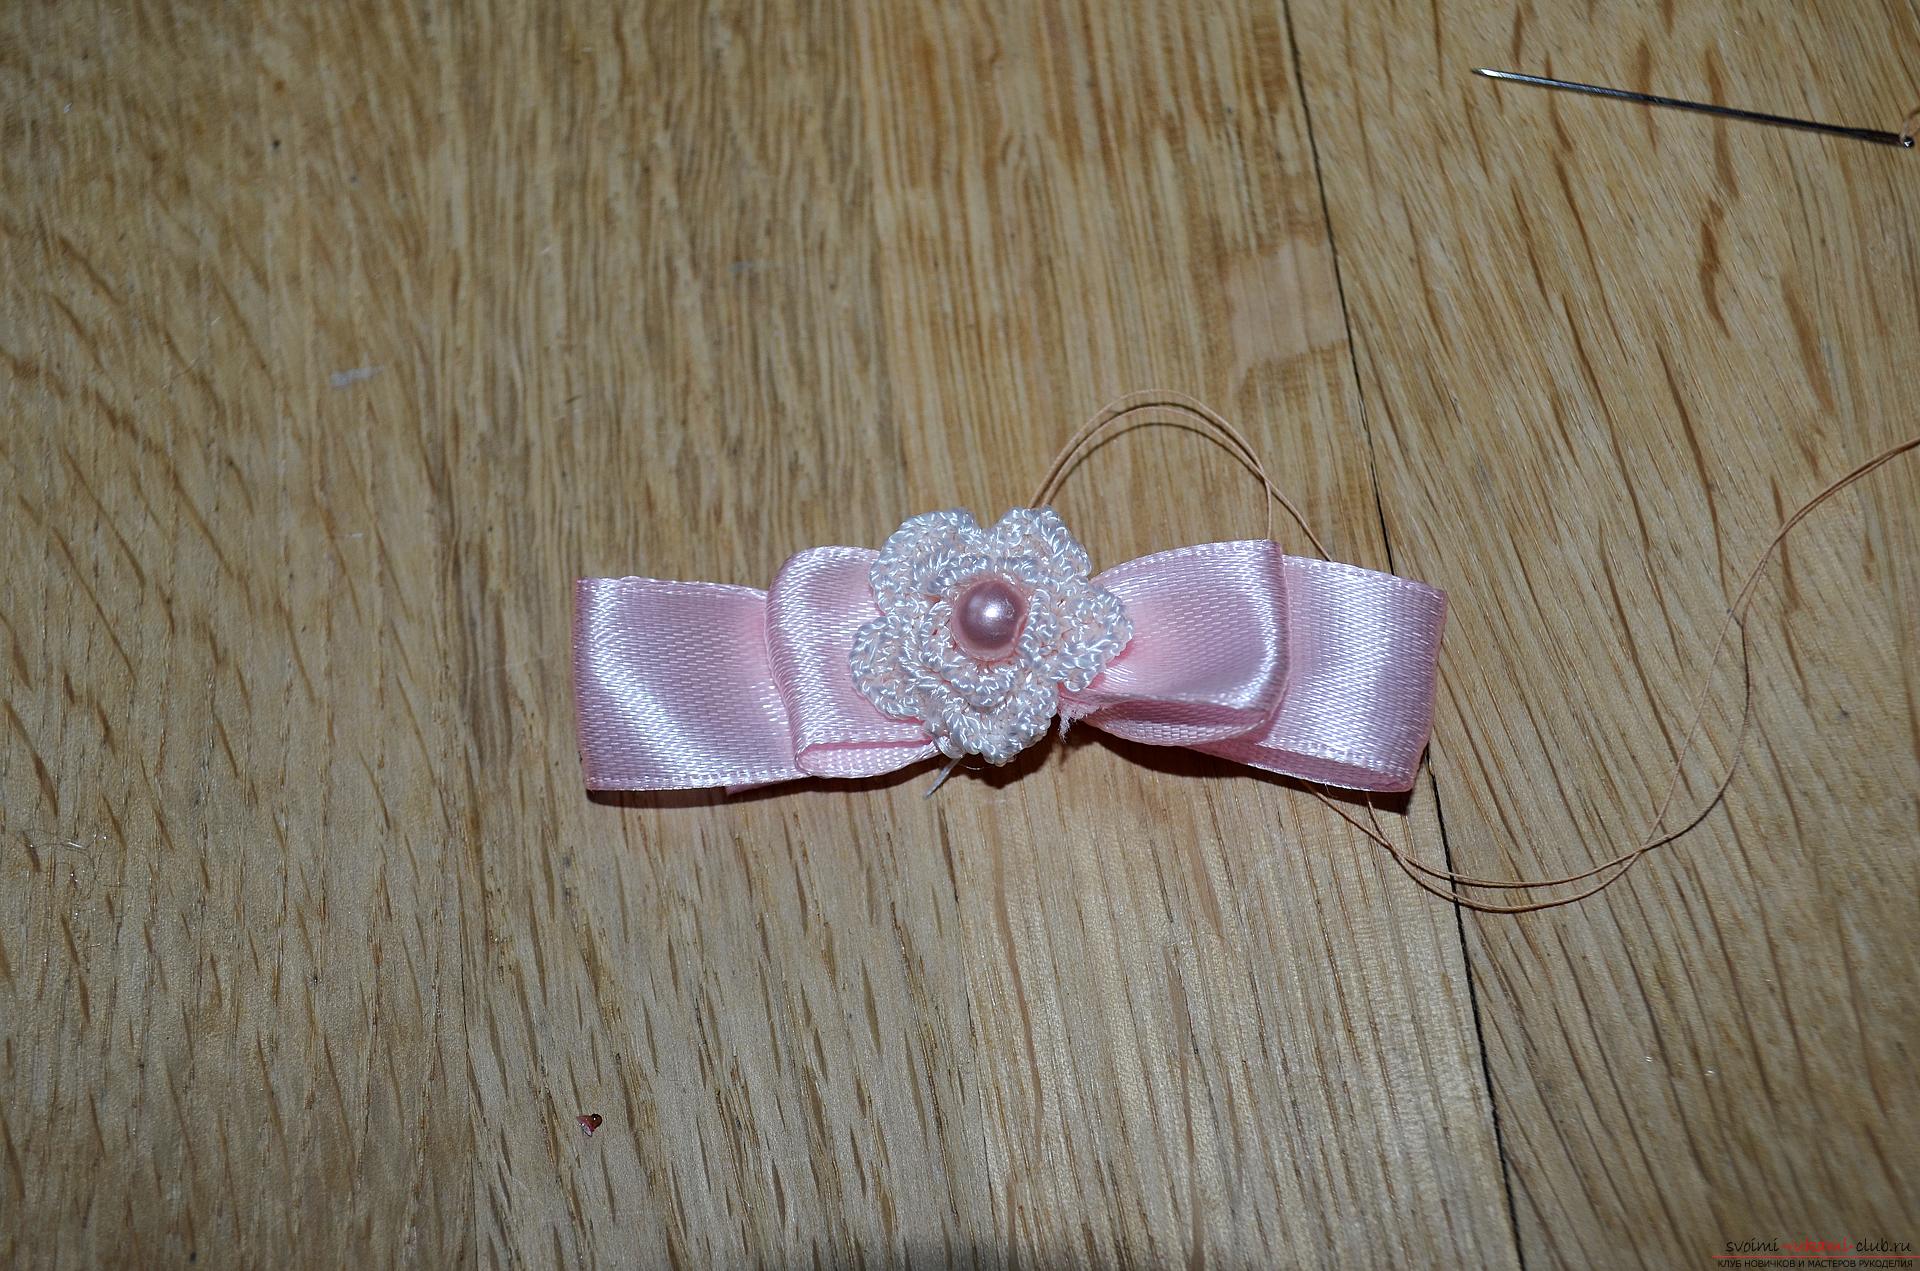 11. We sew a bow on the belt, thereby decorating it.
  12.Cut out a black striped shawl with a width of 2.5 cm and a length of 12 cm, fold it along in half and attach it to the needle and thread along the joined edges, tighten the thread, so that we get a flower that is decorated in the center with a small pink pearl bead.
 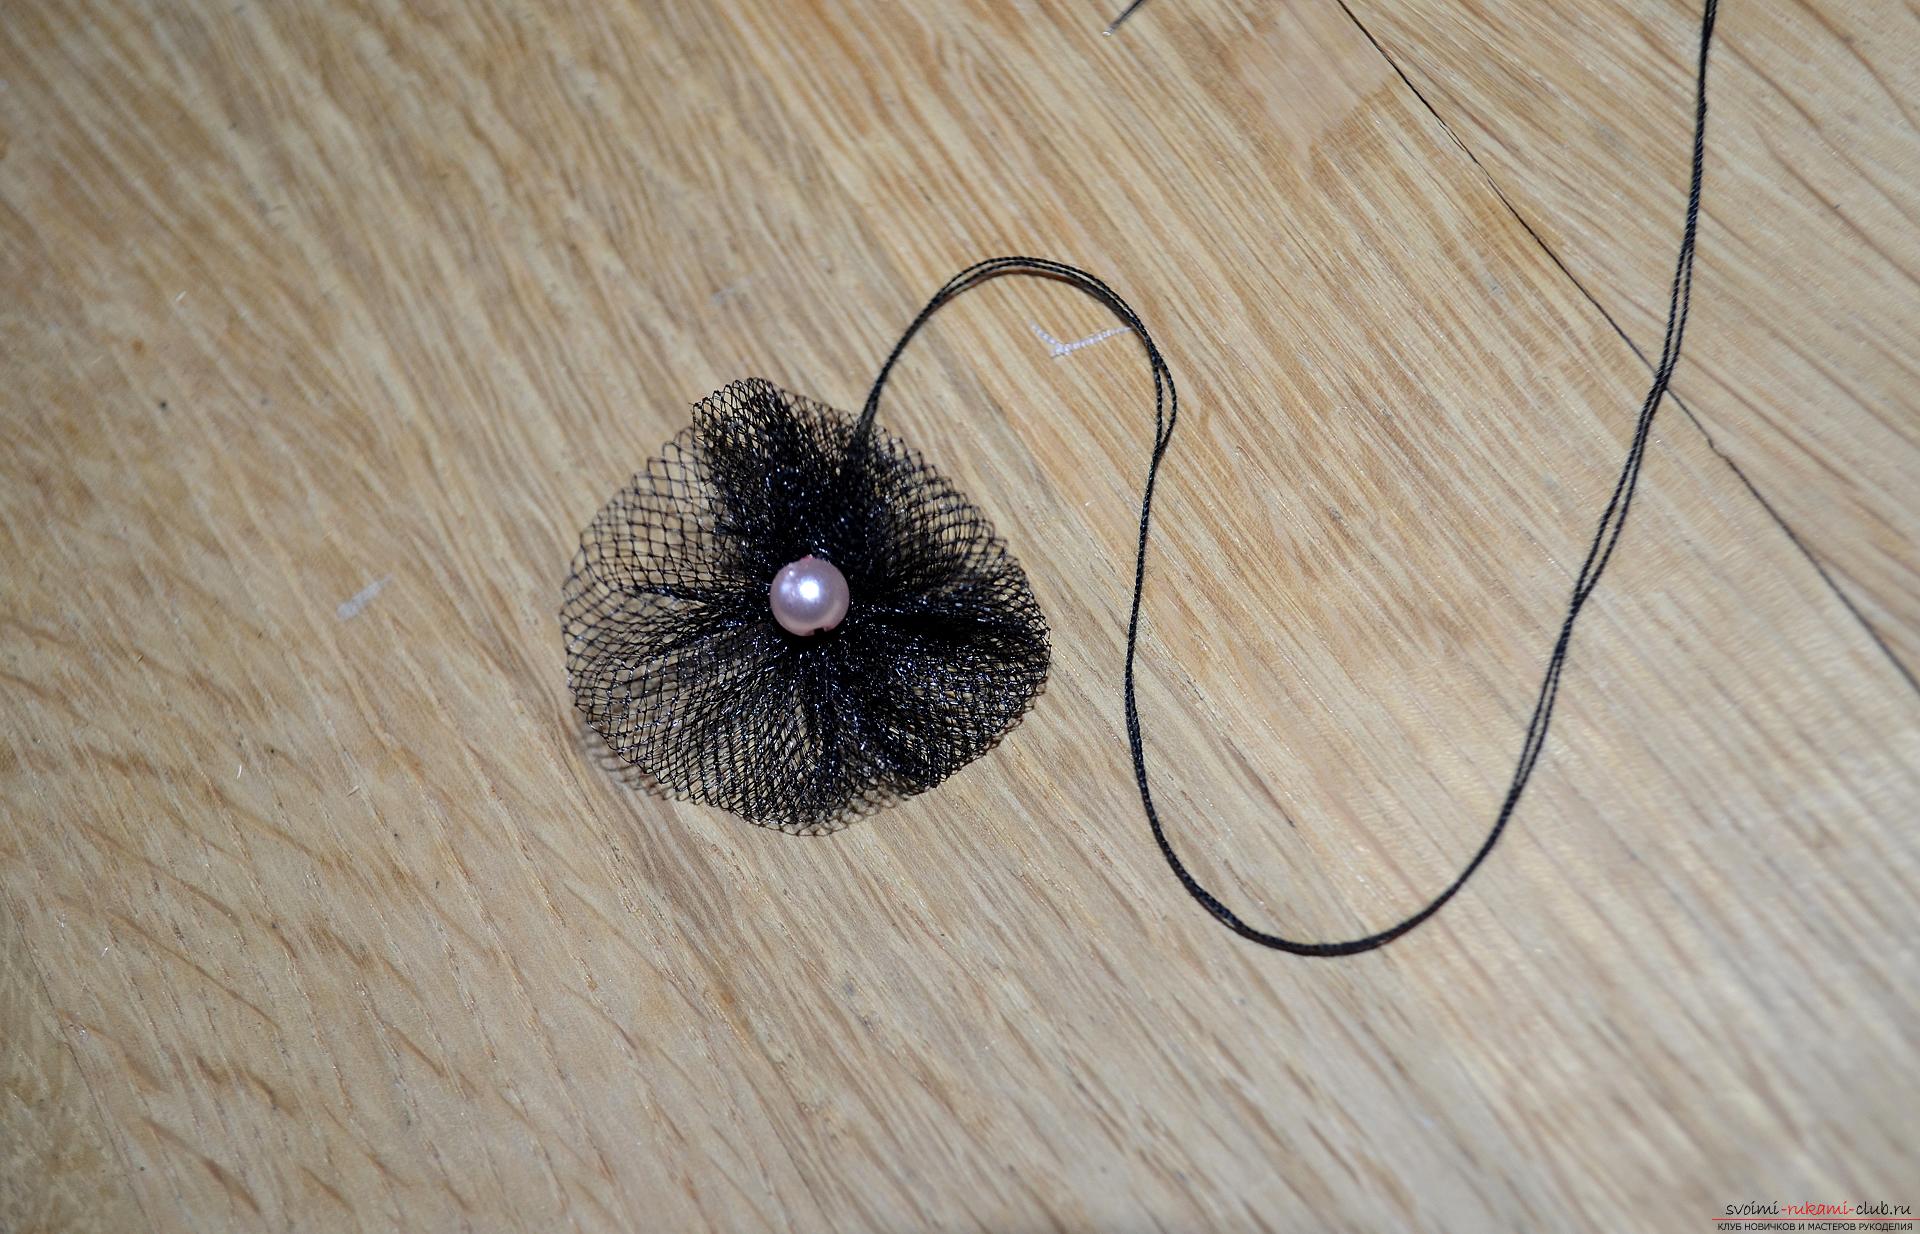 13. Sew the manufactured flower from the tulle along the side of the neck of the mannequin and add it with beads, and strung of pink pearl beads. F13
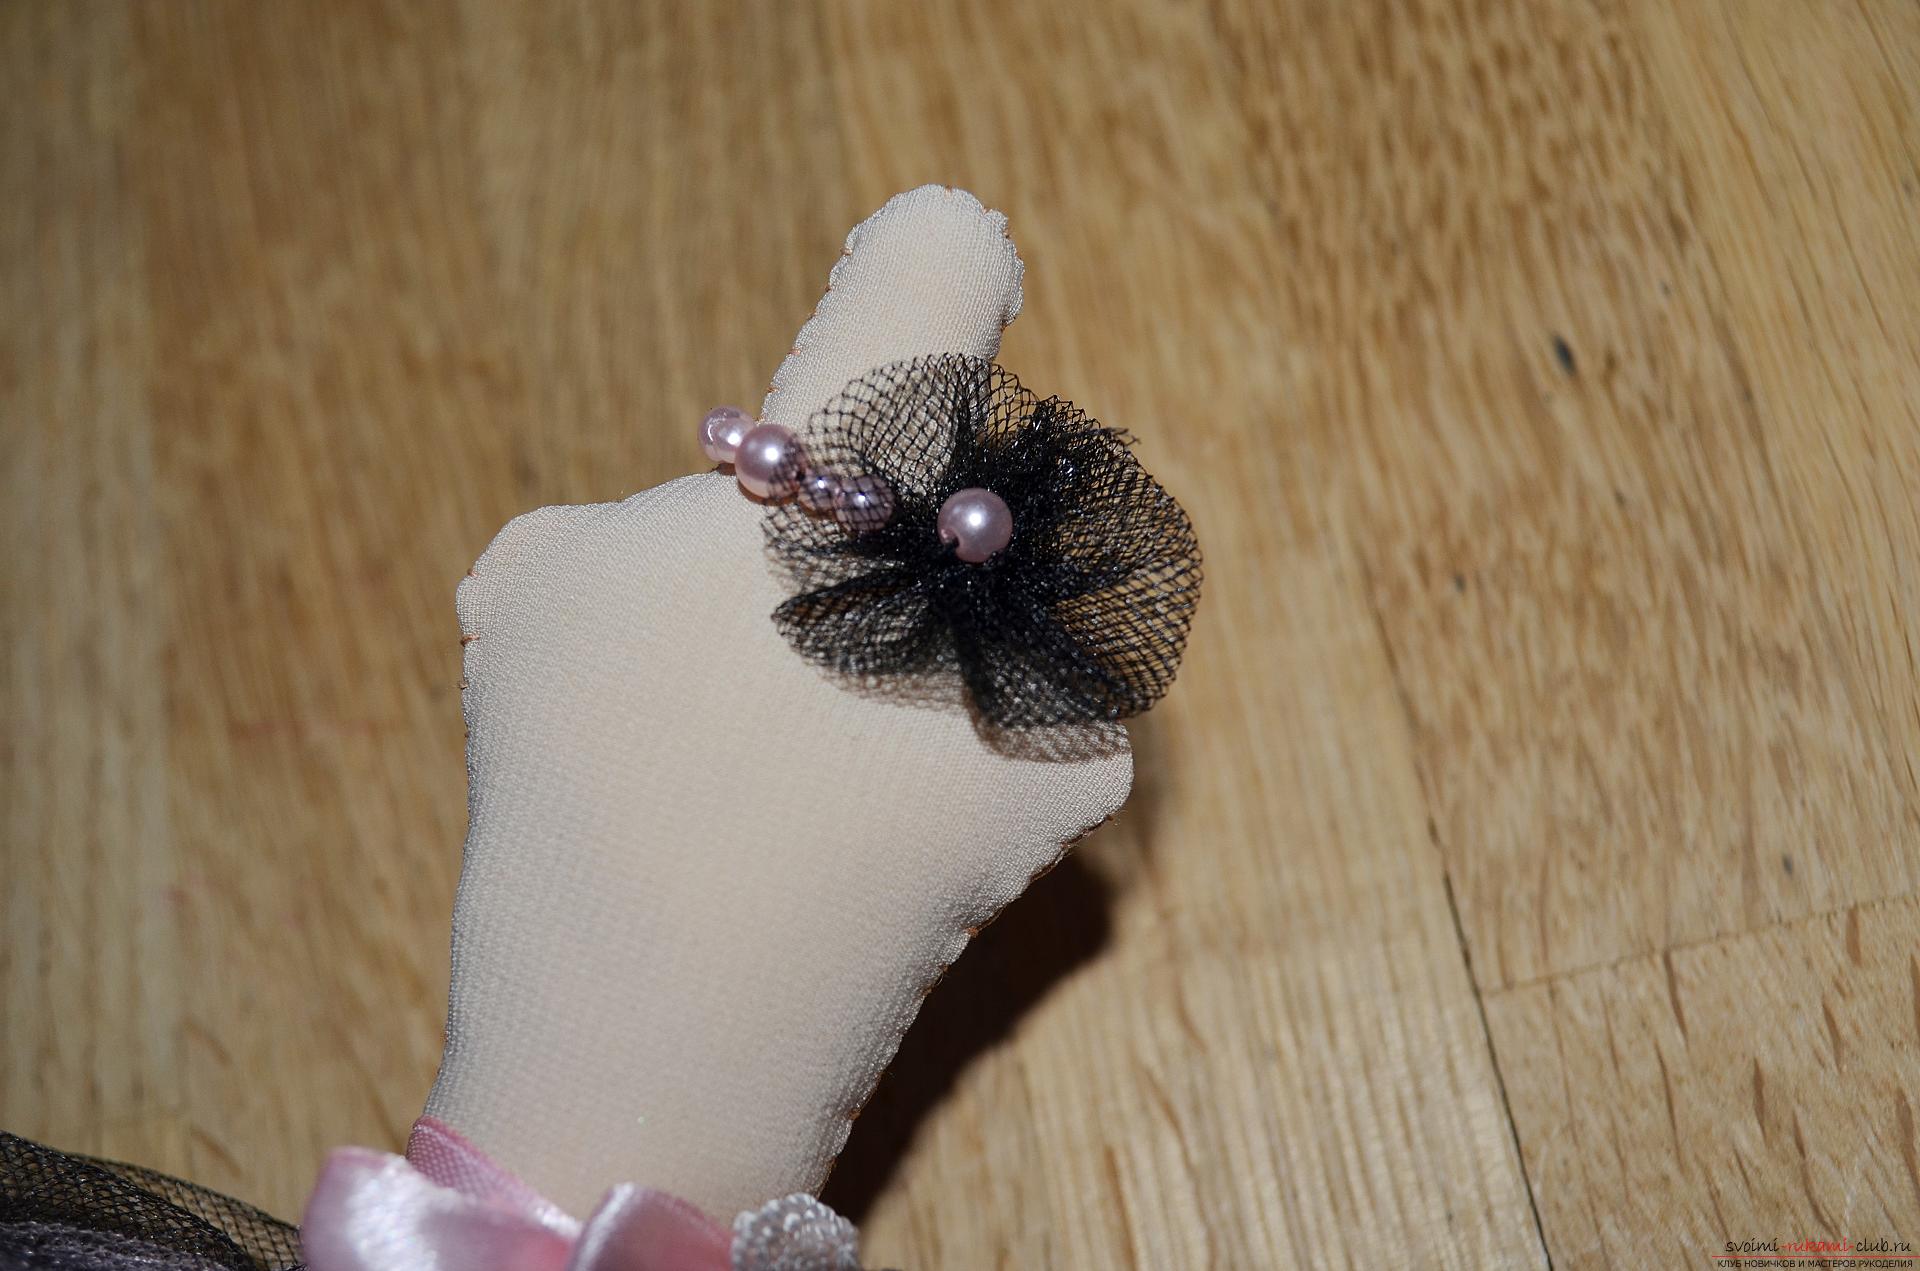 14.In the end, we can only use a knife to make a small hole in the wooden stand, insert a stick into it. On which the dummy holds and securely fasten everything with the hot glue of the thermo gun. Also, from the remnants of the pink satin ribbon, we will form a bow and glue it onto the podstavochku. If you can not find a suitable flat frame for the dummy stand, you can replace it with a wooden thread reel, a suitable wine stopper, etc.
 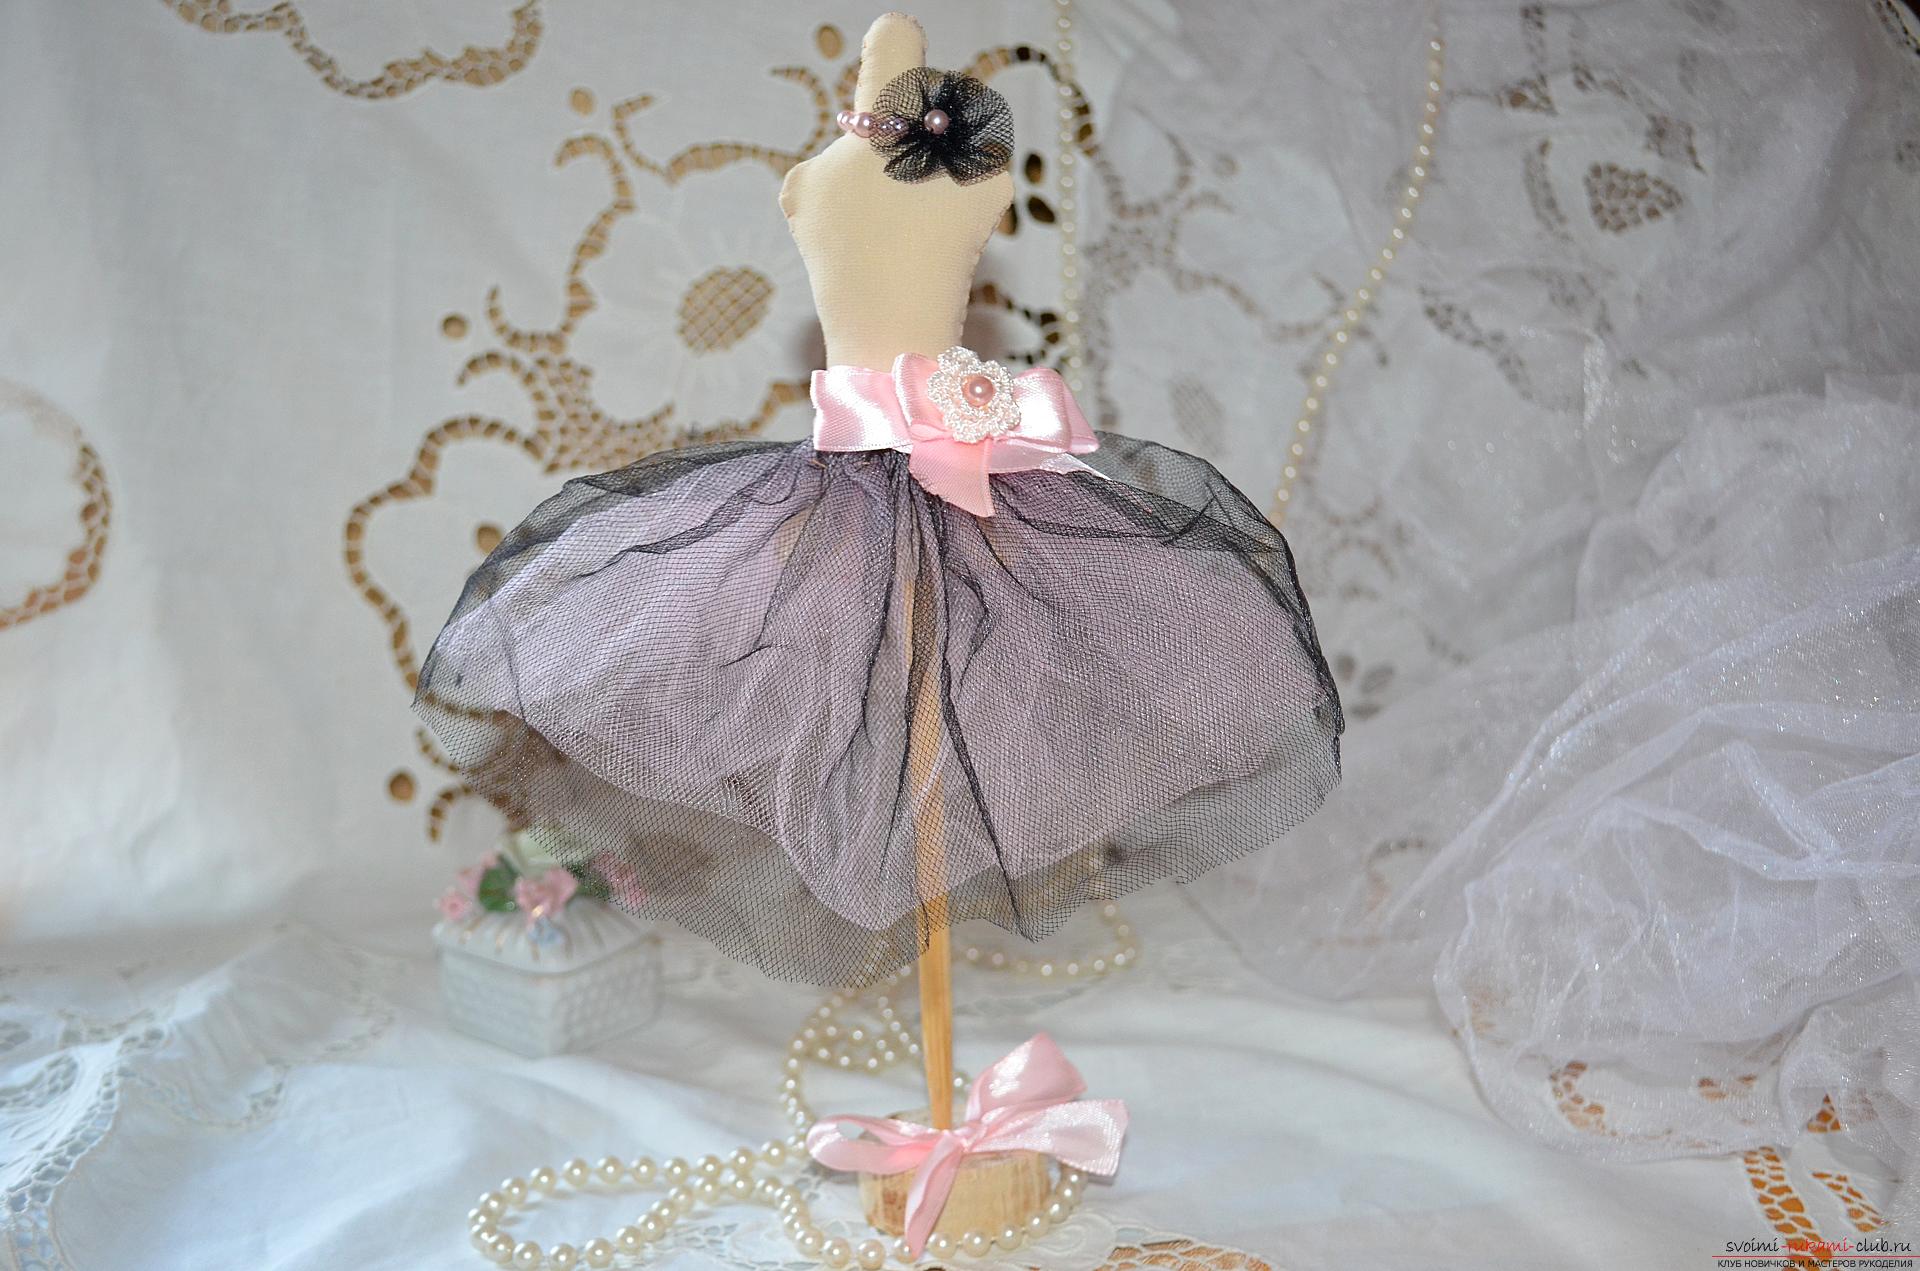 Here we have such a charming decorative mannequin.
Comments
Related posts:
 Knitting lessons on warm knit socks "Chess" with step-by-step recommendations and photo
 An original master class with step-by-step photos on the creation of the decorative tree "Heavenly Sineva".
 This article will give a lesson on how to crochet flowers of poinsettia, a master class with photos
 How to fashion a small penguin from polymer clay? Lesson modeling with a detailed description of technology, work stages and step by step photos
 Mini Zen garden with their own hands