
Lesson on making a stool with a dermatine seat with your hands, step by step recommendations and photos
It is very simple to make a stool. A little skill, neatness and you will succeed. 
Materials and tools
For work you will need:
- plywood multilayered with a thickness of 16 mm (18 mm), size 700 x 1000 mm (or other, from which four pieces can be cut 300 x 430 mm);
- electric jigsaw;
- pencil, ruler, compasses;
- sandpaper of different granularity;
- PVA glue;
- drill, drill;
- Furniture dowels;
- varnish is transparent;
- paint brushes;
- piece of dermatina 500 x 500 mm;
- foam rubber for sitting;
- Particleboard 300 x 300 mm;
- cardboard for marking.
Stages of work
All the details are the same, so consider the manufacture of one rack. They must be done four. To begin with, we mark out the rack. Marking according to the dimensions is done on a sheet of cardboard 500 x 500 mm. 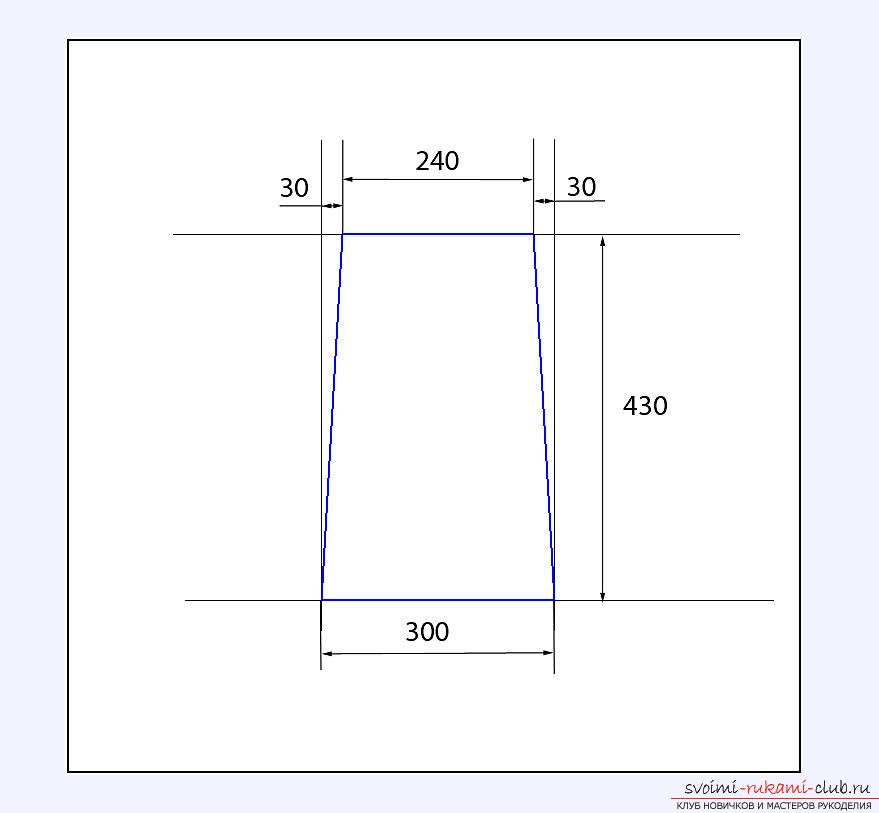 The drawing is placed in the center, since the centers of the two circles extend beyond the borders of the rack. We mark the middle of the workpiece. We mark the boundaries of the hole and the figured notch.
 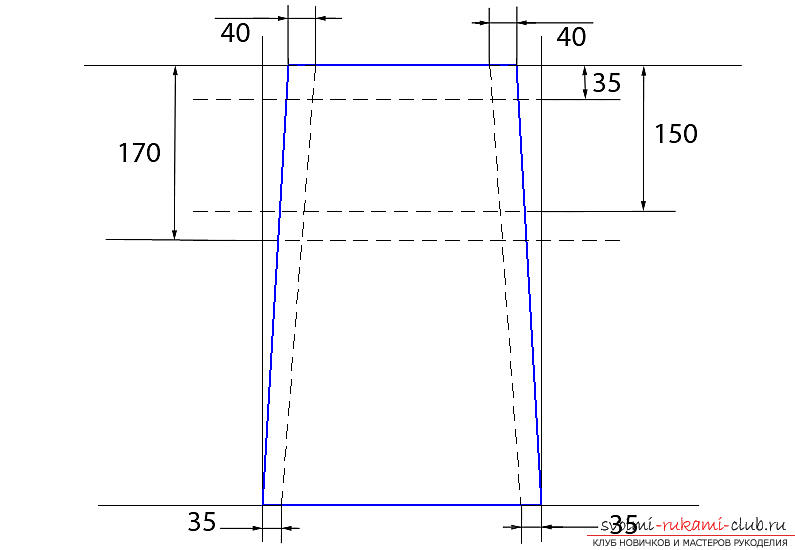 The hole is a wrong oval,composed of arcs of four circles. The location of the centers and the radii can be seen in the drawing. In order not to overload the drawing, it is divided into two parts.
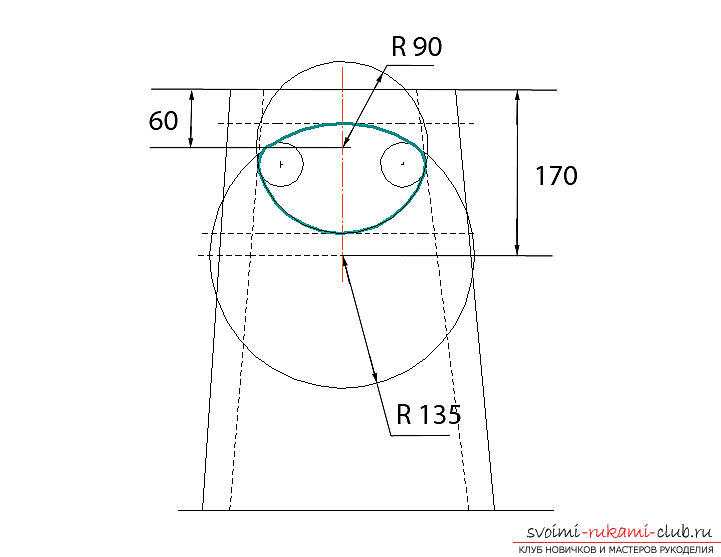
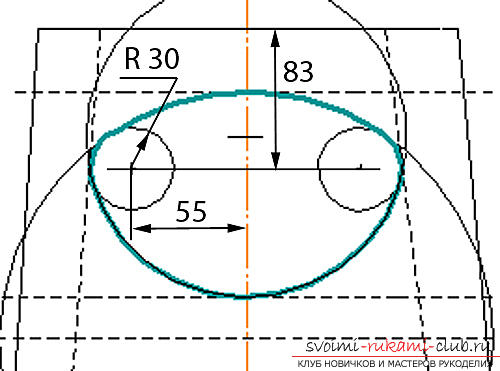 The thickest line is the part thatis used. The cutout is part of the oval. The oval consists of parts of two large circles and an arc of a small circle. The centers of large circles go beyond the borders of the racks, the location of the center of one large circle is shown in the drawing. The center of the other large circle is located symmetrically. The location of the center of the small circle is shown in the same drawing on the middle line.
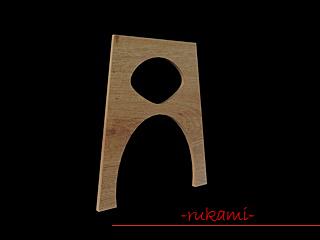
 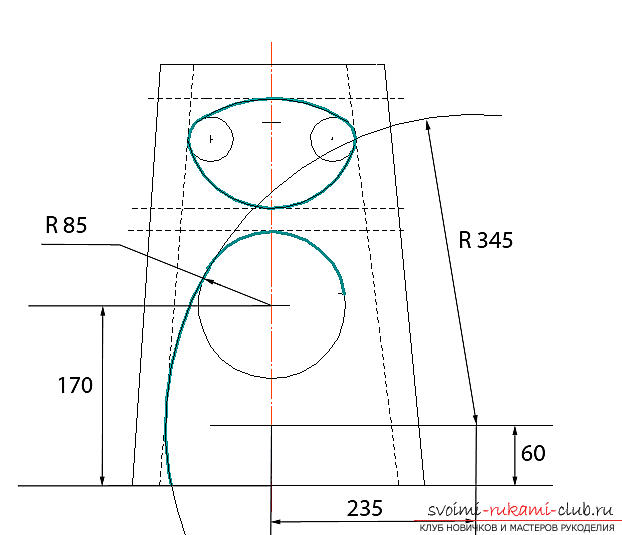 Curvilinear contours we cut out on thick lines a nail file for figured cuts.
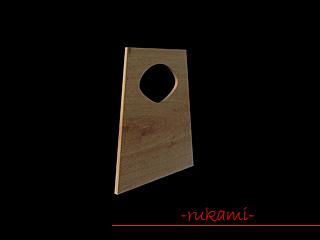
  To cut the upper hole, do with a drilla suitable hole inside the boundary of the hole where we insert the nail file. We get a ready rack, which we use as a template for the manufacture of the other three racks.
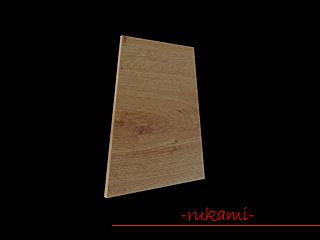
 We make thorns for connecting racks. Marking is done on the counter. From the edge of the rack note the thickness of the plywood - 16 mm (if you use a plywood thickness of 18 mm, then substitute this size). We draw a line. On the line mark the boundaries of thorns and grooves.
 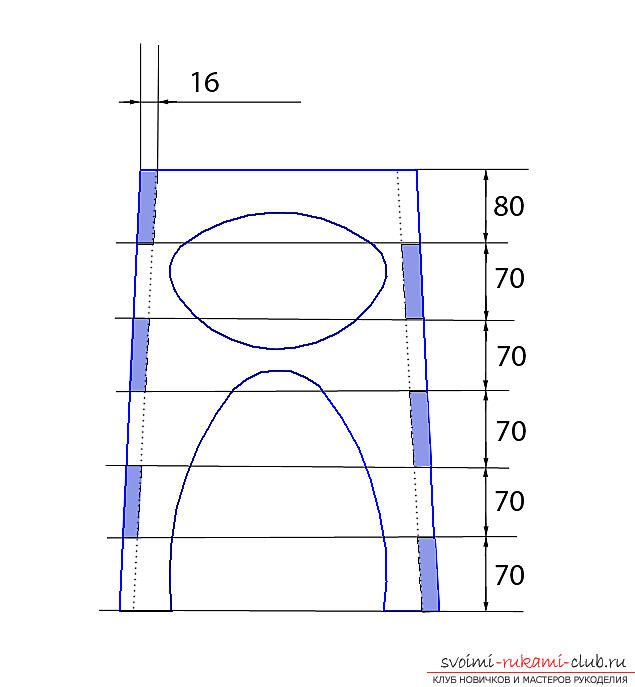 Slots and spikes should be perpendicular to the sides of the post.
  Cut out, not forgetting which side of the cut should be "clean" size. We cut out a jig saw. To facilitate work in the corners of grooves, drill holes of a suitable diameter.
 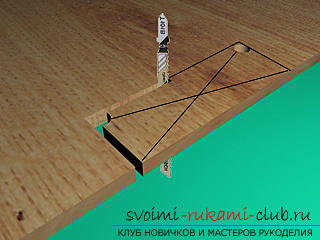 From the accuracy of the cut depends the density of the joint. The location of the studs and grooves on all racks is the same.
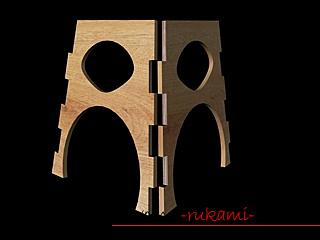 After sawing the thorns and grooves on all the racks - we collect. If necessary, adjust the spikes and grooves with a file. If the assembly is tight, we collect the construction for glue.
 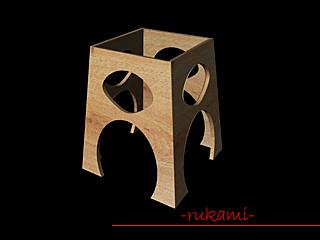 Note that the corners of the assembly must be straight. If the level of the top or the legs does not coincide, smooth it with a sanding machine or manually sandpaper. After drying the adhesive, strengthen the legs. We use furniture dowels.
  For this, on the first and second bottom studs on the opposite sides of the column in the middle of the stud, we drill a hole for the furniture dowel with the required drill.
 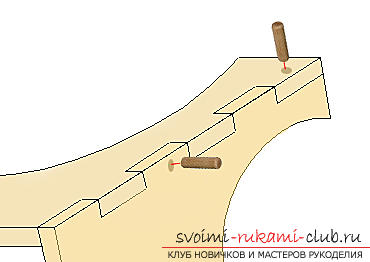 We fix the dowels on the glue so that a littleacted. We strengthen all the legs. Then we smooth out all sharp corners with a sandpaper, if necessary shpaklyuem irregularities and dowels, cleaned, dowels are equal to the planes, cleaned to the desired smoothness with a fine sandpaper, cover with a diluted varnish. We prepare the seat. This chipboard size of 300 x 300 mm. On it in the middle we mark out 240 x 240 mm. From the inner side in the middle we recede half the thickness of the plywood, in our case it is 8 mm.
 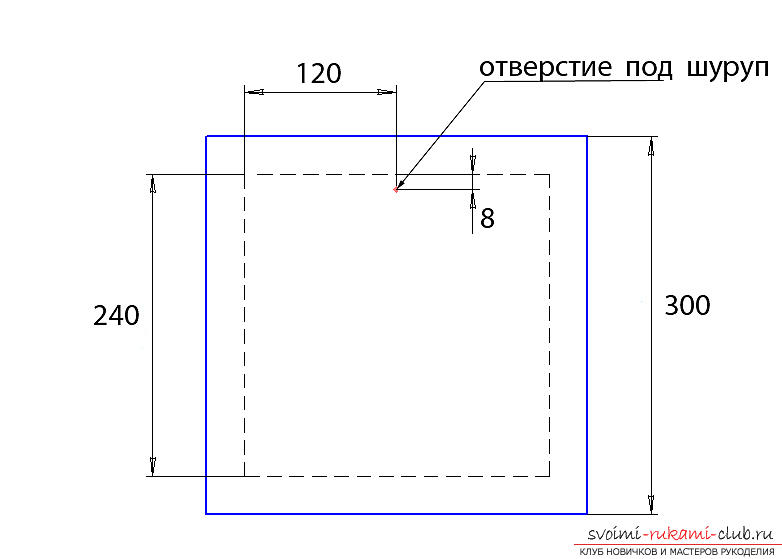 This is the center of the hole for the screw or screw,which the seat is attached to the posts. Such holes are made on all sides. We prepare places for screws. On the ends of the racks, also in the middle along the length and in the middle along the thickness, make a hole for the screw.
 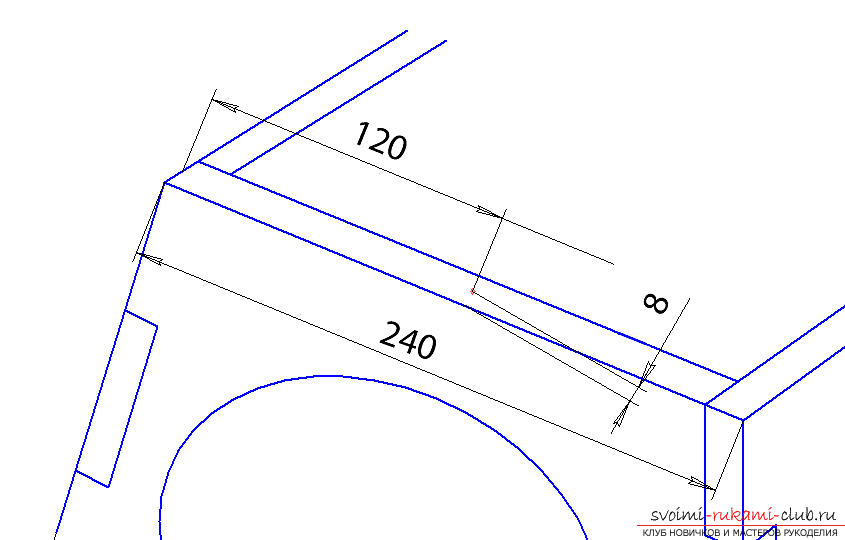 Screws are used with a countersunk head (cap). In principle, the stool is ready. It remains to ennoble it. We polish all the surfaces with a fine sandpaper, varnish. Depending on the applied varnish, we impose 2 - 3 layers. We prepare the tire. It is a dermatine, a leatherette or a dense fabric with a size of 360 x 360 mm.
 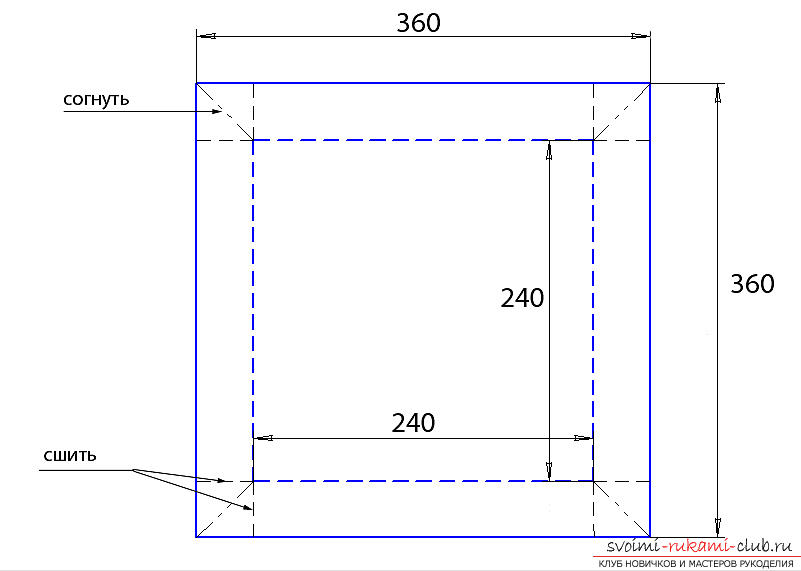 We prepare the foam rubber 2 cm thick, 300x300 mm in size. We lay foam rubber on the seat, we cover it from above with a tire cover.
 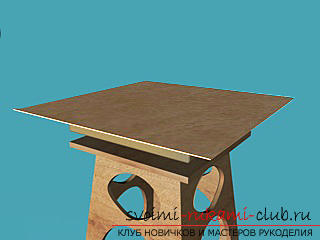 Tire it is better to sew on the corners, but you can just wrap it.
  We turn the stool with the tire,we turn the tire on the seat from the bottom, nail small carnations or stapler. Superfluous dermantin trimmed neatly. To the legs do not scratch the floor, glue felt or leather pads. All. The stool is ready.
Comments
Related posts:
 Master-class on making a candlestick from improvised means by oneself, advice and recommendations.
 Festive decorations with their own hands, tips and advice on making pumpkin out of cloth.
 Gifts for mom with their own hands, how to make a gift on March 8 with their own hands, advice and recommendations for making crafts with children.
 Recommendations for making a tiger-pillow with your own hands.
 Tips and advice on making the original witch costume with your own hands.