Decoration of bottles and decoupage with tights with their own hands - master class
Creating relief and beautiful objects - verya difficult task that requires special efforts from the author and the desire to understand the topic as brightly as possible, creatively. The issue should be approached with undue seriousness and, of course, look for a variety of solutions in order to formalize the subject. For example, we need to process the bottle. In this case, we have to think over its design and, of course, make some innovations to make this object even more memorable and interesting. We are talking about serious and interesting projects, therefore, let's try to consider the most unique and interesting options with which you can work.
Decoration of bottles and decoupage with tights with their own hands - master class
Did you know that even a kapron stocking canBe an excellent alternative for modern decoupage materials? Using a normal, old and unnecessary piece of clothing, you can create miracles and a real beauty for the appearance of the bottle. Ways for this are more than enough. We will try to get acquainted with some new ways of decoration to improve the appearance of the bottle and add new, brighter and interesting tones for it. To implement such a complex idea, oddly enough, the material will also be required. A special set of special items for decoupage will facilitate your ability to realize an interesting and unique appearance of the bottle. Nevertheless, the entire set is basically standard. The only serious addition is kapron stockings and a special varnish for vintage. Let's look at the detailed list:
- The bottle itself will be required for processing
- Let's prepare a varnish-craquelure for recreating the effect of small cracks
- A degreaser is required
- Take also a stocking from capron
- Take the sticky substance PVA
- We need to find a varnish for vintage from bitumen cover
- Need napkins
- Prepare for work discs made of cotton wool, also oil for artistic processing and paints made of acrylic
- Take the contours of gold, as well as printed maps for decoupage (or wipes)
- To work also need a sponge
- It will take an ugly lacquer and braid
- Take an acrylic paint in the color of a white mat
Preparing the bottle 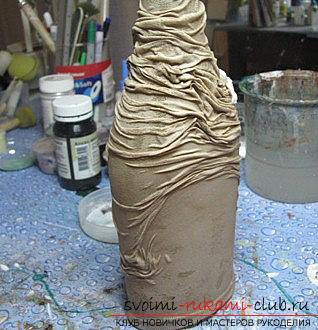 This set should be quite enough to perform a beautiful and unique decoupage of the future bottle. Let's try to take a closer look at the methods of work and how to design such a bottle.
 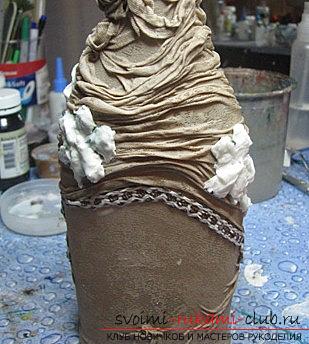 It is necessary to take a bottle and degrease. For this purpose, a standard means for washing dishes is suitable. Any other degreaser is also suitable. Next, you need to take a stocking from kapron and dip it into the glue. After, pull the product onto the shape of the bottle and form the folds in the shape. Then, you need to take the napkins and also get wet in the glue. Of these, we form a variation of papier-mâché in the form of a flower. Next, we expect the drying of our products. This can last 1-2 days. After we have waited a certain amount of time, we need to cover the product with a black acrylic paint. Cork is also covered, but not in those places where the decoupage process will be. For decoupage we use a surface coated in the color of white paint from acrylic for a matte surface. Again, wait until our product dries. After, you need to pick up a picture and print it, or pick the right version of the napkin. Draw the cover on the front side with three layers of varnish, using an intermediate drying for 30 minutes. Pass day, drawing cut out in the form we need. The printout should be soaked in water for several hours, then put on the front side of the file sheet and roll all the white paper from the center to the edge, until the pattern appears. The print is glued to the glue diluted with water.
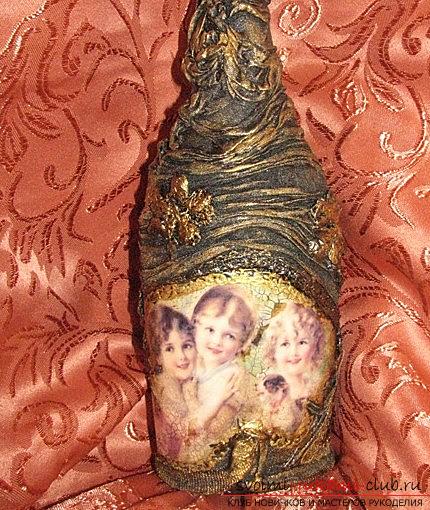
 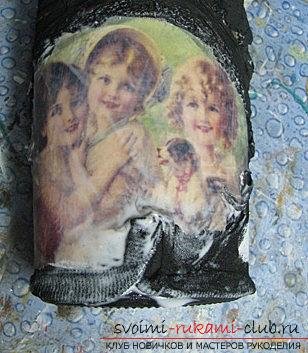 Decorating and decorating in vintage style Afterof how the printout dry out, we take a sponge and a paint from acrylic of gold color to make a toning of the surface covered in black color of a paint. After the tinting dries, using a contour for gold, you need to work the transition from the drawings to the dark color of the ball. The same contour you need to outline the cork.
 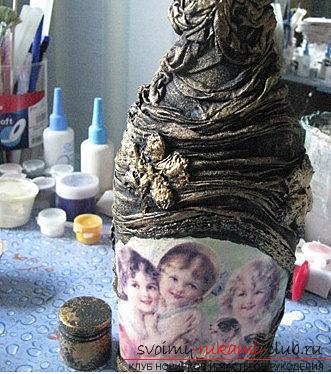 Next, it is necessary to apply craquelure from smallcracks. Apply with a synthetic brush, then, after 3-4 hours, we put a second layer and wait until it dries (3-4 hours). It will take 2 hours and you will see the first options for cracks. After, it is necessary to age our printout,using a bitumen patina. It is applied by means of a soft crack, wiping the cracks. After 40 minutes we have to put on the disc of cotton wool of artistic type and wipe off any excess that will remain from the patina. We will look like an excellent effect!
Comments
Related posts:
 New Year's motive for tin cans - a master class of decoupage by own hands
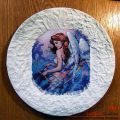 Decoupage of a unique plate with an angel by one's own hands: a photo and a master class with a lesson
 How to make a tree of beads with your own hands? Schemes and a master class for work
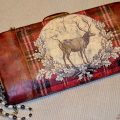 The master class will teach you how to decorate the clutch with your own hands using the technique of decoupage
 Volumetric decoupage with their hands in the workshops (photo)