We are getting to know more closely with information on how to make a dinosaur from plasticine with our own hands.
Plasticine is the material that cognizeschild from an early age. To make crafts from him is easy and pleasant. Due to its plasticity, softness, the property to keep the given shape, moisture resistance, it in the hands of the child turns into a simple tool for modeling any shapes and shapes. Classes with him develop motor skills and finger sensitivity, skills of mental abilities and memory training. Well, the very kid - a sincere pleasure and an interesting time, when from obscure colored bricks you can create everything you want. Only computer "emoticons" can create as much as you like.  We'll try to dazzle a dinosaur, aboutsuch as shown in children's cartoons: kind and pretty pretty. The process of molding must necessarily take place on a special board or cardboard. In addition, it is immediately worthwhile to prepare the plasticine itself, which includes a cutting knife, a box of kinder-surprise and matches (or a pair of toothpicks). So, let's get started! Dinosaur
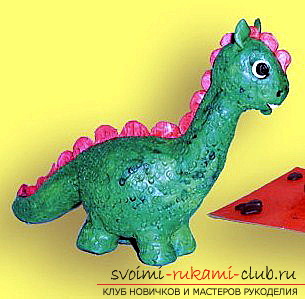
- We take plasticine of similar colors. At us it is dark and light green. We put them together to make spots and divorces. At us it something similar on a coloring of a water-melon or a cucumber.
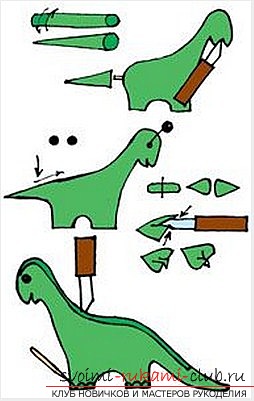
- From the barrel of kinder-surprise we make a trunk. To do this, roll a piece of plasticine in a pancake and overlay it with a barrel.
- Gently closing all the cracks and giving a smooth shape,we get the body of a dinosaur. If plasticine is enough, or do not want to mess around with the keg, the body can simply be rolled out of a piece of plasticine, giving it an oval shape.
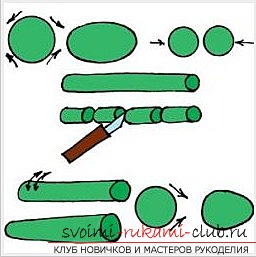
- We sculpt the legs from 4 identical rollers. To do this, we make one long roller and cut it into four parts.
- The neck is also made from the same long cushion, only slightly giving it the shape of a cone.
- Similarly, we make a tail, only a smaller one.
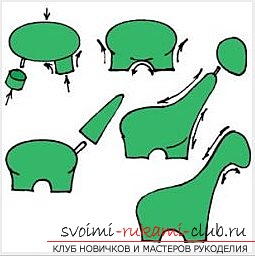
- Now roll the ball and give it the shape of an egg - it will be a head.
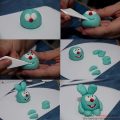
- From the yellow plasticine we make a few small balls, which we pin down with our fingers. The pancakes have turned out, which will crest on the back.
We proceed directly to the assembly. Let's start with the legs that attach to the body andmash neatly the joints. It turned out something like a green pig. Similarly, we cling to the upper edge of the trunk of the neck, and to the other edge of the tail. To keep the head on the neck, fix it with the help of a match half, stuck it into both parts and also all the ointments. Carefully cut out the mouth. And from the black or brown plasticine we make and adhere eyes. From two small pieces of plasticine we roll the ears. After making an incision along the ridge of the dinosaur, insert the yellow scallops and our ears on the head. Now draw the fingers like an elephant. In the end, it turned out such a cute dinosaur!
Comments
Related posts:
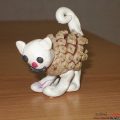 Teach children to make interesting little animals with their own hands with cones and plasticine
 How to make an original picture of plasticine. Step-by-step manufacturing of an unusual picture by one's own hands
 Molding of plasticine in kindergarten. Create crafts from clay with your own hands.
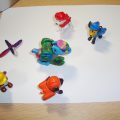 Crafts made of plasticine: Racer from the cartoon Puppetry patrol for the 2015 contest, crafts made of plasticine with their own hands
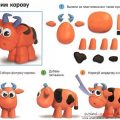 Molding of plasticine for children aged 3-4 years. An example of modeling a cow with your own hands