Colorful peacock and quilling technique for birds - a master class with their own hands
Beautiful handicrafts in the quilling technique are forcingto tremble our heart and of course become the brightest crafts, all of which are trying to turn their attention. Not an exception is the quilling technique, which allows the realization of different kinds of birds. We will consider one of the options for creating a beautiful bird that was made by own hands. This technique uses the capabilities of modern quilling, supplementing it with new and quite popular innovations, like fringe.
Colorful peacock and quilling technique for birds - a master class with their own hands
 For those who want to recreate a beautiful bird,there will never be obstacles. An example of this is the master class for the construction of the Firebird. It should be noted that the creation of such art requires incredible perseverance, as well as systematic knowledge. Only thanks to this the master will have the opportunity to make a similar bird. Peacock or Firebird will look beautiful only if you approach the question with a little imagination. Here it is necessary to use a variety of colors to recreate a special kind of composition. Materials for peacock
 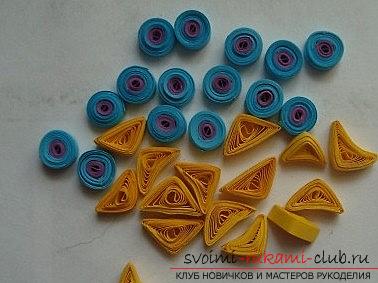 This work is great for those who wantto realize a bird in the form of a picture-composition. It can be presented to your close people as a symbol of prosperity and good luck. Some also create such hand-made articles to decorate the interior of their own apartment and add a lot of new colors to it. Moreover, this lesson explains many aspects of working with quilling and tells how to create different objects using fingers and special paper. For work we will need special materials: Large feathers:
- Violet (light) color - 30 centimeters
- Fringe (1 centimeter x 10 centimeters)
To middle feathers strips will go:
- Violet color - 10 centimeters
- Blue color - 30 centimeters
- Green color - 30 centimeters
- Yellow color - 30 centimeters
- Dark yellow color - 30 centimeters
- Fringe (8 mm x 10 centimeters)
Small feathers:
- Yellow color - 15 centimeters
- Green color - 15 centimeters
- Blue color - 15 centimeters
- Fringe (5 mm x 10 centimeters)
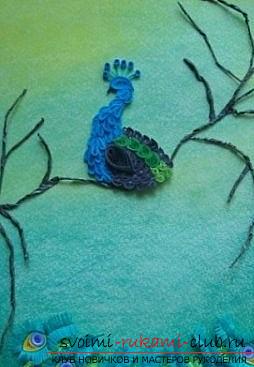
Working on a peacock 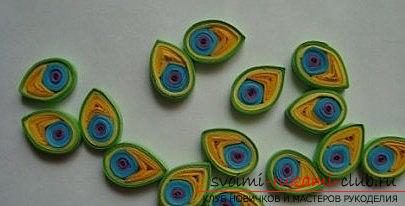 In order to form a peacock, it is necessaryprepare and wind up the relevant parts using our set of materials and the top instructions. After making up the workpiece, using two elements, it is necessary to glue a variant of the craft. Then, using a yellow-green strip, wrap our parts and at the same time, do not forget to combine these colors in advance into one kind of strip. Next - proceed to decorating the future wings. To do this, you need to decorate each feather with a fringe. We will prepare it in advance, and then - just paste it to our hand-made. Preparing the sketch
  After this, you need to prepare a sketch of the work. Here there are two options: First - independently draw a hand-drawn sketch of the details of the tail to decorate the future peacock and its tail. The second is to download the ready peacock pattern from the web and based on your calculations, make a ready peacock pattern, using the dimensions and characteristics from your template. Arrangement of objects
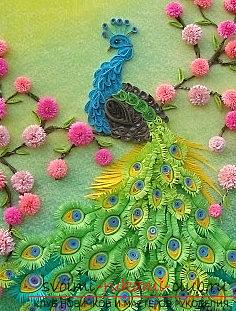
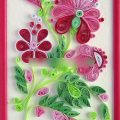
  For a full-fledged composition will be requireda variety of elements, their number you can find in the photos of the lesson. To make the fire bird more effective and interesting bird, you should make a background preparation for the corresponding craft. Use pastel with toning on cardboard, then, cover this cardboard with organza material. After you have formed a firebird on our branch, it remains to proceed to form the tail of the article. Using the building component from row to row, we will get the finished form of a fairy bird. It will look great with pink flowers,which can be formed with the help of fringe. The work should be placed in a special frame, so that your article looks more perfect and finished.
Comments
Related posts:
 New Year's deer Rudolph - wool felting technique and master-class by own hands
 Master class of quilling of a New Year's snowflake with own hands - a needlework lesson
 Christmas bow with own hands - beading technique with our own hands and a master class
 Creation of an artwork of Santa Claus and herringbone by own hands - a master class of quilling
 Technique of a quilling flower "Fantasy" with their own hands - a master class