Build a pattern of the dress for girls with a step-by-step description and photo.
This article describes how you cancreate a dress pattern for the girl. If you have a desire to sew a beautiful dress for your little princess, but you do not know how to make a pattern, then you definitely need to carefully study this article. Perhaps for the first time it will seem too difficult for you, but believe me, in time you will learn how to create patterns with your own hands easily and quickly. Today we will talk in more detail about building a drawing of the basis for a dress. Having mastered this lesson, you will be able to apply the technology of building a pattern of the base to any other model of dress for the girl. 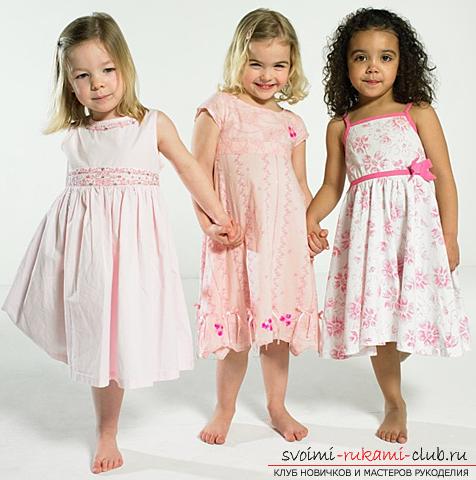 Before you start building the pattern, youIt is necessary to carry out the removal of measures using a centimeter tape. In our case, the drawing is made for the thirty-second size. To create a pattern-drawing of our dress you will need such measures: to determine the half-grip of the girl's neck, the half-crouch of the girl's chest, the half-dressing of the girl's hips, the hem of her waist, the length of the back to the waist, the center of the chest, the length of the sleeves, the width of the back, the length of the dress, arm circumference. It is necessary to leave such allowances for free fitting: the breast line - six centimeters, the waist level - two centimeters, the level of the hips - three centimeters.
  So, let's get started. On the left side of the paper sheet we step back from the upper base of the edge 7 centimeters, draw the line along the vertical line. It is necessary to mark the measurement of the length of our product on it and mark two points - A, H. Through them to the right side, draw the lines horizontally. Create the width of the product. On the right side of point A, it is necessary to postpone the obtained data of the half-breast + six centimeters, and then put the point B. AB = thirty two + six = thirty-eight centimeters. We draw a perpendicular line from point B until the intersection with the straight line of the product occurs. At the point where they intersect, put the point H1.
  We build a site from the back to the waist. In the lower part of the point A, it is necessary to postpone the obtained data of the length of the back to the waist line + one centimeter, and then put the point T. AT = twenty nine + one = thirty centimeters. Next, draw a line horizontally to the right of the point T, passing through it. The intersection with the line BH1 is called T1.
 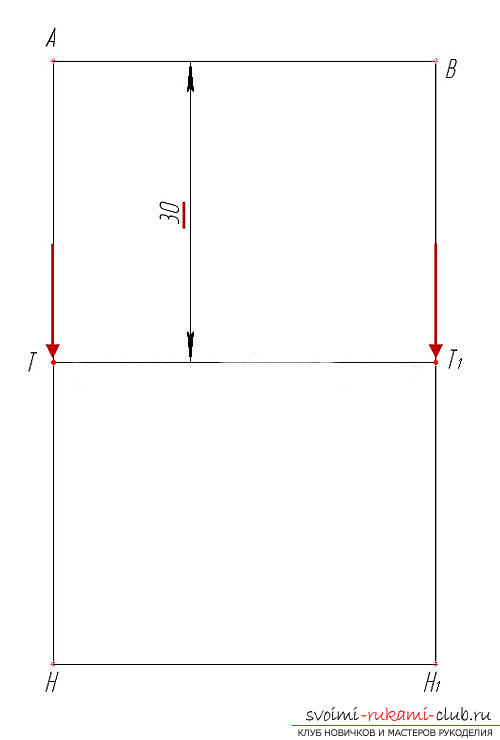 We build a site along the line of the hips. At the bottom of the point T, it is necessary to postpone half of the measured length of the back to the waist line, and then put point B. twenty-nine: two = fourteen and a half centimeters. Next, draw a line horizontally on the right side of point B, passing through it. The place of intersection with the straight line BH1 is called B11.
 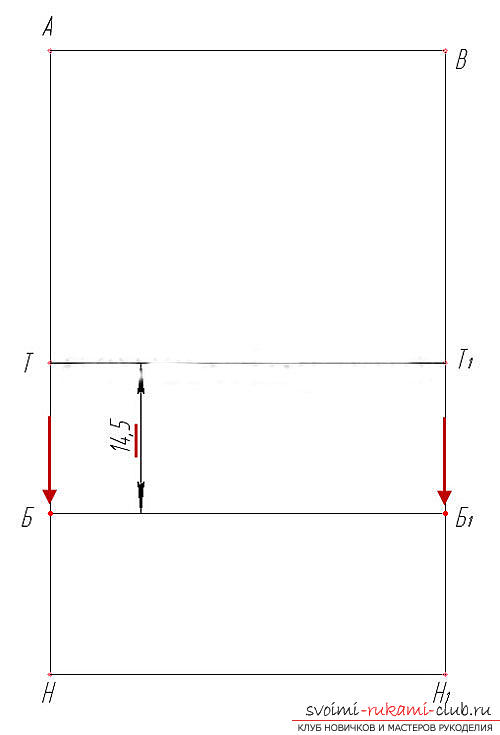 We build a section along the width of the back. On the right side of point A it is necessary to postpone the obtained data of the back width + one and a half centimeters, and then put the point A1. fourteen + one and a half = fifteen centimeters. We build a section along the width of the armhole. On the right side of the point A1, a quarter of the obtained data of the half-breast + one centimeter should be postponed, and then put point A2. In the downward direction, starting from the points A2 and A1, it is necessary to draw two lines along the vertical of any length.
 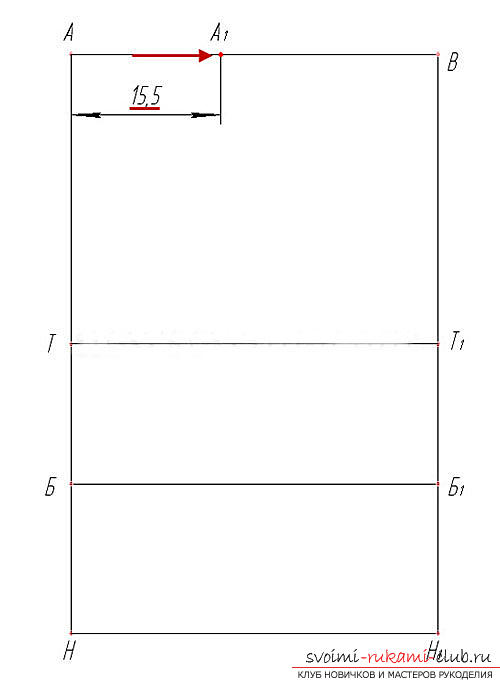 We build a section of the neck of the back. On the right side of point A it is necessary to postpone a third of the obtained data of the half-grip of the neck + half a centimeter, and then put point A3. fourteen: three + half = five centimeters. We draw a perpendicular line upwards from point A3 until the segment is equal to the tenth part of the measurement of the neck hemming + eight tenths of a centimeter. At the point where the line reaches this length, put the point A4. The corner that formed near the A3 should be divided into two equal parts, and starting from A3 in a right angle, create a segment equal to the tenth part of the measurement of the neck half-grip - three tenths of a centimeter. At the point where the line reaches this length, put the point A5.
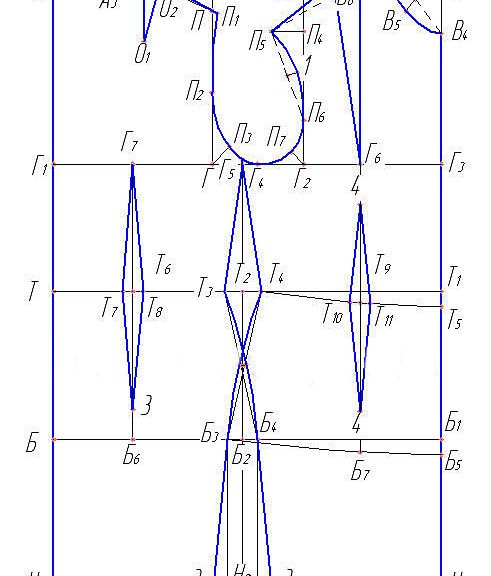
 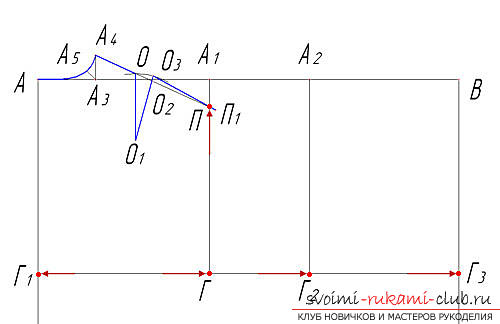 The resulting points A, A5 and A4 should be connectedwith each other by means of a smooth concave line. Then, by analogy, orienting yourself on the photo of our pattern, create a dart on the back, depth of the armhole, a cut of the back and front armhole, a cut of the shoulders and the tuck line, as well as the line of the side seam.
 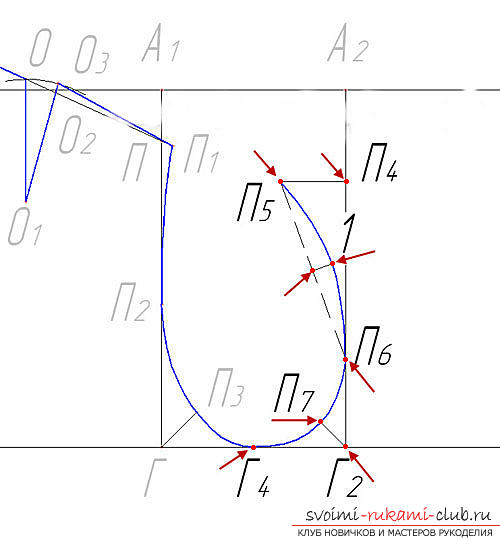 In more detail, we will focus on creating a linewaist of the front side. In the direction down, starting from point T1, it is necessary to draw a segment of one and a half centimeter and put point T5. Then draw a smooth line between points T4 and T5.
 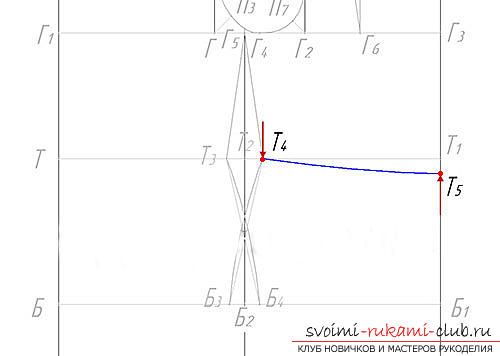 Creation of a line of hips. In the direction down, starting from point B1, it is necessary to draw a segment of one and a half centimeter and put point B5. Then draw a smooth line between points B3 and B5. We draw a dart on the back of the product. The segment that formed between ГГ1, it is necessary to divide into two equal parts, and the point of division becomes Г7. And, starting from Г7, create a perpendicular segment along the straight BB1. At the point where the line intersects with the waist and thighs, mark the points T6 and B6. The process of constructing the pattern of the base of the dress is completed by forming a dart on the shelf.
 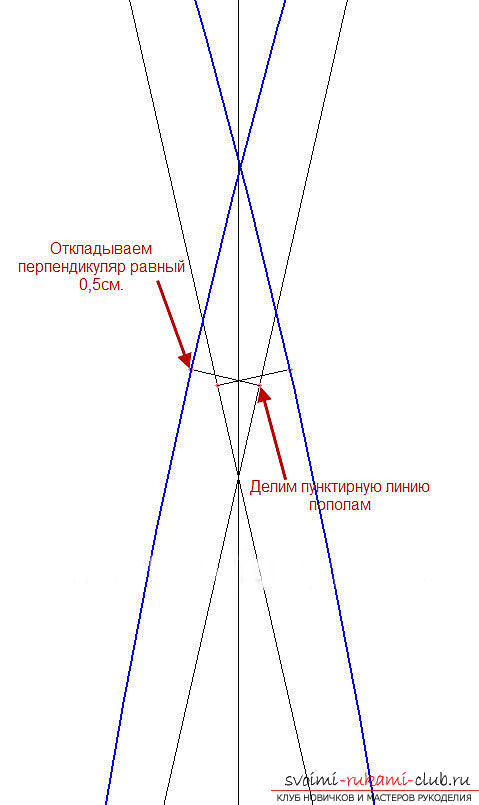 In the direction down, starting from the points B3 and B4,It is necessary to draw two lines along the vertical of any length until they come into contact with the lower line. On the place where the line intersects with the bottom line, we put the marks H3 and H4. If you want to create a flared model of a dress, then you need to create from H3 and H4 in the direction to the left and right sides segments of three to five centimeters and connect them straight with points B3 and B4.
 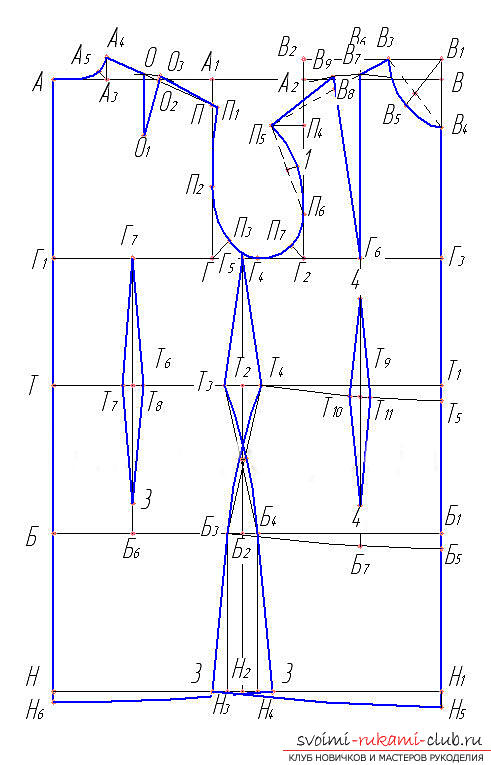 That's all. The creation of the basis of the dress pattern for the girl is over.
Comments
Related posts:
 How to build a pattern of a long dress for a woman with your own hands, using step by step instructions with a photo and description.
 Master class on crochet summer dresses for girls from 3 years with their own hands with a step-by-step description and photo.
 Make a simple dress pattern for a girl with her own hands, using a step-by-step instruction with a photo and description
 We make our wardrobe more diverse. We make a pattern of a simple dress base with our own hands. Simple diagrams and photos
 How to build a pattern-base of the dress will be interesting to learn absolutely all needlewomen