Crafts from the branches with their own hands: 10 workshops and photos
Hand-made crafts fromnatural materials will create in your home an atmosphere of comfort and a romantic atmosphere. Such crafts and furnishings from natural materials are very popular today. It is especially pleasant to surprise your friends with such hand-made decorative items. In order to decorate the interior of your country house or apartment you can make crafts from the branches of various trees. The content of the article:
Technical features
To use the necessary branches, not eaten by a bug. It is better to collect such branches in autumn or early spring. Also, all branches without exception require processing in at least 2 stages:  1) Drying the branches is a must. Otherwise, the product will warp in the first month. We dry at room temperature 1-2 weeks. Or 7 days on batteries. And if you want to very quickly, then in the oven -2-3 hours on a small fire and with the door ajar, that would leave moisture. 2) Painting or lacquering is also desirable. If there is no special varnish for wood at all, then it can be treated with clear nail polish. To do this, we offer you 10 workshops hand-made from tree branches with your own hands.
Candlestick from tree branches
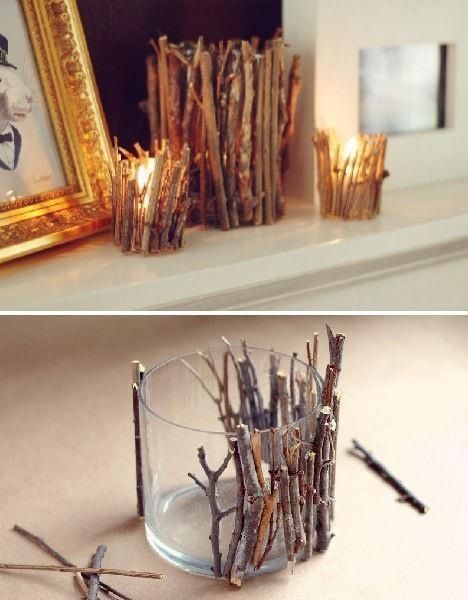 Stylish candlestick in 5 minutes In order to make a candlestick from twigs, we need:
- Dry twigs.
- A small glass cup.
- Hot glue gun.
- Candle.
Step 1: Collect a small amount of twigs, wash in water and dry them. After drying, cut the pruning shears to approximately equal length. Step 2: Take a small glass cup and a hot glue gun. Apply glue to each branch with a glue gun and glue it to the cup. Thus, each next sprig stick next to each other.  Step 3: Take a candle of the required size and insert itinside the glass. The candlestick is ready to use. Another option is to make a candlestick, it's just to take a thick candle and glue it with a glue gun with sprigs around the candle. Also, if the branches are painted in golden color, the effect will be more glamorous.
  The branches are painted in gold color.
  Gold candlestick
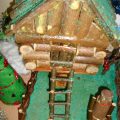
House of the branches
Unusual crafts for the child can be made ofordinary twigs. In the photo below, our reader shared his wonderful creation, which he did for the child. TIP: If you decorate the house with a garland you will get a great night light in the nursery!  House of the branches
  How to make such
Frames for photos from the branches of trees
Unusual photo frames can be made from dry branches with your own hands. For this we need:
- Dry twigs.
- Wooden base under the frame.
- Hot glue gun.
- Decor (moss).
Step 1: Take dry twigs. Using a hot glue gun. Apply glue to each branch with a glue gun and glue it to a wooden base. Likewise, all subsequent twigs should be glued next to each other in the form of a rectangle. 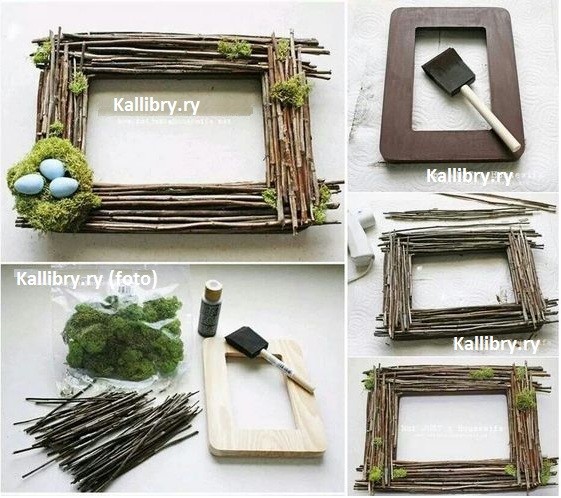 Step 2 Then take the decorating material,Our case is moss and stick it in the corner of the frame. Get a great composition. Look at even more photo ideas, how you can decorate the framework and exposure of the photos in the interior.
 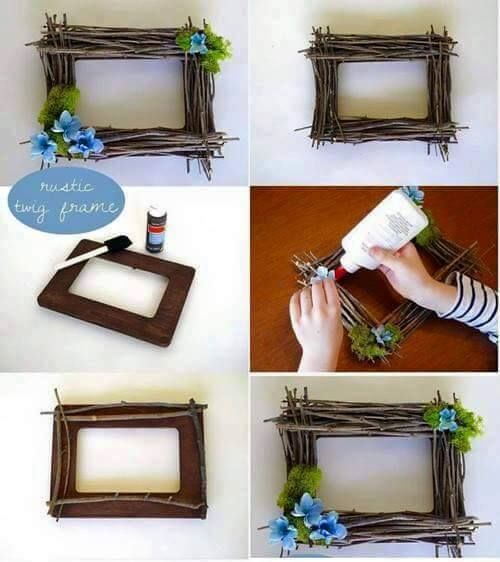 Making a spring frame for a photo
  Tree with photos in a vase
Pencil stand
This thing will look extraordinary on your desktop.  DIY pencil holder you will need:
- A cut down of a tree or a stump, with a diameter of 10 to 15 cm andabout 10 cm thick (the photo shows such a "stump", previously cleared of bark, but for a greater effect of naturalness, you can leave the saw cut in its original form).
- Drill, the diameter of the first drill which should not exceed 8-10 mm. Piercing drill is used to create shallow, but clean, with smooth edges, holes.
- Fine grained sandpaper.
Step 1: Take a drill, make 25-30 holes in the frame (depending on the diameter of the “hemp”), each at a distance of 0.5 - 1 cm from each other. 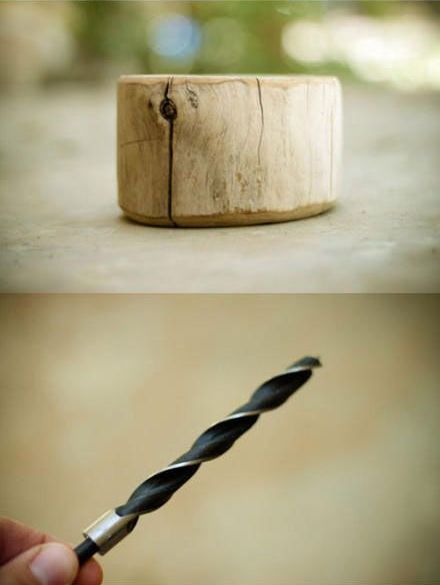 Step 25: After that, take a fine-grained sandpaper and sand the surface, so that there are no irregularities.
  Sand sandpaper base and top afterof this, the stand is ready. It can serve not only for stationery, but also for artistic brushes. Also look for other ideas on how to arrange an organizer for pens.
  Pencil holder
 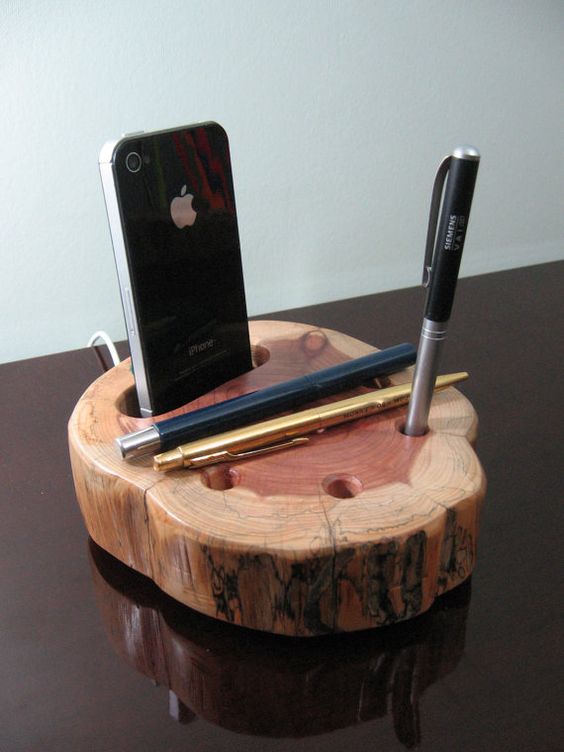 Stand for pens and phone
Clothes hanger
Such crafts, no doubt, will be your decorationhallway and will delight everyone who comes to visit you. Only it is necessary to choose such branches which have rather strong and thick knots hooks. Hangers can be made from small branches of trees.  Hanger in the hallway for clothes you will need:
- Strong branches with thick knots with a diameter of 30-50 mm.
- Screws.
- Saw on a tree.
- Drill.
- Wall blank
Step 1: Sawing the trunk in half. We select a suitable billet with a length of 300-400 mm. Butt saw immediately form a hook. We cut the knot from the branch at a distance of 50-120 mm. And then we cut a half of a branch with a knot with a saw along the edges.  We select a suitable billet with a length of 300-400 mm. Step 2: We drill a hole in the hook with a screw. And fasten it to the workpiece under the hanger. If desired, you can hang individually or form a hanger. If the hanger is designed for light things, then you can attach the branches with the help of wood glue.
  We paint with white acrylic paint. If desired, these hooks can be painted with special paints for wood or you can use an aerosol spray.
 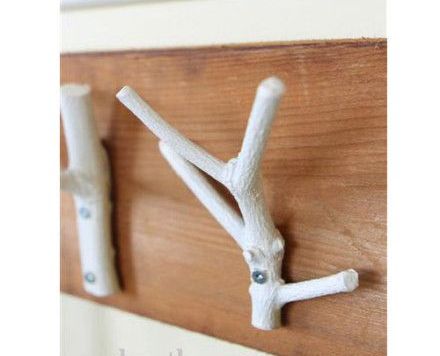 Original hanger ready
Flowerpot for flowers
In order for all the pots to become identical and original, you can make a pot with your own hands. You will need a minimum of effort and a maximum of desire and good mood.  Flowerpot from the branches For this you need:
- Dry twigs.
- Saw on a tree.
- Cord of twine thread.
- A piece of burlap.
Step 1: First we take dry twigs and with a saw on a tree we make them approximately all of the same length.  cut twigs and tie together Step 2: Then we wrap a pot of a flower or a pot with a piece of burlap. Fix it with any glue. Step 3 Take the twigs previously prepared, tie them together with a string of twine, so that the twigs would not break up (see photo)
  Wrap a piece of burlap our old pot Step 4: Then tie these little twigs pot or pot and secure it with a bow.
 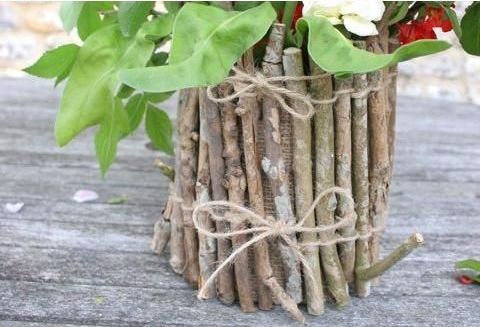 With the help of the rope fix the branches around the pot
Hanging table with their own hands
Suspended items are able to give in anyinterior feeling of weightlessness and airiness. Hanging wooden table can be a wonderful bedside table. It is attached with three ropes to the ceiling by the hook. How to make it? It is necessary:
- The tablet.
- Sanding machine.
- Drill.
- Glue gun.
- Screw.
- S-shaped hook.
- Polyurethane spray.
- Felt strip.
 Suspension table mounting Step 1: First you need to choose a suitable board of unusual texture. Treat any irregularities with a grinder. Step 2: Next you need to drill three holes that will fit the selected rope in diameter. Holes should be equidistant from each other, and one of them should be located as close as possible to the wall. You can hang the table and four ropes, then you will need to drill four holes. Step 3: The wooden surface should be covered with several layers of polyurethane, allowing each of them to dry. As the table will adjoin to a wall, protect its surface from damage. To do this, glue to the part of the table that is adjacent to the wall, striped felt with hot glue. Step 4: Next, stretch the ropes into the holes and tie strong knots under the plank. After that, you need to drill a small hole in the ceiling and insert a screw with a ring into which you should thread an S-shaped hook. Step 5: Then tie all the ropes at the top into a sturdy knot with a loop and hang the construction on the hook. The result will be just bewitching. Your hanging table will just float in the room. as in the photo - a detailed lesson on the link!
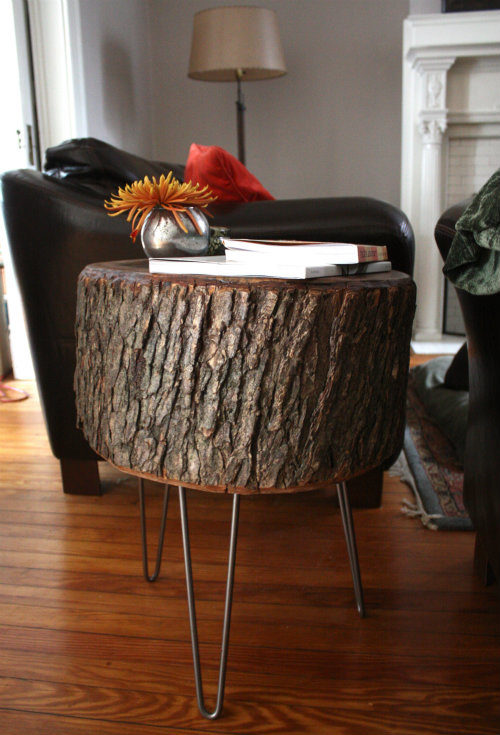
Decorative tree
To decorate the interior of your home, we offer to make a decorative tree with flowers. You need:
- Twigs.
- Decorative flowers (can be made from paper).
- Sea pebbles.
- A piece of styrofoam.
- Moss.
- Hot glue gun.
- Unusually shaped pot (in our case, square).
 Step by step making the decorative tree
 Ornamental tree painted in gold
  White decorative tree
Wreath on the door of the branches
This is the easiest workshop that could only be shown. We make a decorative wreath on the door of the twigs. To start and finish our craft we need:
- Twigs.
- Copper wire.
 The base is a blank for the Christmas wreath. Step 1: Take a copper wire and make a circle with a hook from it (see fig.).
  make a circle out of the wire Step 2: It is necessary to make small bundles from the twigs, holding them together with a wire.
 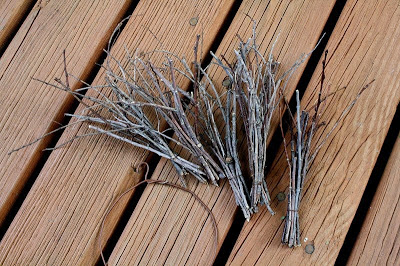 We connect branches in small bunches Step 3: Then fasten the bundles of twigs to the previously prepared circle from the copper wire. And so on to the end. Your wreath is ready. You can also paint it with spray paint, giving it your favorite color.
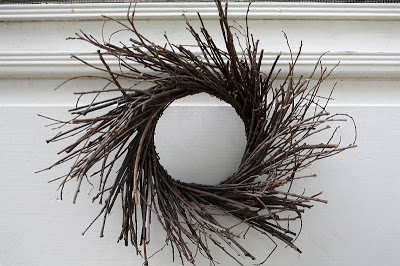
  We fasten "bunches" from branches to the base
  The wreath can be decorated according to your desire. And to make it either New Year's, or for another reason from spruce and pine in this article!
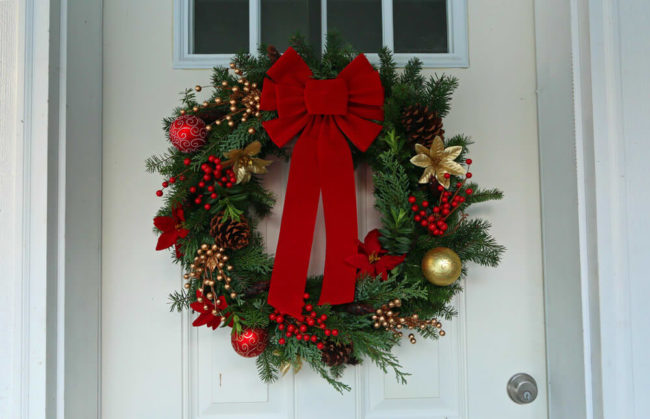
Mirror decoration with branches
If you are tired of the old mirror and you want to change it, do not rush. With the help of sections of branches, you can decorate your mirror, and it will sparkle with its beauty in a new look. 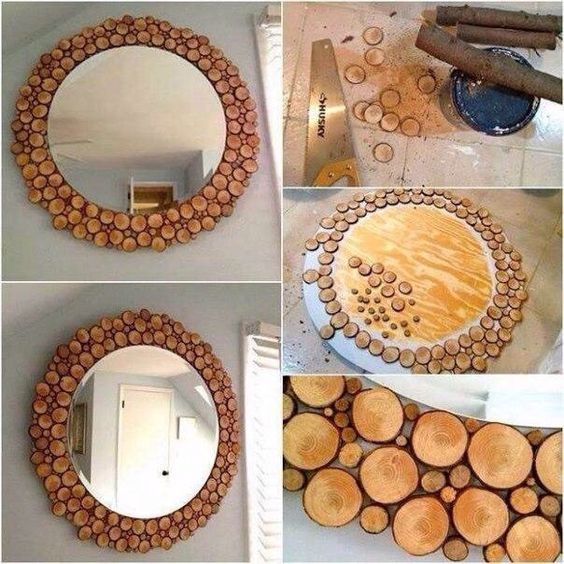 Mirror decorated with saw cuts What is needed for this:
- Twigs of different diameters.
- A file on a tree.
- Hot glue gun.
Work process:
Also, from small dostochk can be done just such a lesson here! 
Wall decor
With the help of branches you can make various decorations- - Look, you will definitely find something for yourself! And now we offer a simple master class for the manufacture of sea horses. It will decorate your room, giving it originality. To make the decor more original, create your own figure.  The decor of the branches for the wall To do this, you must have:
- Twigs of different sizes and diameters.
- Pruner for branches.
- Hot glue gun.
- Cardboard, simple pencil, scissors.
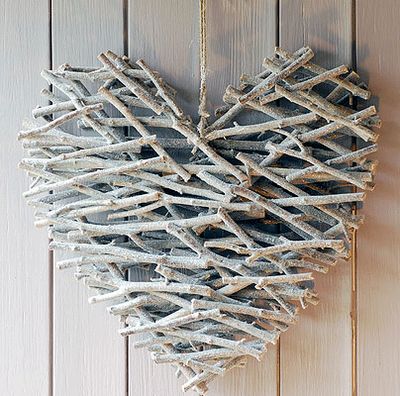
Step 1 Draw a piece of cardboard on the cardboard, for example, a sea horse. And cut with scissors. 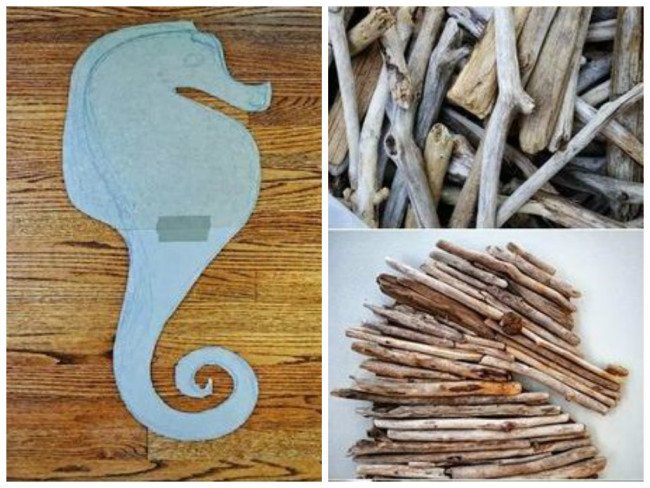 Cut out the shape of the paper. Step 2 Take the hotglue gun, apply glue to the twigs and stick them on the cardboard blank, vylazhivaya them one to one. Step 3 When finish gluing. Take a pruner for branches and twigs that extend beyond the edges of your base, trim. So get a very beautiful decor on the wall. In the same way, you can make crafts for the new year in the form of a Christmas tree, decorating it with a decor, or a star on the door, crafts for Valentine's Day. Twig heart
Comments
Related posts:
 Crafts from willow and cone branches for own hands for the 2015 competition
 This master class with a description and photo will teach you how to make crafts from felt by yourself.
 If you want to learn how to make your own handiwork of wood and branches, look in our master class.
 How to make a bouquet of chocolates with your own hands, a few detailed master classes in the style of the suite design, step-by-step photos and a detailed description of the work
 Eco-decor. Crafts made of twigs with their own hands.