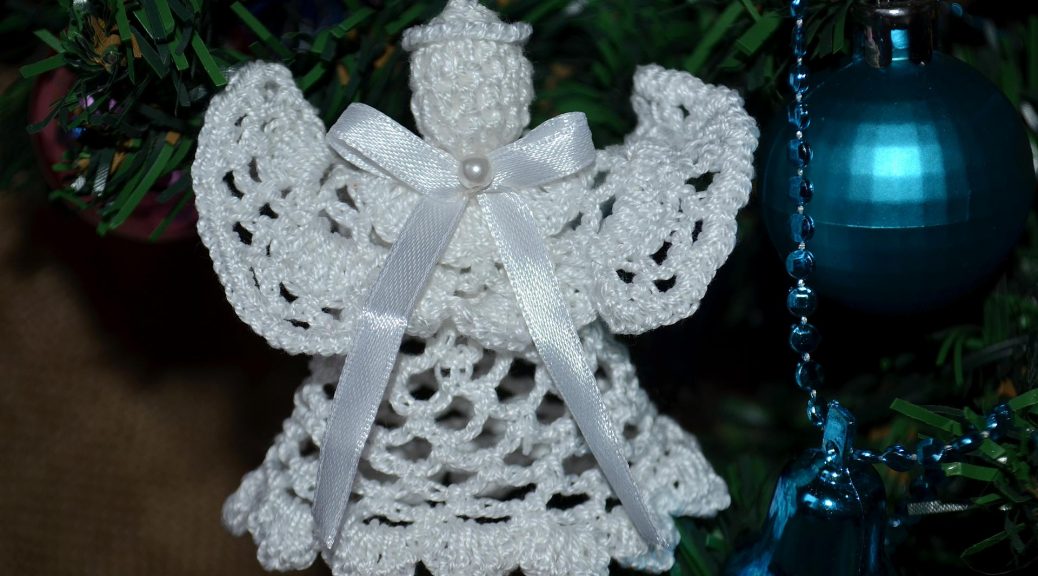
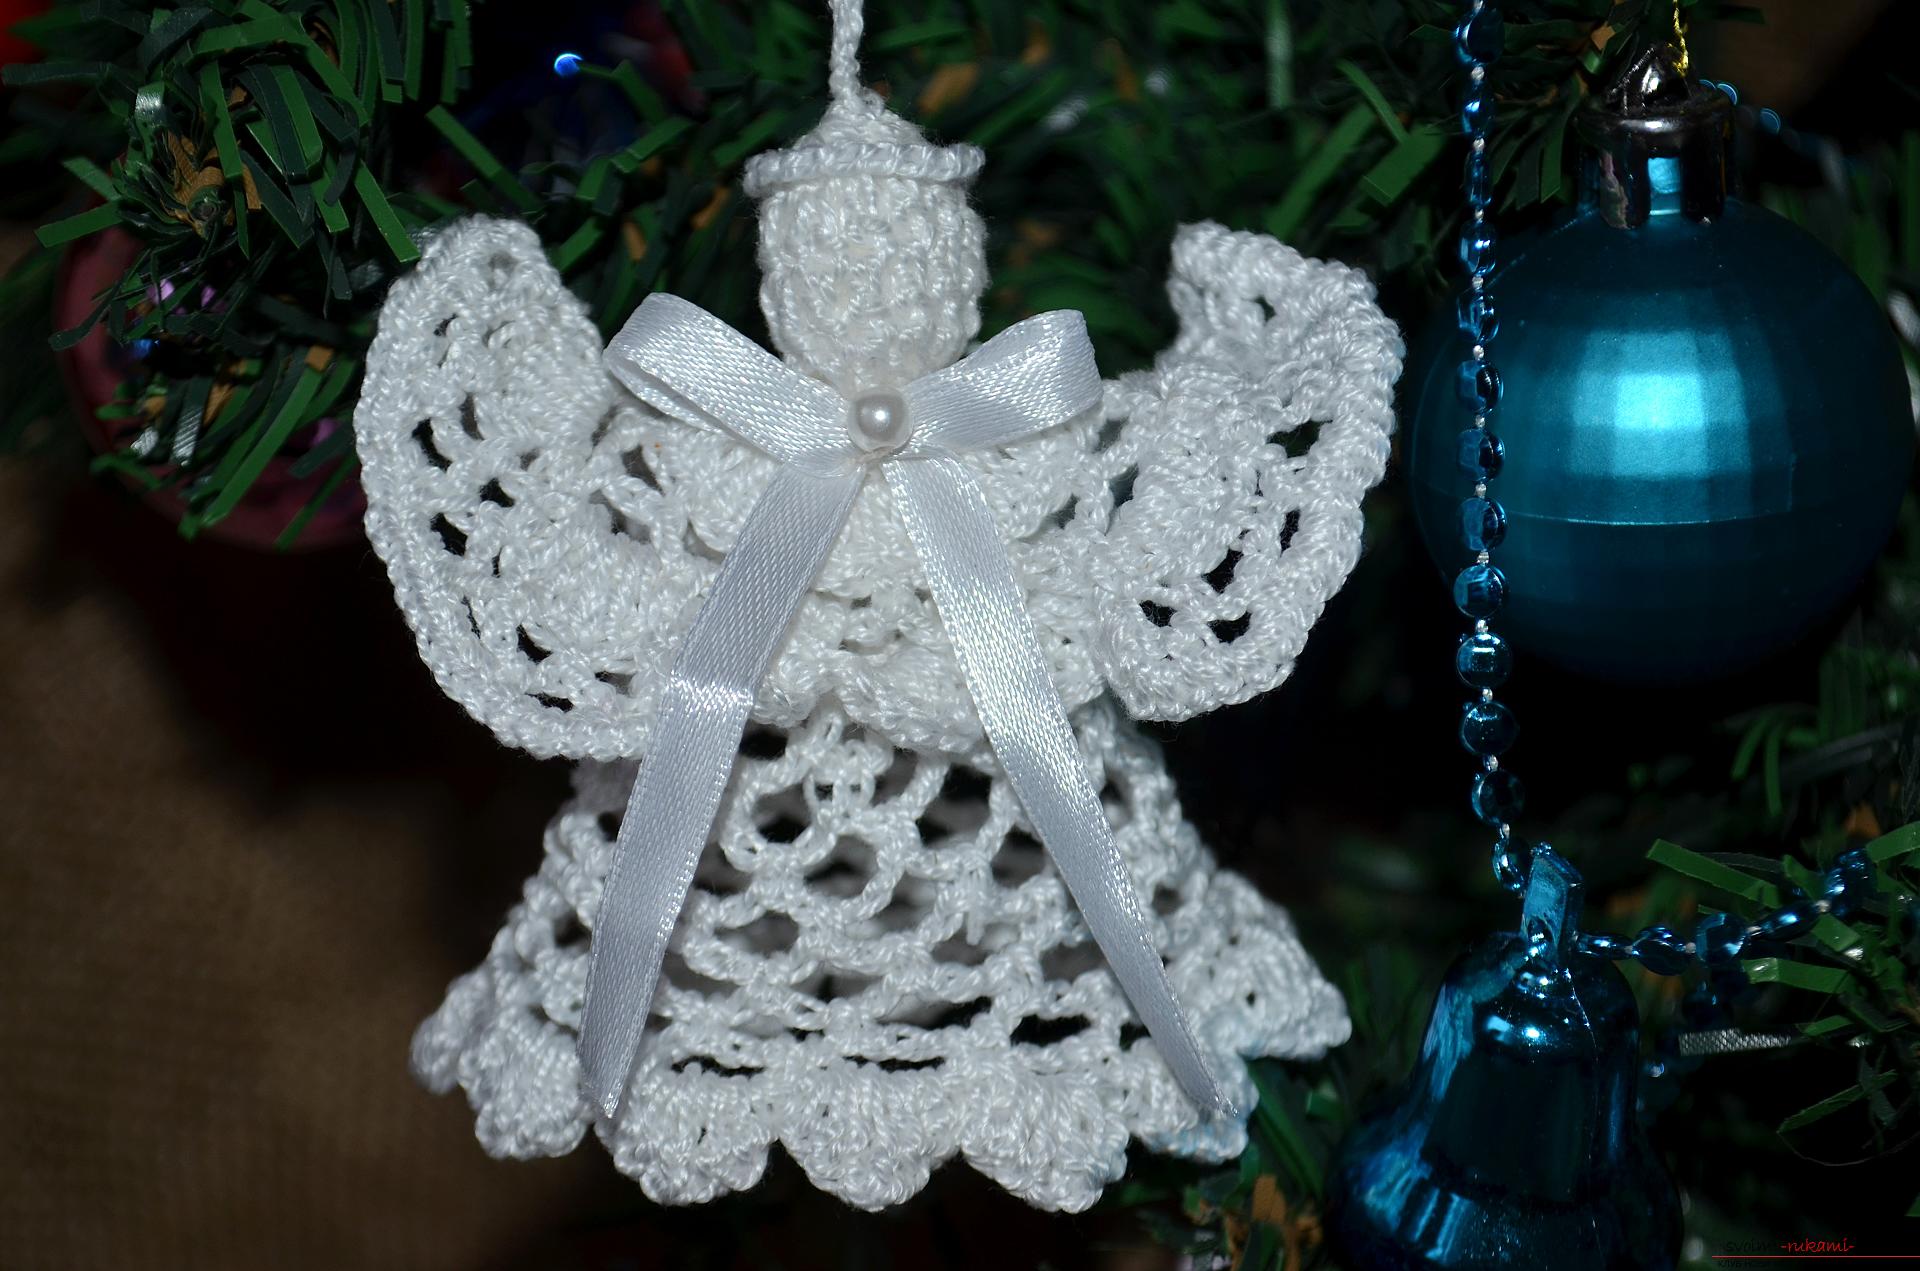
How to create a stylish decoration for the Christmas tree "Christmas Angel"? Step-by-step guide to crocheting an angel with a crochet
That in your house there was happiness, love andwell-being, since ancient times it's customary to hang a Christmas tree on a twig of a Christmas tree. Previously, such figures were cut from wood, woven from straw or cut from paper, today such decorations are easy, on the eve of the New Year's and Christmas holidays can be bought at any suitable store. However, such decorations can also be made independently with their own hands, unlike cheap factory stamping, such an angel can become a real keeper of your family hearth, because creating it you put in the toy all the warmth of your hands, love and tenderness.
Materials and tools
So, to make a Christmas angel, crocheted we need:
- a hank of fine mercerized white yarn;
- Crochet hook;
- 10 cm thin white satin ribbon;
- a small white pearl bead;
- sewing needle;
- scissors.
Description of work
1. We form the first air loop and we tie it around in circles with columns with one overhang, so. That we have a knitted detail resembling a circle in shape. 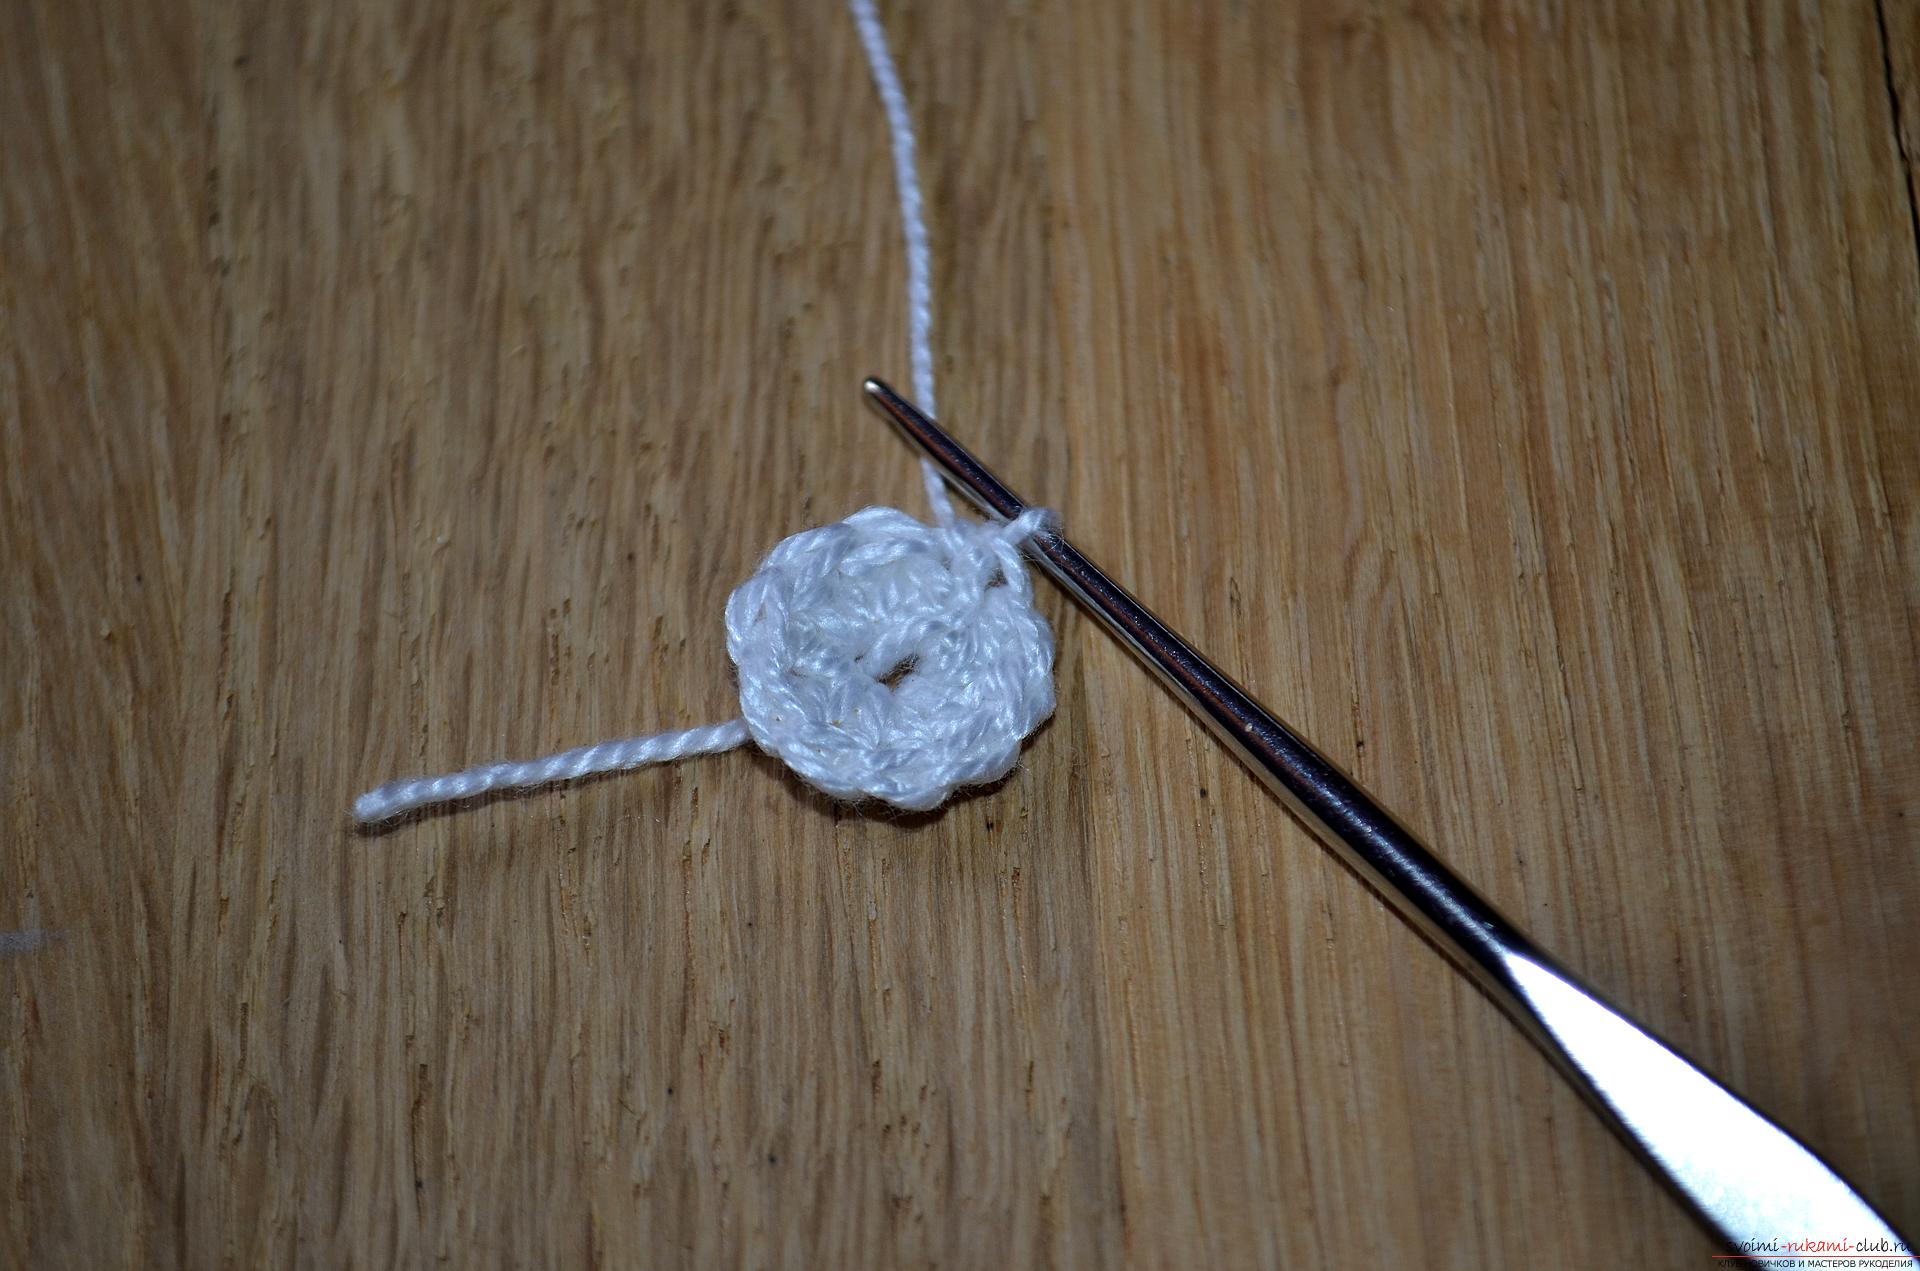 2. Next, we knit in a circle the second row for this we also use columns with one crochet, and we unfasten from each column of the lower row, only one upper row. Due to the fact that we did not make any additional rounds, our knitted detail looks like a small hat.
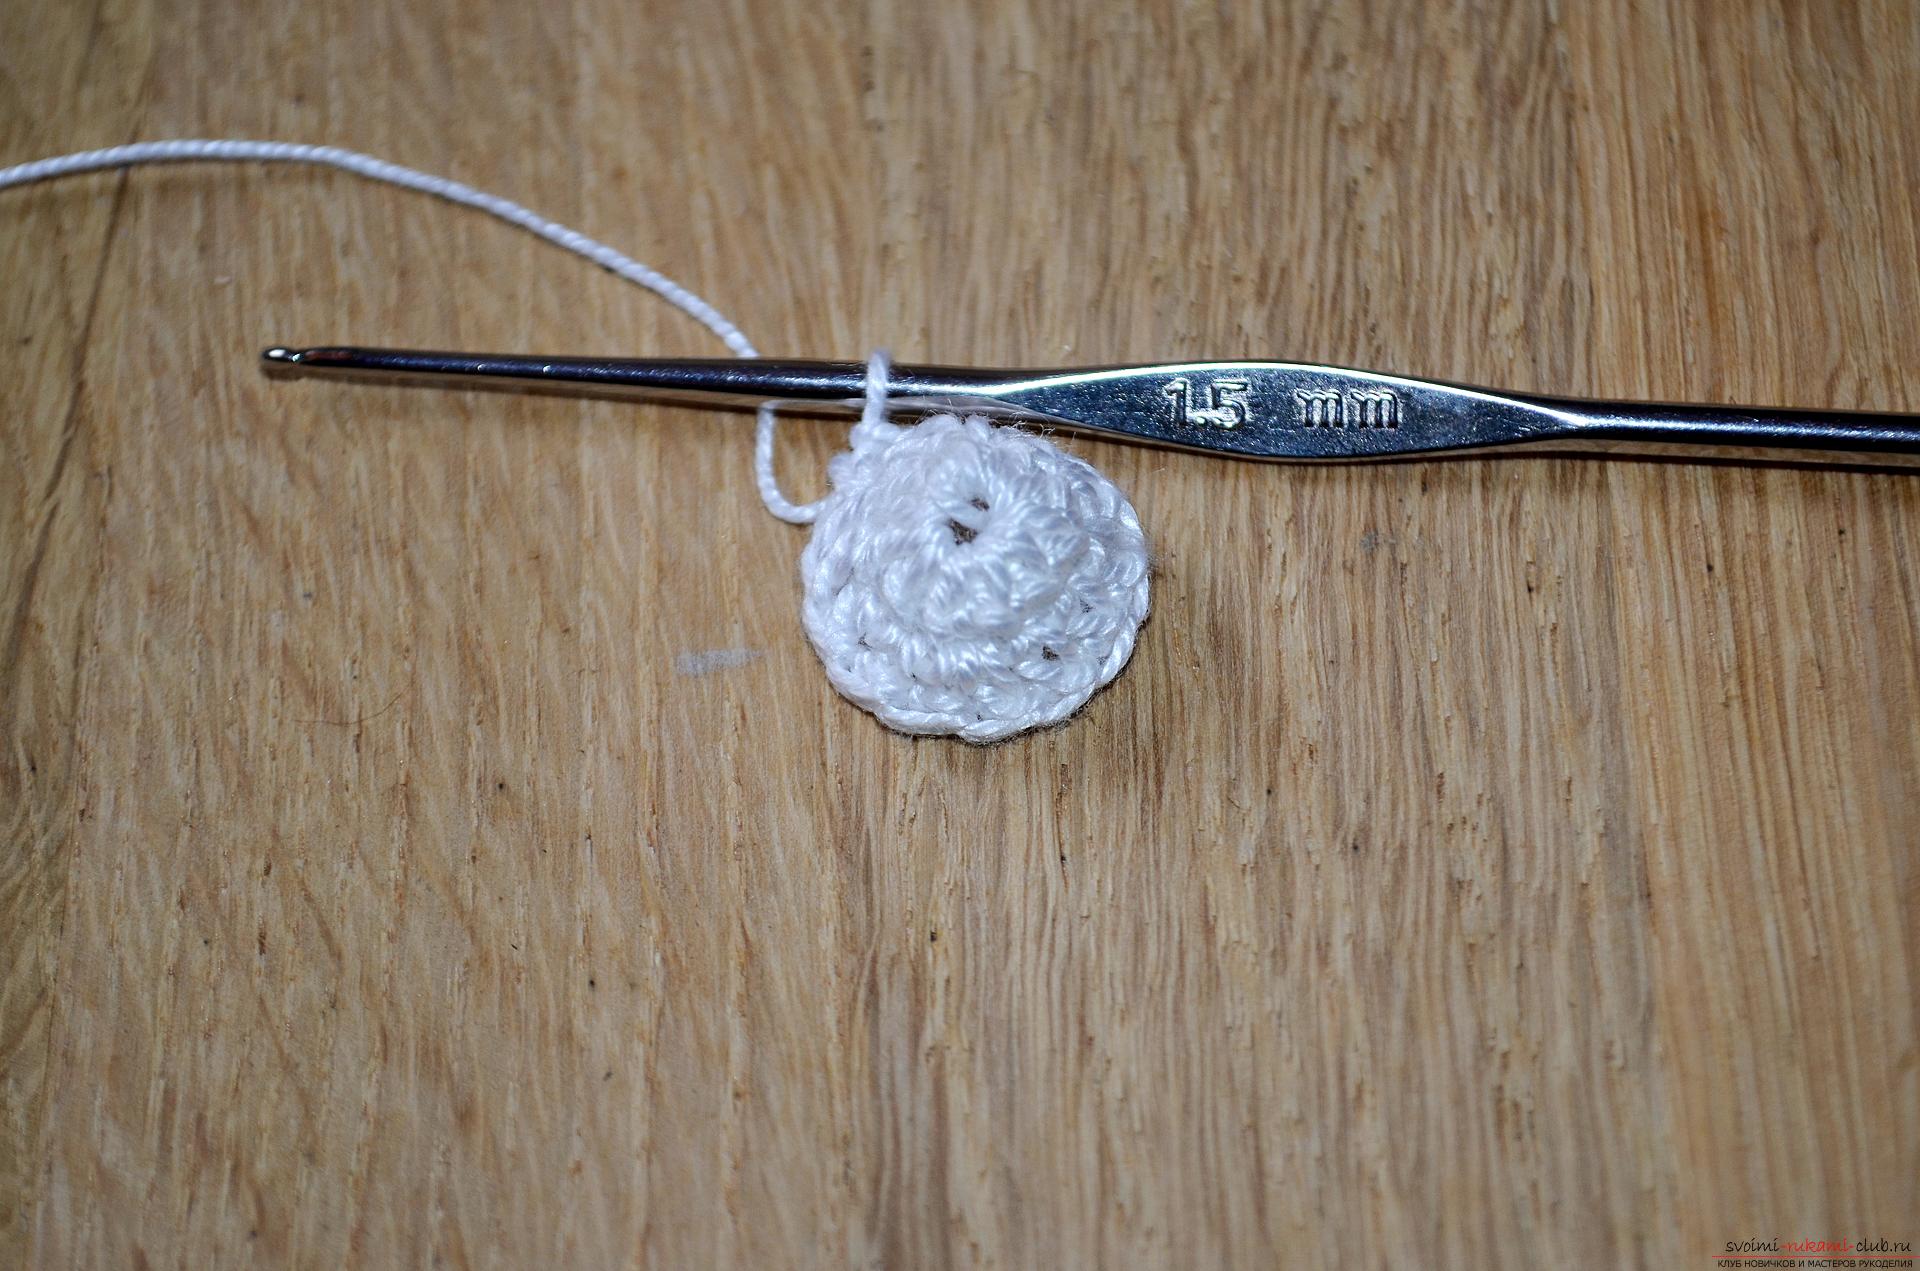 3. Following the second row, we knit the third cake with columns, in it we also do not make any additions, only we unfasten one new column from one column of the bottom row.
  4. As a result of three connected rows, we get a practically ready knitted detail of the angel's head, stuff it from the inside with a sintepon or ordinary cotton wool, and then pull all the loops together into one.
 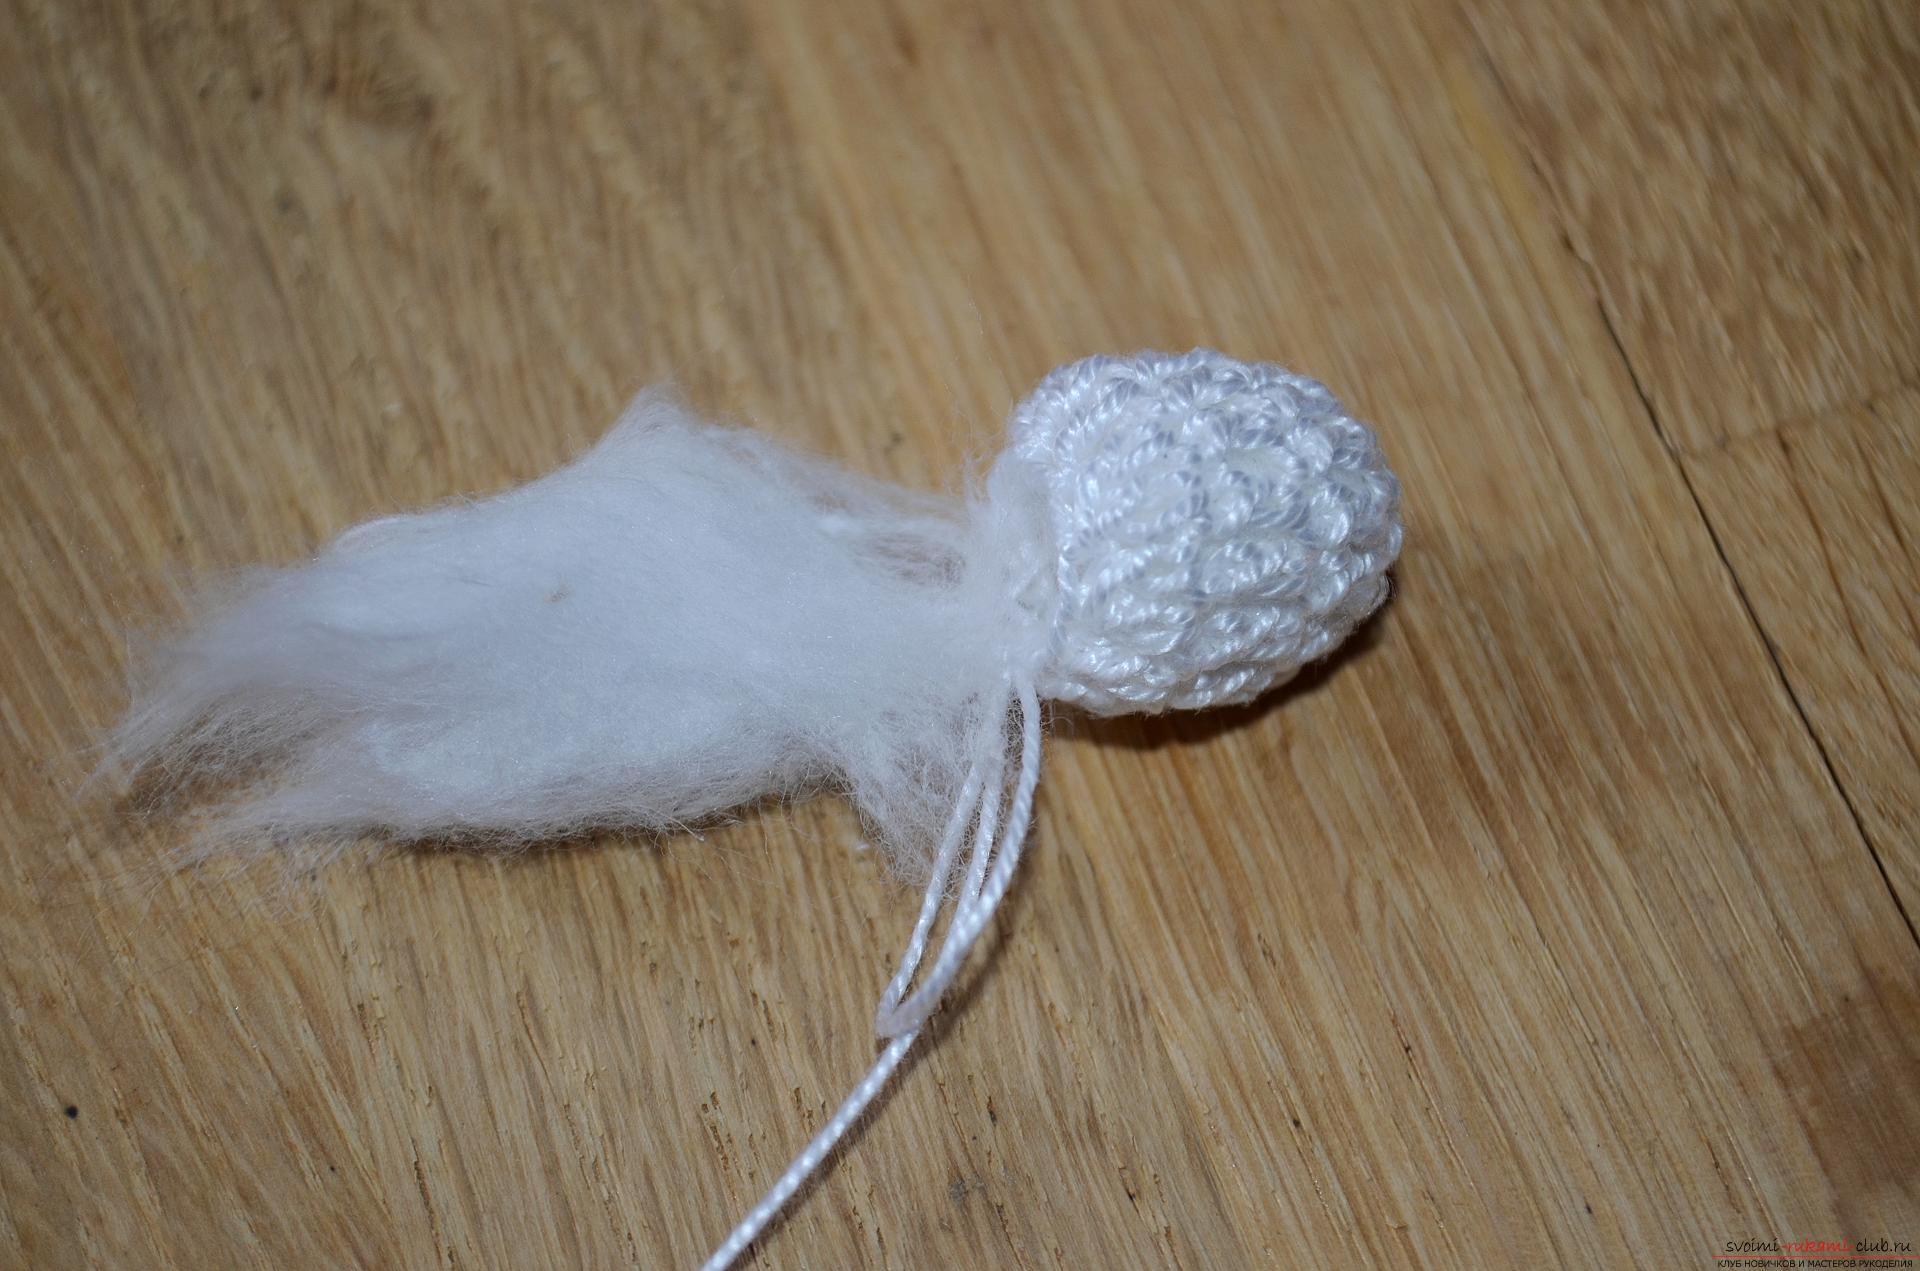 5. After the head of the angel is ready, we move on to further knitting the torso and wings, for this we tie a series of columns with one crochet around the head, this time we cut two bars from each lower loop and get this detail. Reminding collar.
 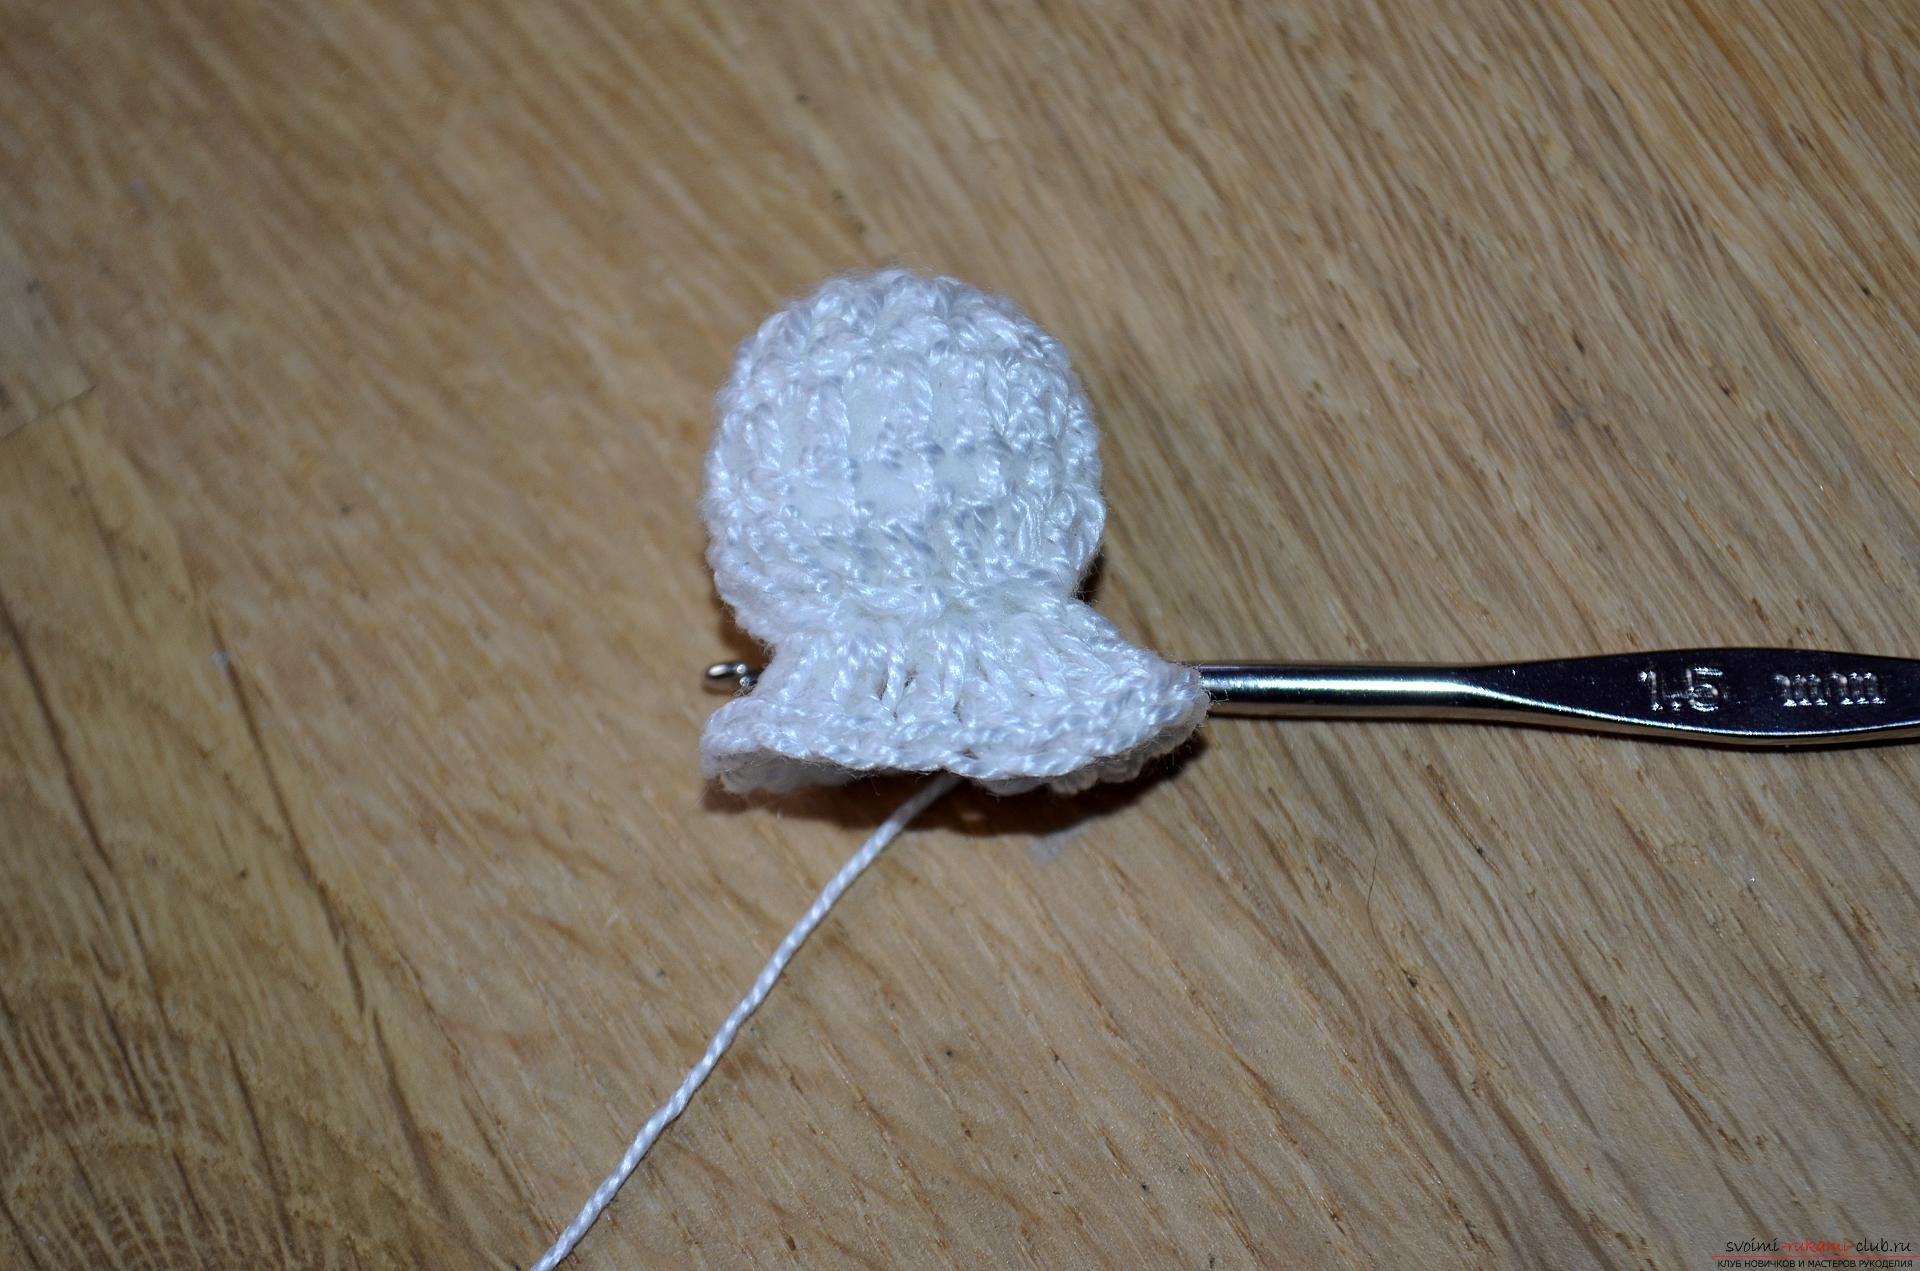 6. The next row is knitted similarly to the previous one, namely, from each column of the bottom row, we cut two columns with one top cuff.
  7. Now we will knit with small arches, each of which is a chain consisting of four air loops.
 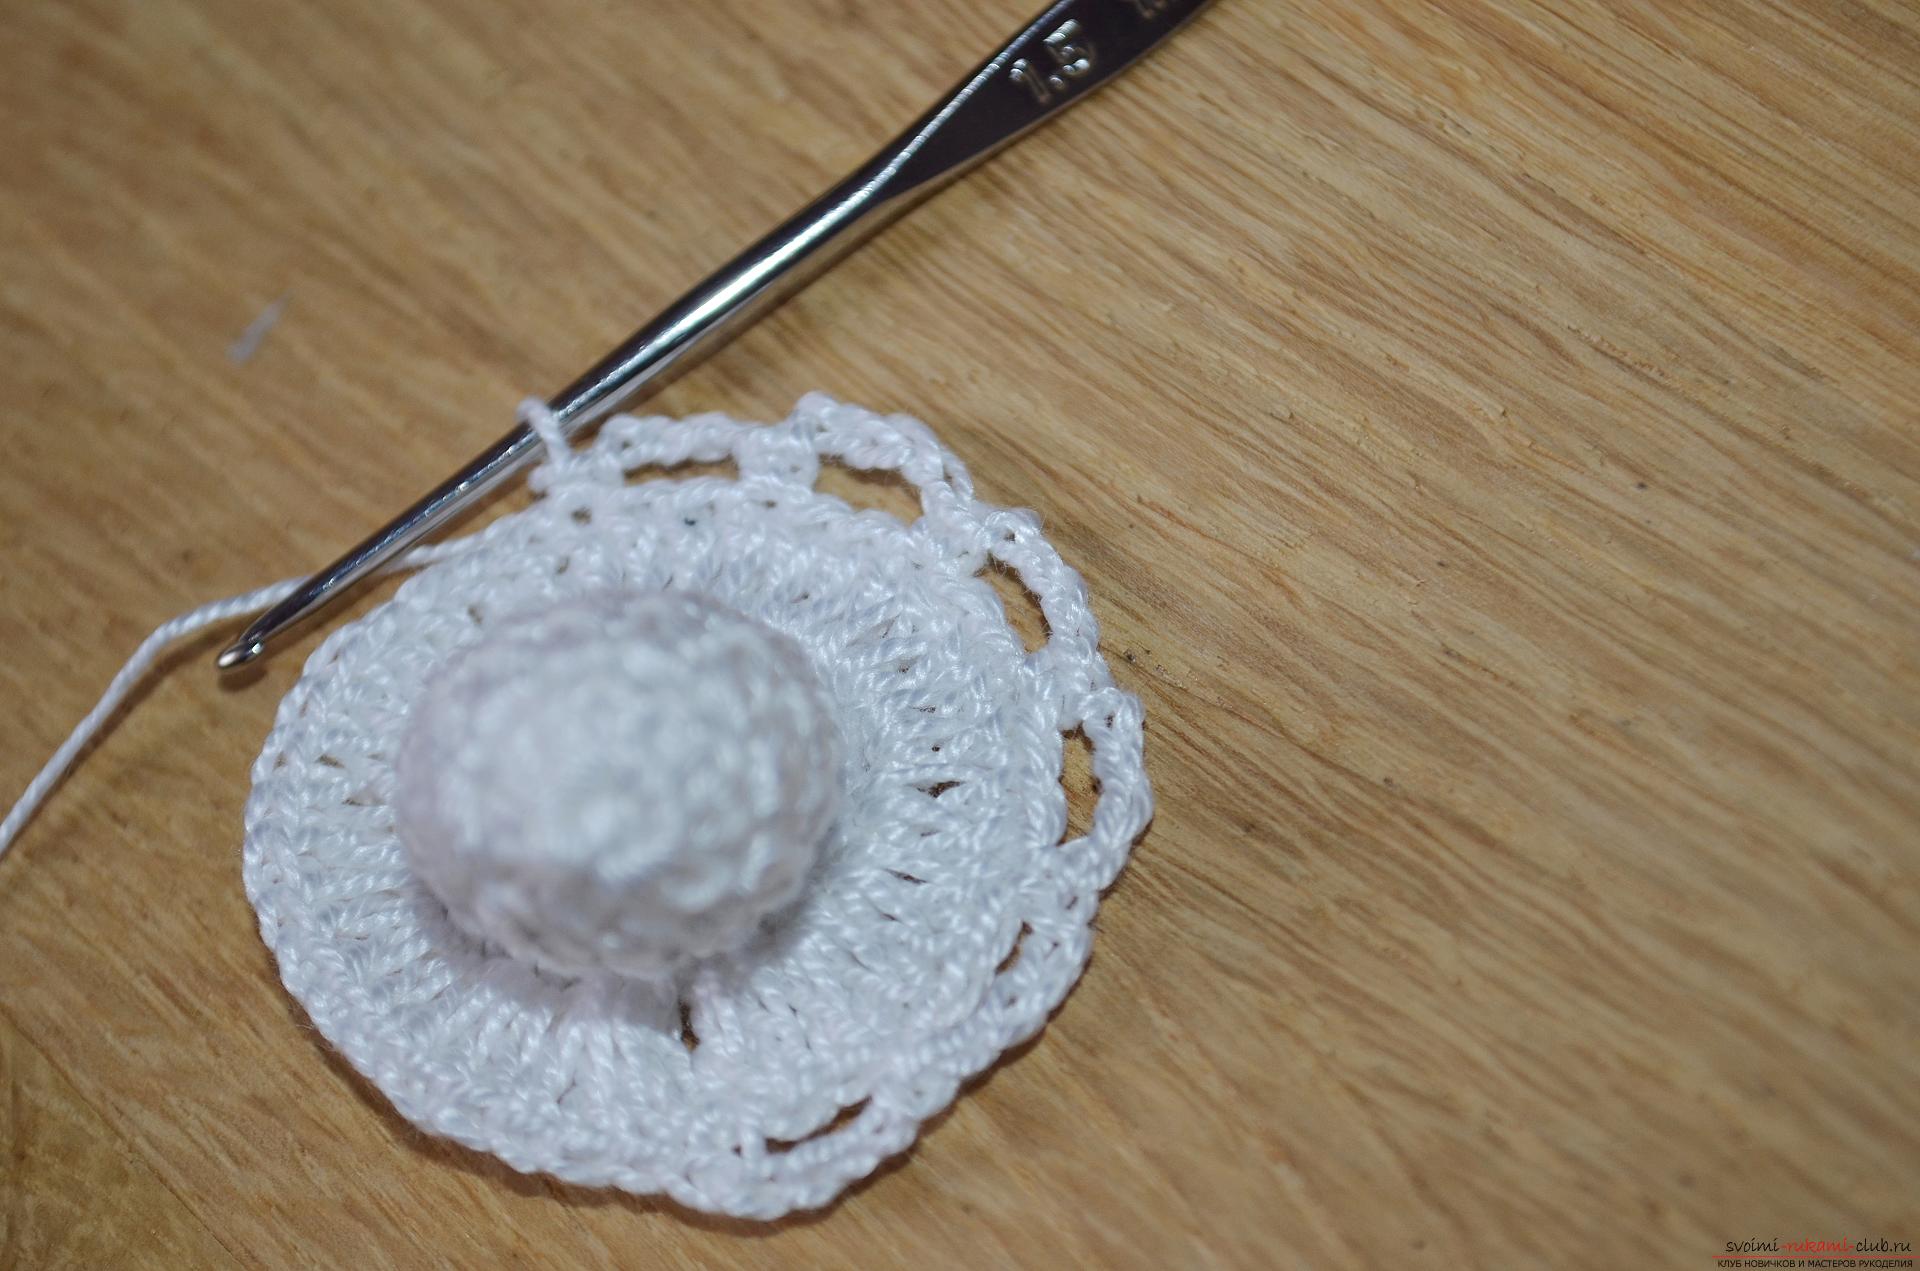 8. Next row also knit arches, placing them in a checkerboard pattern.
 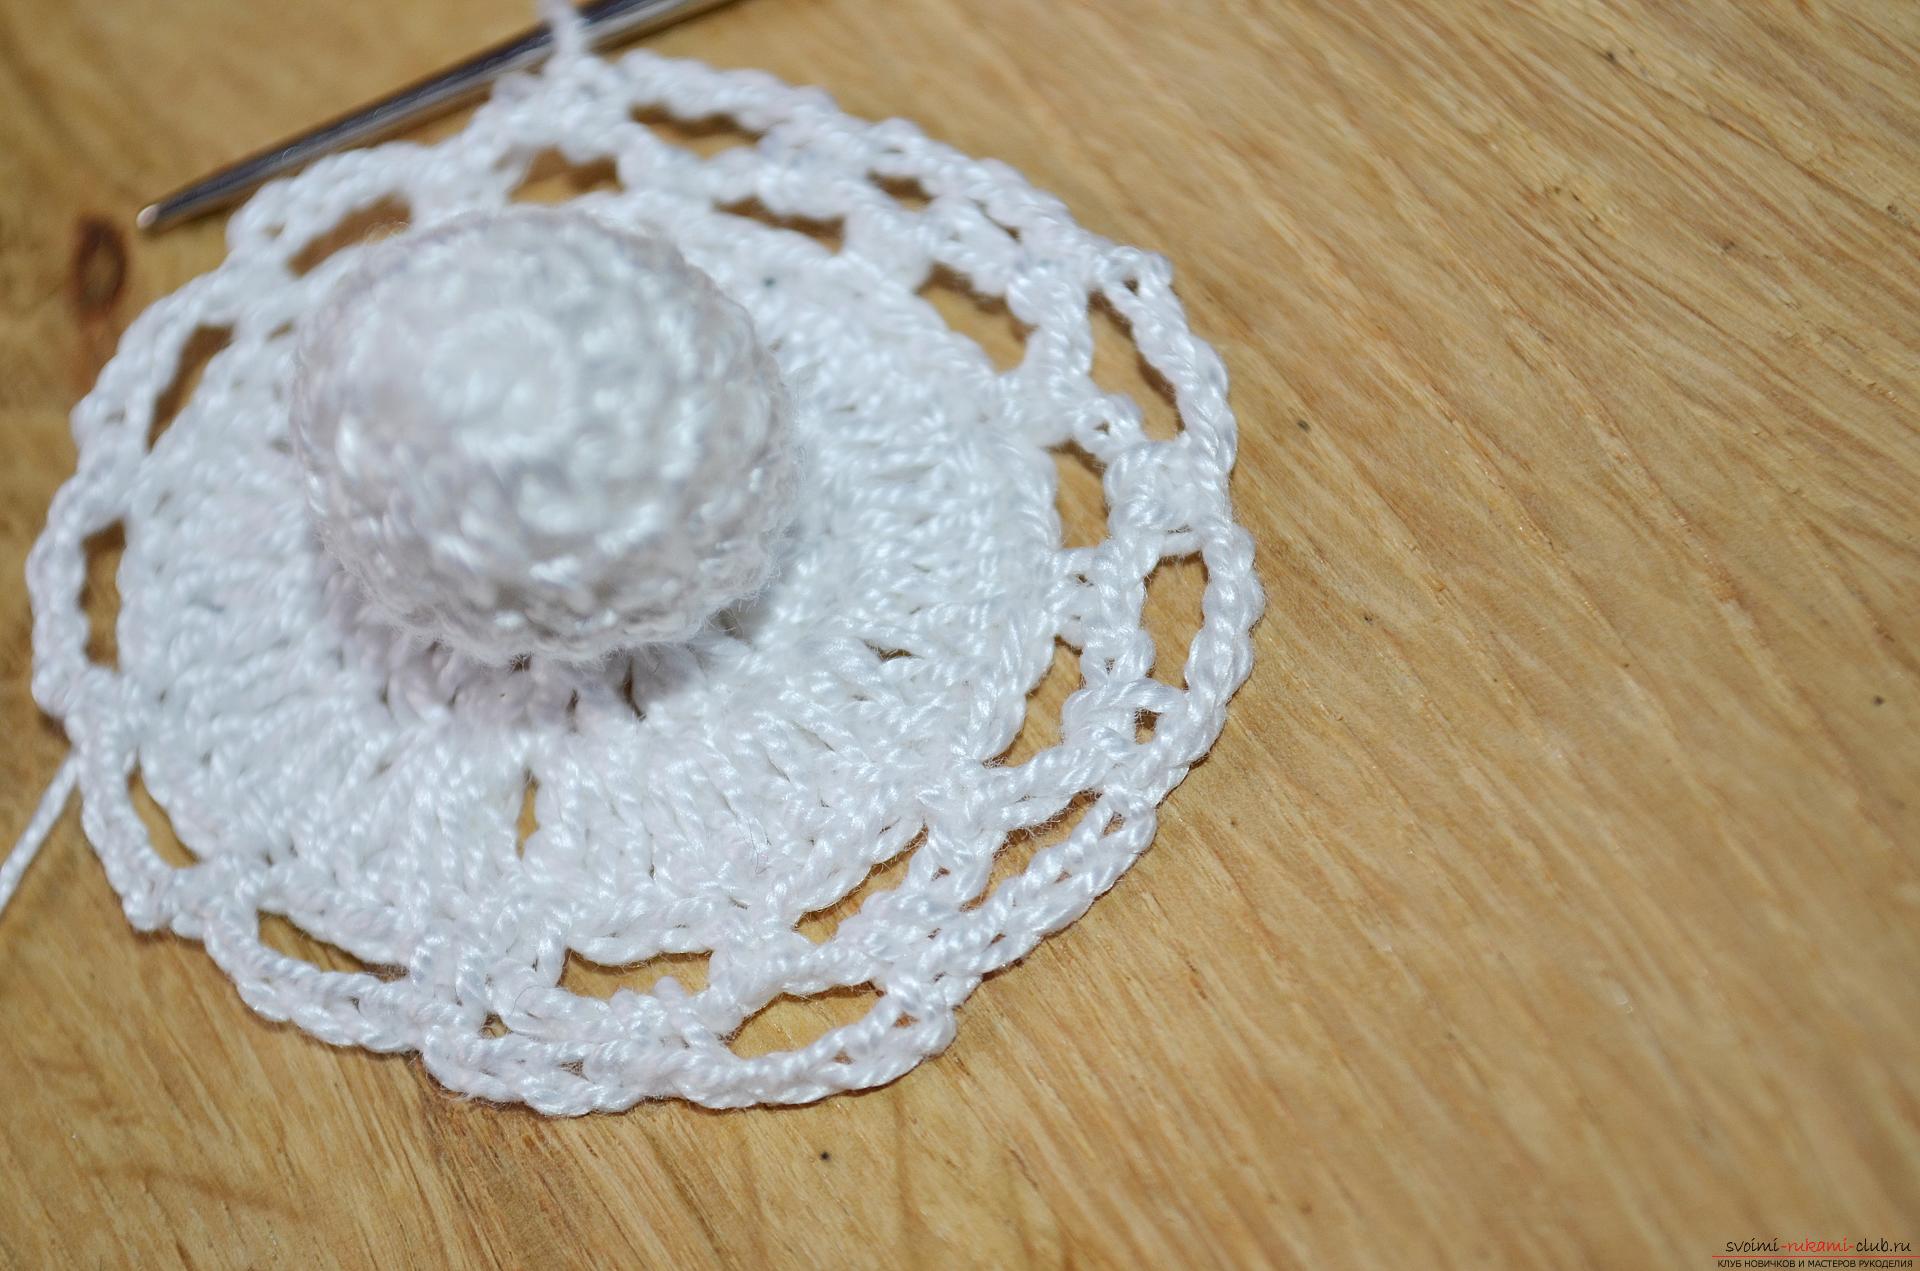 9.Next, the last row of arches we need to tie with elements resembling a pattern "fan" for this from the first arch, we knit one column without a crochet, then one column with one crochet, one column with two crochets, again one pile with one crochet and again a column without a crochet. We mess around the whole series in a circle.
  10.After this, we determine symmetrically where the wings of the angel will be allocated, we select three handles for each side on each side and we tie them with two rows of arches, each of which consists of three air loops.
  11. The last row of wings is tied with columns without a crochet. We fix the thread and cut off the excess.
 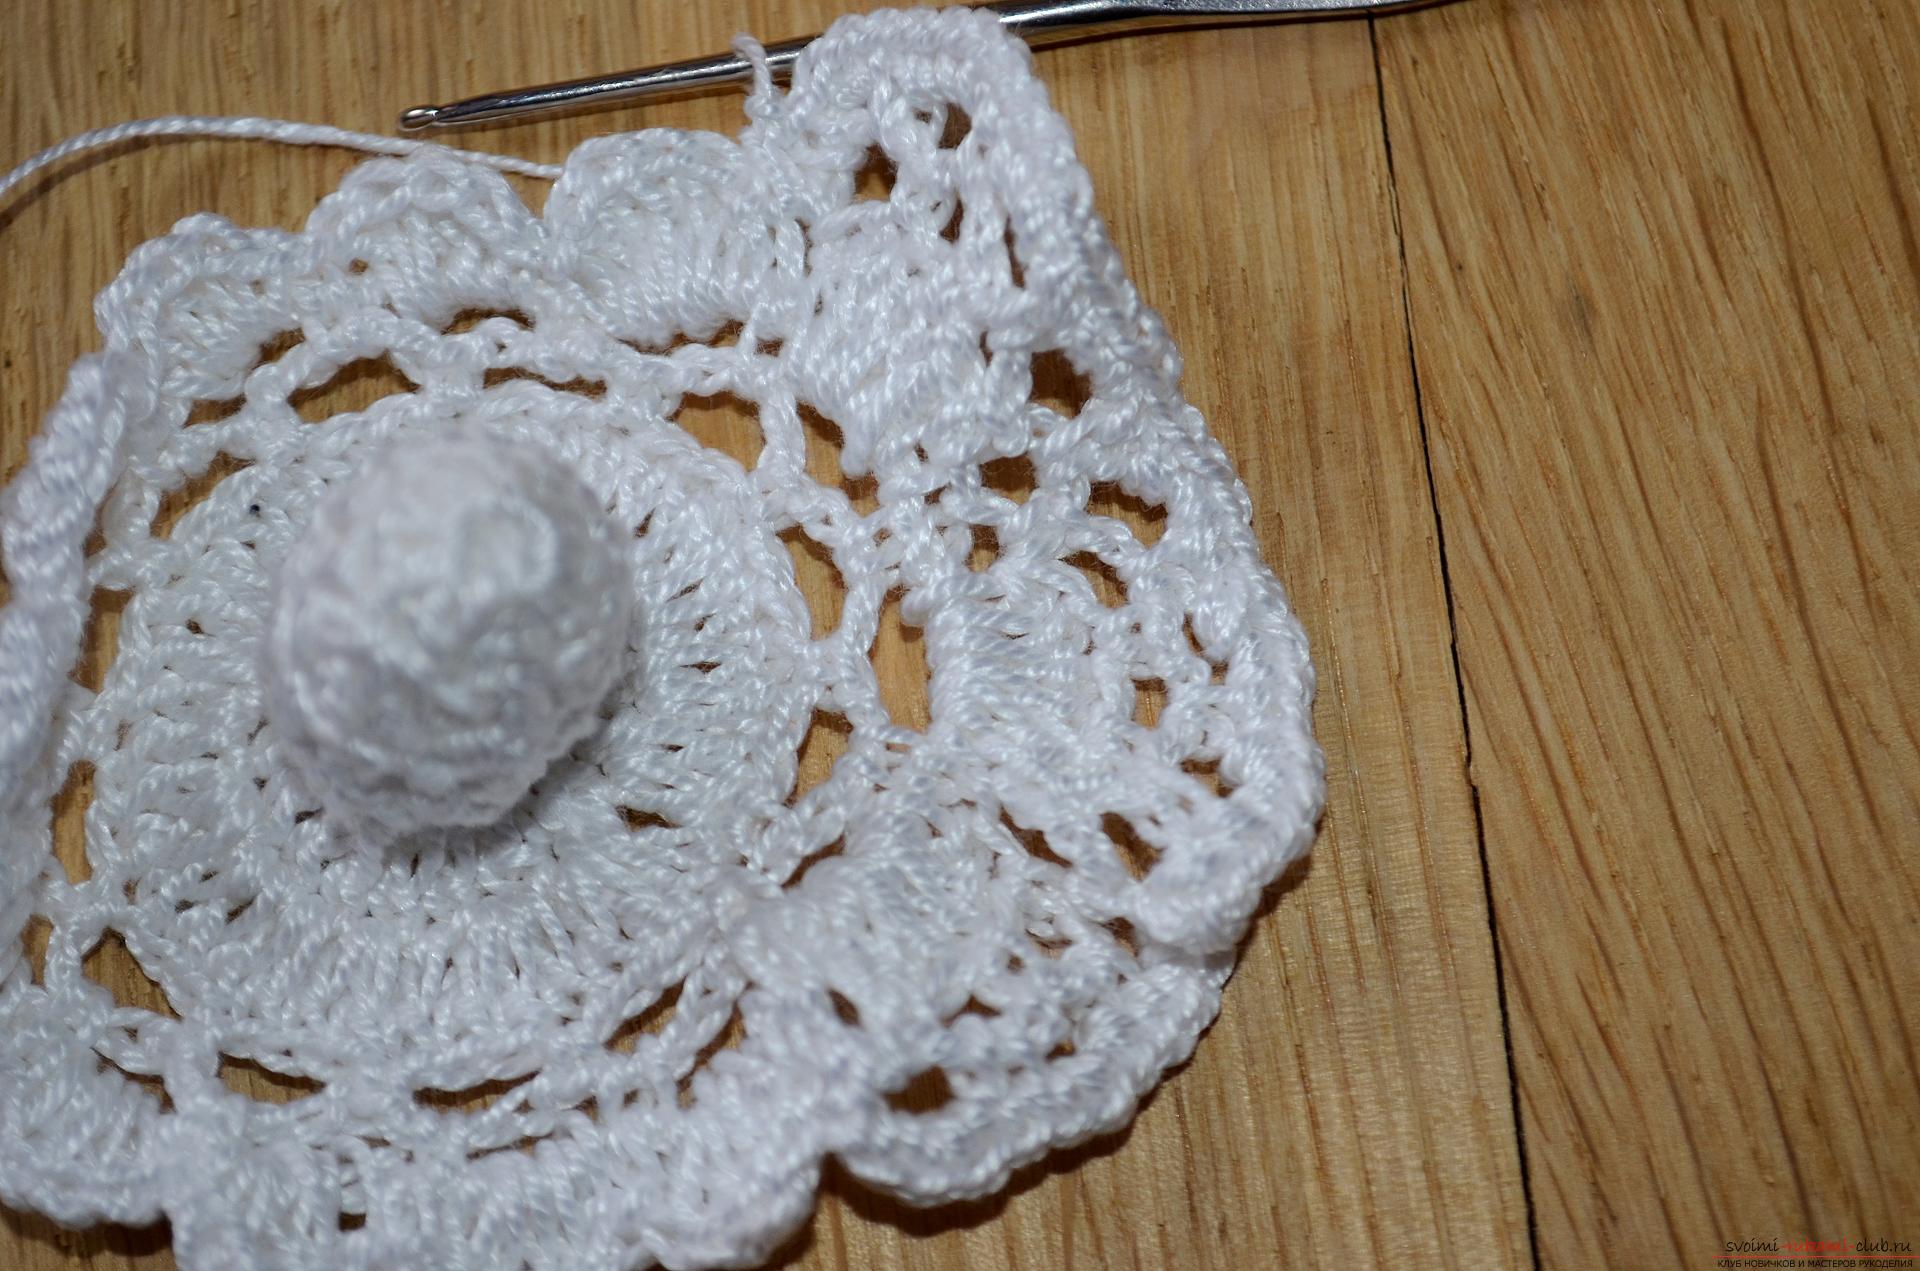 12. That's what we get.
  13. Now we need to tie the bottom of the angel's attire. To do this, from the inside we tie one circle line with arches consisting of four air loops each.
  14. Continue to knit further in a circle with the same arches, making even increments according to the knitting principle of the pattern "fillet mesh" nine more rows.
 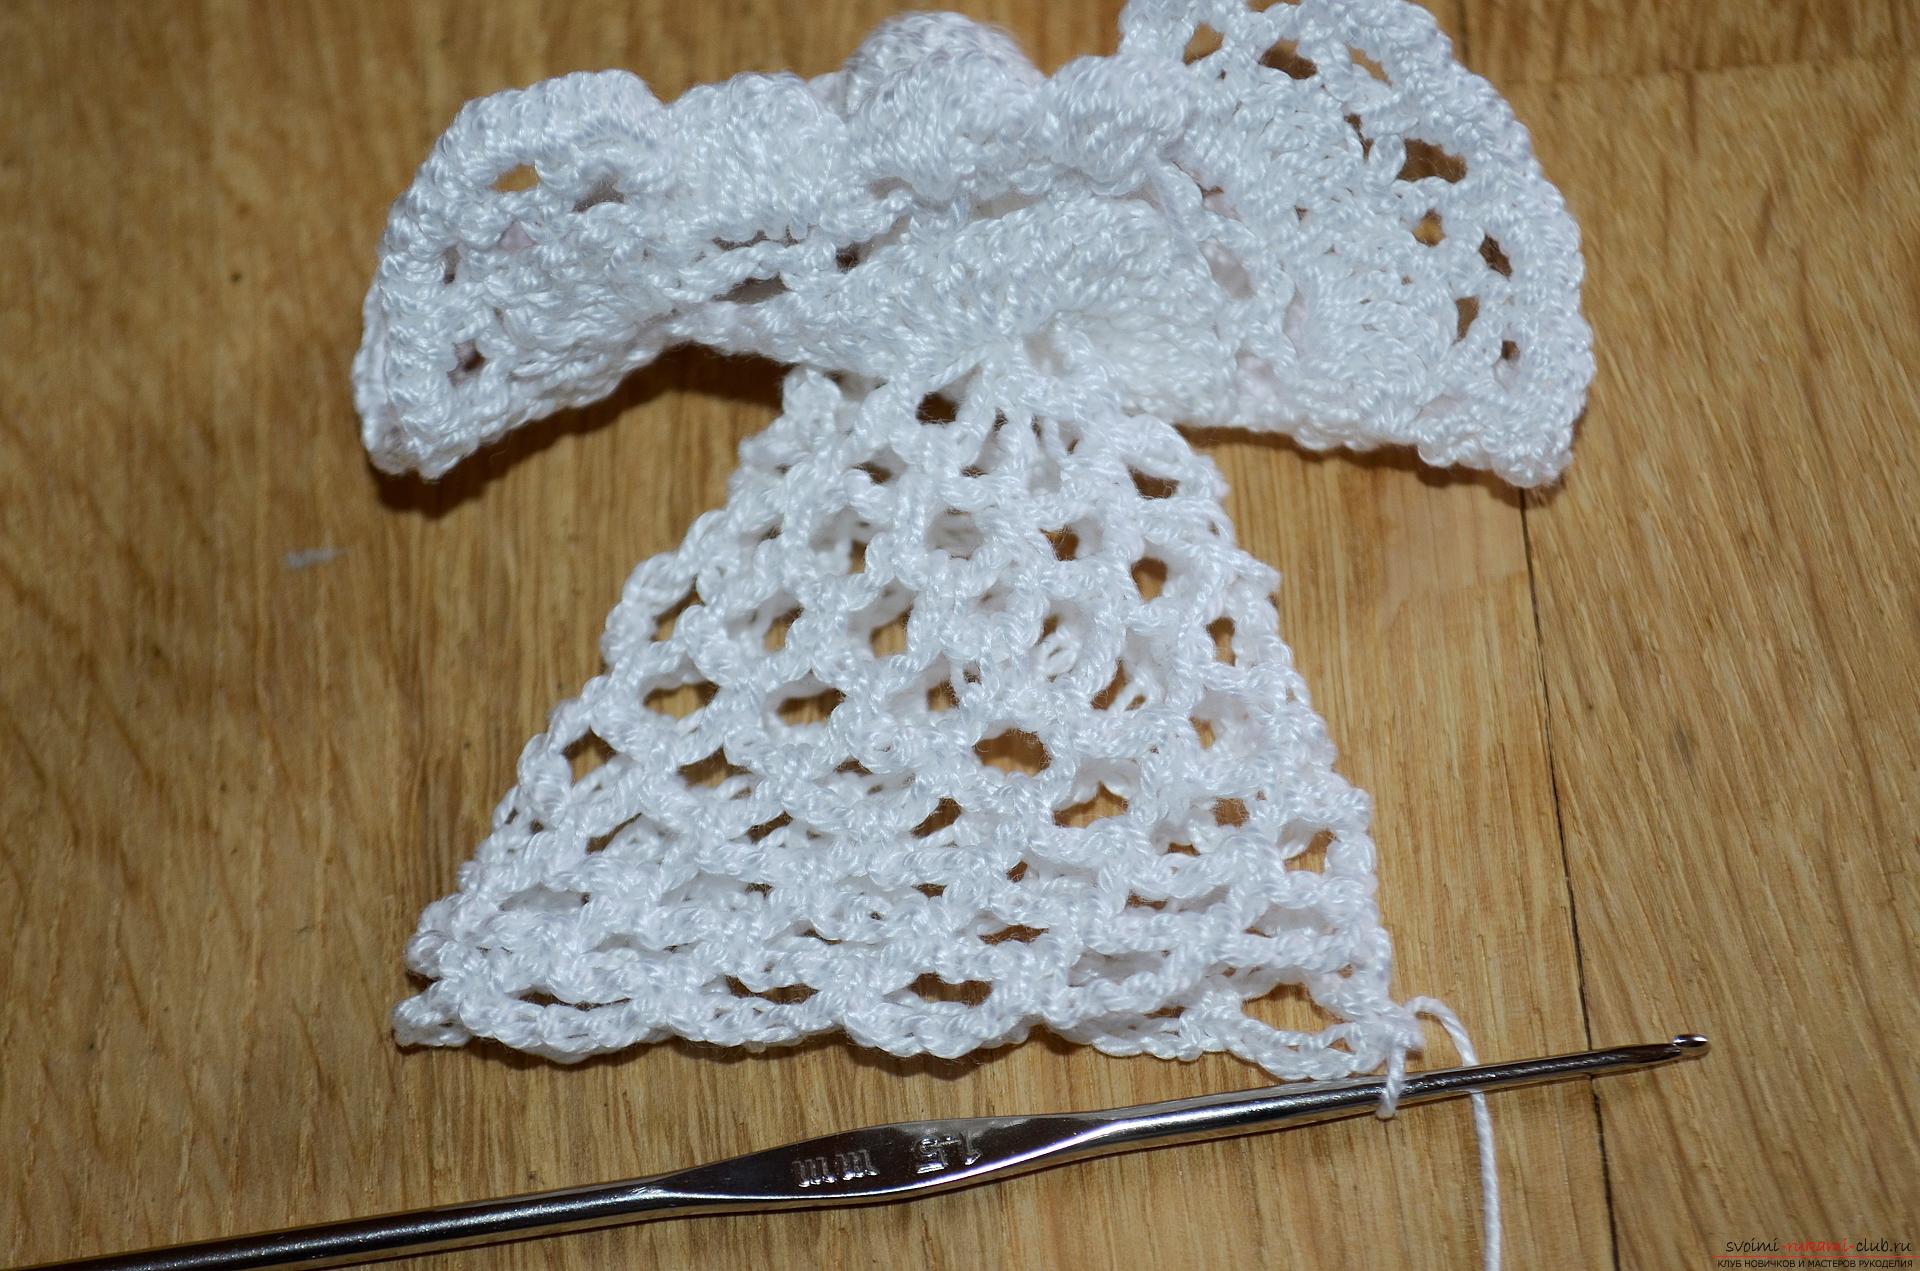 15. The last row is tied with "scoops", for this from each arch we unfasten one column without a crochet, two sticks with one crochet, one column with two cuffs, again two sticks with one cuff and one pile without a crochet.
 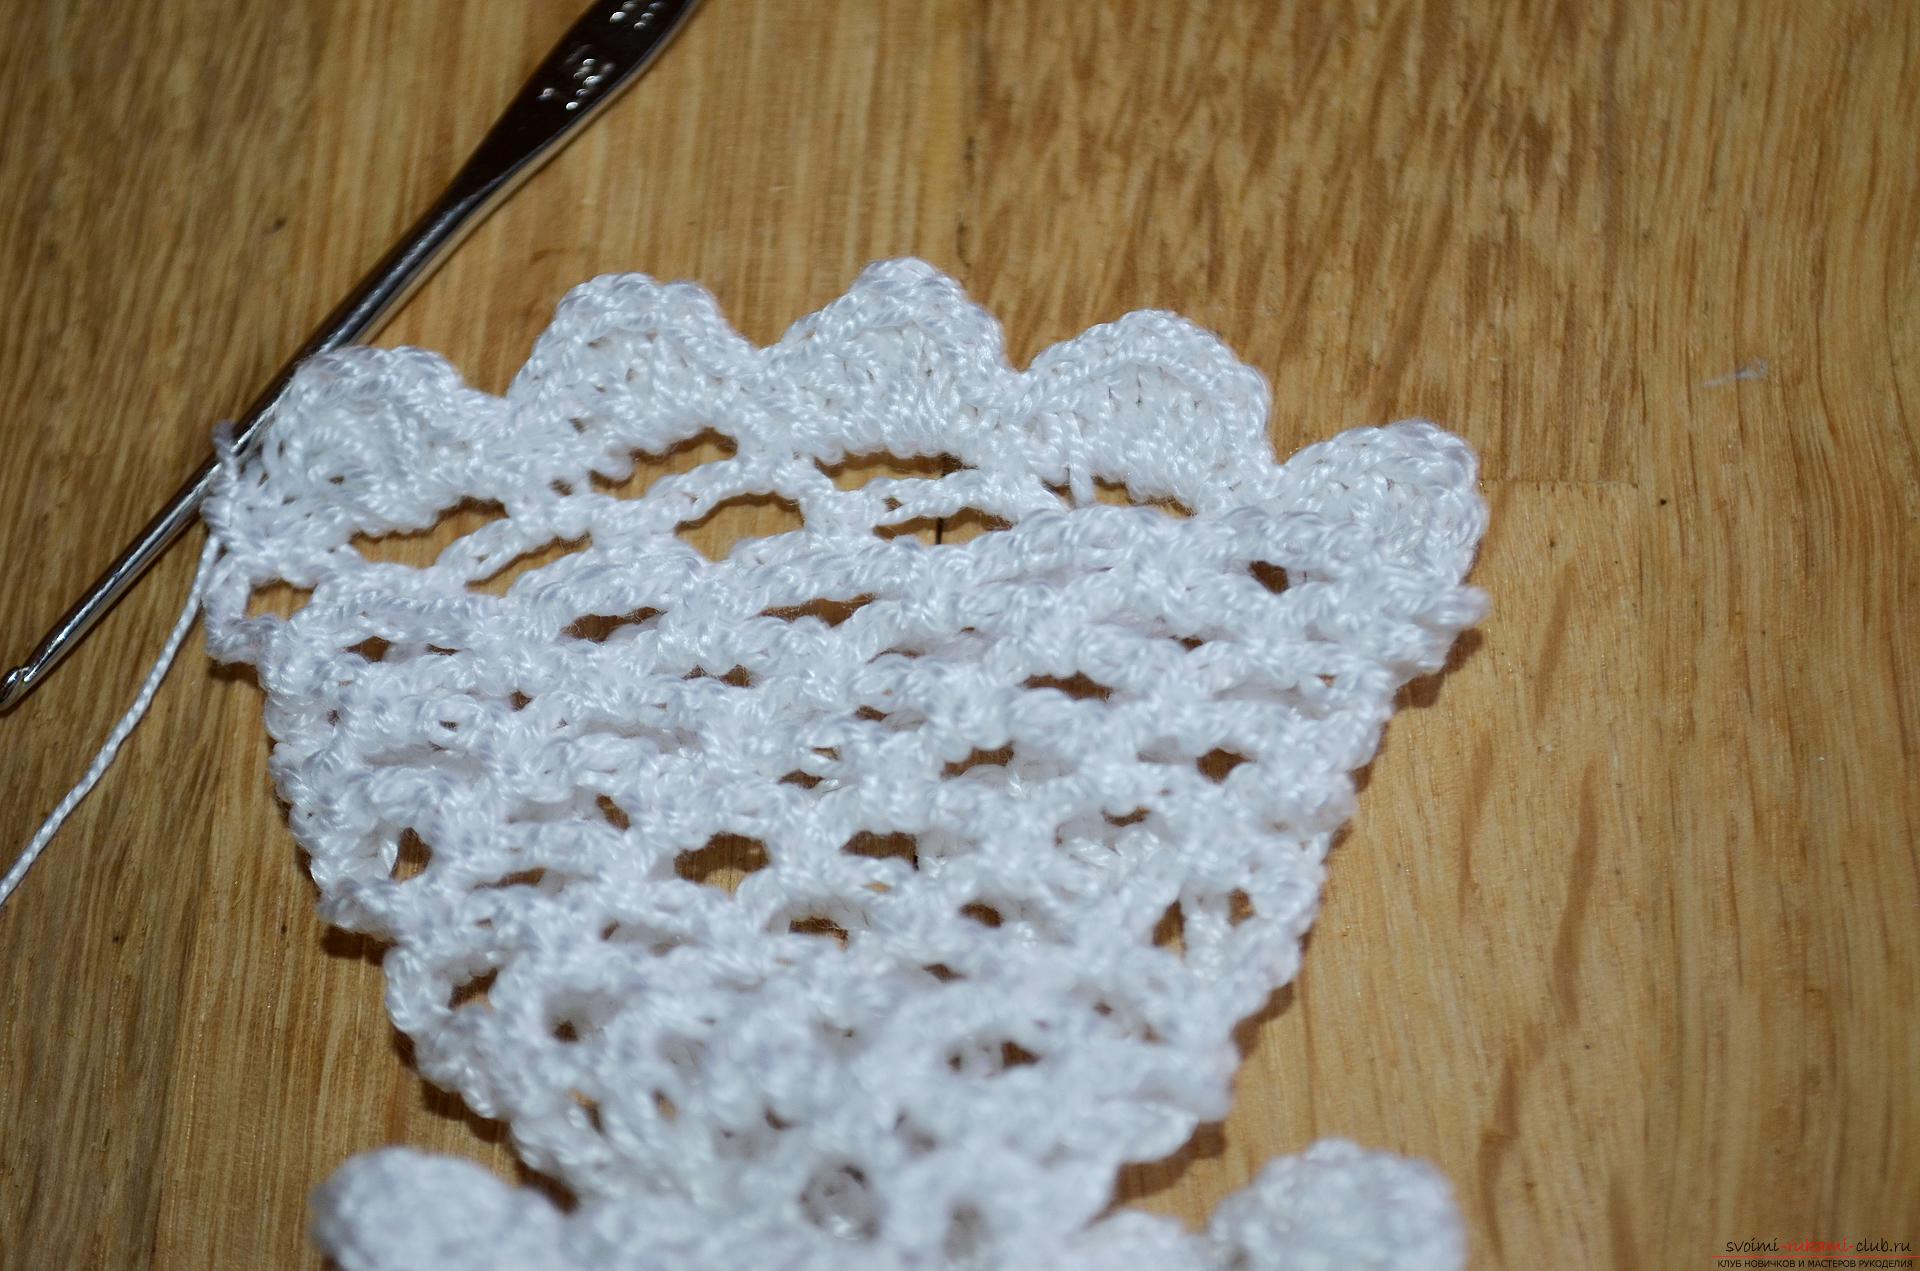 16. That's such a charming angel we have.
  17. To decorate the head of the angel with a halo, fix the thread from the occiput and unfasten the chain of fifteen air loops.
 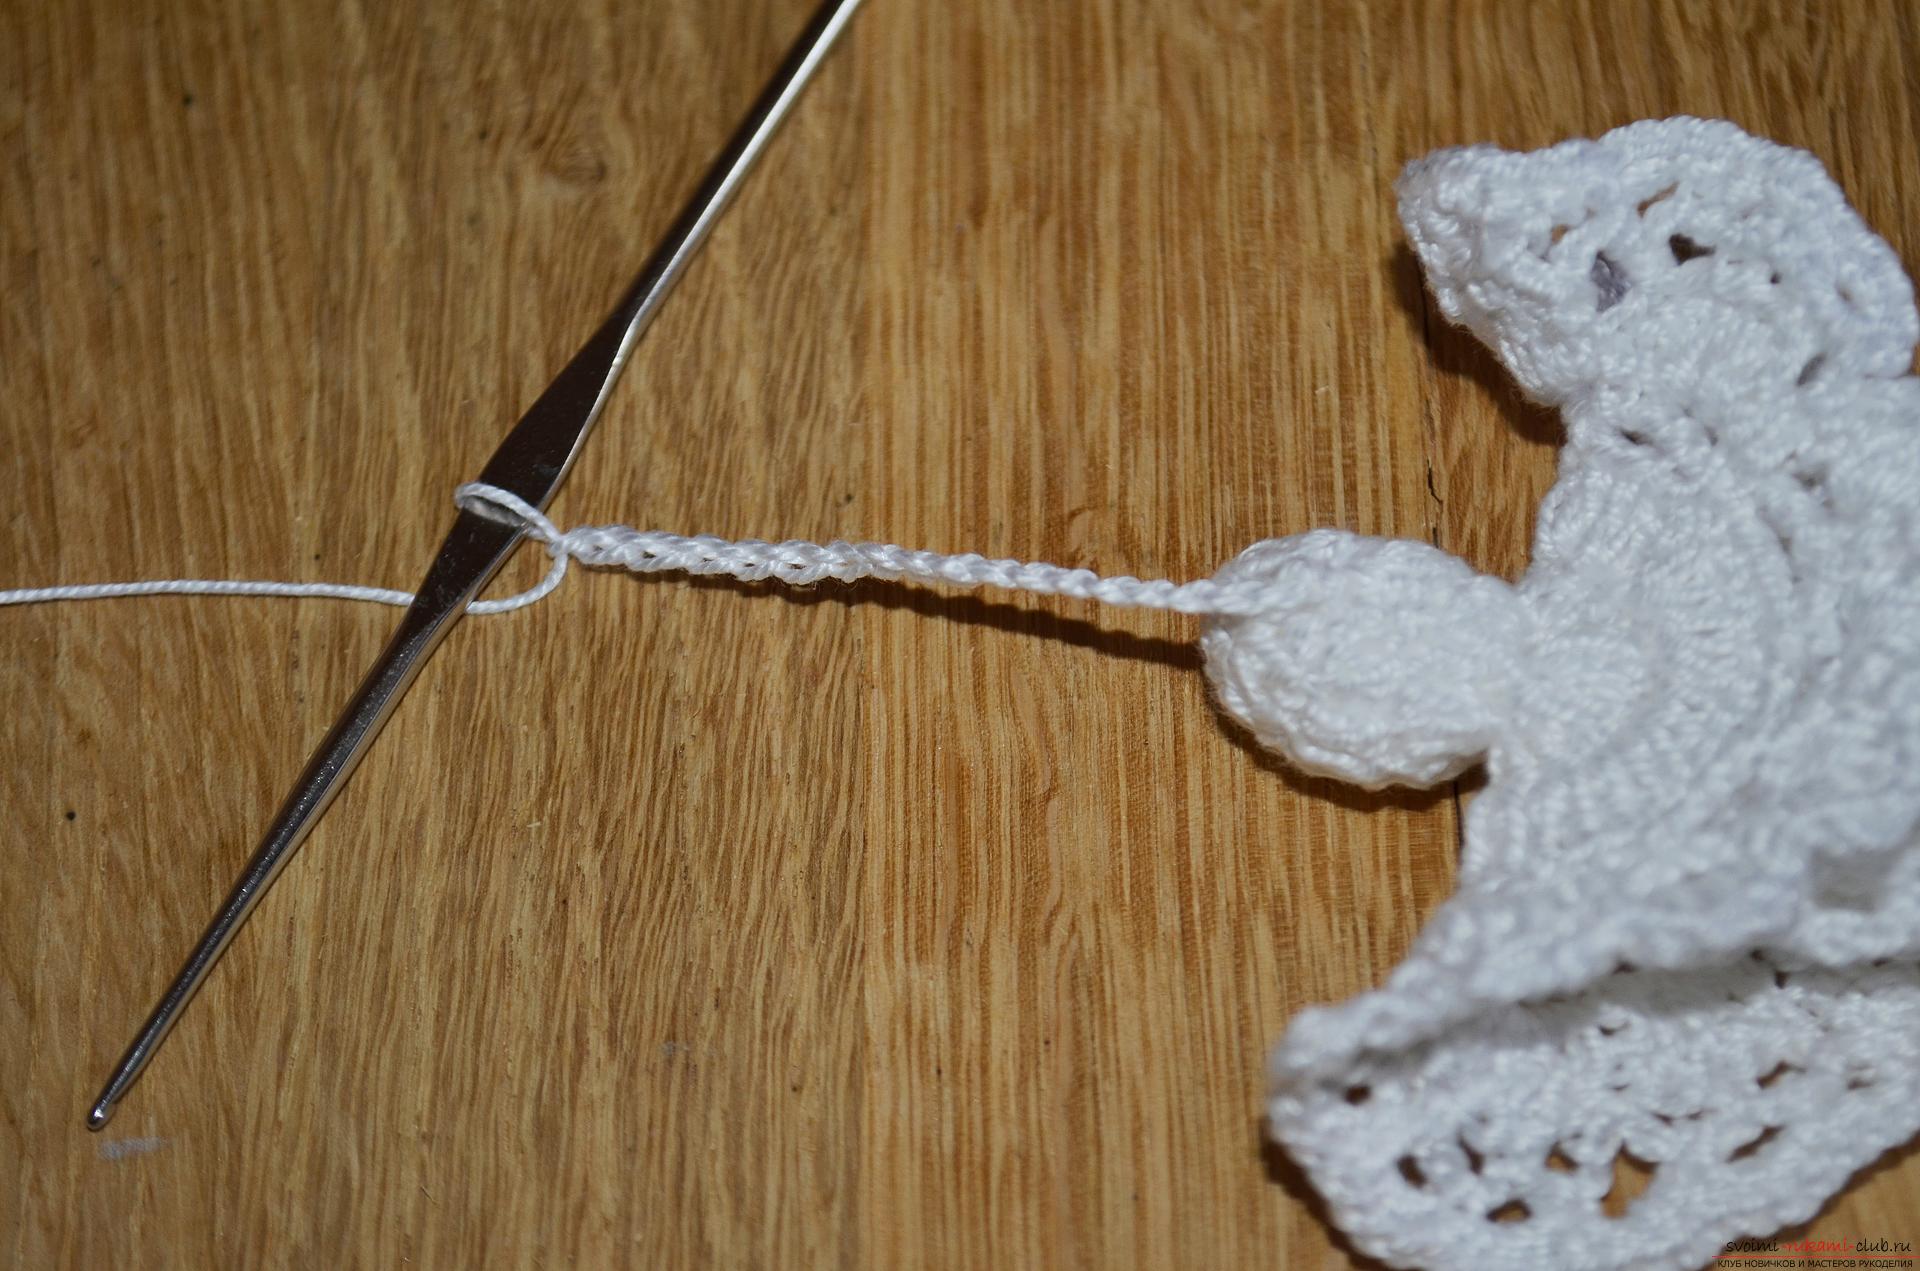 18. The last loop of the chain is connected with the first by means of a connecting column, fix the thread and cut off the excess. We put a halo on the head of an angel.
 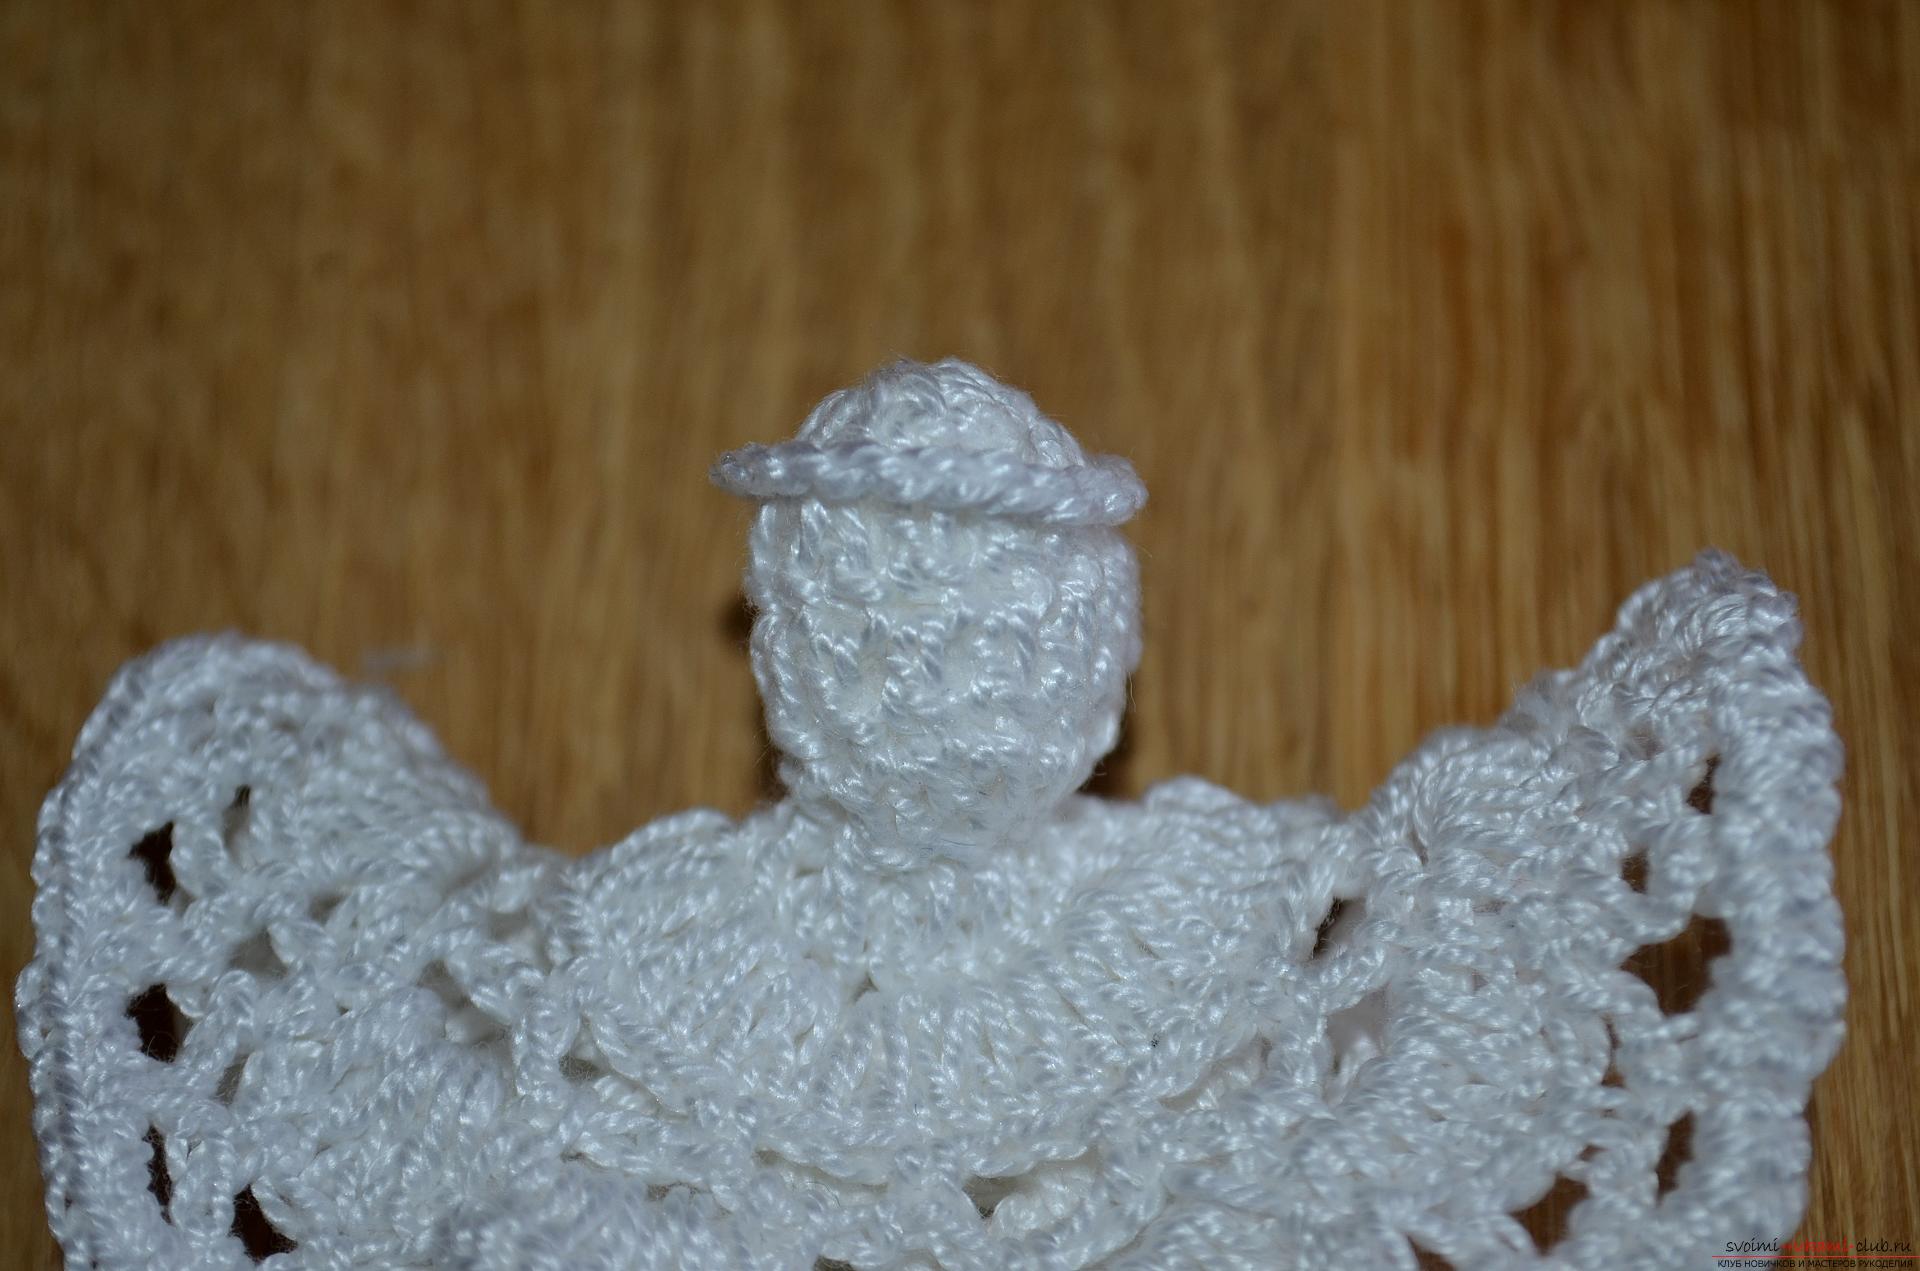 19. To decorate the angel's attire from a piece of thin satin ribbon of white color, form a bow and decorate it in the center with a small pearly white bead.
 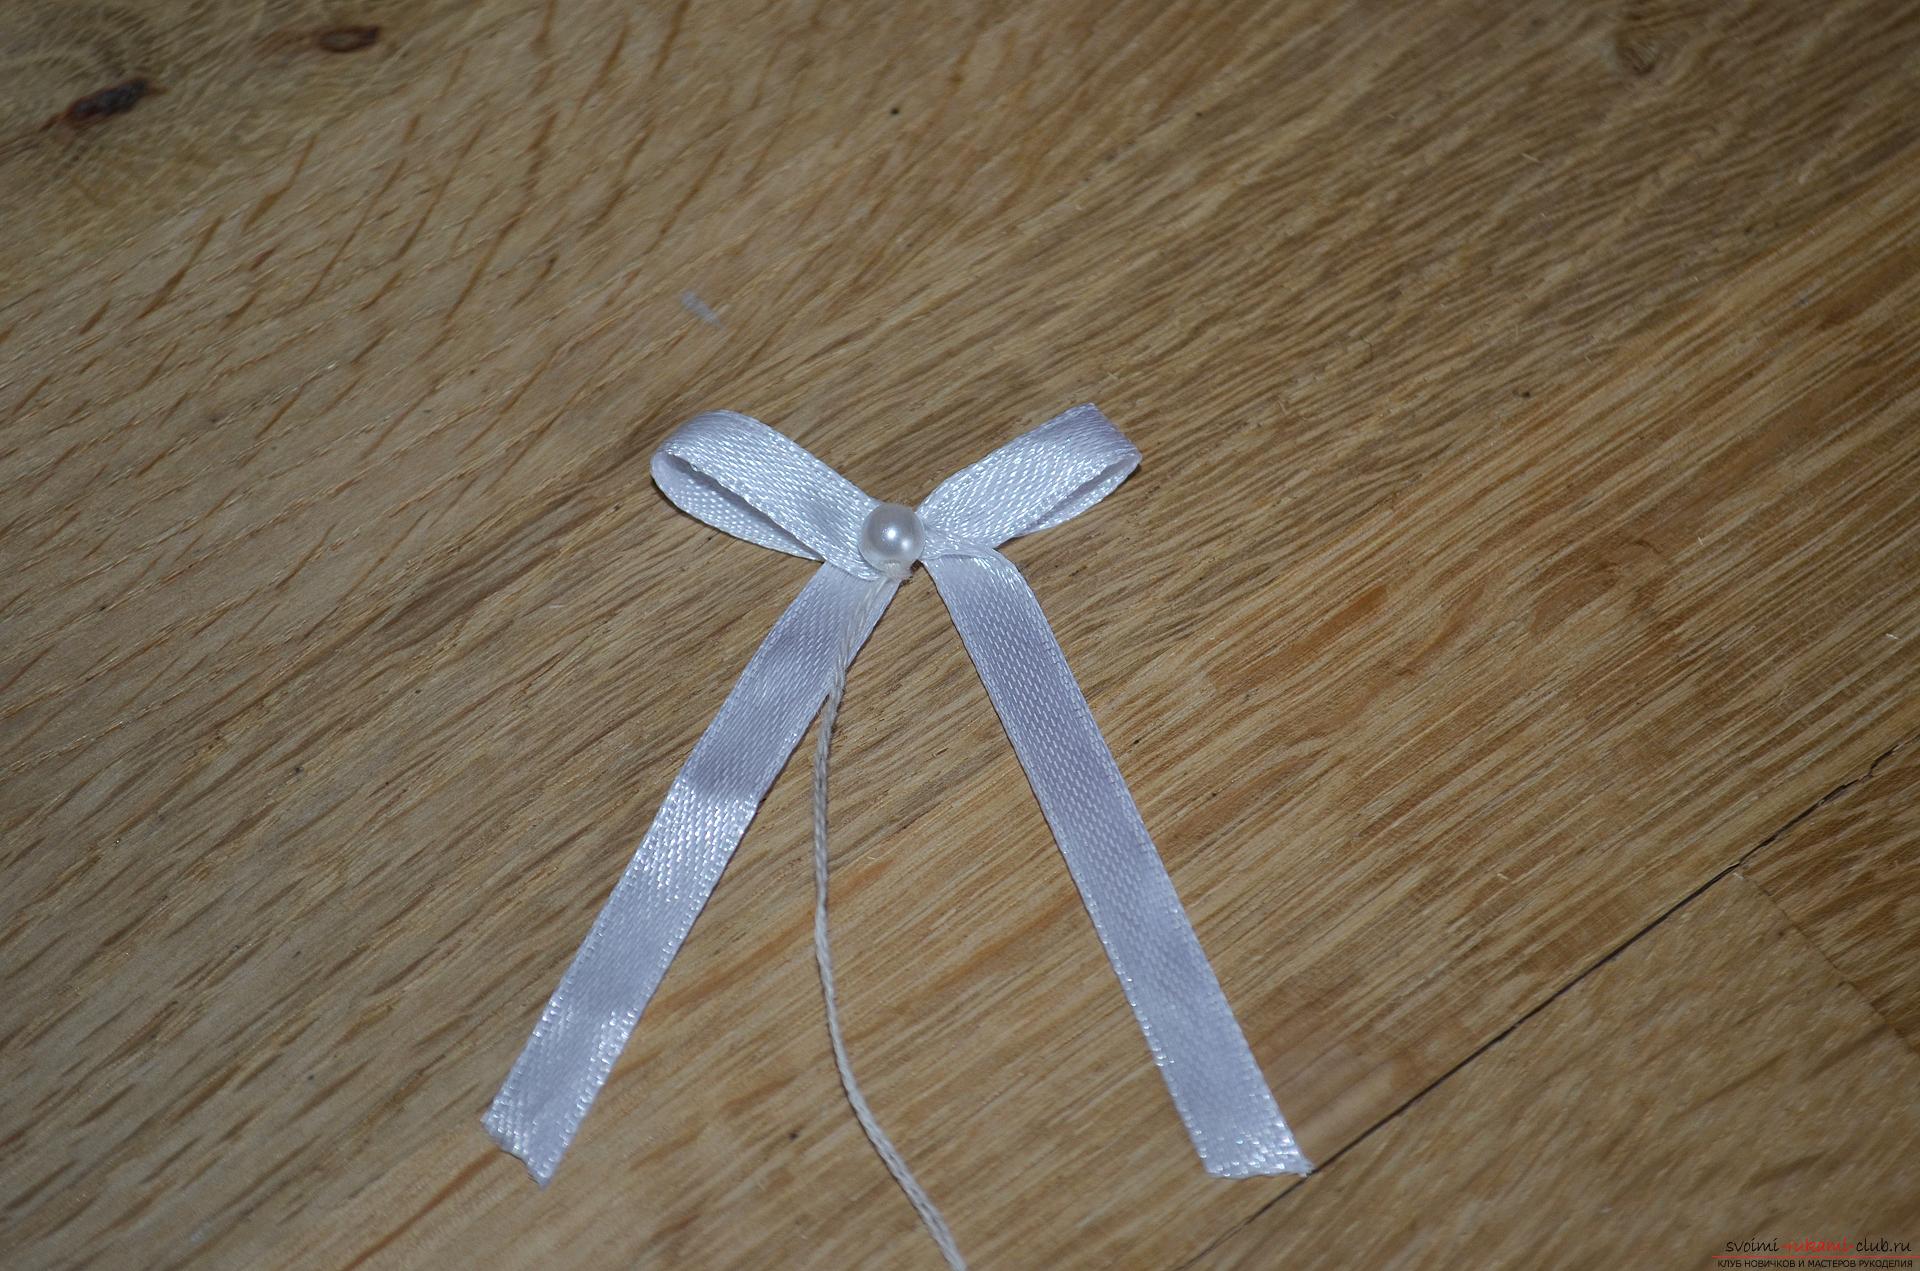 20. Using a sewing needle, sew the bow to the angel.
 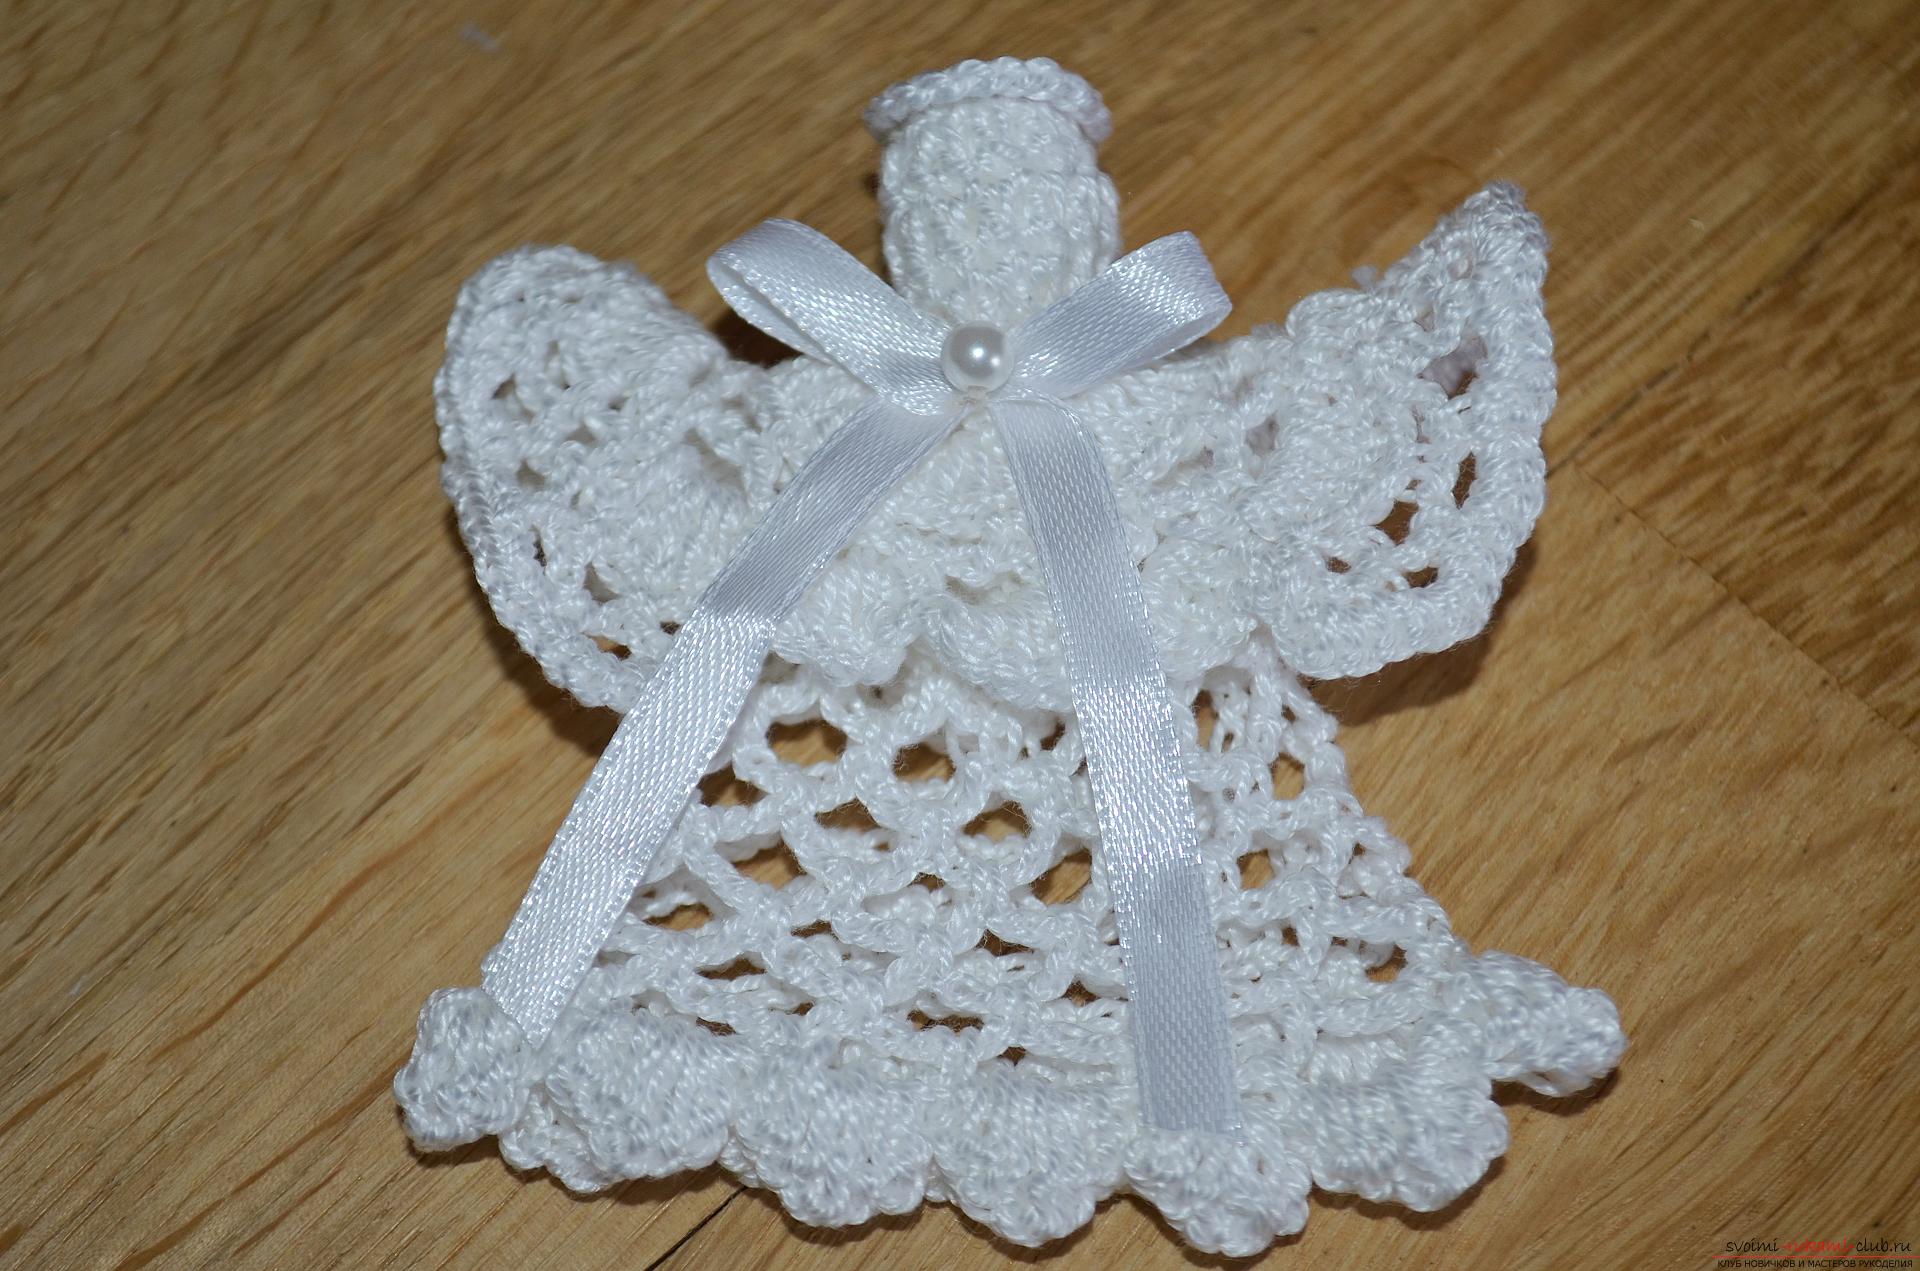 21.To make our toy possible to hang on a twig of a Christmas tree, we need to make a loop. To do this, fix the thread on the crown of the head and untie the chain of air loops of the desired length. The first and last loop of the chain is joined together by a connecting column fixing the thread and cutting off the excess.
 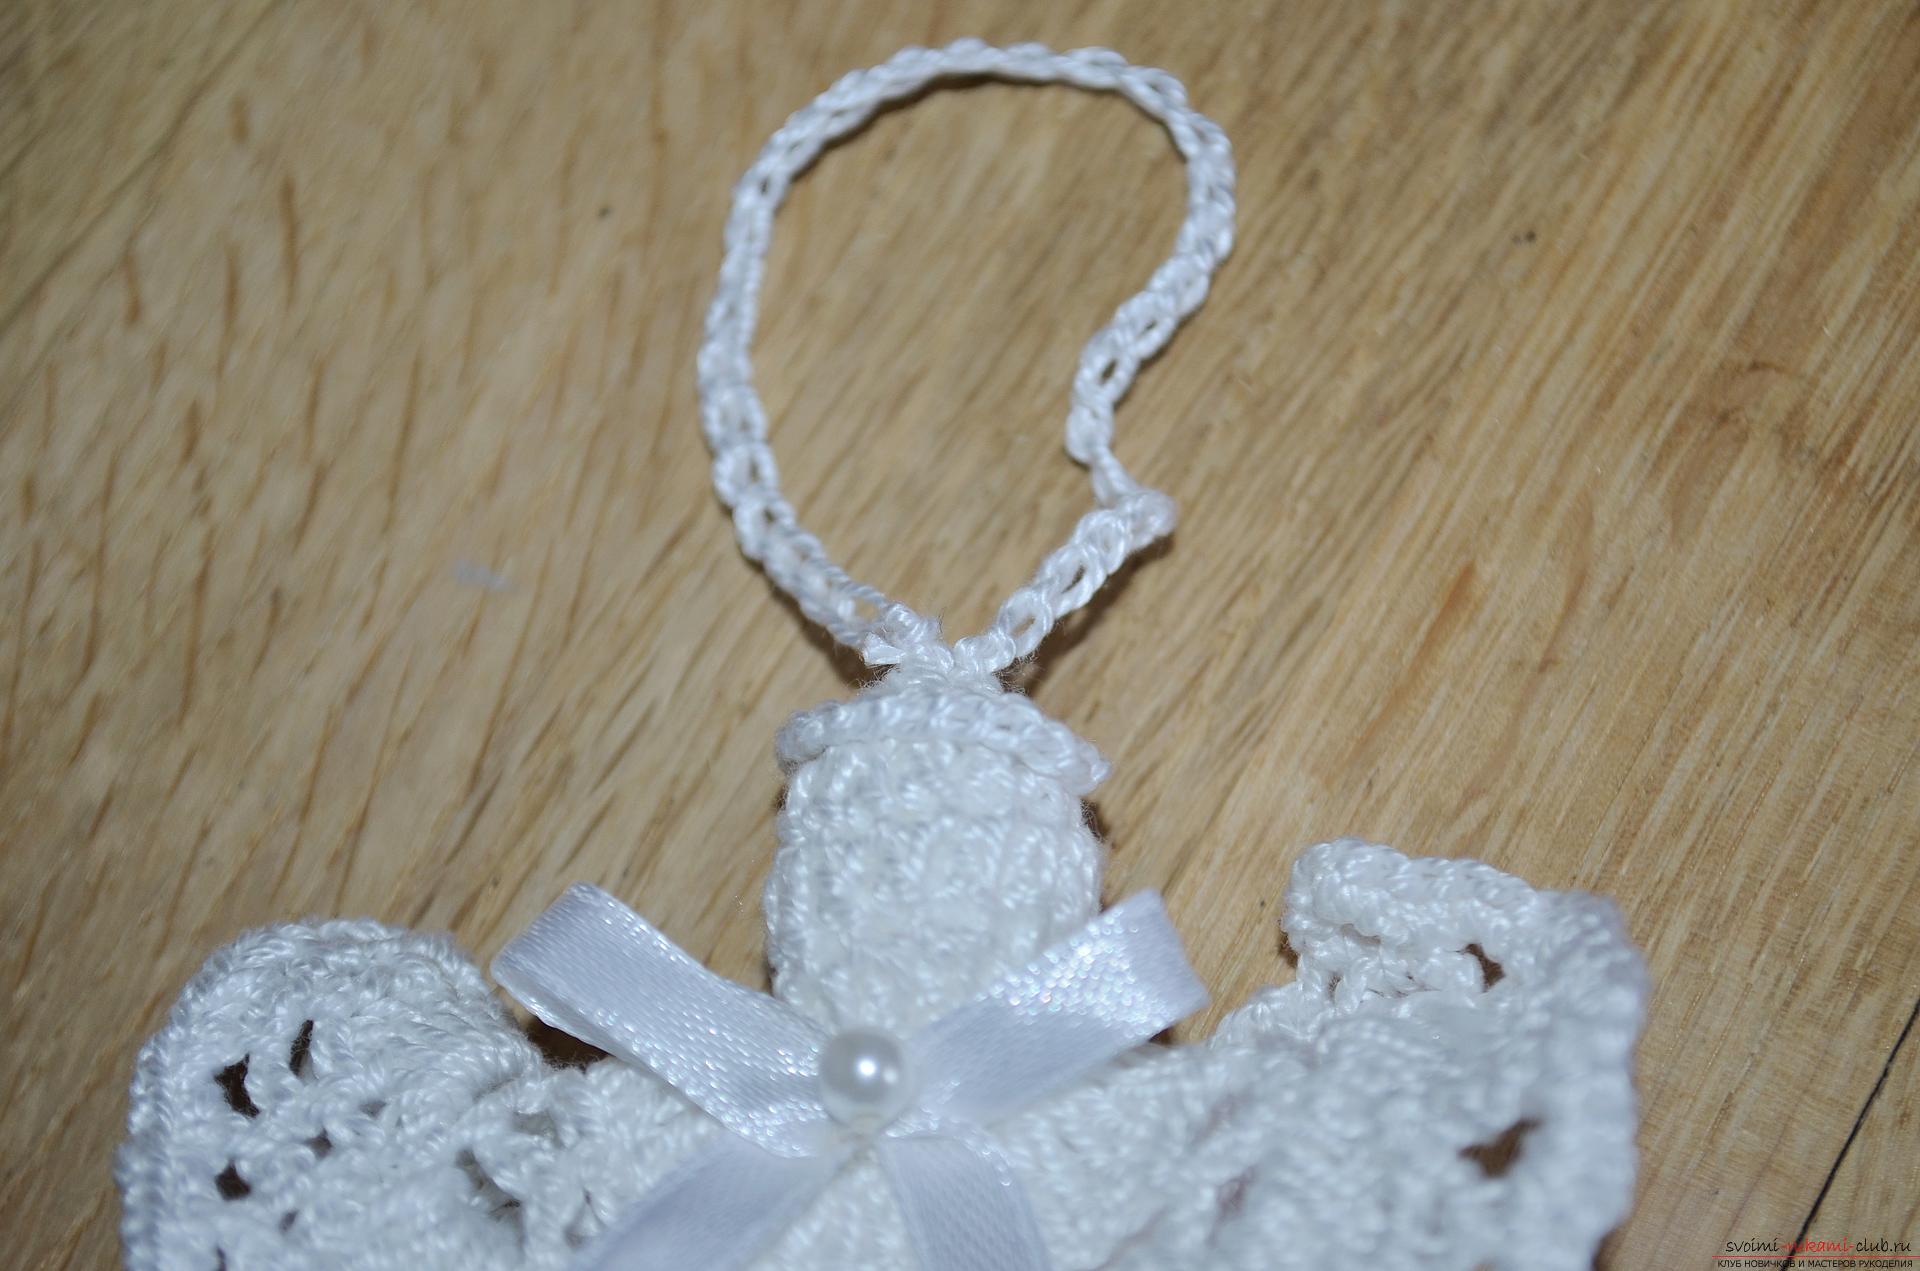 22. Our decoration on the Christmas tree, a crocheted Christmas angel crochet - ready! Additionally, to keep the toy in shape, it can be made rigid with the help of starch or concentrated sugar syrup. That's such a sweet little angel we got.
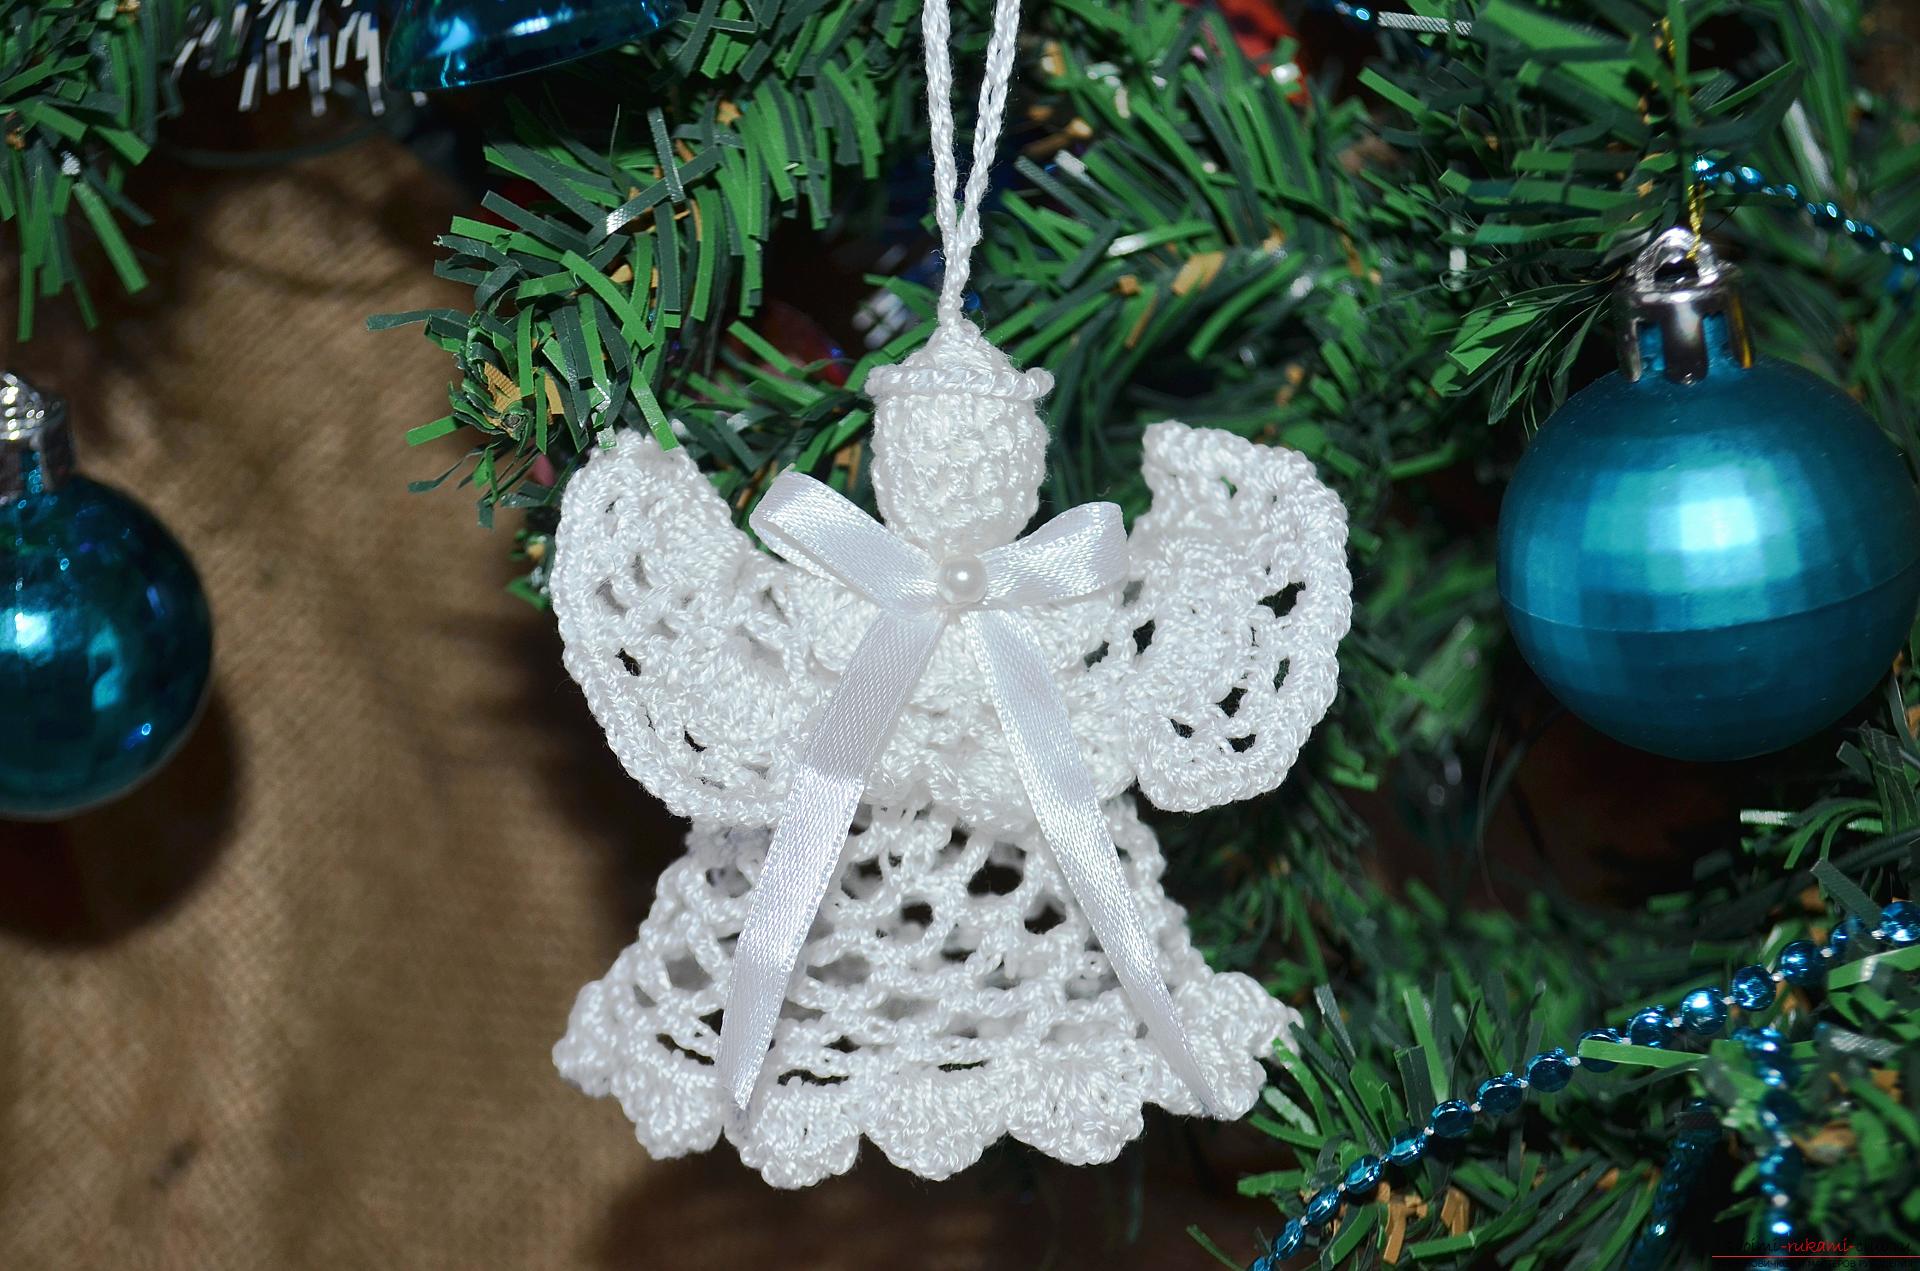
Comments
Related posts:
 How to tie a Christmas tree crochet? Crochet crochet lesson with detailed instructions and photo
 The master class will teach how to crochet a New Year's craft - a knitted garland on the Christmas tree
 How to tie a snowflake with a crochet for the New Year's decor of the interior? A crochet lesson on the openwork snowflake with detailed recommendations and step-by-step photos
 This master class on crochet will teach you how to create a beautiful frame for your photos.
 How to weave a beautiful snowflake from rubber bands? Detailed description of the technique of weaving, step by step guide and photo