Creation of postcards by oneself, postcard on mother's day, paper roses from own paper, tips, recommendations and instructions on how to create.
Mother's Day is an international holiday,when they congratulate all mothers and pregnant girls. Mom - this is the most important person in our life, so for this holiday simply can not remain indifferent people. When, as not on this day, it is worth saying the most important and warm words for a loved one who gives us all the warmth, care, affection and love. Congratulate your moms on this bright holiday, present them with a piece of your warmth along with the postcards that you made yourself. Postcard with Mother's Day A postcard decorated with roses that you made with your own hands will bring your mother much more pleasure than just a bouquet of flowers. This project is not as complex as it might seem at first glance. It is enough to read the instructions, and everything will become clear immediately.  From materials and tools you will need glue PVA (it is more convenient if it will be in the form of a pencil), a sufficiently thick sheet of A4 paper, two-sided adhesive tape and two-sided colored paper.
 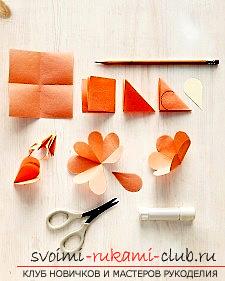 First, cut out a square from the colored paper,whose sides will be equal to 2.5 cm. Then bend it four times: twice in half. The resulting square of a small size should be bent once again in half, only on the diagonal. On the resulting triangle, draw a semicircle as shown in the illustration, and cut the shape along the line. Uncover the design, you should get a flower. Now cut one more petal and glue it in the place where there is emptiness. So you put the flower in one complete piece. Similarly, you need to make a lot of flowers in different shades.
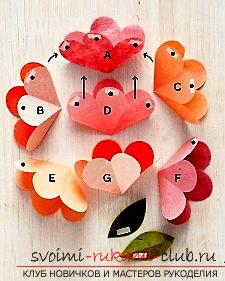
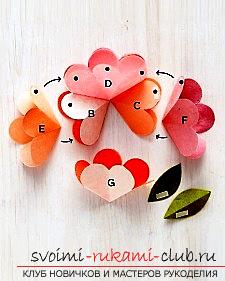
 The next step is to connect all the colors in theone bouquet. Study the illustration below, in the same way, paste two-sided adhesive tape on the petals and collect all the flowers together. The last stage of work remains: fold a piece of thick paper in half and place a bouquet of flowers in the center. A postcard for my mother is ready, you just need to write down the wishes. Greeting card for Mother's Day for 20 minutes This postcard for mom looks very impressive, but it's very quick and easy to make it yourself. From materials and tools you will need a thick paper of any color you like for the base. In this example, we used red paper. In addition, prepare a colored paper of two colors, a serpentine of two colors, a multi-colored paper on which to be written, a pen, a spoke or a toothpick, tweezers, glue, and scissors.
 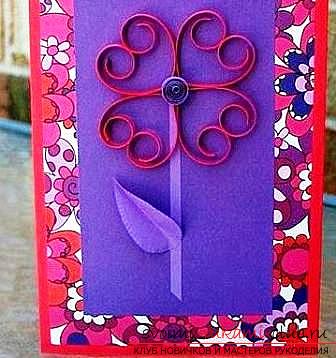 First, prepare the base by bending it in halfselected paper. Now, from a different shade of paper, cut out a sheet of the same shape as the face of the base, but a little less. Glue it to the base with a glue of PVA, placing it in the center. Now cut another rectangle of colored paper of a different color. It should also be less than the two previous layers of paper. Fix it with glue in the center. Now that the base is ready, leave it to dry and make the decorative part. You need to cut four identical strips of serpentine and make out the petals in this way, as illustrated in the photo.
  Next, use a serpentine of a different color and twist it into a roll, for convenience use a spoke or a wooden stick. All the details of the flower are ready, it remains to glue them together in a common design.
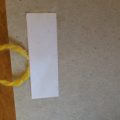
 Cut out a sheet of paper designed forrecords, and glue all the details to the finished postcard. It's such an easy way to make a postcard with a rose to the Mother's Day. Postcard with a bouquet of roses This master class offers you step-by-step recommendations for creating a cute greeting card with a bouquet of roses for your mother. Prepare a half of a thick green leaf and the second is the same piece of white paper. From white paper you need to make such a frame, as shown in the illustrations below. For this you will need a figured scissors. You can do without them, but the work will be more complicated. To begin with, fold the paper twice in half and trim the edges with figured scissors. Then cut out the middle, retreating from the edge about 1.5-2 cm. You should get a folded frame.
 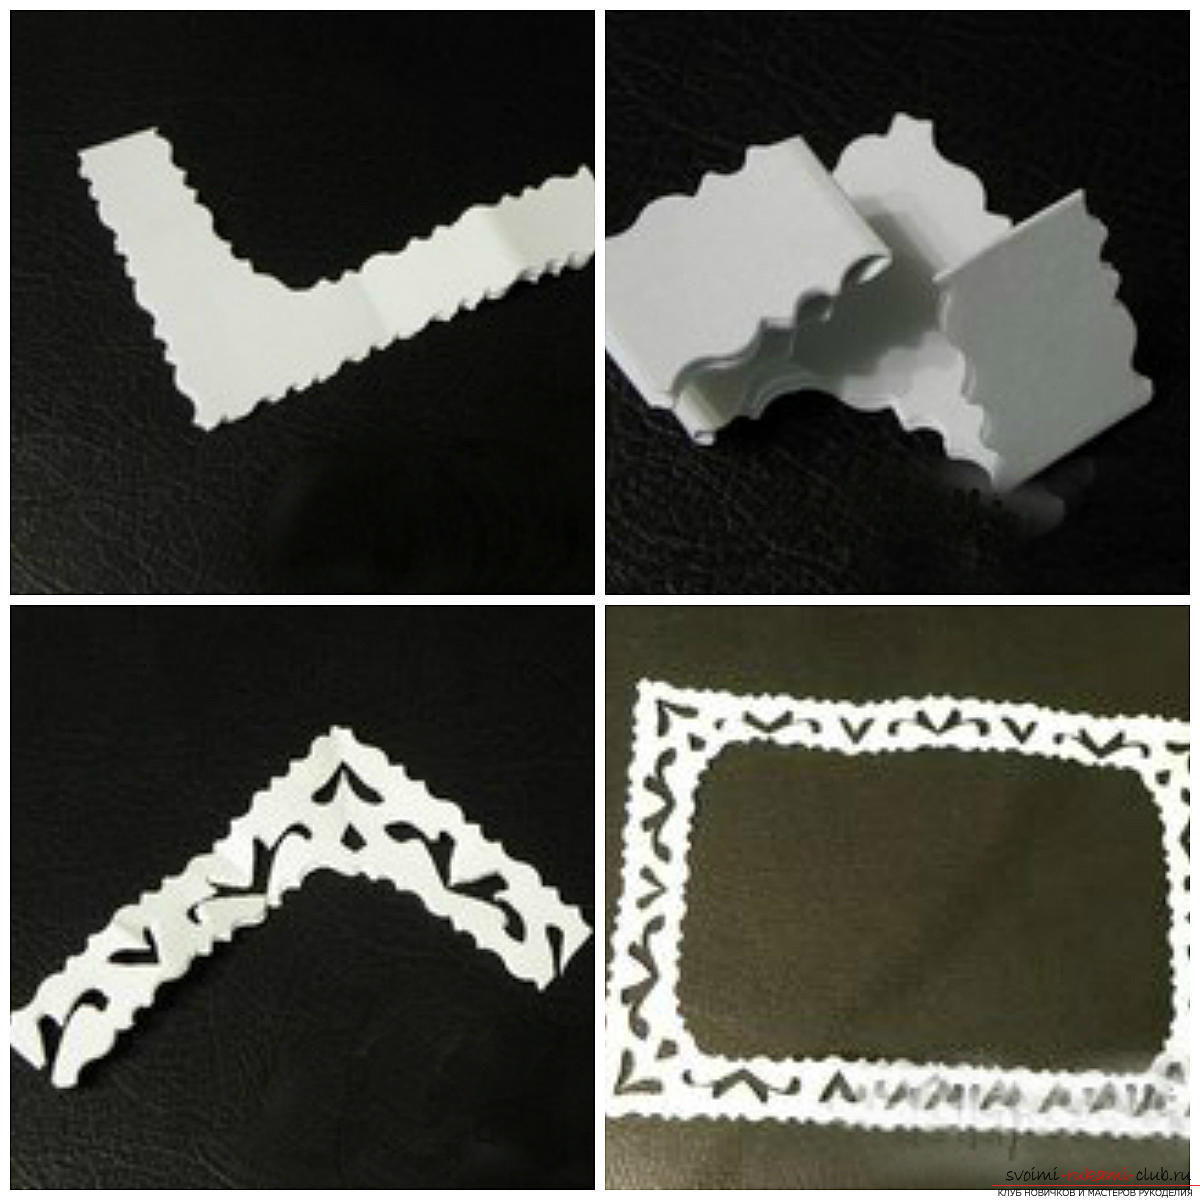 Fold it with an accordion and cut it out on the foldsevery possible patterns. From the first time you may not succeed. You can initially practice on a separate sheet, so that in the end you have a very beautiful frame for the postcard. To create patterns on the corners, fold the frame in half. Now unfold the finished frame with patterns, use a brush to carefully lubricate it with glue and glue it to the base of dense green paper.
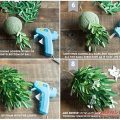
 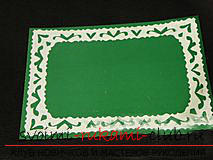 The base of the postcard is ready. Leave it to dry and proceed to creating roses. You will need a plain napkin of the color that will most closely correspond to the shade of the rose. Cut it into strips about 2 cm wide and bend the accordion. Cut the oval from one side, and unfold the stripes. You should get it as in the illustration.
 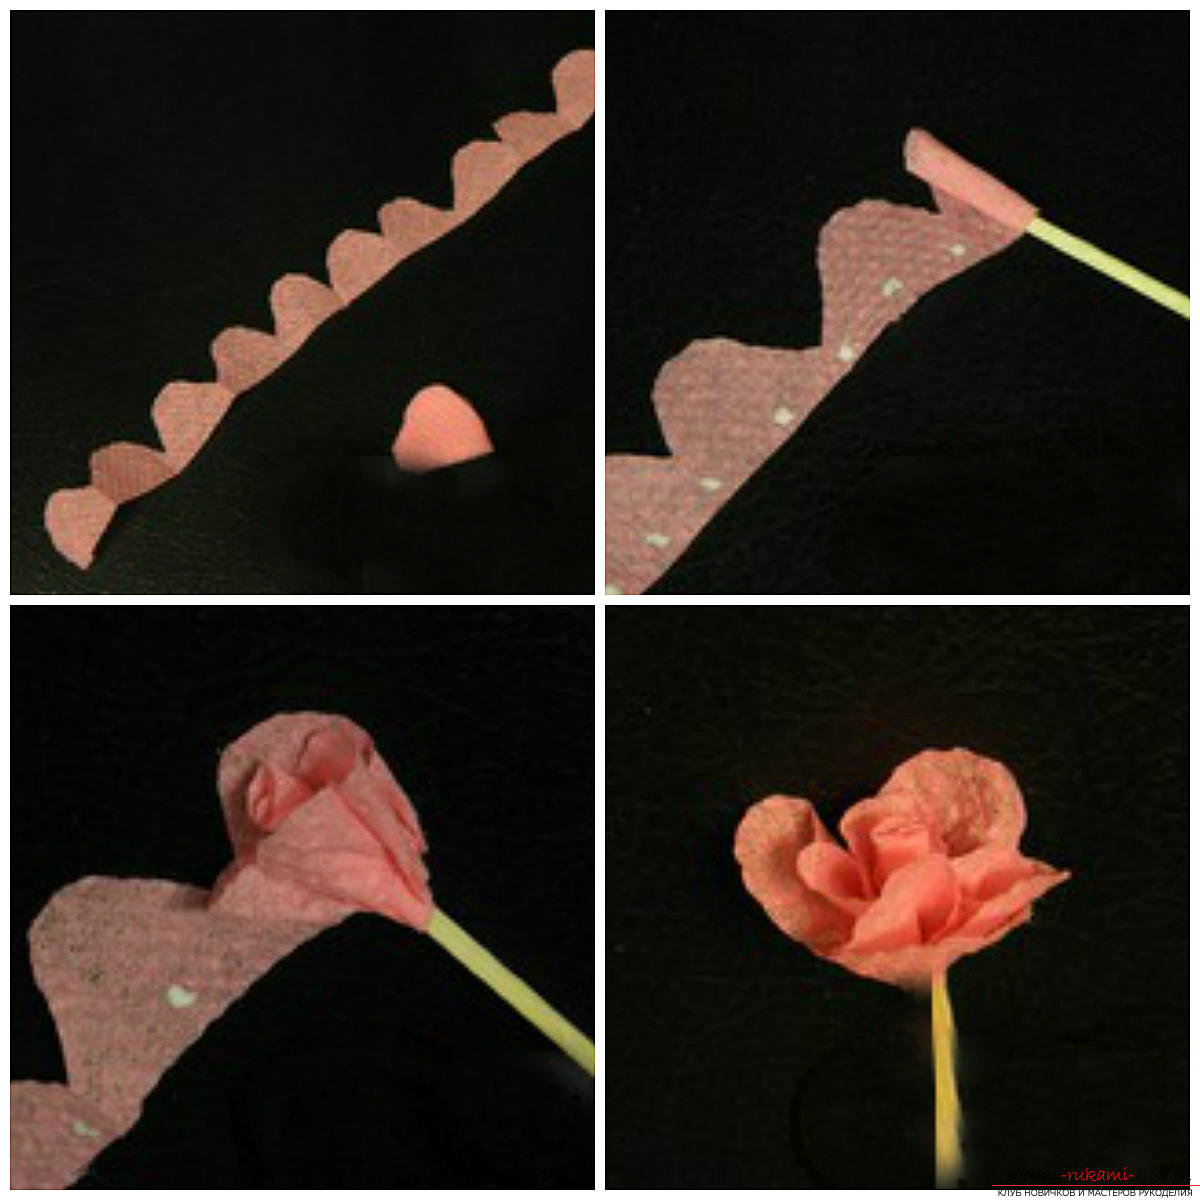 Take an ordinary match and wrap aroundher edge of the strip, fixing glue. Continue to fold the strip into a roll, creating wrinkles at the bottom. You need to shape the bud in such a way that the petals do not coincide with each other. Next, you need to form the stem of the rose. To do this, use a multi-layer napkin, cut it into strips 2 cm wide. Take one of the stripes, squeeze it slightly at the edge, apply glue on it and start wrapping around the base of the rose. When the napkin is well fixed, wrap it further so that a peculiar tourniquet is obtained. He will serve as a stalk of our rose.
 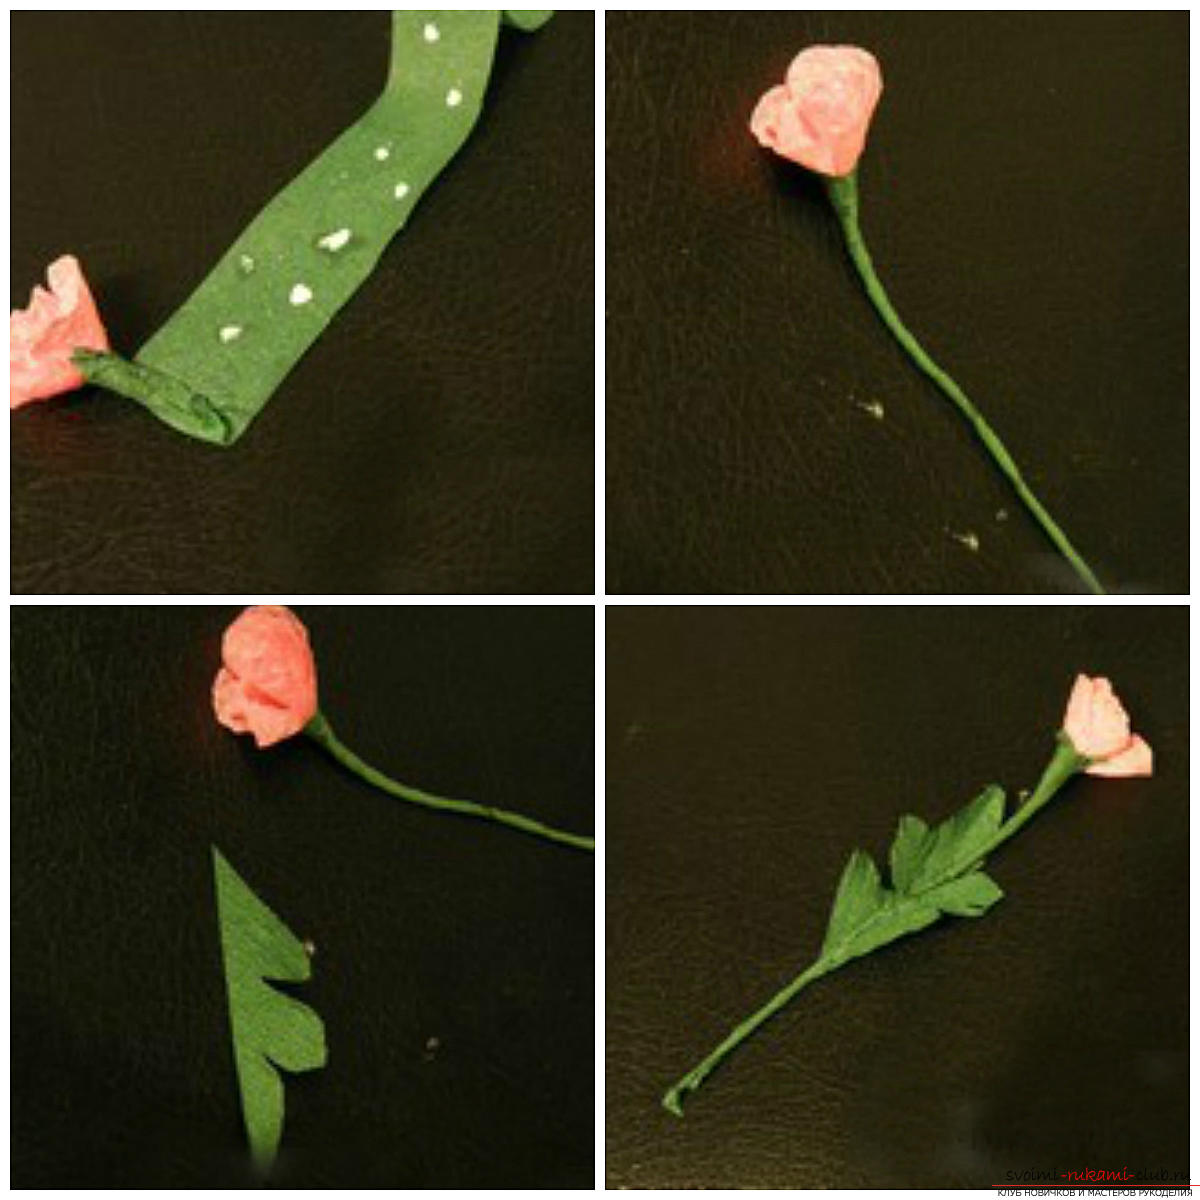 From another piece of napkin you need to makea leaf for a flower. Fold the napkin green in half, cut out of it a detail in the form of a folded sheet and make incisions in the form of a small fringe along the edge. Glue the sheet to the stem, and the rose for the future card is ready.
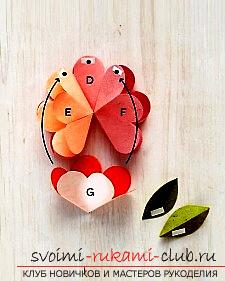
 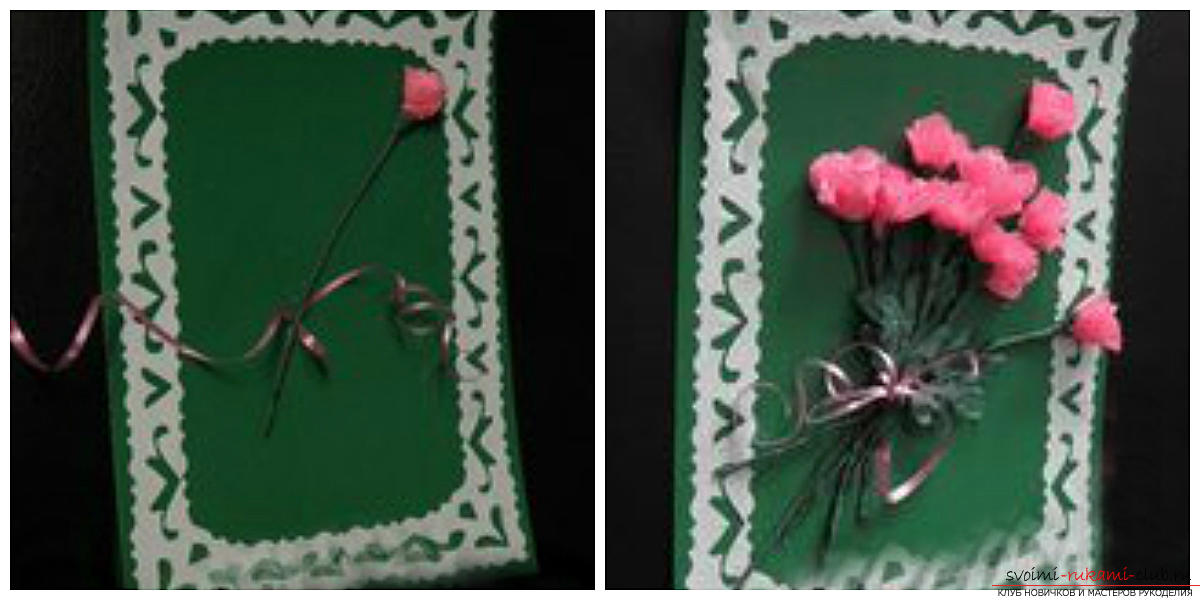 For a card you need to make nine roses, three of themwhich will have leaflets on their stems. Next, take the ribbon, slightly twist its edges with scissors and paste on the center of the postcard. Now, one by one, you need to glue all 9 roses, forming a beautiful bouquet. Tie it with a ribbon, and the card for your mother is ready. You only need to make an inscription with wishes. Composition of roses on a postcard The composition of roses looks so beautiful and noble that it will not leave you indifferent. These flowers managed to simultaneously combine austerity, tenderness and grace. Therefore, roses - these are the flowers that are best for a gift to my mother. Let's try to make a few pieces and decorate them with a postcard. To work, you need a solid base (choose the color and size of paper at your discretion), paper for quilling, wooden skewers or spokes (in order to twist the paper), as well as those tools without which almost no one can do - this is PVA glue, as well as scissors. The first thing to do is to make buds of roses. To do this, choose a paper of different shades, let them be gentle. Cut the paper into separate not very wide strips (the width of the rosettes depends on the width) and begin to twist the bud.
 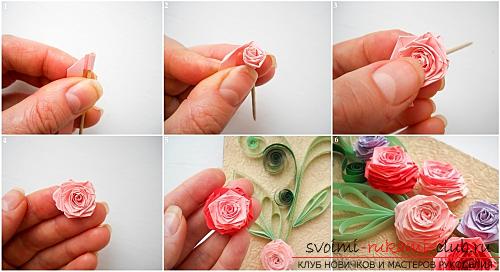 Take one of the stripes and start wrappingher around the toothpick. First make a few turns, then bend the paper strip by 90 degrees. Next, you need to make another revolution of the paper, as shown in the photo. Continue wrapping a strip of paper around the toothpick, periodically bending, turning it over and fixing it with glue. Form a hollow bud, at the end fix it with glue. When it is dry, remove the rose from the toothpick. It turned out very nice, is not it? Similarly, make a certain number of roses of different color and size. Now go on to make the leaves and curls. Everything is much simpler here than it may seem. Take a long strip of green, bend it a few times and wrap all the folds with a curl from the same stripe of paper. Do not forget to fix everything with glue at the base. Make a few large and a few small leaves. You have to make small green curls. For this, just take one strip of paper (you can take another shade of green) and wind it from two sides on the sticks (you need to twist in different directions). You should get it as illustrated in the photo.
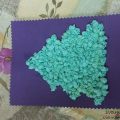
 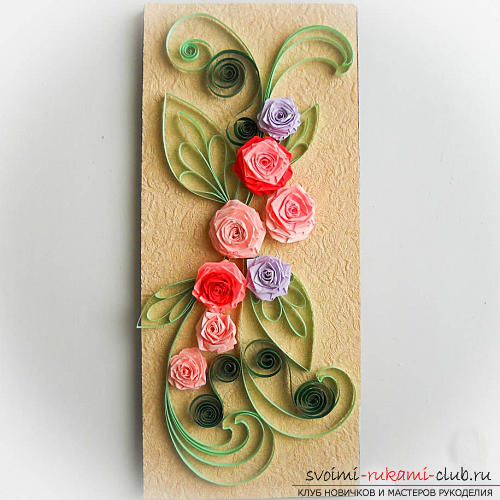 You have left to lay out the composition on the basis ofthick paper and properly glue it. Now a bright and beautiful postcard with roses is ready. Postcard with a large bouquet of roses for mom This version of the postcard for mom looks very beautiful and impressive thanks to a large bouquet of roses, while the manufacturing process is absolutely not difficult.
 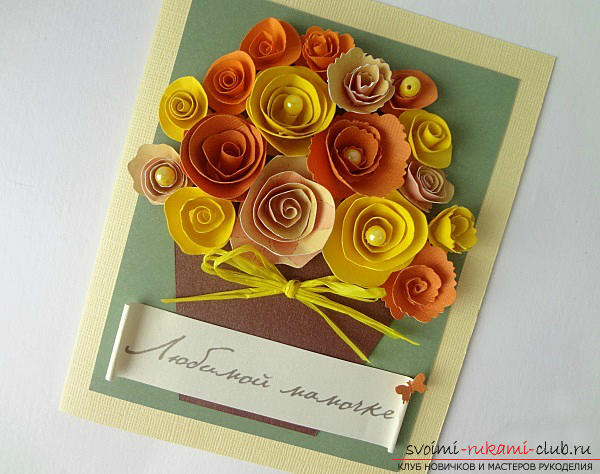 The work on creating roses is based on a verycommon quilling technique. The bouquet looks very elegant and bright. Making a postcard can take from half an hour to one hour, it all depends on the number of roses. So please be patient and diligent. Let's start. For work, prepare several sheets of thick paper of different colors, a stick for twisting, glue in the form of a pencil, two-sided scotch tape, a ribbon, and curly scissors (if not, you can use the usual ones). First, cut out a lot of different colored circles of the same shape. Cut them in a spiral, as illustrated in the photo. Cuttings can be made straight or curly, depending on the final type of colors. If you make the cuts figurative, you will get more openwork roses.
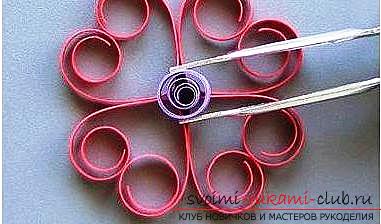
 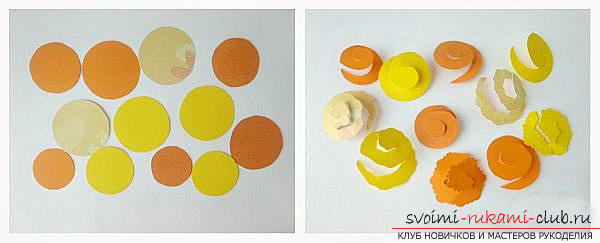 Now a bud must be formed from each spiral. To do this, take a wooden skewer, a spoke or a special twist tool, and begin to twist the part in a spiral from the edge to the center. When the bud is fully formed, fix its end by gluing the tip to the center of the spiral.
 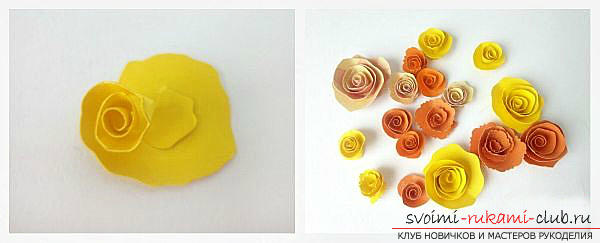 Fold the cardboard for the base in half, then try on all the flowers. Check if there are enough of them, if not - finish the number of roses that is required to create a full bouquet.
 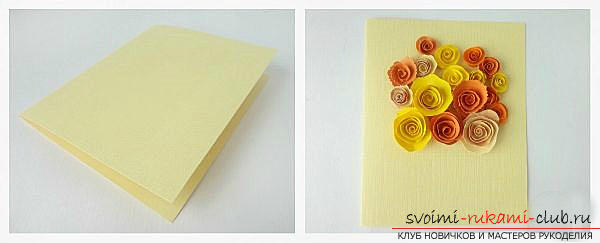 Cut out a vase for flowers from dark paper. Glue two-sided adhesive tape to the back of the vase.
 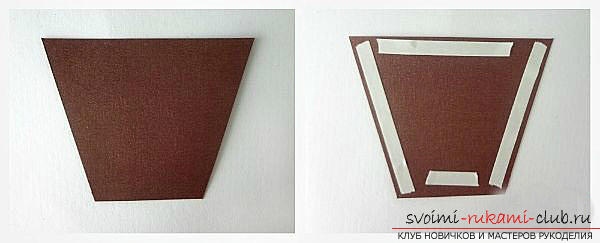 Prepare the base of the composition by cutting out a rectangle of green color. It should be slightly smaller than the card itself. Place it in the center of the greeting card with a two-sided adhesive tape.
  It remains to paste on the postcard vase and topabove it to place a bouquet of roses. Optionally you can decorate the greeting card. In this version, the tape and the inscription were glued. You can paste beads on individual roses buds. Now the card for your beloved mother is ready. Universal greeting card with roses This postcard is suitable for any occasion or occasion, materials are not required at all. Prepare a dense cardboard of bright color, a small tight white sheet, a ribbon and artificial roses, for decor you can pick up a few beads and rhinestones.
 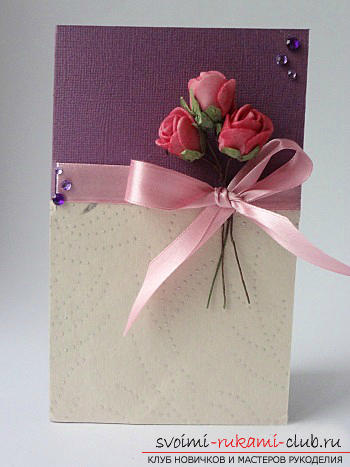 Fold in half the colored cardboard. Cut out a square of white cardboard, which in width will fit the bottom of the postcard. Fix the back of the light square double-sided adhesive tape. Glue this part to the bottom of the postcard.
  At the junction of the white and colored parts of the greeting card you need to arrange a ribbon. Make an inconspicuous slit on the right side of the postcard as close as possible to the fold. It needs to insert a ribbon.
  Bouquet of artificial roses should be glued ontape on a double-sided scotch tape. Tie the ribbon with a decorative bow over the bouquet. In addition, fix it with glue or double-sided tape. The postcard is almost ready. You have left sticking inside a rectangle of light paper for a wish, as well as decorate the card with beads or rhinestones. Now everything is ready.
  Making a rose for a postcard If you wantmake a postcard with a rose, but you have no idea how to make it, this master class will teach you how to make a rose, which you can use to make absolutely any postcard. The process of manufacturing it is very simple, you only need one piece of paper for work, but the result is impressive - the rose looks luxurious.
 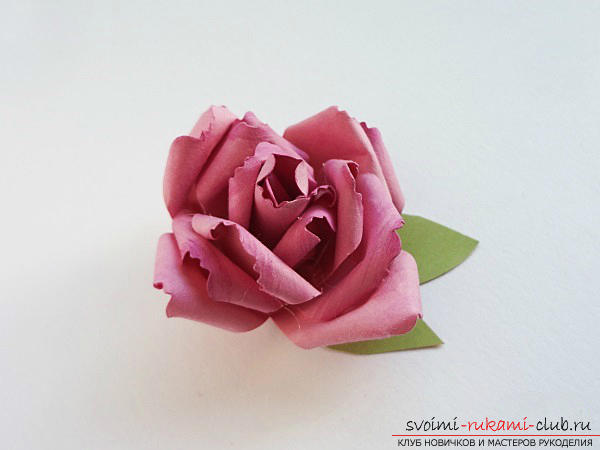 Prepare thick paper of the right color, scissors(if there are curly ones, use them), a small brush (sponge), PVA glue, and a stick for twisting the petals. First of all, you need to cut out a strip of paper, the width of which will be about 3 cm. If you have curly scissors, use them. If there are no such scissors, make a wave with ordinary scissors.
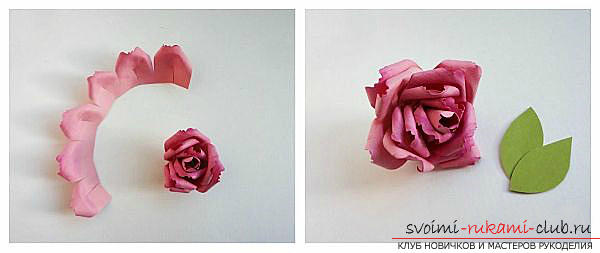
 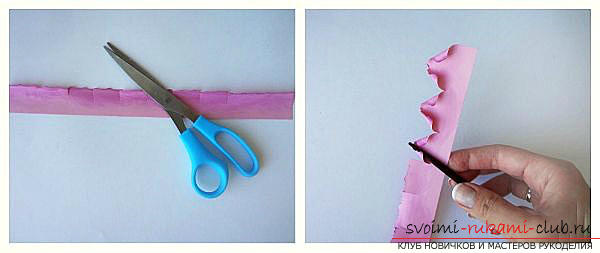 Using a brush or a sponge, tint the tipsfuture petals with acrylic paint. So the rose will look more alive and natural. Now you need to make incisions along the entire strip. The gaps should be 2.5 cm. However, in the beginning it is necessary to leave a gap of about 5 cm - a bud will be formed from it. Twist the edges of the petals using a pre-prepared wand.
 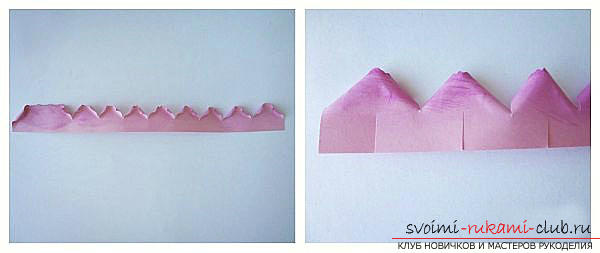 Make incisions in the middle of each of the petals (from below). Glue them with glue overlap - so you will be able to form bulging petals.
 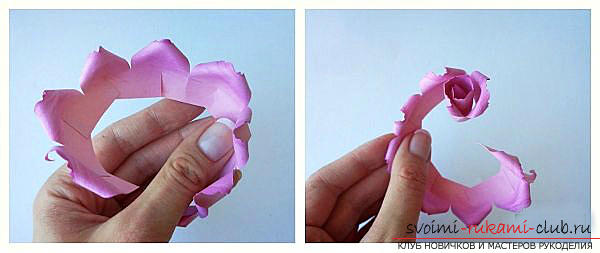 Now start twisting the bud from the biggestof the gap. Twist the strip, periodically gluing it with glue. If you want to get a more magnificent rose, make an additional strip in this way. In the end, you can add green leaves. Now the rose is ready.
Comments
Related posts:
 Beautiful postcard to Mother's Day with your hands on the 2015 Competition, a card for your mother's day with your own hands
 Quilling technique, various flowers in technologyquilling with your own hands, creating compositions using colors, quilling techniques, tips, recommendations and instructions for creating them with phased photos.
 Greeting cards with own hands, creating Christmas cards with children, two free master classes for making light cards with preschool children.
 New Year's crafts, the creation of Christmas decorations from paper, the various creation of paper balls with their own hands, how to make a beautiful garland of paper with their own hands.
 Flowers with their own hands, how to make a flower from paper with their own hands, flowers from corrugated paper, tips, recommendations, step by step execution instruction.