Crochet hats. Part 2
There are several fairly commonforms of caps: beret, fez cap or skullcap, cap caps round and elongated. . How to knit beret. From the point of view of creating a form, this is the simplest work. First, a circle with a diameter of approximately 27-35 cm is knitted. This value depends on what shape you want to give to the beret, as well as from the fashion. After that, the straight part of the beret is knit from the 1st row to 5 cm in height. The shape of the beret also depends very much on the height of the straight part. When he takes a dress on his head, the even part will create folds and a volume along the fold. The larger the even part of the beret, the larger its volume. After the even part, the bottom part is knit, on which instead of increments there are additions. The end of the work is determined by fitting. Beret should sit tightly on the head. Cap type fezki or skullcap. 
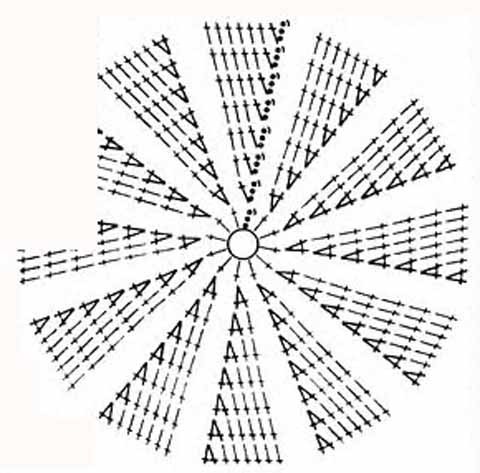
 For such a cap, a circle with a traditionalthe number of increases. Unlike beret, the diameter of this circle is determined by the size of the cap. First of all, taking the measurement of the circumference of the head, find the radius of this circle, remembering the formula: circumference = 2 / Pi * R. Then, with the size of the cap 56, the diameter of the circle can be taken as 16-17 cm, taking into account the stretching of the jersey. That is, with the simplest cap of the fez or skullcap type, you need to connect the initial circle with a diameter of 17 cm. Then go to knitting an even part of the cap without adding. The height of this part, as a rule, is determined by fitting, on average somewhere about 12-14 cm. The cap is a round cap.
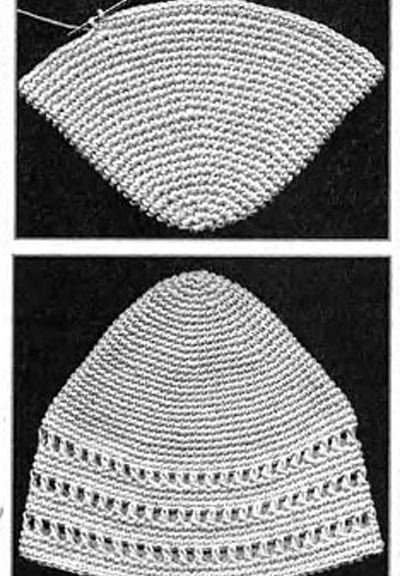
  To get the bottom of the rounded shape,the diameter of the initial circle is taken less, that is, 10-12 cm. Then, to get the cap of the right size, you will have to tie several rows that will give the rounding of the bottom. When knitting a circle of RLS in each row, 6 RLS (when knitting CIH - 12 CIH) is added, and when knitting the transition part, you can either add 3 RLS (6 CIH) in each row or alternate rows without adding and rows with 6th additions (for CIH 12-th additions). Having connected several such series, you can see that the cap starts to take the desired form. If you fold the knitting in half and measure the edge of the cap, you can get the size of the cap. At the edge of the length of such a folded shape should be about 27 cm (2 cm should be left to stretch the jersey). Next, knitting will go around in a circle without adding exactly to the height that is needed for this model (12-14 cm). A cap is an elongated cap.
  This form of the cap can be obtained by twoways. One can associate a circle with the traditional number of increases in each row: for the RLS it is 6 increments, for C1H it is 12 increments. The diameter of this circle should be taken smaller, that is, 6-9 cm. Then, to obtain the desired size of the cap, you will have to connect more rows for rounding. To do this, you can alternate rows with and without additions, or take half the number of increases in each row. With the second method of knitting, you can knit in a circle, making fewer increments in each row from the very beginning of knitting. For RLS - is 5 increases, and for CIH-10, increases in each row. So, performing the increments in each row, knit the cap to the desired size. The shape of the bottom thus becomes as it were set from the very beginning and, unlike the previous method, it is difficult to change it. Source: magazine Mod.


