Cutting the right snowflake from paper with your own hands is easy, the work will take several minutes
How to cut the right snowflake from paper inThe origami technique is an urgent issue on the eve of the New Year. To make simple snowflakes you only need a few minutes of your free time, a simple pencil, scissors and a piece of paper are better than white. This simple activity will be interesting for both adults and children. Technics of origami is familiar to mankind from ancient times. She came to us from Japan and took a lasting place in our life. Initially, only paper of a square shape was used, from which various figures were made by bending. Thinning and cutting in any case were not allowed. But over time, everything has the property of changing and improving. This fact also applies to origami. Therefore, in order to produce a beautiful piece of paper, including a figured carved snowflake, we can also use additional tools, such as scissors or paper clips, in the case of 3D models. The first snowflakes we each learned to cut out in school, when preparing decorations for rooms and trees before the winter holidays. As a rule, such an occupation always invariably caused only delight. Today we will look at how to cut out the right snowflake from paper in origami technique. To complete the task, we need:
- paper sheet, white;
- scissors;
- pencil simple.
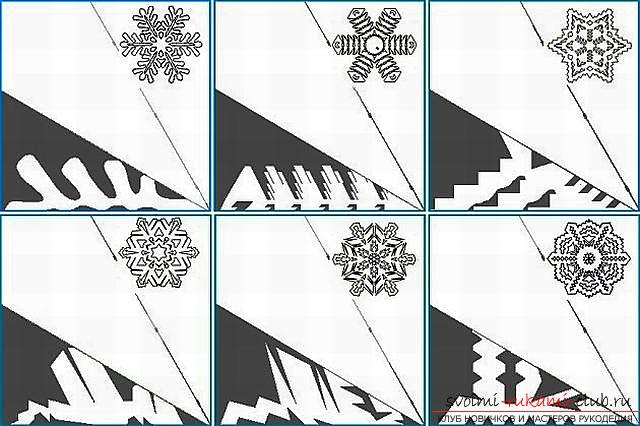
To begin the process of making thisbeautiful decoration, take a paper sheet (A4 format) and give it a square shape, cutting off the excess part with scissors. We fold the sheet diagonally, as a result, we get a triangle, which we bend in half. The lower part of the triangle is divided into approximately equal parts. After this, bend the corners of the triangle one by one to the marks, first the right corner, then the left one. We turn and use scissors to cut off excess paper. Thus, we receive the basis of the future paper snowflake. The diagram below shows step by step all the actions that we will need to implement. 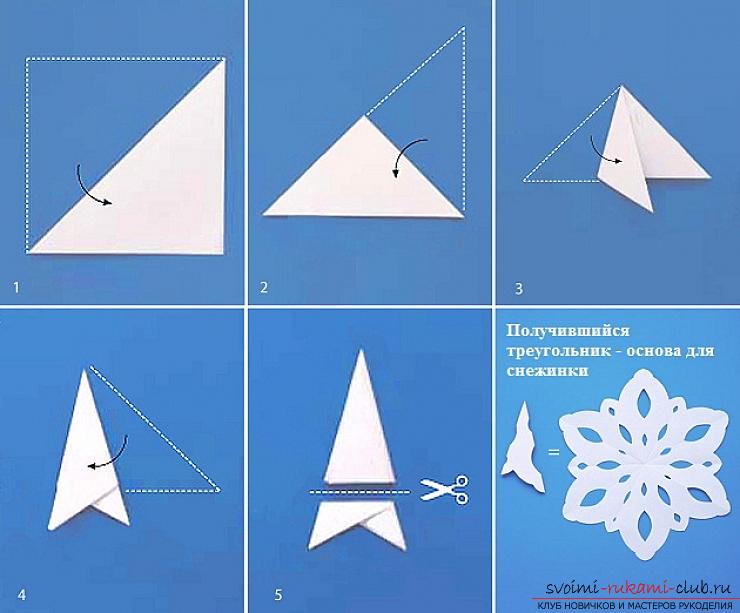 On the resulting blank we use a simple pencilWe draw a picture, then cut out with scissors. You can not transfer any drawing, but immediately proceed to the carving, imagining the pattern that we would like to see mentally. The photo shows several models of beautiful snowflakes, which you can easily do yourself.
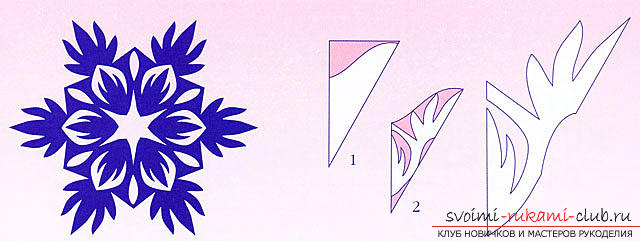
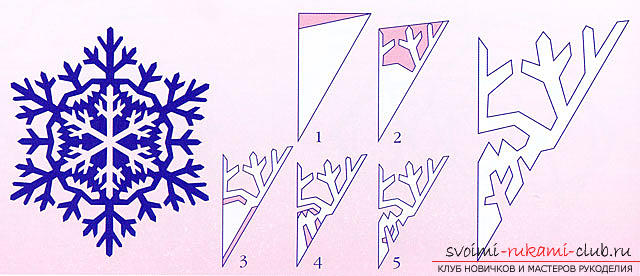
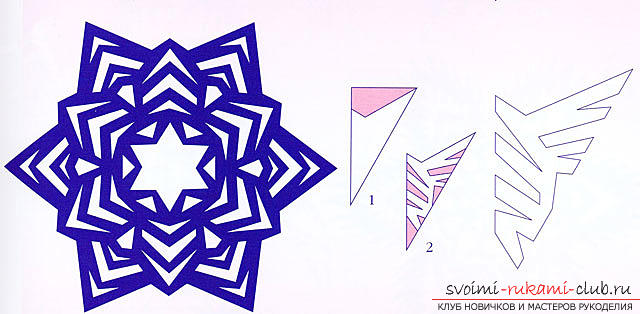
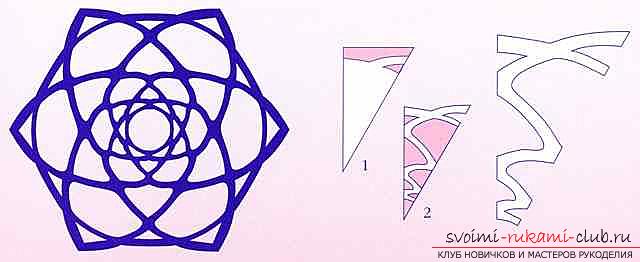 According to the rules of origami technique, real snowflakeshave six rays. It is these snowflakes with carved patterns that we can make using the above descriptions and diagrams. Everything is so simple that you do not have a question, how to cut the right snowflake in origami technique. And, after a little training, you can make beautiful ornaments that decorate the windows, a Christmas tree or make chic garlands for decorating rooms. Having learned to make simple models of snowflakes in origami technique, you can proceed to more complex models that differ in their volume and originality. It can be snowflakes of one color or have several shades in one product. The room, decorated with paper snowflakes, made by own hands, will look festive and unusual.
Comments
Related posts:
 Hair equipment with your own hands in a few minutes
 How to make a volume snowflake from paper
 New Year's crafts, the creation of Christmas decorations from paper, the various creation of paper balls with their own hands, how to make a beautiful garland of paper with their own hands.
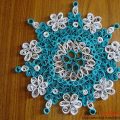 Make your snowflake in the technique of quilling from paper: handmade crafts
 To make a piece of paper made from origami in origami technique, it takes a few minutes