Openwork flowerpot holder crocheted by hand, master class with photo
Flowers on the windowsill are always the decoration of the house,the creation of coziness and an interesting piece of furniture. A beautiful, well-groomed flower in a decorative pot or flower pot can decorate any room - kitchen, living room, hallway or bedroom. But often the pots on the windowsill, especially the plastic, remain stained. Avoid them will help stand under the pot. You can buy it in the store or link it yourself. In the first case, it's fast, well, in the second case - it's exclusive and interesting. Moreover, things made by own hands add warmth and comfort.  To link the stand, you will need:
- thick threads;
- a hook suitable for the threads;
- a little time and a good mood.

Let's start knitting our podstavochki from the chain, which will consist of eight loops.  Having connected a chain, we make from it a ring, having connected the first and last loops by a column which will not have накида.
  For the beginning of the second row of our stand we will connect three lifting loops.
  In a ring formed by a chain, we will connect fifteen columns, in which there will be one cape.
  The next, third, row of the stand will consist offrom the columns, in which there will be one crochet. We connect five loops. Three of them will replace the first column, and the fourth and fifth loops are the gap between two adjacent bars.
  Now we will fasten a column with a crochet to the next column of the second row.
  And behind him is a third, also separated by a pair of loops.
  And so on all round.
  In the fourth row, the bars will also have one cape. But the distance between them will consist of three loops. Therefore, at the beginning of the fourth row, we link six loops.
  Then, similarly with the previous row, we will fasten a column with one overhang, exactly to the third row.
  Only 15 bars.
  The fifth row will consist of columns not with one, but with a pair of crochets, separated by four loops. Therefore, for the beginning of this series we connect 8 loops.
  The first column with a pair of cords we will fasten in a columnthe bottom row. Next, we have to tie a flower of three petals in the corner of our stand. The distance between the column and the first petal is three loops.
  Next in one bar (this will be the corner) we will tiethe first petal. To do this, in the column we will tie three columns with three crochets. But we will bind them unfinished. After each column on the hook should be added along the loop. In total - 4 loops.
  Then, in order to finish our petal, we will fasten all four loops at a time.
  Between the petals make a distance of three loops.
  To ensure that the corners formed, the averageThe petal should be slightly larger than the two adjacent ones. Therefore, in it we use columns with four crochets. The knitting principle of the petal is exactly the same - a common base and a top.
  Separate the last petals in the same way, with three loops.
  The flower is ready.
  Now we need to tie the other side of our stand. To do this, in the next column after the flower we will fasten a column with a pair of cords at a distance of three air loops.
  Then we make another one of the same column, previously tying the chain into 4 air loops. This is the central side bar.
  From it we will connect four more loops and we will execute again a column with a pair of nakidov.
  Now three loops and a flower that will help to form the second angle of the stand.
  So we will form from a circle 4 angles with flowers and 4 sides on three columns.
  We tie the stand with one more set of meshes fromposts and air loops. In the columns there will be 2 nakida, and in the chains - 4 loops. To start the series, we make 8 loops. We link the column to the column of the previous row.
  We will fasten the next column to the first petal of a corner flower.
  In the central petal we will connect two bars, dividing them by a chain of 7 loops. This we finally form our corner.
  We will tie a podstavochku around the perimeter.
  Now let's make one short row of simple columns, in which there will be no capers. Columns we will knit in every column and every air loop.
 And one more dense row of columns with one crochet. In this row we will fasten a column to each loop of the previous row.
  To save the corners of our stand, we will tie three columns with one crochet from each corner post.
  We will tie it around in a circle, more precisely by the square.
  In the last row the stands will alternateSimple posts without a crochet with columns in which one is a crochet. For the beginning of the series we will connect 5 loops. Then, having retreated from the beginning of knitting one loop, we will connect a simple column. After that we will make 2 loops and we will fasten a column with a crochet, having receded already a pair of loops from a simple column. It turns out like a letter "m".
  So, alternating the columns and the distance between them, we make one more "m".
  In the corner, we'll fasten 2 bars with one crochet, dividing them with a chain of three loops.
  The stand is ready.
  Having connected such podstavochki under each pot onwindowsill, you not only complete the image of the window, but also protect the windowsill from scratches and streaks. Well, as we knitted a stand of natural thread, it can still be used and instead of the stand under the hot in the kitchen.
Comments
Related posts:
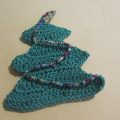 This master class New Year crafts with their own hands with a photo and description will teach how to tie a Christmas tree crochet
 The master class will teach you how to make a crocheted crocheted vase with your own hands from a glass jar
 Master class on the creation of a children's toy - a giraffe, crocheted.
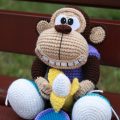 Master class on knitting monkey amigurumi crochet with their own hands with step-by-step description and photo.
A detailed master class with a photo of crochet with her own hands bandages on her head for a girl.
Master class on knitting monkey amigurumi crochet with their own hands with step-by-step description and photo.
A detailed master class with a photo of crochet with her own hands bandages on her head for a girl.