
A detailed lesson on knitting with crochet and crochet of homemade slippers, without a seam and on two or five knitting needles, according to a simple scheme, with a detailed description, a photo for free
We knit homemade slippers with knitting needles and crochetthe needlewoman does not dream of pleasing her loved ones with an elegant and practical product created by her own hands ?! One of these can be called home slippers, which you can knit easily and quickly. With this version of knitting with household slippers, you need 70 grams of yarn, preferably - yarn from the wool of the required thickness, as well as knitting needles and a hook. 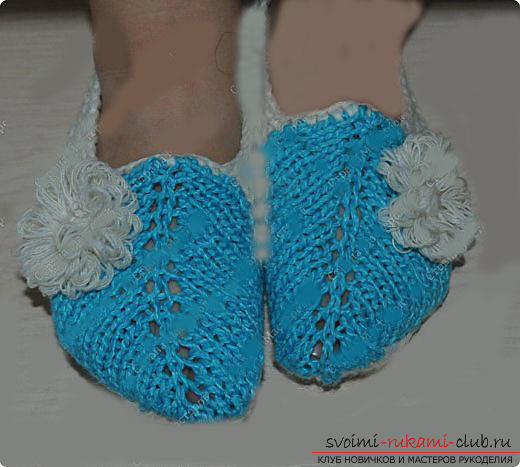 The pattern is formed by four rows,which are repeated in the future. The basic principles of knitting here are very simple, so you can understand the technology from the first. Since the slippers are knitted with a single cloth, we recommend using 2 long / circular knitting needles. If you tied a thread of a different shade, then, tied to the little finger, cut off the edge of the thread. First, a hole for the leg is knit (the one that is at the level of the golinostop). First we dial a chain of 17 air loops (VP). The length of the foot is selected according to the size of the foot: 35 - 37 - twenty two centimeters; 38 - 40 - twenty five centimeters; 42 - 44 - twenty eight centimeters. And so on in ascending order. We continue to knit on all eyelets with a pearl pattern. We knit the central ten loops. Next, we connect the two loops into one and turn the work over to the wrong side. We knit the sneakers and the sole separately.
 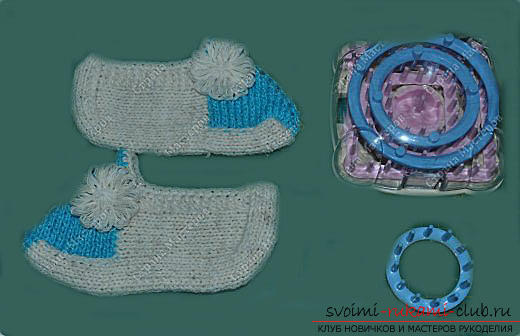 The 1st row is finished. Work, as it were shifted to the right, but the total number of loops remains the same. Then we form a foot, tying thirty-four loops straight sheet. Next we will apply for knitting back and front rows. We knit another row (in the same way as done in the installation row) after the last addition. From it we form nine loops, similarly with the last time. We pass to the front row: we knit until 7 - 8 - 10 is left, we sew one face and remove the next loop. Having finished knitting six hems, you need to close all the loops, and then turn the work in the opposite direction. Only central loops are knit. In each row in the center we knit one cape, two face loops, a cloak. Similarly, the loops knit until the desired length is reached, which is left at the end. Loops are typed on the side. So we add two more loops. We put the finishing loop on the hook. The third row is four columns without a crochet. Next, from each edge, we collect 9 loops. You can dial nineteen loops and tie two rows in a circle. Then go to the top and again you need to dial ten loops. We are running from the thirty-sixth to the forty-eighth row. We loosen the loops on the toe at the beginning of the first and third spokes and at the end of the second and fourth.
  52 - 56 rows: repeat the rows 50 - 51 (18 loops). After this, these rows alternate (from 52nd to 56th). As soon as one needle remains on the knitting needles, knit them together. In the 59th row everything fits facial. In view of the done downsizing, the number of loops decreased to 34. After closing all the loops, we begin assembling the details of the slippers together. You do not need to cut the thread. We got a sweep of the sneakers. The element of slippers, which we tied first, is called the sole. We bend it down and with the help of a thread and a needle we combine the parts on the sides. The sole is knit, focusing on the size of the foot, and there is no need for complex calculations. We type twelve EPs for tying the top part. Then we knit all the descriptions. After the completion of the knitting process, the wizards often fix the sole. The second sneaker is exactly the same. Basically, knit is started from above and then stitched along the sole.
Comments
Related posts:
 Knitting with knitting needles for women with openwork diamonds according to the scheme with description and photo for free
 Knitting women's stoles with a knitting needles with a description and photo for free
 How to knit with cute mittens "Winter Tale"? A lesson on knitting winter mittens from acrylic on knitting needles, with a detailed description of steps and photos
 A detailed lesson for beginners on the set of knitting needles for different types of loops for socks, socks, scarves and much more with detailed descriptions and photos for free.
 How to tie two-spoke slippers, seamless for beginners, with detailed descriptions, photos and diagrams for free