Detailed step-by-step photos and description of weaving of bead trees, two master classes.
Create crafts from small beads peoplebegan at the dawn of civilization. The first of them was made from bone and shells, cast from precious metals. With the advent of the first glass more than 6000 years ago, the first progenitors of beads appeared - glass beads. The oldest 9 mm diameter was found near the Ancient Egyptian city of Thebes. The needlewomen weave and embroider very beautiful crafts made of beads of various colors and sizes. Looking at a lot of images of hand-made articles from beads on the Internet or on the pictures of magazines on needlework, it seems that only professionals can create such a thing. That's why the articles of our Club offer step-by-step photos and a detailed description of creating a variety of crafts. Miniature trees, flowers, original bijouterie in the form of bracelets, earrings, necklaces and much more can easily decorate the house and complement the outfit if you follow our advice. This article is devoted to step-by-step photo lessons on creating trees. Orange tree from beads with turn-based photos. 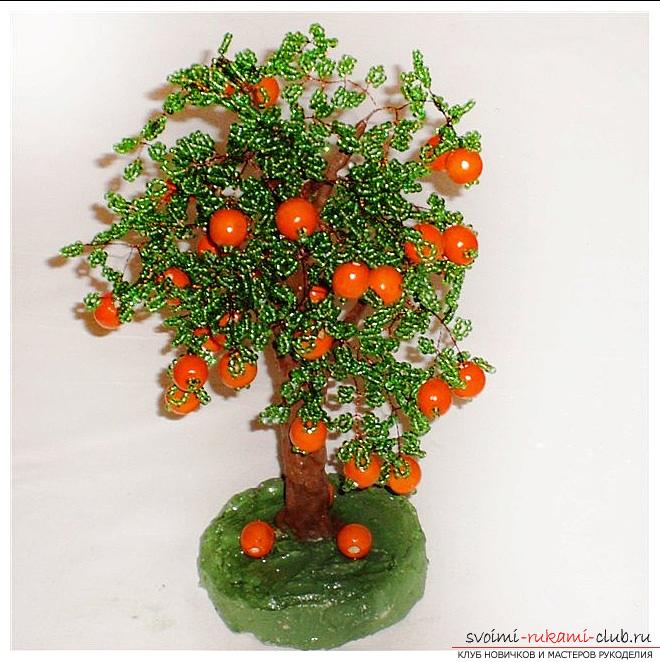 On the expanses of the World Wide Web are very populartrees from beads. Very often you can find sakura, herringbone or a birch tree. In the same master class, it is proposed to create a non-trivial and bright orange tree. Materials for work:
- Beads of green color 100 g;
- Orange large beads 30 pcs .;
- Thin (0.3 mm) and thick (1 mm) wire;
- Yarn;
- Paints, acrylic;
- Alabaster;
- PVA glue;
- Acrylic lacquer;
- Nippers;
- Capacity for the stand;
- Polyethylene film.
Stage one, weaving twigs. On a piece of thin wire, 80 cm, thread 1 orange bead (this will be an orange) and 3 green beads. Arrange them in the center and pass one of the tails of the wire into a bead. At one end of the wire, dial 7 pcs. Beads and twist the loop near the bead. Make 2 more of these eyelets around the bead. 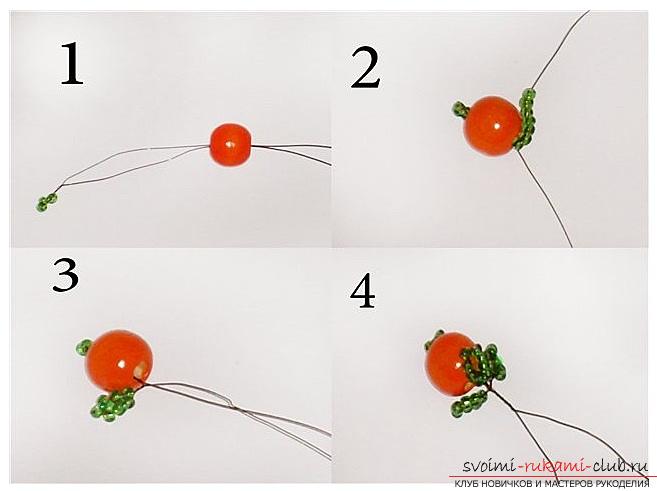 Twist the wire ends a distance of 1see make 2 loops of 7 beads. Again, twist the wires by 1 cm. Retreat 3 cm and weave another 1 orange with eyelets. Unbend the end of the wire in the other direction and weave a twig without an orange bead with five eyelets from a green bead.
 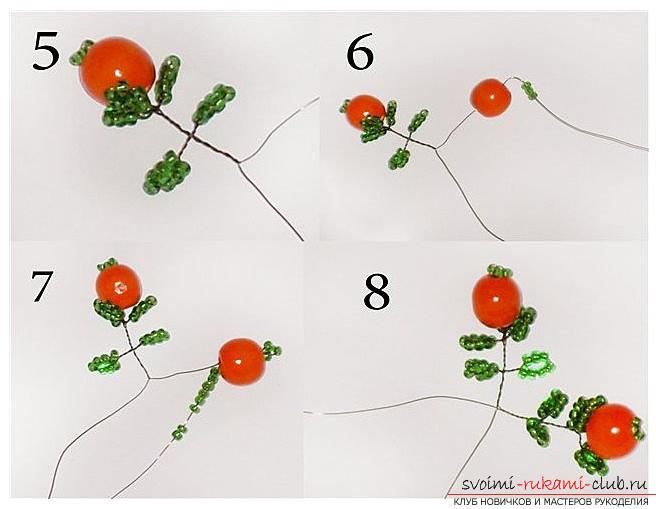 Step back down another 1 cm and weave on both sides on 1 green loop. Weave 2 twigs from 9 loops only from green beads. Screw them to a branch with oranges.
 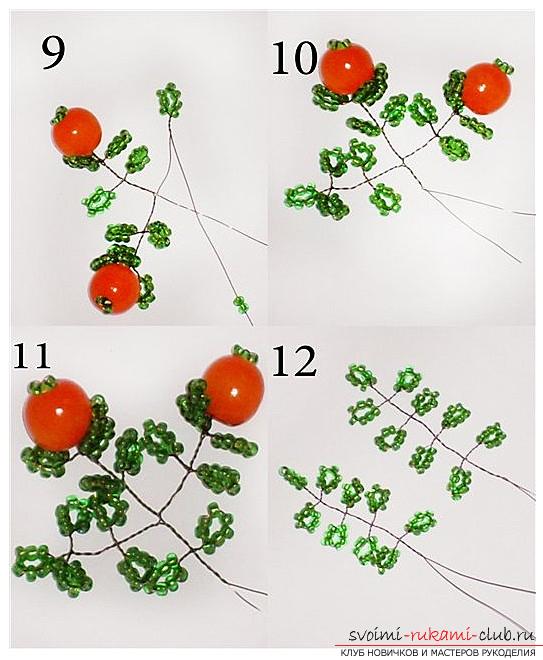 The first workpiece was obtained. We need 2 more such blanks for one full branch.
  To create it, you need to take a piece of thick wire 20 cm and screw the twigs. At the top of the first, below is another and a little lower than the last. Wrap tightly with a thread.
 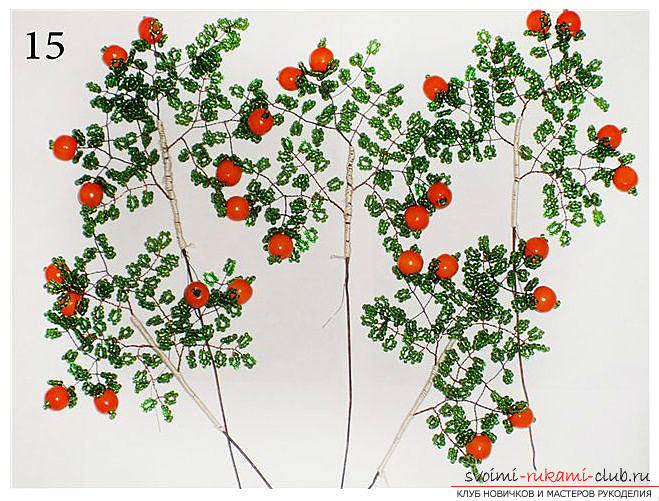 In total, 5 full branches are needed. Stage two, the union of twigs. Join them in a single trunk. The location of the branches is arbitrary and limited only by imagination. The trunk must also be threaded.
 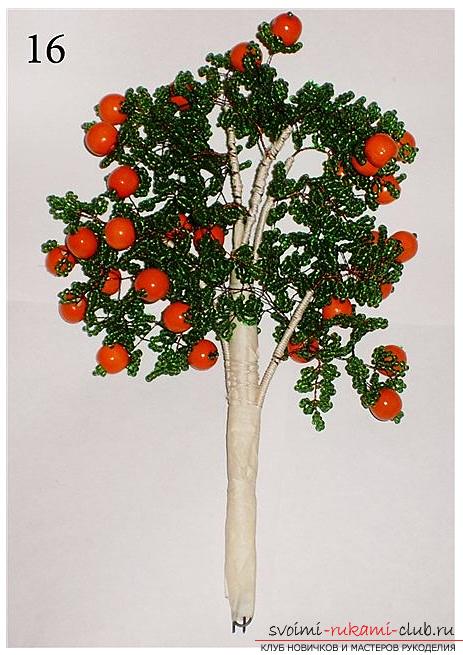 Stage three, the creation of the stand. It is necessary to send the chosen container (it can be any small jar, for example, from under the cream) to cover with polyethylene. Add the alabaster with water 1: 1, place the wood in the container, pour the mixture and firmly fix it until it is completely solidified.
 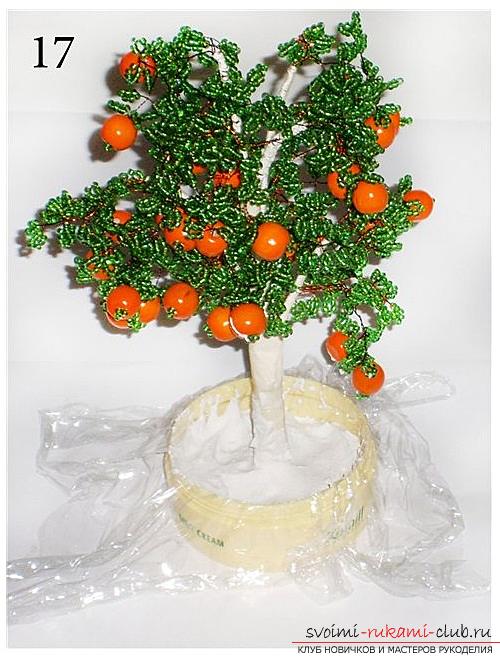 The last stage - decor and painting.
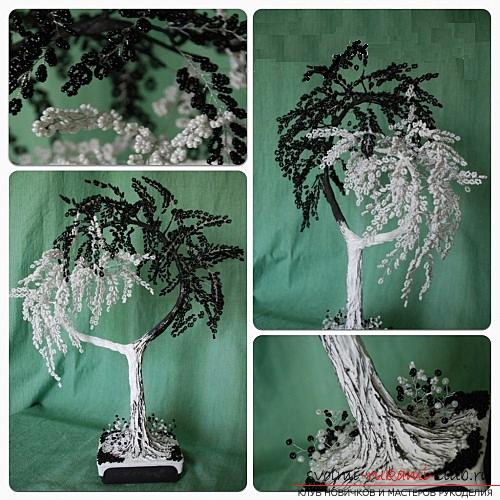
 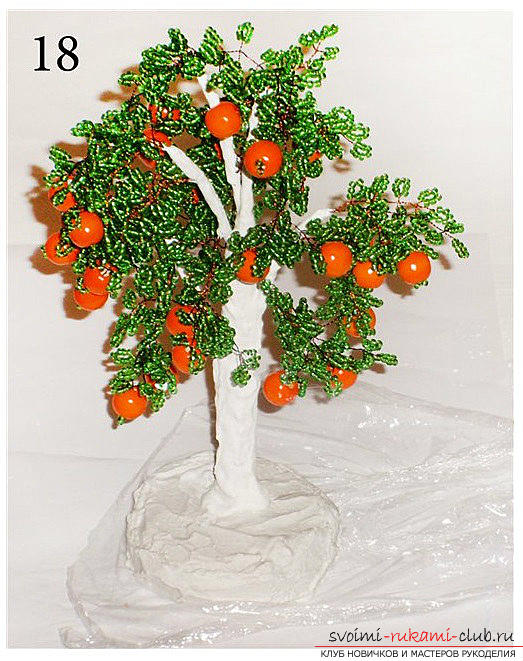 After the alabaster is completely dry,you need to extract the tree, now you can begin to process the trunk. Dilute alabaster and glue with water (1: 1: 1). Cover with a trunk and twigs. After drying, paint the stem, twigs and podstavochku paint. The orange tree is ready. Ancient Chinese belief says that everything in the universe has two diametrical hypostases: light and darkness, heat and cold, a woman and a man. In the presented master class, we suggest you make a Yin-Yang tree of your own by yourself.
  Materials for work:
- Opaque beads (fine - 150 g black and 120 g white, large 20 g of both colors);
- Thin wire 3 coils;
- Thick copper wire 1 m;
- Capacity for the stand;
- Black and white thread (suitable silk shoe or mulina);
- Black and white paint;
- Gypsum;
- Brushes;
- PVA glue;
- Clear aerosol varnish.
The first stage, the creation of branches. The branches are made in looping technique. It is the same for both black and white beads. Before work, thread the beads on the reel wires. The color of the wire should be neutral (silvery). From the free tail measure 15 cm and weave 15 or 17 loops, consisting of 8 beads each. Measure from the last eyelet another 15 cm and cut off the wire. 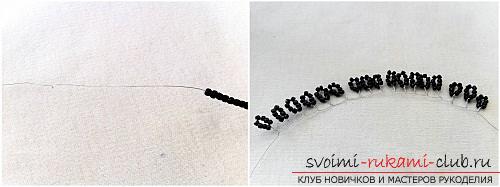 Find the central loop, bend the workpiece in half and twist the twig (see photo). Straighten the loops. Approximately 70 white branches and 100 black ones are needed.
 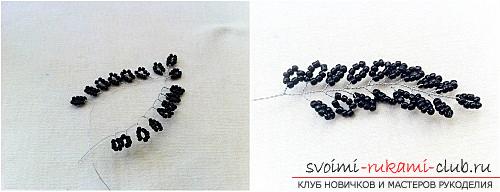 The second stage, the assembly of twigs and trunk. In this version, the black twig is more white, it is slightly above, and the tree has the shape of a heart.
 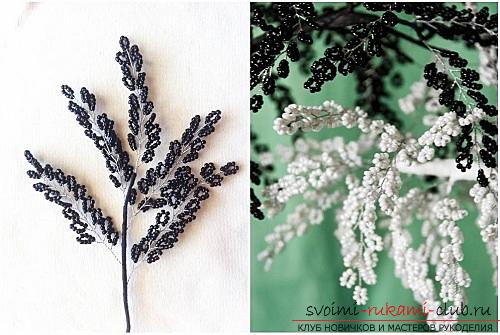 Make billets for twigs. Take a piece of thicker wire (1 mm) about 17 cm and thread it with black thread bead twigs from 5 pcs. and more. White - white thread. From two pieces of thick copper wire (3.5 mm in diameter), 50 cm long, twist the blank for the trunk and main branches. At the end, make a loop so that the tree is easy to install and fasten.
 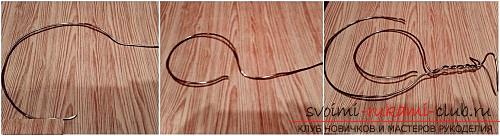 Screw the workpieces to the frame with threads of matching colors, placing the branches spirally. Since there are many blanks, and they are quite heavy, it is better to further strengthen the frame with a piece of wire.
 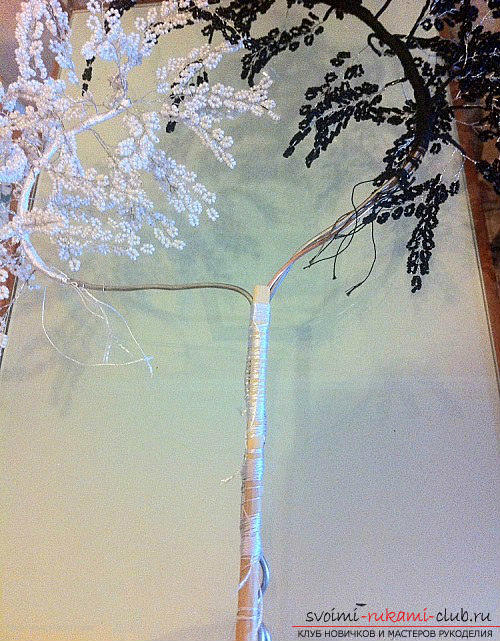 The third stage, the creation of supply. It is similar to the previous master class, the main thing in this moment is not to pull the workpiece out of the mold too early, so that the base does not crack. The last stage is decor. The trunk of the tree is covered with a mixture of gypsum, glue and water (1: 1: 1), for branches make a more liquid consistency. To impart texture to the trunk, its bottom should be smeared with an additional layer of the mixture, and until it has completely frozen to draw the bark with a sharp knife. Leave until completely dry. On the surface of the base, holes for decor elements are needed, so you can insert cocktail tubes into the non-hardened solution. If the stand is already dried, you can use an awl or a hand drill.
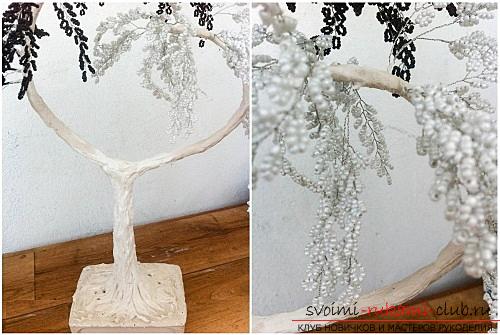
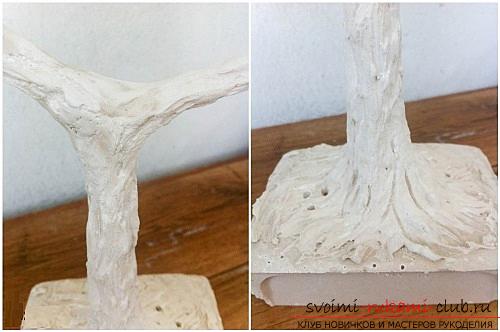 Black paint paint the top of the blackbranches (to the intersection of twigs), white everything else. After drying, apply smears of black paint with a dry, hard brush to the bottom of the stem and roots. After drying, paint the bottom of the delivery. Twist out small white elements from white and black beads and wires and fasten them in the holes of the stand.
 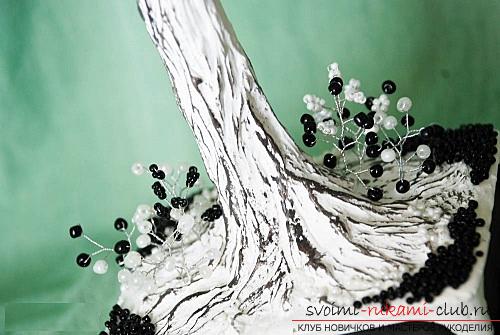 The Yin-Yang tree is ready.
Comments
Related posts:
 A detailed master class on weaving a hyacinth flower from beads, step-by-step photos and job description
 How to weave beautiful beads, detailed instructions, description and step-by-step photos for beginners in beadwork
 How to create a gerbera flower from beads in the technique of parallel weaving, step by step photos and description
 How to create a tourniquet from a bead, various techniques of weaving and knitting of plaits, step-by-step photos and a detailed description of the work
 How to weave wisteria from beads, step-by-step photos and a description of the wickerwork of Japanese and Chinese wisteria in loop technique, tips on decorating crafts