
DIY clothes hanger: Pvc pipes, from wood: Photo and drawings
Such hangers can be used not only forouterwear in the hallway, and as well as mini wardrobes in the room. It all depends on what type and design you choose. The hangers of the clothes rack are functional, easily rearranged from place to place, and free the backs of the chairs from wearing unnecessary clothes.  This article has collected some interesting andsimple ways to make a floor coat hanger with your own hands. They will not take much time and effort. Choose your favorite option and go to the interior changes! The content of the article:
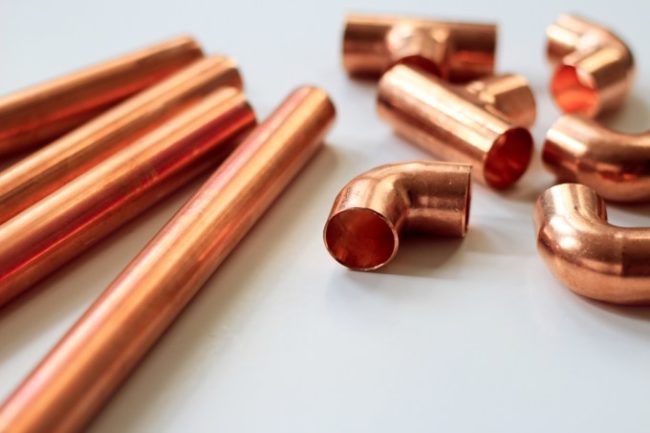
Copper pipe hanger
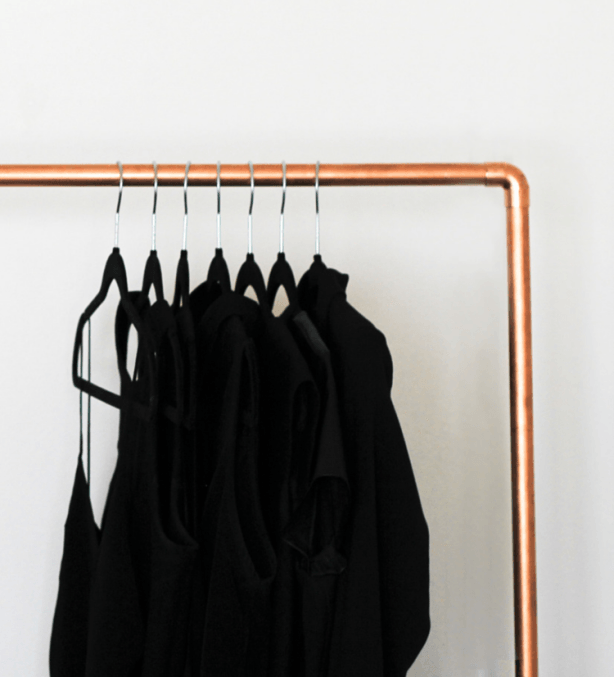 Necessary materials:
- 1.5 m long - the height of the hanger (this height should be enough for the jackets and for fine ones, but you can take more or less at will);
- 1 m long - the size of the pipe on which you will directly hang things (you can also take it longer or shorter, calculate how many things you want to put there);
- two tubes about 20-25 cm long - with them we will make the legs of the hanger.
That is, it turns out 2 copper tubes of 1.5 m, 2 of 1 m, 4 of 20-25 cm. 
- 4 copper angles (tubes, bent at an angle of 90 degrees) for attaching the pipes to each other, select the diameter of the pipe (approximately 2 cm);
- 2 T-shaped connectors;
- 2 caps for pipes;
- Glue (epoxy glue or consult with the seller in the store, that of what is in stock, fit);
- Felt pads to protect the floor (optional).
 Step by Step Instruction: Step 1: Measurements Measure the space on the floor where the hanger will stand, make sure it fits. If you take these dimensions, you will end up with 150 cm x 100 cm x 45 cm. TIP: Adjust the dimensions if necessary. Step 2: Putting the legs of the hanger We begin to fold the floor hanger itself off the legs, make support and stand. To do this, take the first pair of tubes of 20 cm and fasten them together with a T-shaped connector, and then do the same with the second pair. Step 3: Fasten the protective caps In order to keep dust and dirt in the middle of the pipes that will serve as legs, you need to close the holes. Attach a pipe cap to each of the two legs folded in the previous step at one end.
  Step 4: Basis
- On tubes with caps on the other hand, attach along a corner in this way: when a corner is lying on the floor, the T-shaped connector located in the middle of the leg should be directed upwards.
- Take one of the pipes of meter length and insert it into the corners, now the base of the hanger is ready.
ATTENTION: To securely fix the structure, you can use glue (at least in all the joints), but then the hanger cannot be disassembled and folded again (when moving, for example). Step 5: Side racks Insert the one-and-a-half meter tube into each of the T-connectors, thus forming the side racks. Step 6: The Final Touch
- Attach one corner to each of the racks just put (they should face each other), and insert a meter tube into them.
- You can also attach felt pads to protect the floor. Floor hanger is ready!
 Note: Since this design is easily disassembled (if you did not use glue), you can change its length, for example, depending on the season: in winter there are more things - longer pipes were installed, in summer they are shorter.
PVC pipe rack (budget option)
The method of making this floor coat hanger is similarthe previous one: the pipes are folded like a designer, forming a hanger. But here we use not copper pipes, but PVC, so it will be much cheaper. And, of course, another new design idea. 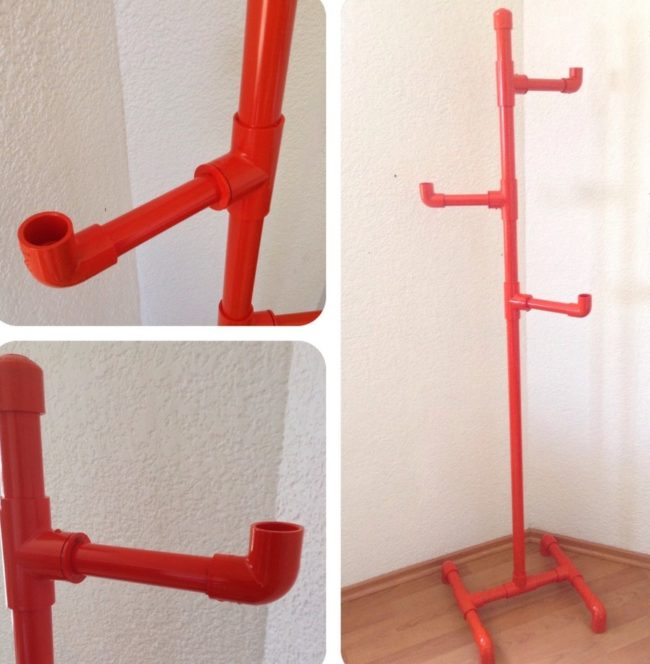 Necessary materials:
- PVC pipe with a length of 2 m and a diameter of 2.5 cm, it must be cut into such parts: 12 cm (6 pieces), 80 cm (1 pc.), 20 cm (2 pcs.) And 10 cm (1 pc.).
- PVC pipe 50 cm long and 2 cm in diameter, cut it into 3 parts by 15 cm.
- 4 tap-angle with a diameter of 2.5 cm.
- 3 tap-angle with a diameter of 2 cm.
- 6 T-shaped connectors with a diameter of 2.5 cm.
- Adhesive for PVC.
- Spray paint.
- 4 PVC adapters from 2.5 cm to 1.25 cm.
- 3 PVC adapters from 2.5 cm to 2 cm.
- Felt pads to protect the floor (optional).
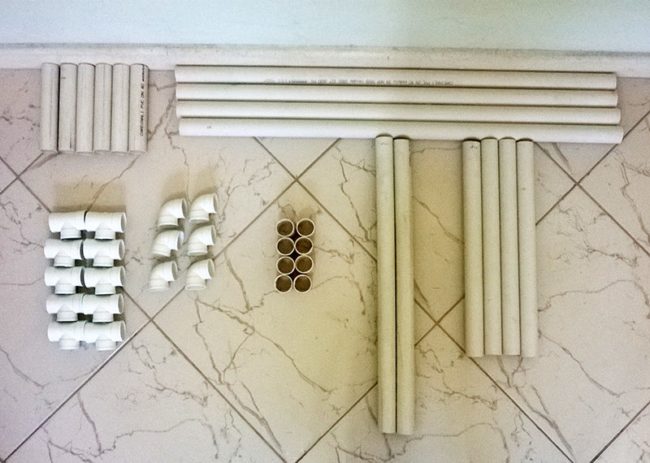
Step by Step Instruction: Step 1: Cut the tubes into pieces of the right size. First of all, we have to cut the PVC pipes for rack mounting. You can do this yourself at home with a PVC cutter or ask at a hardware store. After cutting the pipes into pieces, their edges can be sanded so as not to scratch while collecting the coat hanger. Step 2: Sort the materials Now we have all the necessary parts and for convenience they are better sorted, then the assembly process will be faster and more orderly. Spread out the materials into small groups, depending on their purpose.
- To stand hangers will need: 4 corners, 4 adapters from 2.5 cm to 1.25 cm, 3 T-shaped connectors and 6 tubes with a length of 12 cm (diameter 2.5 cm).
- For each hand hangers: T-shaped connector, PVC adapter from 2.5 cm to 2 cm, 15 cm PVC pipes with a diameter of 2 cm and a corner with a diameter of 2 cm (you can also put a cap on the pipes on it).
- For the rack: one PVC tube 80 cm long, two 20 cm each, one 10 cm and cap.
Step 3: Assemble the hanger
- Stand
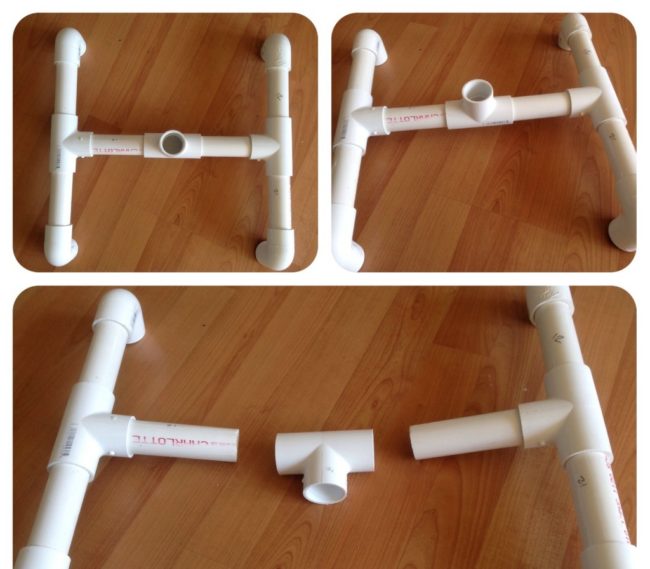 Fasten every two tubes to a T-shapedconnector. Insert one of the three resulting structures between the other two, as shown in the photo. Put the corners on the edges of the other two, turning them down so that a hanger stands on them.
- Arms
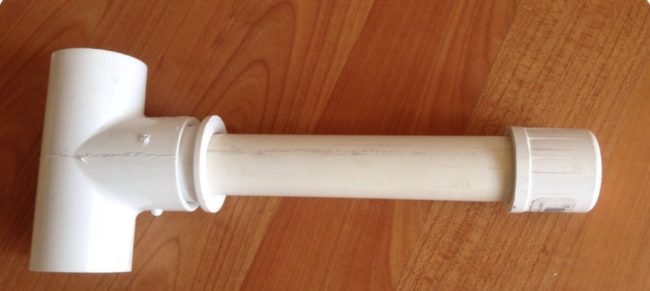 Put the T-connector, adapter, tube and cap together, as shown in the photo.
- Rack
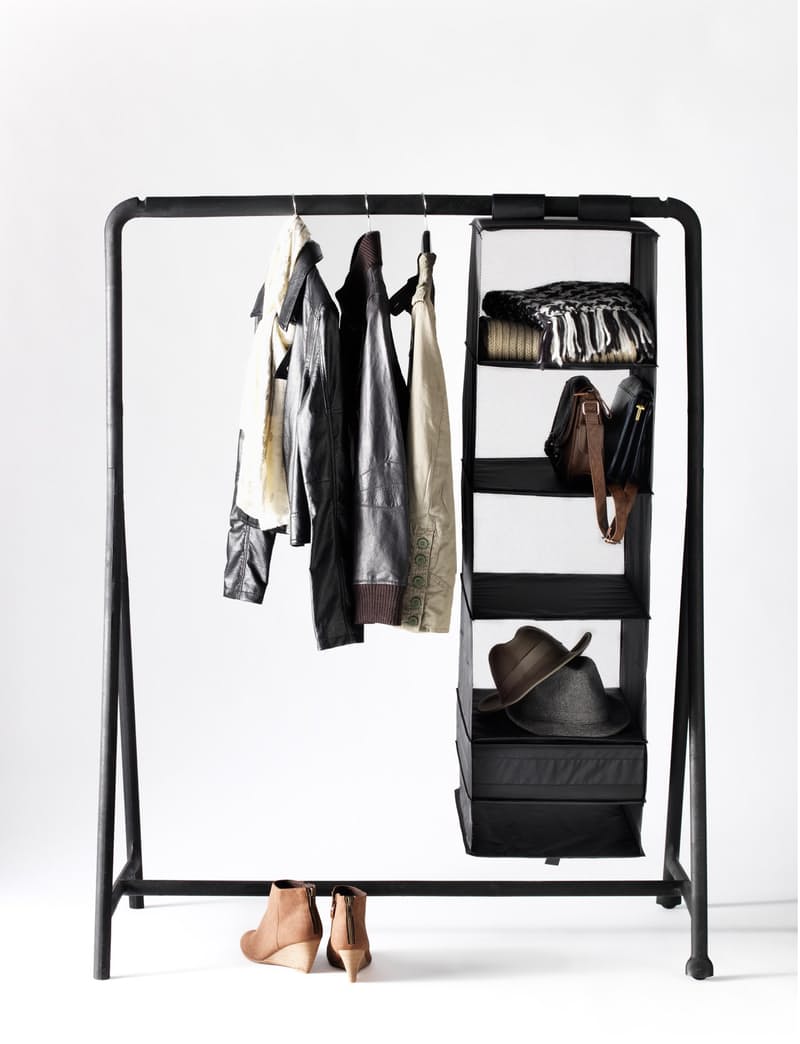
In the stand in the T-shaped connector, inserttube with a length of 80 cm, attach one of the hangers' hands to it, then attach a tube with a length of 20 cm, another hand hangers, again the same tube and hand, put a tube with a length of 10 cm and a final touch on top of the cap.  To keep the structure better, you canfasten with special glue for PVC. Be careful with the hands of the hangers to glue them turned in the right direction - corners up. Step 4: Painting The design of the hanger is ready, but it still does not look very aesthetically pleasing. Carefully and evenly apply a spray paint of your chosen color, do not stain the room. TIP: to make the coat hanger more stable, sand can be poured into the pipes from which the stand is made. After such a small trick hanger will not fall and roll over. Hanger from pipes with several levels Another hanger of this type, but with extended functionality: here you can not only hang clothes, but also put shoes. Compact and comfortable wardrobe.
 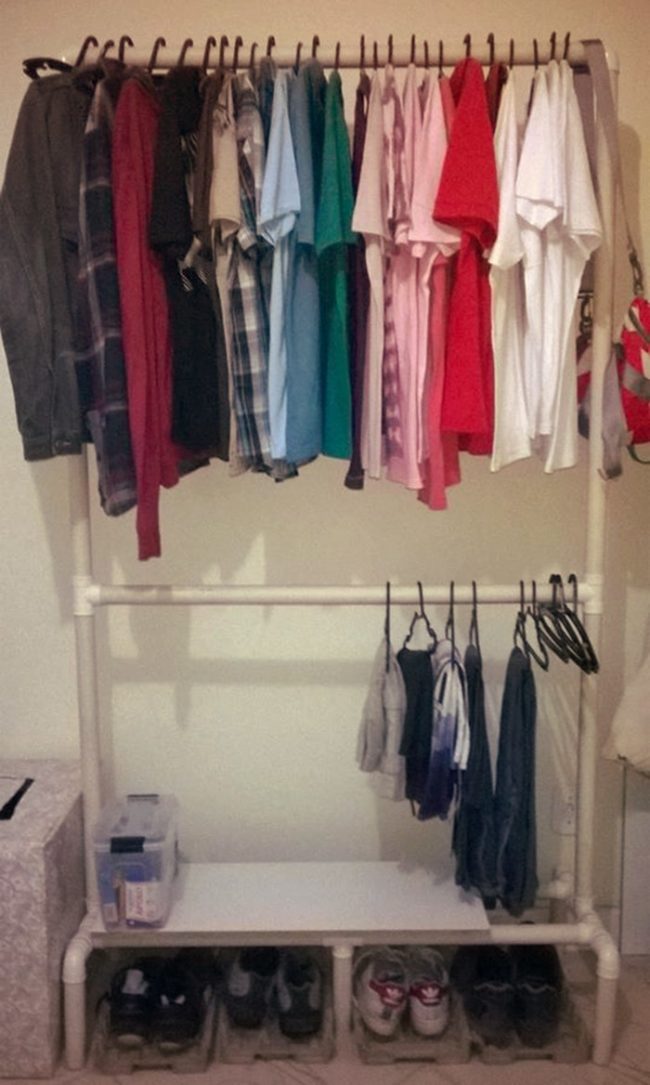 Necessary materials:
- 4 100 cm long
- 2 65 cm long
- 4 48 cm long
- 6 20 cm long
- 8 5 cm long
 We fold completely similar to the two hangers described above.
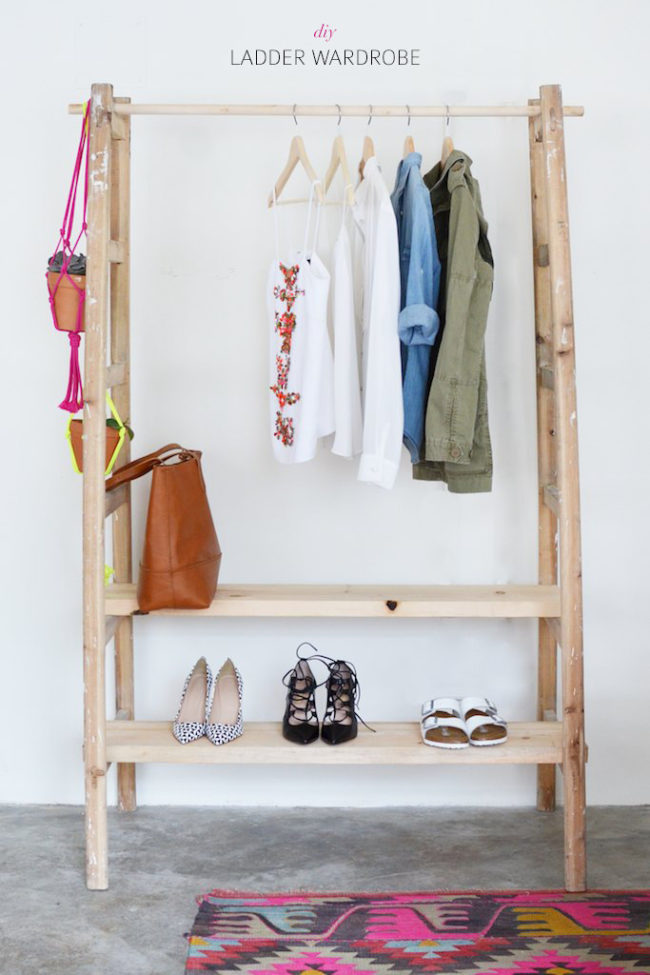
Wooden floor hanger for 10 minutes
 Necessary materials:
 Step by Step Instruction: Step 1: Paint the Supports
- Paint the feet in the chosen colors, let the paint dry.
- Stick masking tape in the place where it shouldfinish spray paint, and gently apply paint to the feet. It is better to do it on the street, or cover the floor with newspapers, so as not to stain anything. Peel off the masking tape.
 Step 2: We form a hanger Connect the wooden supports together with a rope, and then gradually push them apart. There should be something on the basis of this wigwam, the legs should be placed wide enough so that the hanger is stable and easy to use.
  Such a hanger takes a lot of space, so it is best to put it in the corner.
Interesting ideas and photos
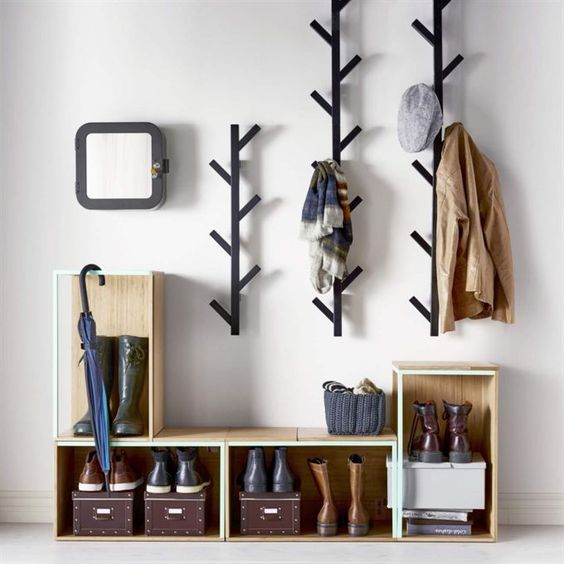
Hangers-trees It can be neatpolished tree trunk or its branch, or folded wooden structure. The main thing is that there was one support and there were branches from it - hangers handles. Original and useful addition to the hallway. 
 Hanger-constructors Number of elements andthe design may be different, but all these floor hangers are united by the fact that they can be quickly folded, and just as quickly disassembled (if not used glue). Sometimes they use more expensive and noble materials, such as copper, sometimes wood or PVC, in any case, it turns out beautiful and extraordinary.
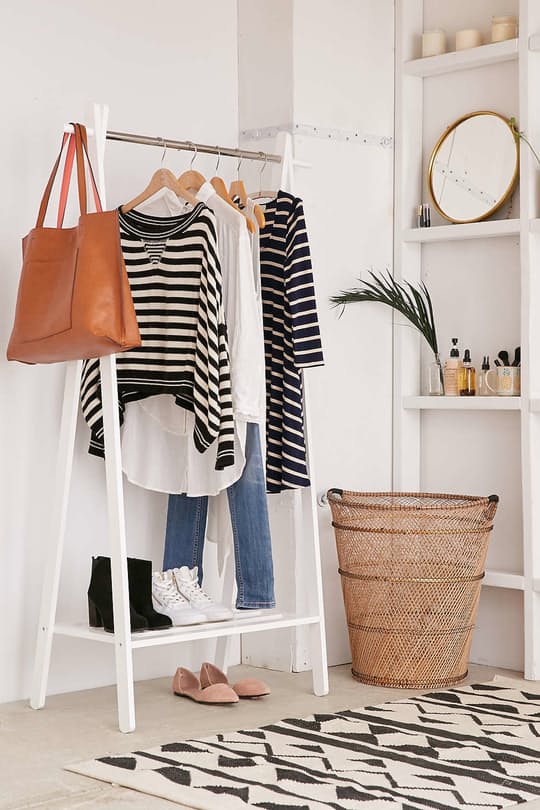

 Hangers from building supports Even suchThings like construction stands, ladders and ladders can become hangers. A little imagination, and things that were uselessly standing idle in a corner and occupying space turn into useful and even designer furniture.
Comments
Related posts:
 Make-up mirror do it yourself step by step: photos and drawings
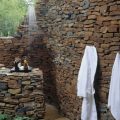 Best photos: summer shower in the country with their own hands. Drawings and dimensions.
 Mobile bar table with your own hands made of pipes
 Wooden candlesticks with their own hands: photos and workshops
 Floor vase from the pipe from the linoleum do it yourself in 30 minutes