
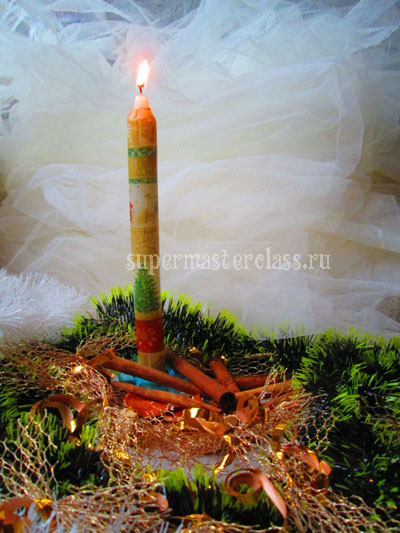
DIY decoupage candles: master class
 The decoupage technique is fun and uncomplicated, notrequiring you special handicraft skills. The only thing that is presented to this type of work is accuracy. And yet - artistic taste. Although we will work with ready-made napkin motifs, we must be able to apply them beautifully. Many try their hand at modifying outdated furniture or kitchen utensils. We today offer you to take advantage of the simplicity of this technique (in a more simplified version!) And create beautiful interior accessories or gifts. Today we will do our own hands decoupage candles for the New Year.
Materials and tools for decoupage candles with their own hands
For the manufacture of candles with Christmas motifsneed: three-layer paper napkins with a suitable pattern; simple white household candles, flat cylindrical; dessert or tablespoon; gas or electric stove. 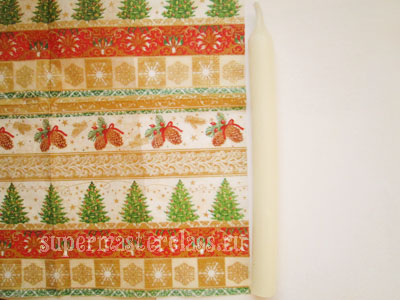
Decoupage candles for the New Year: master class
Traditional decoupage consists of three stages: preparation of the sub-surface for decoration (includes its cleaning, priming and, if necessary, painting), gluing the napkin motifs with a special glue (preferably) or PVA, as well as varnishing with a transparent varnish in order to give the finished product a complete look and durability. In the decoupage of candles with their own hands, the first stage is excluded, and the last is connected to the second. And this means that you can perform the decoupage of candles for the New Year in literally 15 minutes. So, separate the top layer from the napkin - with a pattern. 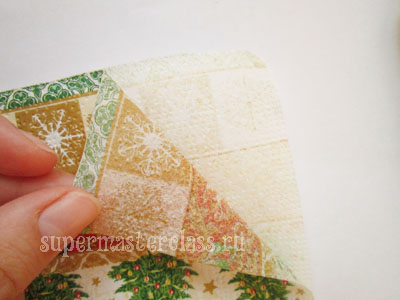 Wrap a layer with a pattern of our candle and mark the line along which to cut the napkin. Let the drawing go a little overlap.
 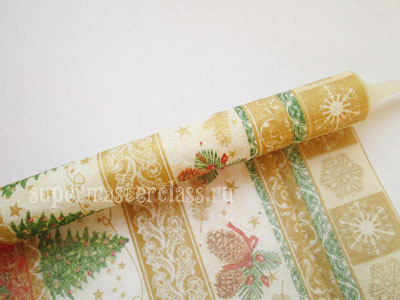 Cut a suitable piece of napkin. If you are going to zadekupazhit several identical candles with the same napkins, we recommend immediately cut the required number of napkin wrappers motifs.
 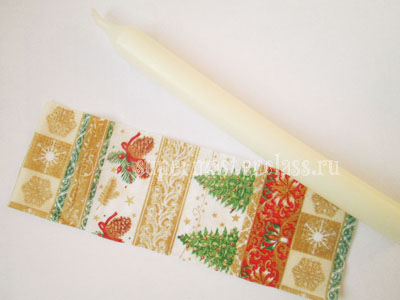 Now we start the candle decoupage itself. If you have a metal spoon with a plastic handle that is not afraid of heating, you can use it. If you don’t have one, think about how you can wrap a spoon of a spoon to avoid getting burned. I used a small kitchen towel for this. Immediately prepare a plate on which you will put a spoon for a while, so that you do not have to think about where to stick a hot object. Now - the most interesting. We wrap a candle over the napkin and, holding the construction with one hand, heat the spoon on the stove. It is enough to place its rounded part in the flame and hold it there for a while. Now we roll the convex part of the spoon over the candle through the napkin.
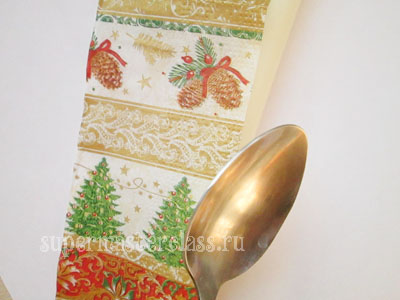
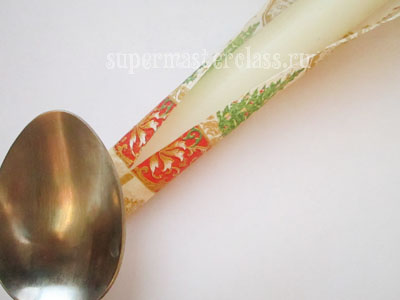 This can be done in different ways: first “seal” the joints; spoon the center of the napkin over the candle from top to bottom, and then proceed to sealing the edges of the napkin until it cuts, etc. We are sure that you will quickly find a suitable, most convenient option for you.
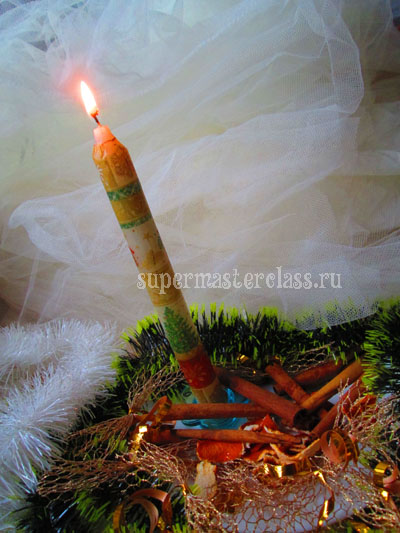
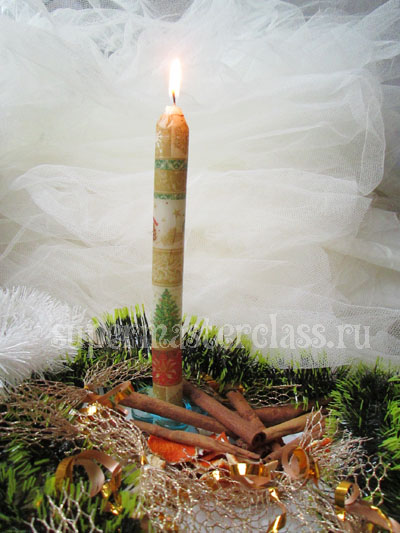
 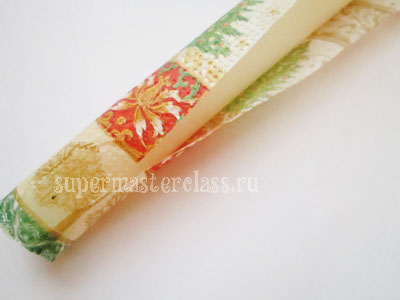 Thus, we “go through” the whole candle. Here is what it looks like in finished form.
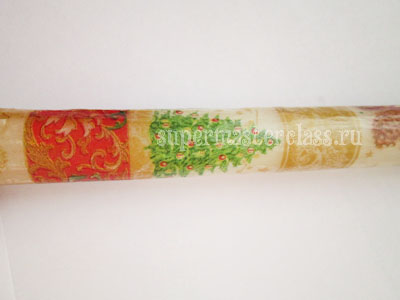
DIY Decoupage Tips
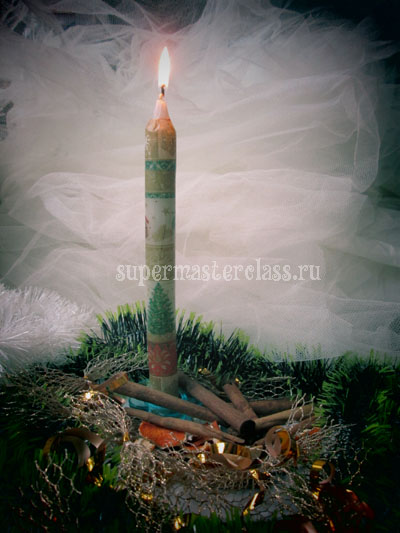
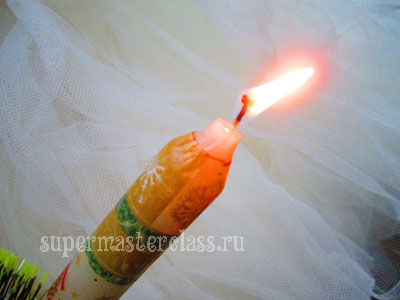
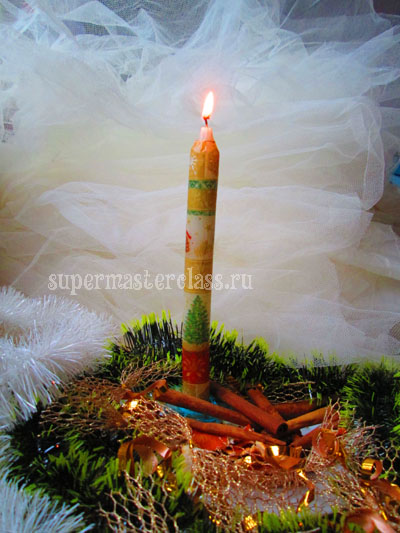
Important: the napkin should be soldered into the candle, and not be slightly glued. Avoid dry islets: an unprinted napkin on a candle can explode during use. If it is “imprinted”, we get an absolutely safe product, suitable for use for its intended purpose. Do not hold the spoon on the candle for too long, otherwise it will lose its shape in that place. The spoon will have to be periodically heated in order to work with equal efficiency over the entire area of the candle. Enjoy your creativity! Make a candle - and you get a great holiday composition! Eva Casio specifically for the site Previous article: Next article:
Comments
Related posts:
 This master class will teach you how to make decoupage of coffee cans by yourself.
 Master class with a description and photo will teach how to make decoupage of a bottle of champagne with your own hands
 This master class will teach you how to make your own tea house and how to decorate it in the style of decoupage.
 Easter decoupage of eggs by own hands: decoupage with napkins for Easter, master class
 Decoupage pot for flowers with their own hands, decoupage of flower pots, master class