
DIY wall clock: 3 turn-based workshops
How and what to make a wall clock
New wall clocks can freshen up anythe interior and at the same time it is not necessary to look for the right option for shopping. It is very simple to make a wall clock from a variety of simple, easily accessible materials. Such a clock can not only decorate the wall in the living room or kitchen, but also become a great gift for friends or relatives.
Hoop Wall Clock
Original look wall clock made ofembroidery hoop and decorative buttons. The advantage of such a watch is that the fabric base, you can choose the appropriate texture and color to the interior of the room. For such watches, buttons of various colors and sizes are suitable. For work you need: • Hoop; • Buttons; • The cloth; • Braid or tape; • Clockwork. First of all, you should fix the fabric in the hoop and cut off the excess edges. Then you need to sew the buttons to the fabric so that the distance between them is the same as between the numbers on the dial. Now you need to fix the clockwork. To do this, make a small hole in the center and fix the clockwork. Such watches can be hung on the wall. To do this, you need to attach a beautiful ribbon or braid to the hoop. 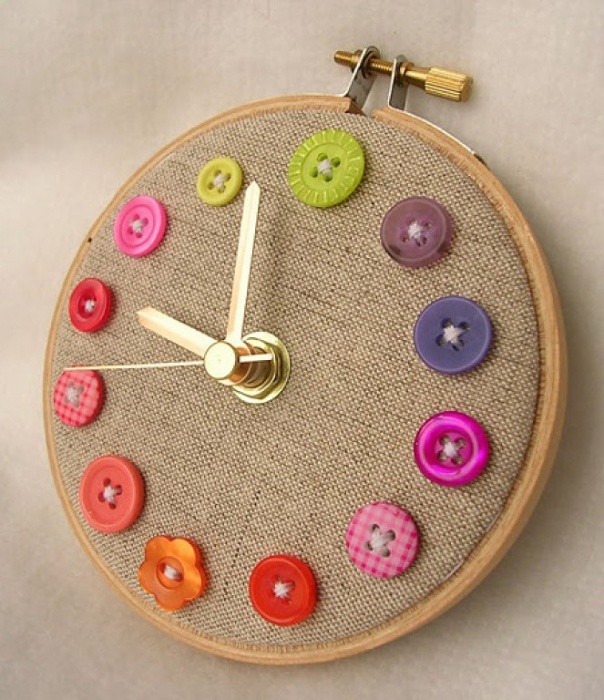 DIY wall clock
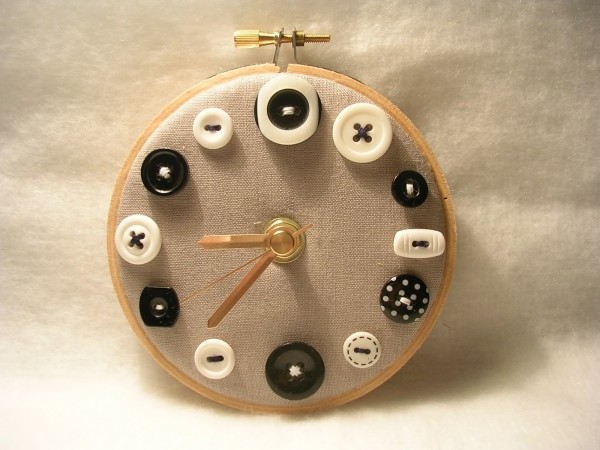


Wall clocks from magazines or newspapers
Unusual watches made from oldmagazines or newspapers. For work you need: • 24 pages from an old magazine or newspaper; • scissors; • Pencil; • Duct tape; • Circle made of cardboard; • Thread floss; • needle; • 2 plastic discs; • Clockwork. Use the pencil from the pages to make the tubes. To prevent the tubes from unwinding, fasten their ends with adhesive tape. Then measure out about a third of the tube and bend in this place. Take the needle and thread and thread the needle through the bent end of the tube. So fasten the remaining 23 ducts to the thread. Make a circle out of the tubes. Take a plastic transparent disk (it can be cut from the packaging from the disks) and fix it over the workpiece from the tubes. Then attach the clock to the disk. In this case, you need to make sure that the hole of the disk coincides with the place of attachment of arrows on the mechanism. On the other side of the workpiece, attach another transparent disc and a circle of cardboard and use a nut to secure the clockwork. It remains only to fix the hands and the clock is ready. 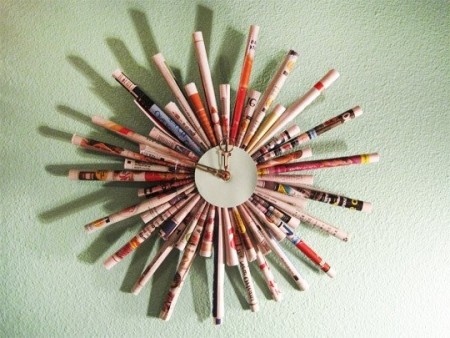 Wall clock from old do-it-yourself magazines


Coffee wall clock
Coffee wall clock will be the bestlook in the kitchen. In addition to the fact that such a watch will decorate the wall, a pleasant smell of coffee will come from them. In order to make such a watch yourself you will need: • A piece of glass with a hole in the center; • Napkin with a coffee pattern; • Acrylic paint; • Varnish for decoupage; • Glass contour; • Stained glass paints; • brush; • PVA glue; • Coffee beans; • Clockwork. To get started, take the glass, attach the prepared napkin to it and gently tear off the ends of the napkin that extend outside the glass. Put a napkin on the glass in such a pattern from you. Dilute the PVA glue with water in a ratio of 1 to 2. Using a brush, gently moisten a napkin with glue with water, at the same time smooth out the wrinkles that form. Then allow the workpiece to dry. When the cloth is completely dry, cover it with acrylic varnish. And again, let the workpiece dry thoroughly. Then, from the back, draw a border to which the dial will be filled with coffee beans. Fill the places where the grains will be placed with stained glass paint and immediately place coffee beans in it. The dial can be made simply by placing bold dots on the glass using a contour or gluing coffee beans at an equal distance. Also tsiferki can be made of clay, plasticine or baked plastic. You can fix the numbers with glue moment. All that remained was to fix the mechanism and the coffee clock was ready. 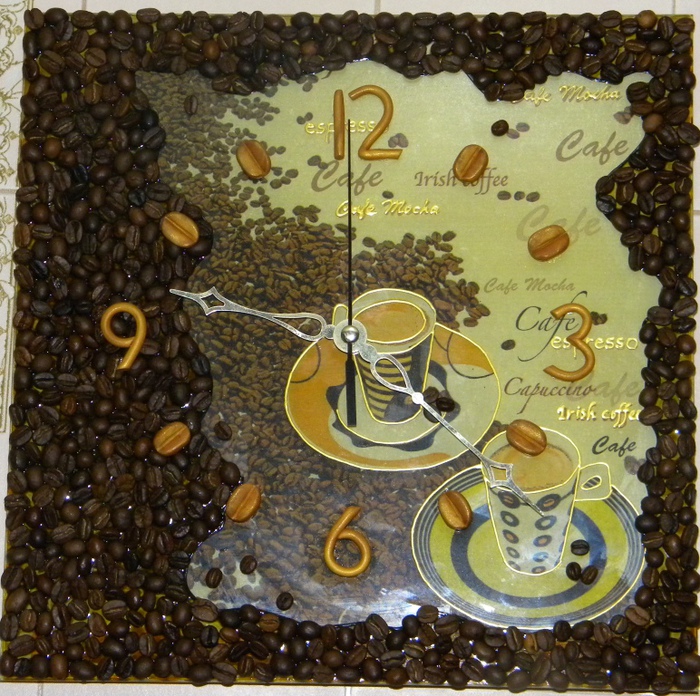 DIY coffee wall clock

 We also recommend viewing:
Do you like the article? Share on social networks!


