
We make beautiful and original patterns of bright New Year's toys. Holidays became even more pleasant and beautiful. Simple instructions and photos
New Year's holidays are a time of magic,gifts, games, recreation and snow. During this period, many hope to see a real miracle, and receive many wonderful gifts. Santa Claus is the main character, without which there is not a single New Year's holiday. Today you can sew modern and unusual Santa Claus with Norwegian roots - Tilda Santa Claus. Now let's talk in more detail about the assembly scheme and describe the process of cutting and sewing. What materials will be used to properly sew Tilda Santa Claus?
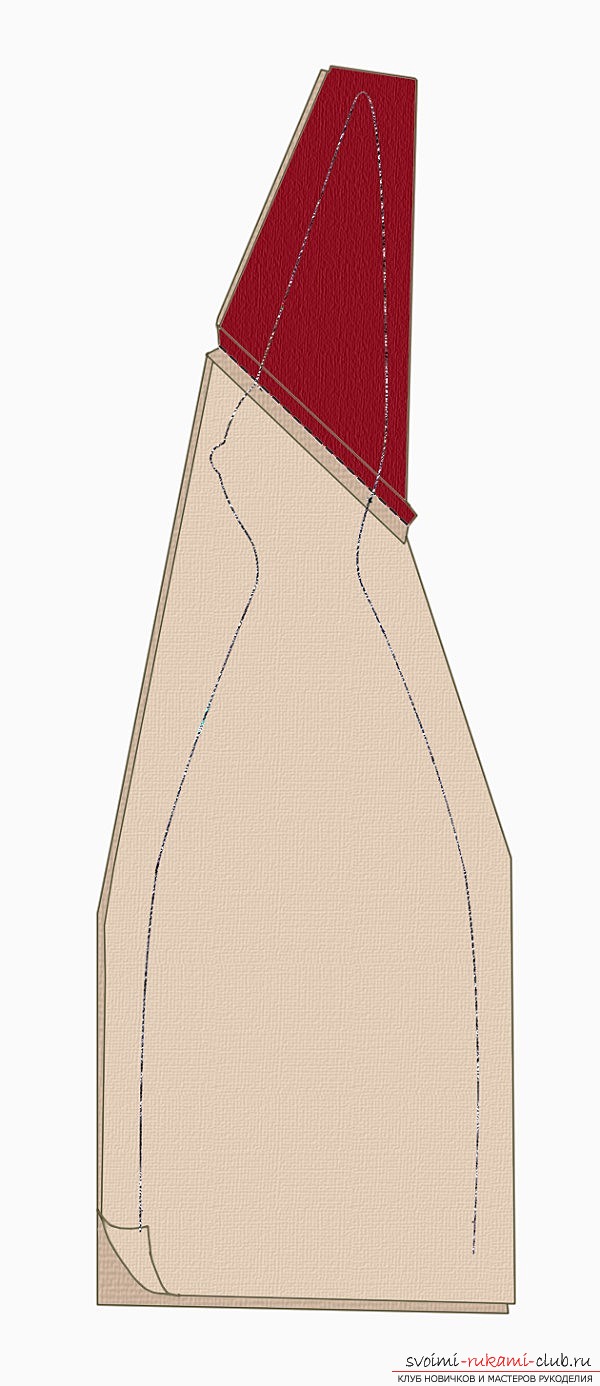 Now go directly to the verythe process of sewing Tilda Santa Claus. It is worth considering the following, the cap is sewn together with the trunk of his grandfather, and not separately! Therefore, it is required to prepare in advance two pieces of body tissue for sewing the trunk, as well as two pieces of cloth for the cap. The fabric should be cut in the direction of the filaments, but by no means oblique. If you do not comply with these conditions, then Tilda Santa Claus will be harder to sew, because the lines and seams of the figure can be distorted. How to determine where to sew a piece of cloth for the hood of the grandfather? To do this, attach a grandfather's tie to the matter for the trunk, and then circle the outline of the pattern. Draw the cap and draw a line, add another allowance to the seam. Cut out a piece of cloth for the hood, and along the line drawn, sew the part to Tilda's Santa's body. The seam is then ironed. In a similar way, prepare the other half grandfather. Both parts should be folded together with the wrong sides, and then sew them along the drawn line. Cut seam allowances, and temporarily set the parts aside.
 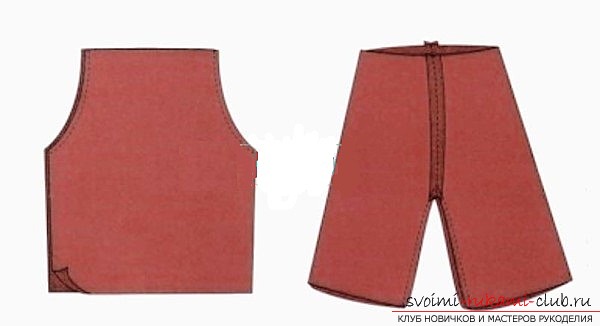 Now we will work with monophonic matter. Translate the patterns of the handles to the fabric. On the cloth with a small pattern, circle the legs of the grandfather. The workpieces need to be cut, taking into account all the seam allowances, and then sew all the details on the sewing machine or manually. Surplus cuts, and in places of rounding it is necessary to make special marks with scissors. The trunk of the toy together with the legs and handles must be turned out with the front side. If all the elements of the body are wrinkled, iron them again with an iron. Seam allowances wrap in and iron them. We begin to stuff Tilda Santa Claus. For filling, use any wood stick with blunt horses. Fill the filler in small portions and tightly, but evenly fill the grandfather inside. Now you can sew Tilda Santa Claus handles and legs. Place the legs in the hole in the trunk, fix the positions with pins. The central seam on two halves connect, and then sew the legs to the trunk with a hand seam. Handles also sew by hand. A figurine of Tilda Santa Claus is ready! Now you need to do your clothes.
 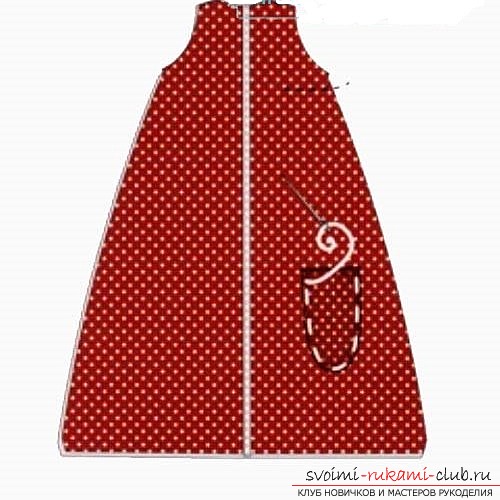 How to sew clothes to a figure? Fabric for future pants should be folded in half, pull the template to the very edge and traverse the pattern. Similarly draw a pattern for the second half of the pants. All the details are cut, taking into account the allowances for seams. The front side is fixed and we sew the pants with the side seam. Now unfold the trousers and sew each leg. Wear them not a figure, the allowances for the seams in the pants wrap so that the cut of the cloth was not prominent. At the edge of the thread. Use a wide step, and tighten it so that the pants are very snug against the legs of the doll, and at the same time, they looked like bloomers. The allowance on the belt is tucked inside, after you place four wrinkles, and along the edge of the trousers, sew trousers to the trunk. The toy is almost ready, it remains only to sew clothes for the New Year's figure! Let's go to sewing a coat for Santa. If the matter is selected fine, then it is worth reinforcing it with fleisilin. Thus, the coat can hold a trapezoidal shape. Fabric for sleeves should not be strengthened. On the back of the matter, circle the pattern of the coat, you will get a back and in front. Both parts are solid. From the same fabric, make sleeves - two parts. One half determine the front, and in the center, attach a thin braid of velvet. Cut out two elements for sewing pockets, connect with each other, and in one half create a slot, and turn out on the right side. Spread the corners at the pocket, iron. Attach to the half of the coat and sew a pocket by hand or a sewing machine. Back and fold together and sew the shoulder seams together. Surplus material cut, and iron the pattern. Treat the neck, in other words, bend the material inside and glue it to the adhesive tape. Sew the sleeves. Find the center of the sleeve, this is easy to do on a pattern. Connect the center with the seam on the shoulder. Start sewing from the center point. Sew one side of the sleeve with armhole, and only then start sewing the second. When the two sleeves are sewn, fold the coat in half with the front side inward. Then sew side areas and sleeves. Cut excess linen along with the stock. Turn out the coat on the right side, and then iron the product from all sides. The hem is wrapped inside, and glue it with adhesive tape and iron. From the fabric, cut a strip to decorate the hem of the coat. The width of the strip is 3 centimeters, and the length is 100 centimeters. Center the seam. Pick up the strip, and then sew it to the coat. The coat is ready, and now you can safely put it on the figure of Santa Claus. Tighten the sleeves on the thread, and then sew to the sleeves of the doll. We proceed to decorating the figure. You will need 4 bowknots, which you can do by yourself. From velvet braid, cut pieces of 8 centimeters, and fold them in such a way as shown in the picture. Center the bow with threads. Bows sewn or glued on your coat. Sew a beard to a figurine, and after that look into the design of the face of Santa Claus. The beard can be made from a white yarn called "bucle". Measure the length of the future beard to begin with. Take the object along the length of the future beard, and wind the yarn over it. Distribute it in regular layers, and then start sewing from the very edge of the cap to the nose and again to the hood itself. Draw your eyes with black paint and place two dots on your face. Blush with dry rouge or pastels, distribute them with a cotton swab very carefully, so as not to stain the beard.
 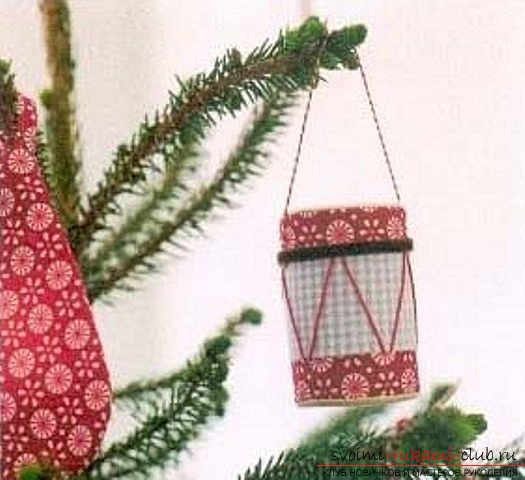 It remains only to sew on the hood specialheadphones. They will hide the docking seam, and the doll will be finished. Cut the headphones pattern twice on the fabric. Cut out the details and sew together, leave a slot in the center. Turn out the headphones on the front side, and sew the slot with a hidden seam. Iron the part. With white threads and decorative stitches, sew headphones to the Tilda of Santa Claus.
 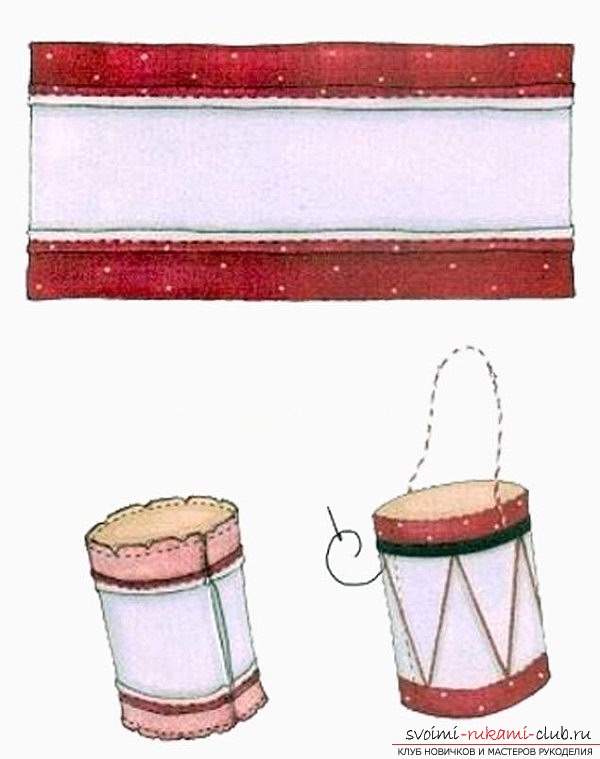 It remains only to create a drum of paper. Print parts on a color printer, cut out the parts and glue them together. The drum is ready! You can create a drum made of cloth. Below is a picture of how to sew such a type of drum. Drum sticks will be toothpicks, with beads glued on the tips.
 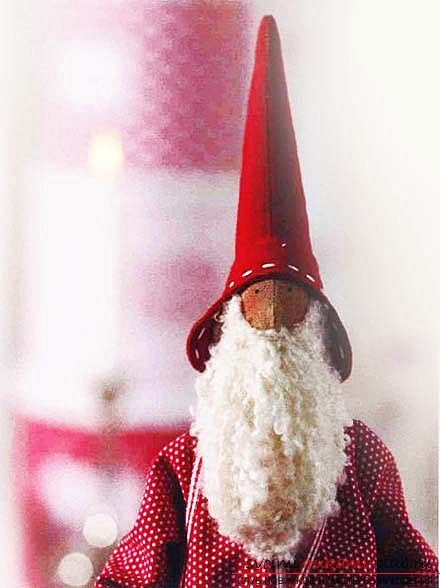 A figurine of Santa Claus is ready!
Comments
Related posts:
 New and original ideas for a coat for a girl. We make clothes for the child in the latest fashion of 2014. Simple instructions and photos
 Getting ready for winter. We make a warm hat together, which will not allow you to freeze. Simple patterns of high-quality winter hats, instructions and photos
 Make beautiful bouquets of toys with your own hands
 We make our wardrobe more diverse. We make a pattern of a simple dress base with our own hands. Simple diagrams and photos
 We are preparing for the summer heat correctly. We make a pattern of a light dress-sundress with our own hands. Simple diagrams and photos