To make bright three-dimensional stars, you can use the origami technique according to the proposed schemes
Bright three-dimensional stars of paper origamido it yourself you can at any time and in any quantity. A minimum of material, a bit of free time and detailed diagrams and descriptions will help you make wonderful crafts for decorating any interior. Origami is an ancient art form of making various figures from paper, which came to our life from Japan. Initially, it presupposed a square piece of paper and no tears or incisions, only folds. But, for its many years of existence, like any other art form, origami was modified and improved, which gave impetus to new techniques. The volume origami, to date, is no less popular than the simple technique. It allows you to make various figures and crafts, attracting attention by its realism. Bright volumetric stars of origami paper are an excellent example of this kind of art. The process of work, though painstaking, but not complex. 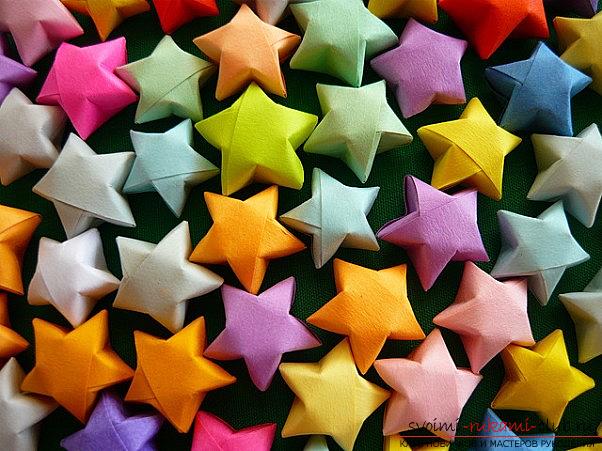 For the manufacture of these wonderful craftsyou will need to prepare the material. To do this, take the colored paper and its mode on the stripes, the width of which is 1 centimeter. If the strips are narrower. The asterisks will turn out to be very elegant, but making them will be somewhat more complicated. Wider bands will make the finished product very rough. You can take any paper, monophonic, wrapping, or use sheets from magazines. The asterisks will turn out equally beautiful. It is not suitable only for a cardboard sheet, since this material is badly bent. Tapes need to glue together with glue to get something like serpentine. For the basis of bright volumetric stars of origami paper, you need to roll the correct rectangle from the strip, as shown in the photo below. From the tape, make a small loop and stretch the end of our ribbon (working material) into it. Tighten so that a knot is formed. It is very important that the strips adhere tightly to each other, without lumens, but too much can not be tightened too. The tail of the ribbon must be hidden. To do this, we'll push him back.
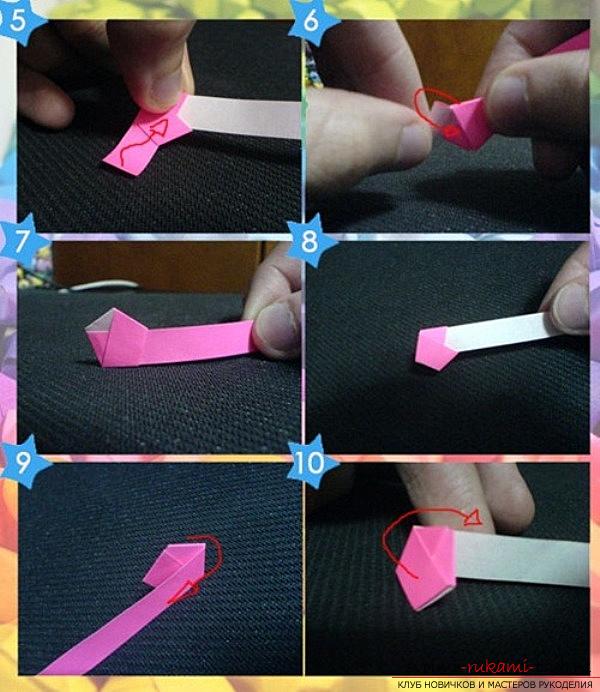
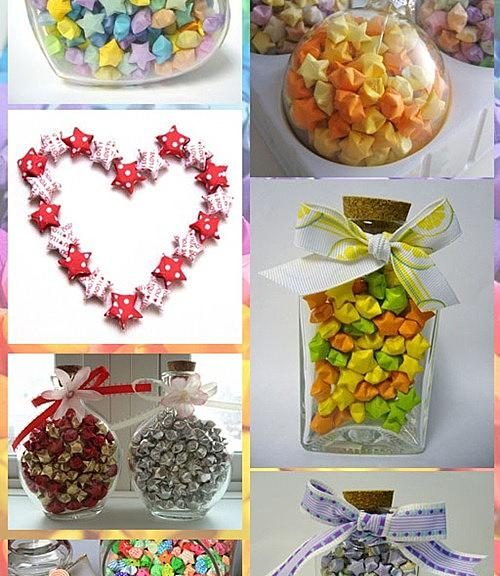
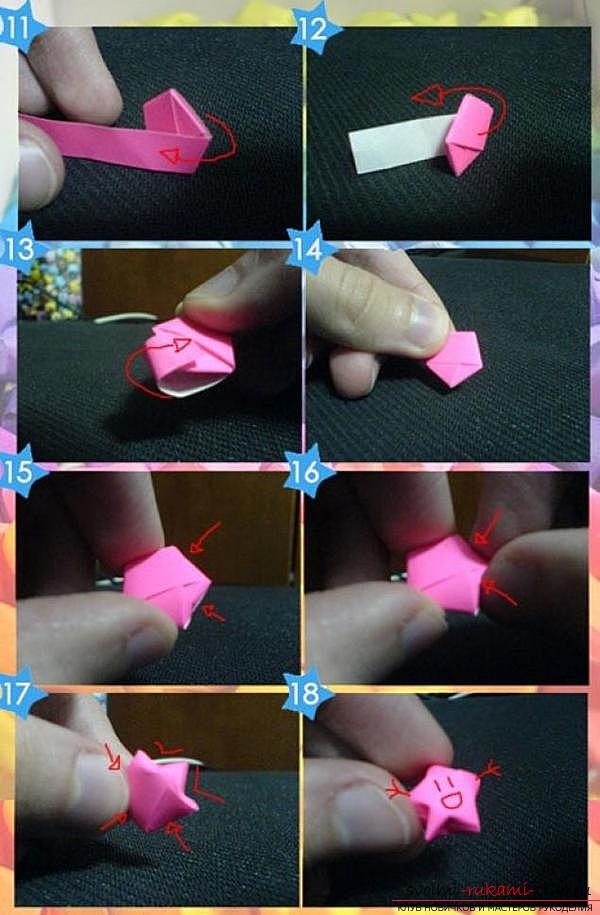 After that, the tape should be wound on the base. To this end, we bend it in the direction that the tail. It is important to make the winding very tight, while you can not allow the edges of the base to crumple. We turn the strip on the wrong side and direct it upward to the right, while bending one of the sides of the rectangle. The strip must be pointed to the right. In the course of the work, she herself will take the position that is appropriate. Each side of our star must be wrapped several times. Approximately one such star takes up to 30 centimeters of a tape of paper. The remaining edge is hidden under the last coil. The base of the star in the form of a pentagon is ready. In order for the article to become finished, you need to give it volume. We take the handicraft and with your fingers iron all the edges from the ends of the corners to the center. Do this carefully, so as not to squeeze the middle. All sides must be identical to each other, then the asterisk will be beautiful. The diameter of the finished craft will be one and a half centimeters. In the photo below you will see how and where you can apply the self-made 3D stars of origami.
 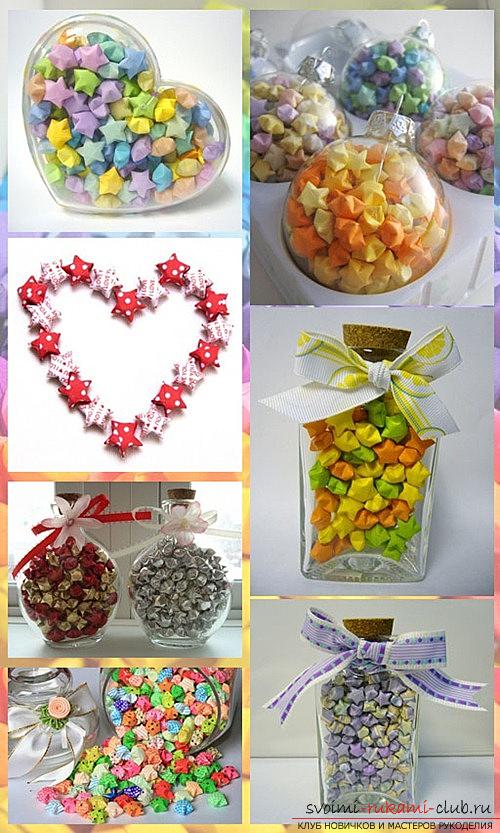 These are just a few ideas for their application. You can adapt these interesting products yourself, using your imagination.
Comments
Related posts:
 According to the proposed schemes, you can easily make your own flower vase, modular origami
 A simple origami boat of paper can make even a child on the proposed schemes
 Link your own hands, you can easily use the knitting needles according to the proposed schemes and descriptions
 Making a swallow from paper in origami technique, which is easy to do according to the description, is not difficult to manufacture
 To make an airplane made of paper, origami technique, use the charts and description