
We make colorful patterns of toys made of fabric for children. Simple and useful fun. Available instructions and photos
When a woman has a baby, sheinvoluntarily the question arises when to buy a toy kid. However, not all toys will be useful and interesting for the child. Manufacturers of toys flooded the market with a variety of products that are not cheap. When buying items for young children, it is necessary to take into account the safety of the baby. Soft development cube will become an ideal toy for the baby! For work it is necessary to prepare such materials:
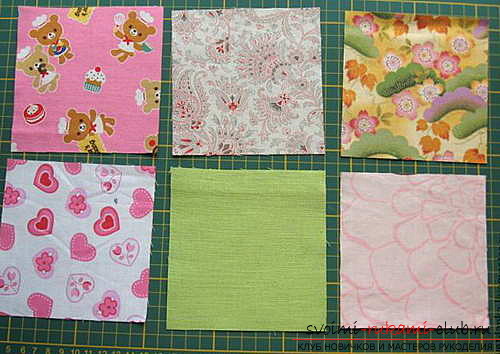
- multi-colored pieces of cloth, square, the right size (6 pieces);
- non-woven fabric;
- filler;
- elements for development (buttons, beads, ribbons, felt and so on);
- thread, needle, sewing machine (the latter is not necessary).
Now go directly to sewing itself. To begin with, we cut out squares from the cloth, especially if this was not done at the preparation stage. From nonwoven we cut out squares, with a side one and a half centimeters smaller than those that were cut from the fabric. We impose non-woven fabric on the fabric, and iron it to adhere. Make out each square. In other words, make an applique, embroider decorative elements, beads, buttons and so on. Everything depends on imagination. In the example presented there will be such design:
- The first element will be a spiral with beads,which move. It is best to draw a spiral with a vanishing marker so as not to leave any traces. We take a strong matter (mesh) and cut out the square, and then put it on the drawn spiral. Now we spend and put beads inside.
- Next square draw with a butterfly,which will rustle the wings. Put the fabric in half, and then draw a butterfly. Under the canvas, put rustling cellophane, and then stitch along the contour. Cut out the details, and cut at the crease of 1-2 millimeters. On one layer there should be a longitudinal section. Turn it out. Laces will serve as shoelaces, we add them in half and then we sew them in zigzag in a suitable place. Butterfly is also sewn in zigzag. We close the cut with the tape and bend the edges.
- The next square is decorated with buttons. There is nothing complicated. Different buttons in shape, size and color are sewn randomly.
- Pitch on the next side of the string zigzag. For strength, it is necessary to sew a piece of felt from the inside under each button, and also that the thread is tightly bound.
- From a fleecy fabric, make a rabbit.
- On the other side, make an application of birds with movable legs made of felt. We sew the legs in this way, like the antennae of a butterfly.
- You can also make moving hearts.
 You can supplement the product with a ribbon of different texture. Now it remains only to sew a cube and fill it. First you need to sew four squares in one line. Now we sew the other faces. We fix the seams, and we do similar operations with non-woven fabrics. The sweep is sewn so that the cube is made. Two edges are joined, and the third allowance is wrapped inside the product. We secure the wrapped corner with a pin in such a way that it is not accidentally stitched. We sew by non-woven fabric. When sewing the last face, it is necessary to leave a non-sewn hole in the corner. Now it remains only to unscrew the product, fill it with filler, and then sew the hole with a secret seam.
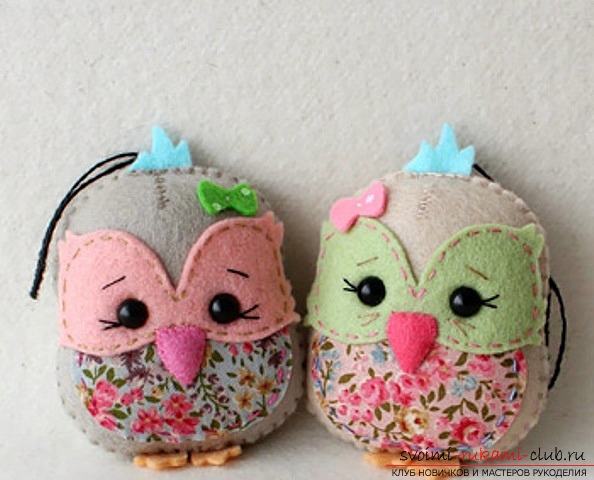
 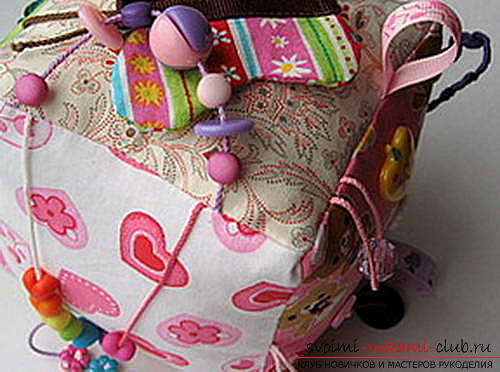 That's all! The original cube is ready! Let's start sewing one more original toy. This time it will be made of felt. Some craftsmen may not have a free question, but what kind of material is this felt? This is the oldest fabric that is known to mankind. It is resistant to bad weather, to snow, so it is often used when sewing outerwear, shoes, etc.. Modern felt is a combination of natural and synthetic fibers. Therefore, the material is strong and durable. Make a beautiful toy of felt - it is easy, you just need to choose the right materials for the pattern and gradually do everything. For sewing original birds, they will need the following materials:
- Feather, the size of which is 10x15 centimeters - for the torso of a bird;
- a fabric of color tincture for a tummy, the size of which is 5х8 centimeters;
- Felt, the size of which is 5x8 centimeters for the area around the eyes;
- small pieces of felt will be needed to create a beak, bow, paws and hairs;
- a pair of peepholes for toys, their diameter should be 6 millimeters if the eyes are black, and if they are colored, then their diameter should be 7.5 millimeters;
- strong thread, its length will be about 17 centimeters, it is necessary for a loop, so that the toy can be suspended;
- filler;
- scissors, needle, thread.
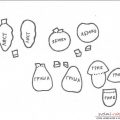
 All patterns can be downloaded, saved onpersonal computer, and after printing them on a 100% scale. Cut out the patterns. After that, you should put the pattern on the fabric, and then cut out the parts neatly. To make it convenient, use a vanishing marker to draw pattern outlines or circle the part with soap or chalk.
  Then in the detail of the tummy is necessaryTreat the edges with glue called Fray Check. It helps the fabric not to be showered. The glue must dry to allow the matter to continue to work. The pattern shows the location of the details of the future bird relative to each other. With small offset stitches, sew the tummy to the front half of the trunk of the future product. On the front half of the body, place the area for the peephole and carefully, sew it to the body with small stitches. In the center, place the beak, and leave the upper area not sewn. With the help of a toothpick will put inside the product a bundle of filler (sintepon, cotton wool, and so on). After the bird has been stuffed it is possible to sew a hole with a secret seam. You should work on the back of the bird. From the wrong side, sew a V-shaped hole on the crown. Fold the thread in half. It is necessary for hanging the toy. Sew a loop on the top of the bird's head. After sew a bunch of hair. We'll work on the bird's eyes. If you already have ready eyes, then just sew them into the necessary place on the head of the toy. For the peephole, you can use a smooth and shiny beads. If the eyes are on the washer, then the scissors must carefully make a cutout for the eyes, and then fasten them in the area. On your head, embroider cilia, namely on the outer corners, just above the eyebrows. Finally you can sew a bow! The front and back part of the bird's body are combined, andafter we sew together. Leave a small hole in order to completely fill the toy with a filler. Then the hole should be sewn with a hidden seam. Do everything neatly and slowly! Sew paws to the bird. That's all, a toy for a child is ready! Your baby will be able to play with the bird all day long, which can not be compared with any other. Trying yourself once in sewing soft toys, it will be difficult to stop. You can improve your skills, and each time you will get better and better. However, your child will have many soft toys, with which he can not only play, but also speak, and you can be proud of yourself and your talents!
Comments
Related posts:
 We make a colorful and beautiful toy theater of felt for your child. Simple and useful fun. Available instructions and photos
 We make beautiful and original patterns of bright New Year's toys. Holidays became even more pleasant and beautiful. Simple instructions and photos
 A simple patchwork technique available when sewing an envelope bag will create an exclusive model
 Beautiful and original ideas for the design of children's toys made of felt. We make wonderful gifts for the holidays for our beloved children
 Decorative and applied art, the technique of patchwork sewing is simple and accessible to everyone