
We make an excellent outfit with our own hands. A pattern of a stylish swing dress that will make you the most beautiful and irresistible. Photos and instructions
The presented stylish blue dress swing isthis is the kind of thing for which I do not feel sorry for all the time that I spent on it. Moreover, it is not difficult to sew such a dress, and you will look amazing in it. The secret lies in a simple cut, as well as drape over the neckline, which is often called a "swing." Soft knitwear gently fits the figure, does not require careful work on the fit, and also makes it possible to hide minor errors during sewing. So get down to work, you will certainly succeed. To create a model of a swing dress pattern is necessary by the standards that you personally need to take off. To make it easier and easier for you to work with a pattern, the following is an instruction that is available to all newcomers. It is important to note that when the dress pattern is ready, it will need to be transferred to the tracing paper. Be sure to save the paper pattern, with its help you can do many more different models of dress. Modeling sweater dress patterns. 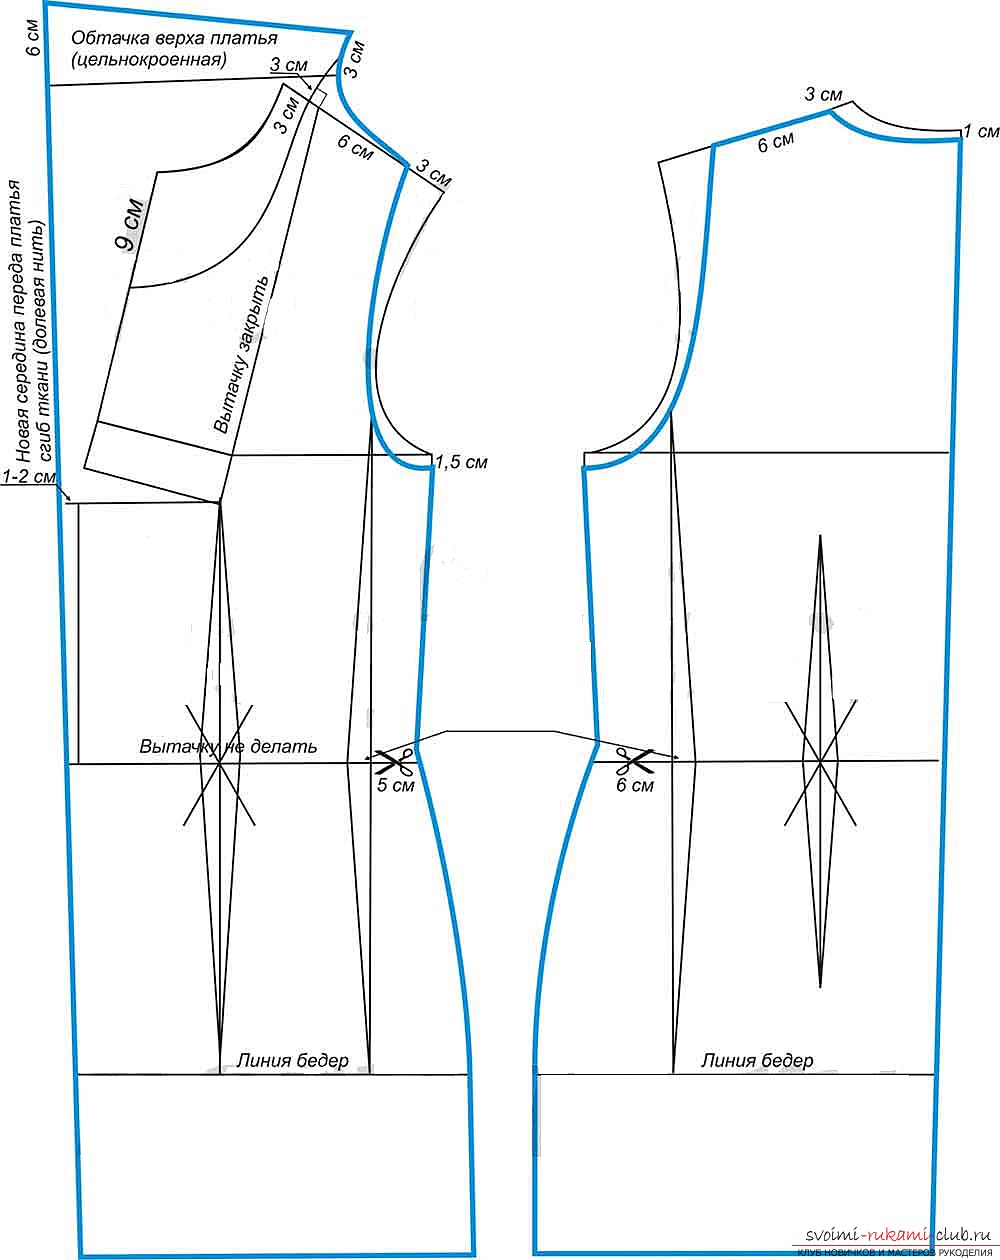 To begin with, the chest tuck of the front partdresses to close, and after the transfer to the middle of the transfer order. Draw a new line for the middle of the dress passing. Tuck off the waist in the side, and then iron. Shoulder should be reduced from the armhole by 3 centimeters. Arrange on the front of the dress a one-piece dress neckline. To do this, from the neck along the shoulder, draw a curved line. On the new line of the shoulder, postpone the length of the shoulder. It will be 6 centimeters. From the point that we got, draw a perpendicular to the middle of the passing dress. Lay up the length of 6 centimeters, and along the curved line of the shoulder - another 3 centimeters. Connect the points with a straight line. Thus, we received a one-ply perimeter of our cut-out. The back of the dress must be modeled according to the drawing. Now let's move on to cutting the dress. Of knitting fabric you need to get:
- Before the dress (1 piece with a fold);
- Back of the dress (1 piece with a fold);
Allowances for seams should be made in 1 centimeter, and bybottom - 3 centimeters. If you want, you can leave the thawed tucks. In this case, our dress will be more tightly fitting your back. How to sew the cut parts? First, sweep aside and stitch the side seams of the dress. The allowances need to be processed on the overlock. We will process the dresses on the edge of the whole dress. Then unscrew it on the wrong side and combine along the shoulder cut. Sweep everything. Rear neck allowances need to be processed on the overlock then tuck and adjust. Sweep and stitch the shoulder seams of the back and pass the dresses. Dress dresses on the overlock turn over and adjust. The bottom of the dress must be tucked and adjusted with a double needle. The sewing dress can be sewn by any beginner tailor, since most swing dresses are very light, they are recommended for anyone who only begins to comprehend sewing skills. Of course, the work is even simpler when you have ready-made decades for the dress. 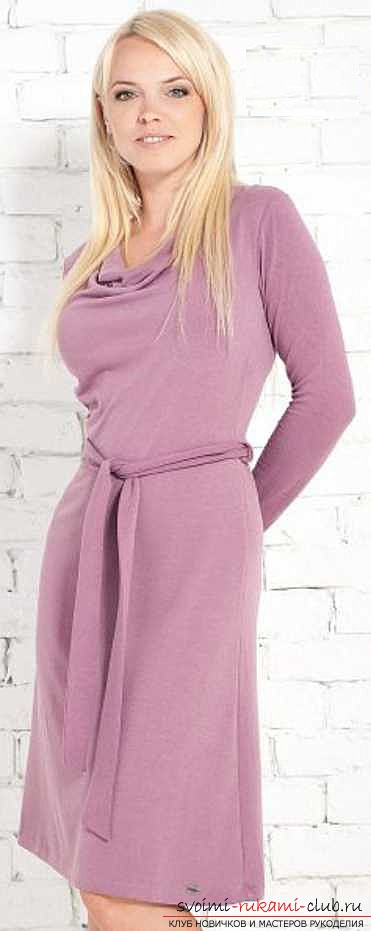 Let's get down to the swing dress pattern If youare going to cut a dress from a stretch and sew it with a knitted suture, then allowances for seams should not be added. Cut the parts out of the stroke line. Note the fact that the presented model can be cut, both without darts, and by sweeping the darts off the truncated tops. To save cloth, cut it in two steps: we'll cut out the shelf and back, folding your fabric in half the width of the layout, and then fold the fabric twice as wide as the sleeves. Cut out the sleeve. When you fold the fabric, do not forget that the edges must be parallel to each other, and also with the edge of the table on which you make the cut. Well, and most importantly - make incisions at the lateral points of the neck and sprout. Without this, the product can not be assembled. If you work with wool, silk or other non-elastic fabrics, be sure to make allowances for seams. Such fabrics are more loose than stretch, so they require another treatment of the joints. Seam allowances should be as follows:
- Lateral, middle, humeral, and also sprout-neck and anterior-posterior suture of sleeves - 1 centimeter;
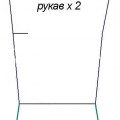
- The swaths and the pellets do the patterns behind the stroke line. From the bottom of the sleeve no more than three centimeters;
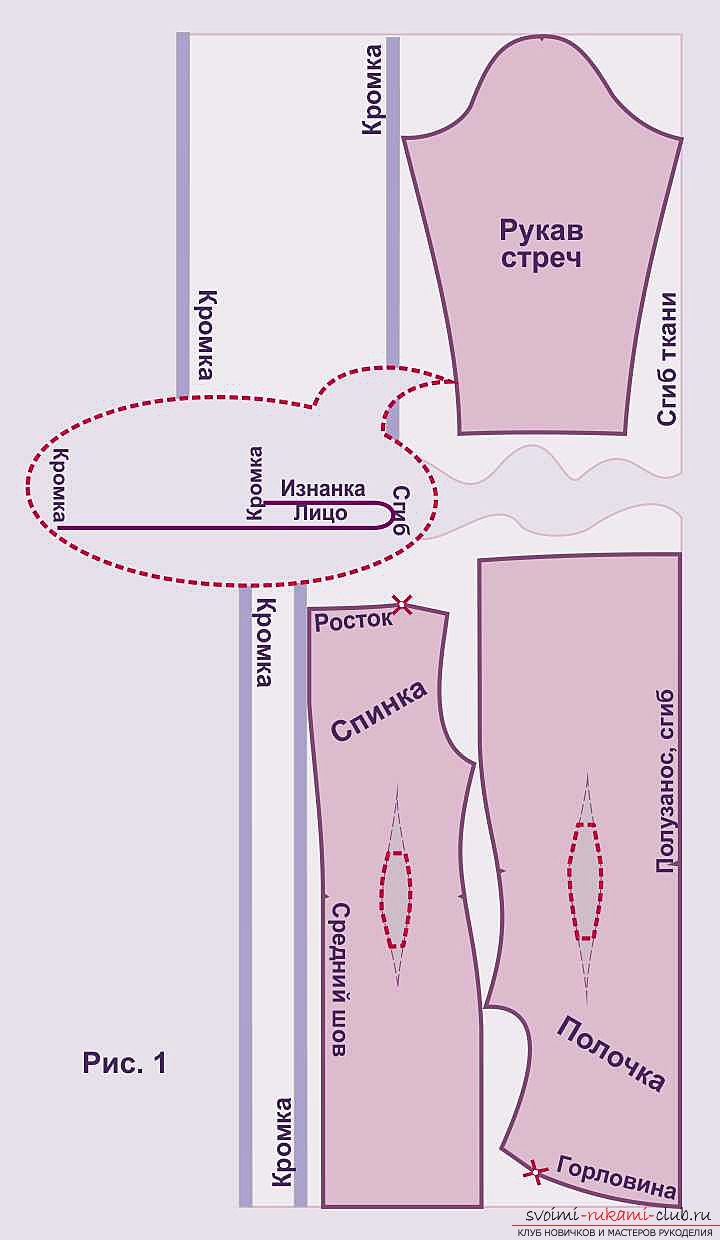 During cutting, the fabric is folded in half,aligning the edges. For the "Valet" layout, the sleeve is cut along the oblique line. At the lateral point of the neck and sprout, the incisions are made over the whole width. Here is another very easy and simple version of the dress pattern swing. This model has a counter fold in front. For sewing the presented model you can use, as a stretch fabric, and any other.
  Let's look at cutting, where is usednon-stretch fabric. Pridd purchase of fabric is recommended to begin to make patterns, and then perform a preliminary layout. It is important to consider all the necessary allowances in order to obtain an accurate calculation of the consumption of tissue. We cut the shelf along the waist and get a pattern for a straight skirt. Mark the waist on the curves with the help of incisions. The lower part of the shelf is attached to the fold of the fabric, retreating to the warehouse. The optimum allowance for the counter store is from 16 to 20 centimeters. If such an allowance does not pass through the width of the fabric, then the lower part of the shelf must be cut only after the back and bodice of the shelf have been cut. Fold the remains of the fabric in the most compact and economical way.
  It is important to note that the smaller allowance for the counterThe warehouse looks very bad on the finished product. If you have a great experience in sewing, you can make a more complex version of the skirt. Open the dress swing occurs in two steps: the back and bodice of the shelves go in the first stage, and the lower part of the skirt, the cloth in the spread, is cut after. For the presented dress you can cut, like the skirt "sun", and the classic "talionka". It is built in a rectangle, where the height is the length of our skirt, and the width is the length of its hem. That's all. The dress is ready. But there are a few more points that need to be clarified. When you choose a fabric, then remember the useful benefits of stretching. He does not need lightning, which makes it much easier to cut the dress, as well as its tailoring. Also, do not forget about the drawbacks of all the tensile tissues. If your figure is not perfect, then all of its details will become available to the public. So I'll have to use corrective underwear to hide all the shortcomings. But on the other hand, sewing a dress with your own hands allows you to save considerably, so you are completely free to please yourself with new new things.
  Here are a few generalized tips for everyone,who will work with sweater dress patterns. This dress is best sewn from knitwear. Make the pattern correctly. Its correctness depends on the neck by the type of swing. It is best to make a full shoulder cut beforehand. If you chose knitwear, then the dart is often unnecessary. From the top of the dart, draw a perpendicular to the middle of the bodice. According to this straight line make a cut, and cut in the direction to the top, and on one side of the dart. To the top do not reach 2 millimeters. The side tuck can be closed with a pin or tape. Measure the depth of the cutout. The recommended depth is 15 cm. When you have decided on the depth, set it aside from the top cut to the middle line. Put a label. It should be connected to the shoulder near the base of the neck.
Comments
Related posts:
 We make an excellent outfit with our own hands. Pattern of universal dress bat that will make you the most beautiful and irresistible. Photos and instructions
 The original design of the pattern of a stylish dress-transformer. A beautiful outfit for a beautiful woman. Photos and instructions
 We make new dresses in our wardrobe with our own hands. A pattern of elegant, gorgeous Raglan dress is easy. Instructions and photos
 We make new clothes in our summer wardrobe with our own hands. Pattern of a fashionable dress with a smell without difficulty. Instructions and photos
 A new pattern of Greek dress. We make beautiful dresses together, prepare for a hot summer. Simple instructions and photos