We make interesting and simple master classes on the creation of autumn crafts from natural materials with our own hands with a photo and a step-by-step description.
Autumn refers to those times of the year whennature there are many ready-made for use in crafts materials. Here, of course, you can talk about the leaves of different colors, acorns, cones, branches of trees. All this and not only will help you to create by your own hands unique products that can become not only the original object of the decor of your house, but also a wonderful present for your relatives. In this article, we offer your attention several interesting master classes on the manufacture of hand-made articles from natural autumn materials. You can create our crafts together with your children. 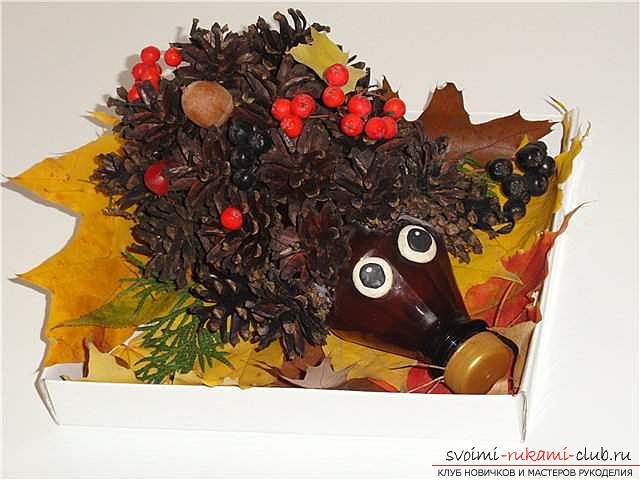 How to make an autumn decoration yourself? This hand-crafted article can be created quite quickly, but in terms of the complexity of the work it is available even to the child.
 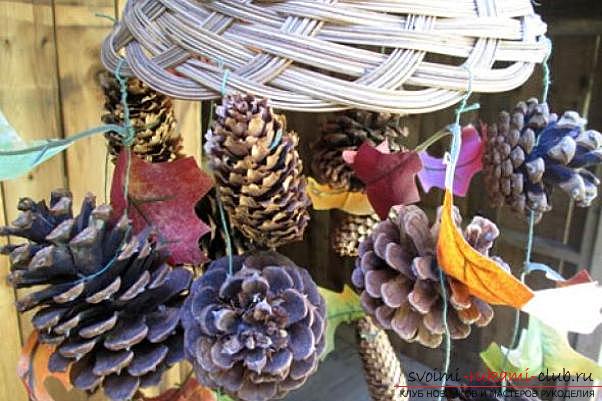 To work on the creation of this craft, you will need: colorful leaves of trees, cones, acorns; scissors; vase, made by weaving; procrastination. Progress
  1. First, you need to expand all the decorative details on the surface of the table. 2. Then cut the wire with a small cross-section. Next, on the pieces of wire we attach the elements of the autumn decor. 3. Go to the attachment of leaflets, knobs and acorns to the wires. Thus it is necessary to wrap a wire around a basis of natural details.
  4. After all elements of the decor are added to the wires, they must be attached to the vase-braid. Handmade from natural material: autumn leaves on a paper basis
 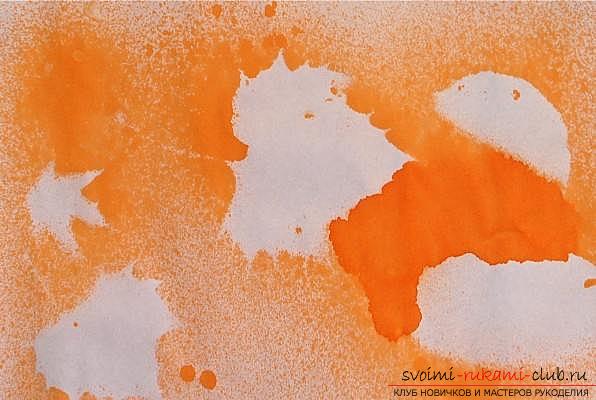 To work on creating this craft, youNeed: multicolored and leaves of trees of several sizes; scissors; paint in the form of a spray, or watercolors and a bulk brush; a sheet of white paper.
  Course of work 1. First, you need to spread out all the leaves of trees on the surface of white paper. 2. Then we turn to painting on the leaves and the area around them. It is also possible to spray the watercolors near the leaves with watercolors. 3. Go to the removal of leaves. At the same time, you need to allow time for the paint to dry out.
 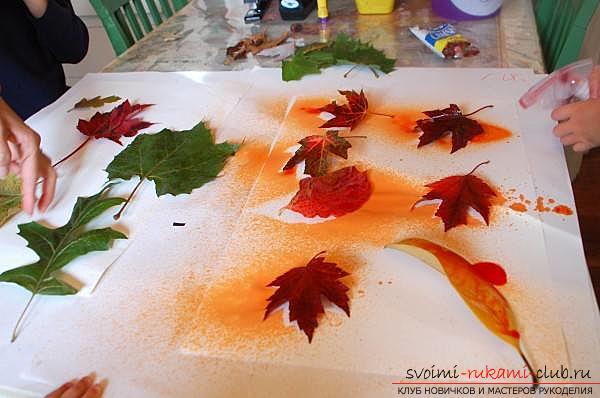 4. The handicraft is ready. It can decorate the interior of any room. We make a stained-glass window from the autumn leaves by our own hands
 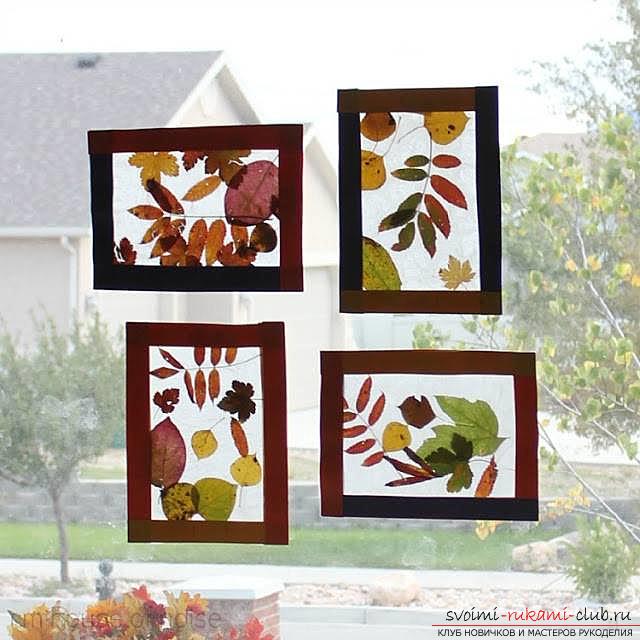 To work on the creation of this craft, you will need: multi-colored small leaves of trees; scissors; cardboard of a certain color; self-adhesive film (parchment with glue).
  Course of work 1. First you need to attach all the leaves to the surface of the film or the same paper. 2. From a cardboard it is necessary to cut out a couple of strips, and then attach them to the paper in such a way that in the end the frame leaves. 3. The resulting stained-glass windows can be glued to the surface of the window to pass the sun's rays through them. How to make an interesting labyrinth for children from leaves?
 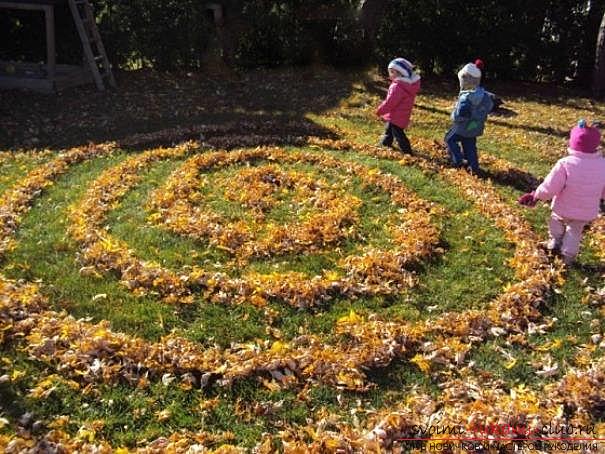 Such a labyrinth is better to create in the park orforest. Your main task will be to create a labyrinth in which the kids will be fun to search for exit points. Interesting hand-crafted article: decorative autumn tree with your own hands
  To work on creating this craft, youNeed: colored leaves of trees; paper bag; scissors; acorns; berries of mountain ash; plasticine; maple lion. Progress of work 1. First you need to take an ordinary package of paper, remove its handles and twist it so that it turns into something that looks like a spiral. At the same time, one of its edges should be twisted in one direction, and the other end in the opposite direction.
 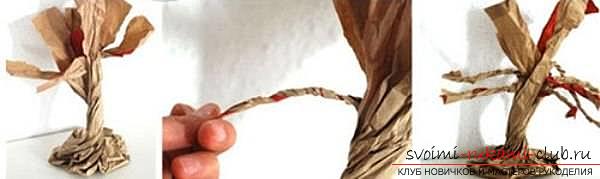 2. As a result, you will get the base of the tree. Please note that there must be an extension in the lower part of the trunk so that your decorative tree has a high stability. 3. On the top of our twisted sachet it is necessary to create twigs. To do this, it is necessary to slightly tear the paper, and then twist the twigs spiral.
 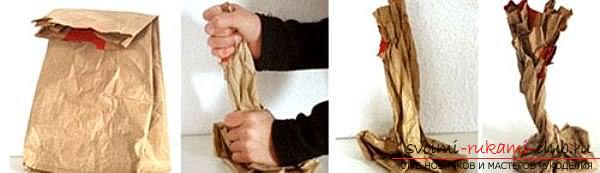 4. Use the handles of the sachet to wrap the tree trunk, then seal them. As a result, you will get a more stable and reliable work. 5. Using plasticine or glue, attach the autumn leaves to the twigs. If you want, attach the maple lionfish to the tree. To slightly "revitalize" the products, try to attach the eyes and nose made of acorns. Pupils can create from plasticine. Rowan berries can be used to create a mouthpiece. That's all! Your decorative tree of natural materials is ready.
Original handmade by own hands: a tree in a jar
 To work on creating this craft, youNeed: colored leaves of trees; a small glass jar; cover to the bank; scissors; twigs of small trees; water; glycerol; maple lion.
 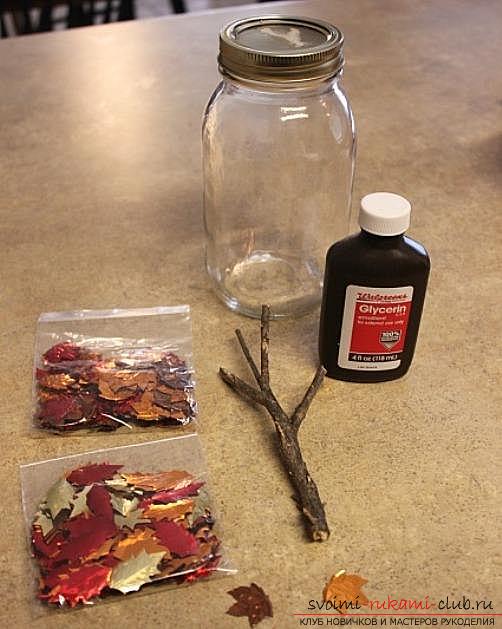 Course of work 1. We take a twig and cut it so that it can easily fit into the jar. 2. Using glue, attach it to the inside of the lid from the jar. If you want, try also to glue decorative stones near our tree. 3. We fix small leaves on the glue to the twigs of the tree.
 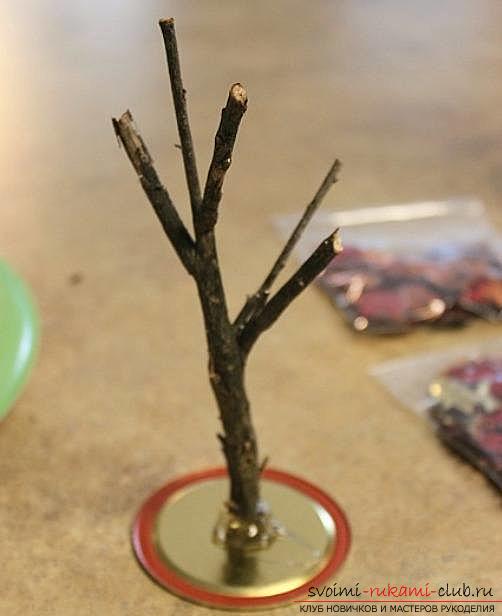 4. In the jar we pour some water and a little glycerin, mix everything thoroughly. 5. Then we insert the cap with the tree in the jar. So that children do not accidentally open the lid with a tree, try to also glue it. However, at the very beginning it is not worthwhile attaching it firmly - it may be necessary to fix the leaves or the tree itself.
 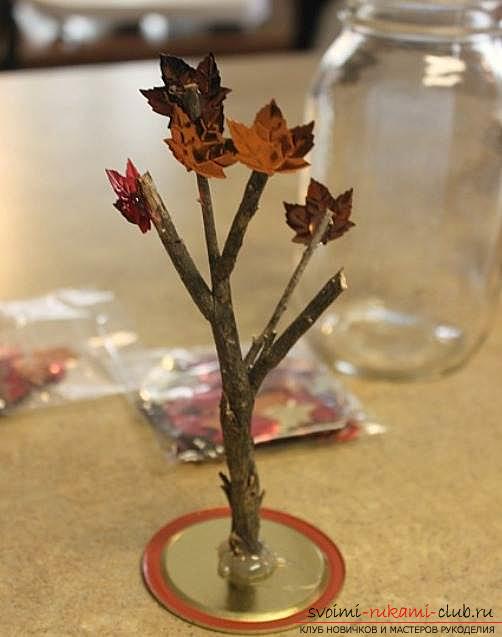 This article can keep its spectacular appearance for a couple of months, after which the color of the water will change from contact with various materials. Making an autumn garden in a frame with your own hands
 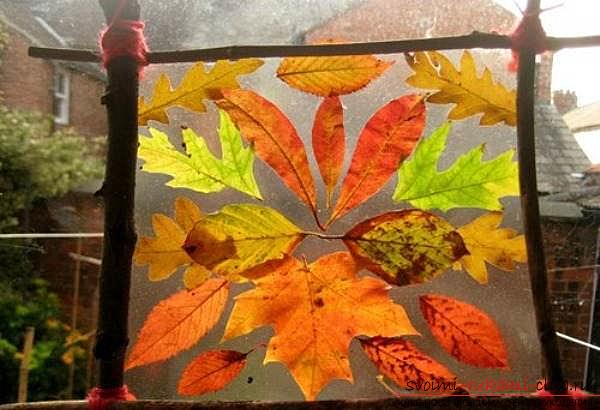 To work on creating this craft, youNeed: colored leaves of trees; scissors; twigs of small trees; thread; self-adhesive film; button. Progress of work 1. We take twigs and with the help of a strong thread we fasten them in a single frame. 2. Use the buttons to fix a piece of self-adhesive film to the bottom of the frame. 3. Next, apply the leaves to the adhesive side of the film in such a way that they are properly attached. You can also attach a ribbon to the frame to be able to hang it on the wall. Beautiful autumn card with own hands
 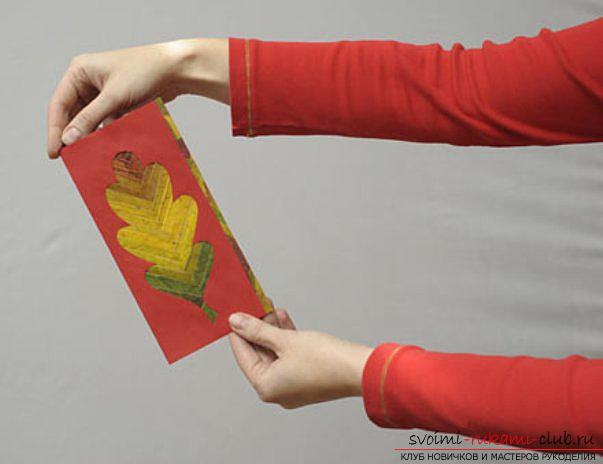 To work on creating this craft, youNeed: colored leaves of trees (in our case - thirty-five pieces); sheet of cardboard (A4 format); scissors; a sheet of A4 paper; simple pencil; sticky tape-scotch ruler; volume book. Progress of work 1. We take leaves and from each of them we disconnect petioles. Each leaf should be folded into 2 parts along the central vein so that the underside of all the leaves is inside.
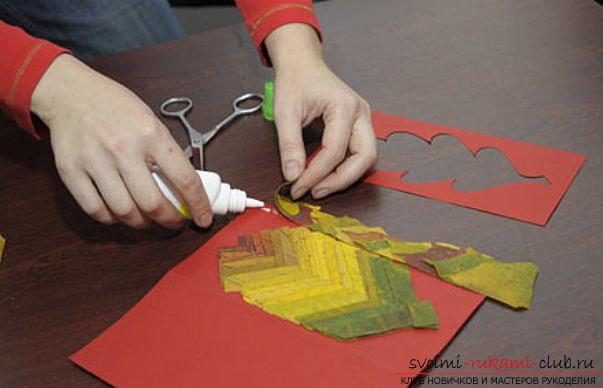
 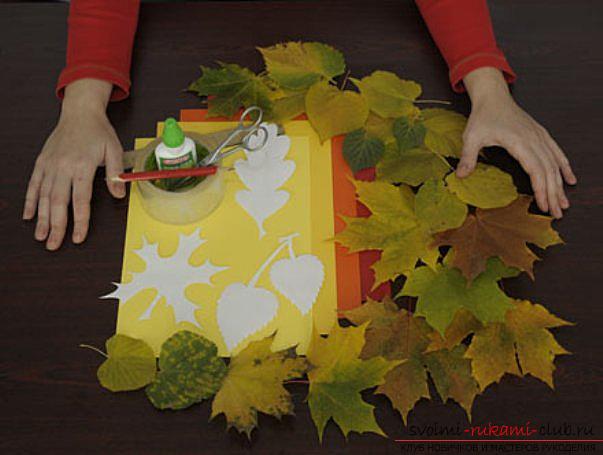 2. Next, put the leaves in a thick book. This will help to smooth them as much as possible. 3 Take a sheet of white paper and draw on it a sheet of some form. Then, this sheet is cut with scissors - this will be your template. We suggest you create an oak leaf pattern. 4. Then we take out the leaves from the book, carefully arrange them, taking into account the color scale. In our master class, the leaves were spread from a greenish to a reddish shade. 5. After that, take a piece of cardboard and put it on a flat plane. Then we retreat one centimeter from the edge on the left side, apply the pattern and make its outlines. Then you need to cut out a piece of cardboard paper. After the figure is cut out, we retreat another centimeter and cut it off. As a result, you will get a rectangle shape, in the middle of which a leaf is created. 6. The part of the sheet that remains is to be folded into two equal parts. So you will get the side cover of your postcard. 7. Put a rectangle with a leaf on the cover, then circle the outline of the sheet. 8. Using a pencil and a ruler, in the figure, draw a strip along the vertical, passing through the center, and from it we draw the veins. The latter should be located one from another at a distance of one centimeter. 9. We take one leaflet (folded into 2 parts), measure from the line of its fold of one and a half centimeters, and then cut off the strip. Those parts that remained after this, do not need to be thrown away immediately.
  10. A similar procedure is carried out with all the other leaves. All cut strips should be cut off one of the edges at an angle of 90 degrees. 11. Those stripes that have turned out as a result, should be attached with glue to the painted leaf, taking into account the lines created earlier. In doing so, we must cut all the strips in such a way that they, at least approximately, repeat the contour of that place on the drawn sheet. Then the strip can be attached to the glue. 12. Next, paste stripes of leaves of different colors to the picture itself. We advise you to take into account the smoothness of the transitions from darker to lighter tones. 13. You can also create a strip from the remains of the leaves and cut one of the edges in it. Then attach the strip itself to the very edge of the product.
 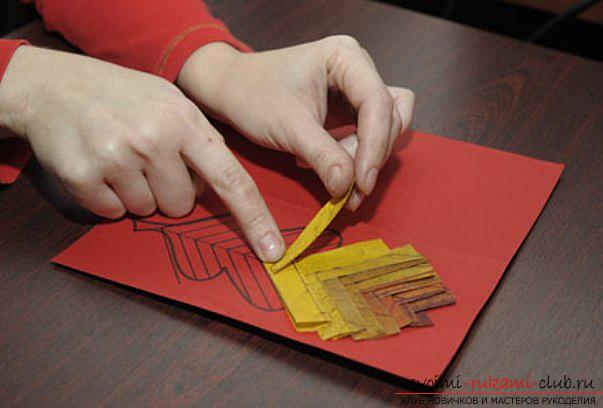 14. Take the rectangle with the cut out leaf, process it with glue and attach the stripes from the leaves. As a result, you get a spectacular colorful sheet. 15. After the card is completed, hold it for a couple of days in the book to finally spread it.
Comments
Related posts:
 How to make a beautiful styling with a bang with your own hands - master classes with step-by-step description and photo.
 Several ways to create original artifacts-Christmas trees from paper for the new year with their own hands with a step-by-step description and photo.
 Beautiful hand-made articles from autumn materials with their own hands, crafts made of cones and autumn leaves with descriptions and photos.
 Original and interesting New Year crafts with their own hands with a step-by-step description and photo.
 How to make Christmas-tree toys: balls, snowflakes and much more by yourself, master classes on creating Christmas tree toys with step-by-step photos and descriptions