Do-it-yourself mirror frame - how to make a designer mirror
None of us can imagine life withoutmirrors. Someone has it only in the bathroom, and someone has a home in each room. Designers often include mirrors in the interior design style. What makes them different? Sizes, shapes and ... frames. If you have been looking for the mirror of your dreams for a long time or you want to experiment with the old one, read this article, you will find 4 detailed workshops in it how to make a designer frame for the mirror with your own hands. Each of the methods is presented as a master class, where the manufacture of the frame is painted in stages. 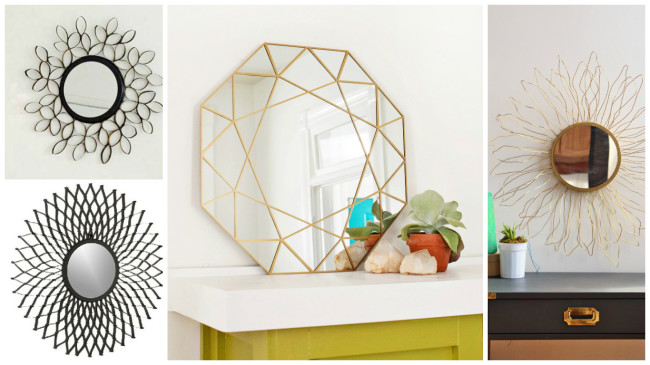 Watching a master class, you will learn how to make frames fromtree, from paper tubes, a creative frame for an oval mirror, a frame from a twine, a frame cloudlet, a frame from a wire. You will definitely find a suitable option and realize that a frame for a mirror with your own hands is not at all difficult! The content of the article:
Master Class No. 1: Frame for a paper tube mirror
What could be more unusual? What could be easier? Check out this original and budget idea for a paper tube mirror frame. 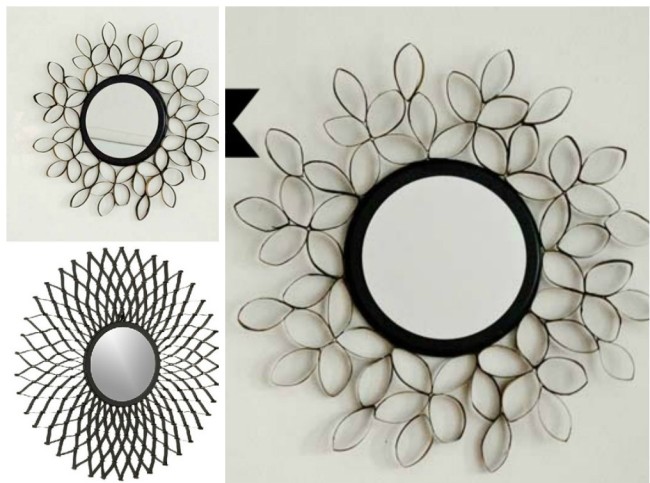 Paper Tube Mirror Frame Materials and Tools:
- 7 sleeves from rolls of toilet paper;
- round piece of thick plywood;
- round mirror;
- black paint;
- fixture for a mirror;
- wire, rope or cord;
- scissors;
- glue gun (hot glue) and PVA glue.
The process of mounting the frame Step 1. To begin, prepare the details for the frame. Take paper tubes and paint them well with black paint inside and out. Leave to dry. Paint over the wooden base in black. Also leave to dry completely. Black will look stylish, but you can take any other paint. 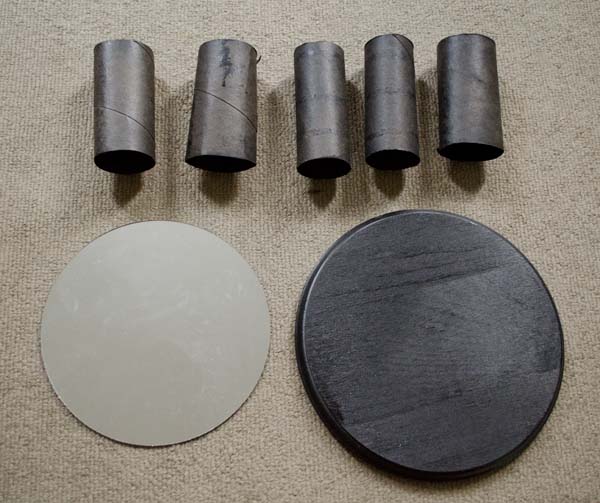 Step 2. After the sleeves are dry, press each of them and cut them off by a centimeter (5-6 pieces from one tube). In shape, they should look like leaflets. Thus we cut all the sleeves.
 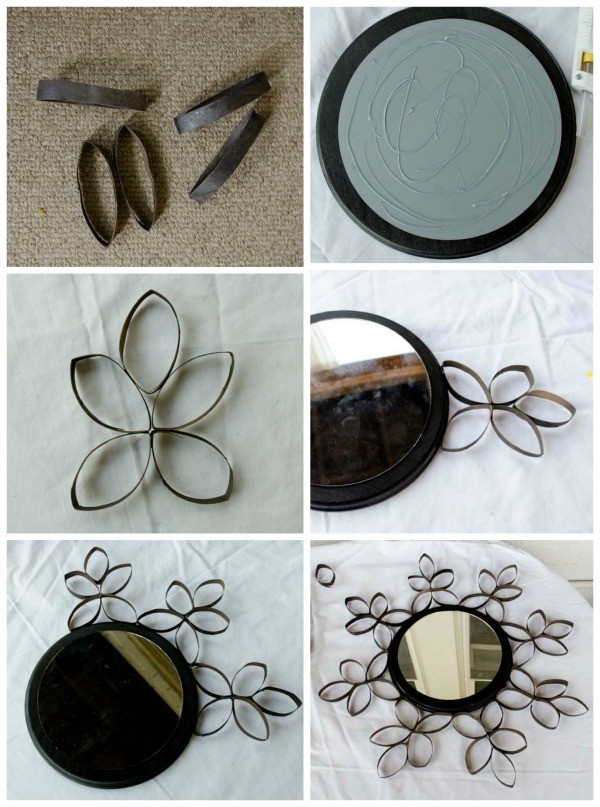 Step 3. When the base for the mirror has dried, take the glue gun and apply it on the back side of the mirror. Press the mirror firmly to the front side of the tree and leave it to cool the hot glue. Putting aside. Step 4.
- We glue the sliced leaflet sleeves between each of 5 pieces, as shown in the photo.
Please note that all groups of leaflets should be the same. To do this, first take the 4 leaflets and glue them with PVA at the corners between each other, and already the 5th leaflet is glued to them from above.
- Repeat this until we glue all the pieces of paper into 5 pieces.
- With a hot gun we glue the groups of leaves to the wooden frame of the mirror. Apply glue pointwise, remove the excess immediately, until the glue is dry.
- This part of the work is perhaps the most important - it is necessary to ensure that all the leaves are on the same level.
 If you still have leaves, you can continue to stick them between the groups to make it like in the next photo. Step 5. The final stage of the master class - making fasteners.
- We take a special fixture for the mirror and install it on the back side of the wooden base in one or two places. If the mirror is not heavy - it will be enough in one.
- We drag wire, twine or rope through the mount and tighten. It turns out a loop.
Now you can hang a mirror in the room, or, for example, in the hallway. She looks so fashionable that no one can guess what this patterned frame was made of.
Master class number 2. Creative frame for an oval mirror
If you ever used a glass cutter -making this frame will not be for you to work. If you have never held it in your hands and are afraid to work with it - you will be sent directly to this master class. You can overcome your fear, because it's worth it! 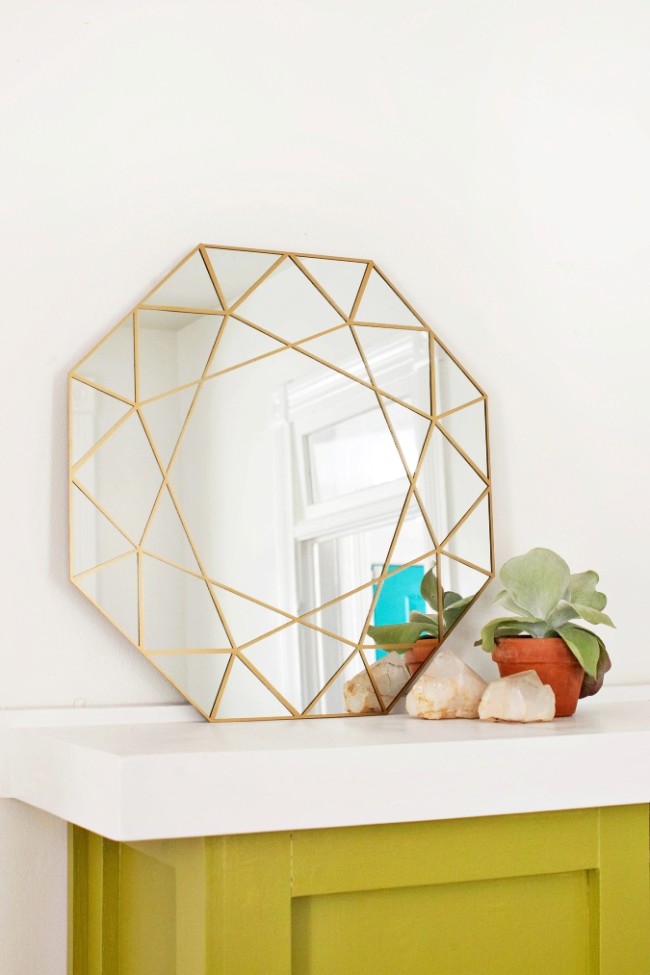 Materials and tools:
- glass cutter;
- a mirror (any will do - we will make the form ourselves);
- metal ruler;
- Scotch tape or adhesive paper (which leaves no marks on the mirror);
- protractor (or corner);
- marker;
- a special knife that does not scratch the surface of the mirror;
- gloves and goggles;
- Fine sandpaper;
- gold paint (spray);
- lacquer for fastening.
The procedure for mounting such a mirror with your own hands: Step 1. Prepare a mirror - wipe it from dust and place it on a stable solid surface. We will make an original octagonal or oval mirror.
Step 2.
This should be done carefully so that the glass cutter does not move out of the line, otherwise you will have to do a lot of additional work.  After that, in one motion, split off a piece of cut glass by clicking on it. Do not be afraid that the mirror will break, you will only hear a small click. Repeat from 4 sides.
 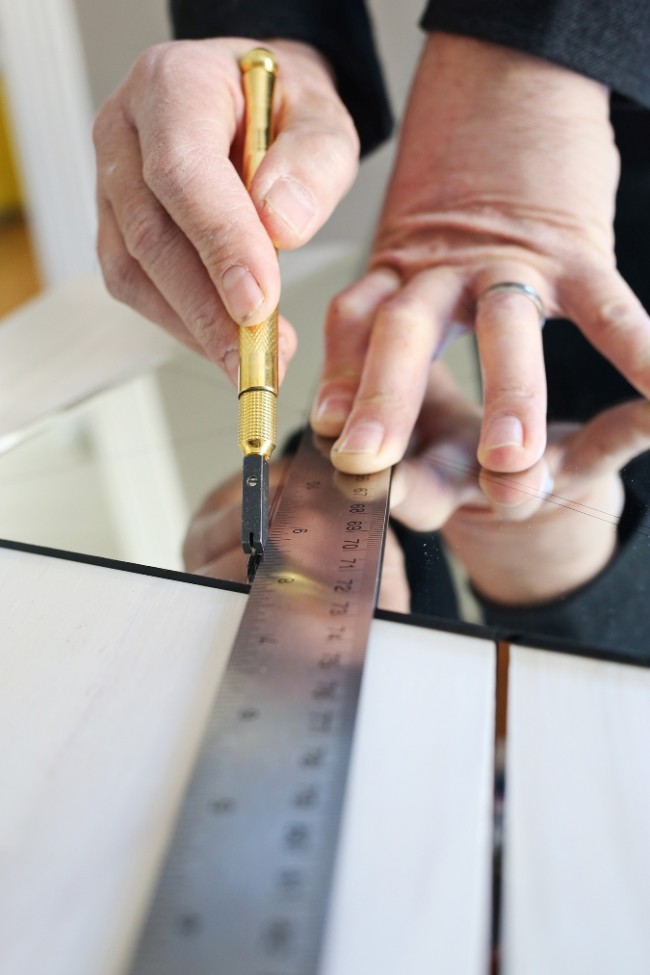 Step 2. After the mirror has become octagonal, proceed directly to its framing. First wipe it with detergent.
  Stick adhesive paper over the entire front surface of the mirror. Using a marker and a ruler mark the surface, as shown in the photo. Take turns:
 Step 3. We take a special knife that does not scratch the surface of the mirror and cut strips along the lines (according to the original idea). The strips can be of any thickness, from 2-5 mm to 2 cm, as you like.
  Note! With the very center we do not cut - it will be an area without decor. Step 4. After all the strips are cut out - the mirror is almost ready for painting. Before this, it is necessary to rub the edges of the mirror with sandpaper so that after painting there are no inaccurate stains.
  Step 5. Apply spray paint to the whole mirror and wait until the paint dries. We also recommend applying a varnish with a second layer - later it will be more convenient to clean the mirror. And now - the final stage of making the frame for the mirror with your own hands - remove the adhesive tape between the stripes. Gently hook and pull, piece by piece. Gradually, the whole picture appears.
 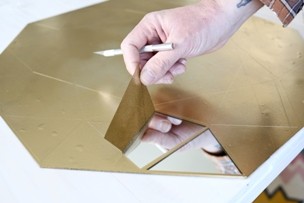 The mirror is ready! You can put it on a table or hang it on a wall, securing special clips. Now you know that working with a glass cutter opens up a lot of opportunities to improve the home interior.
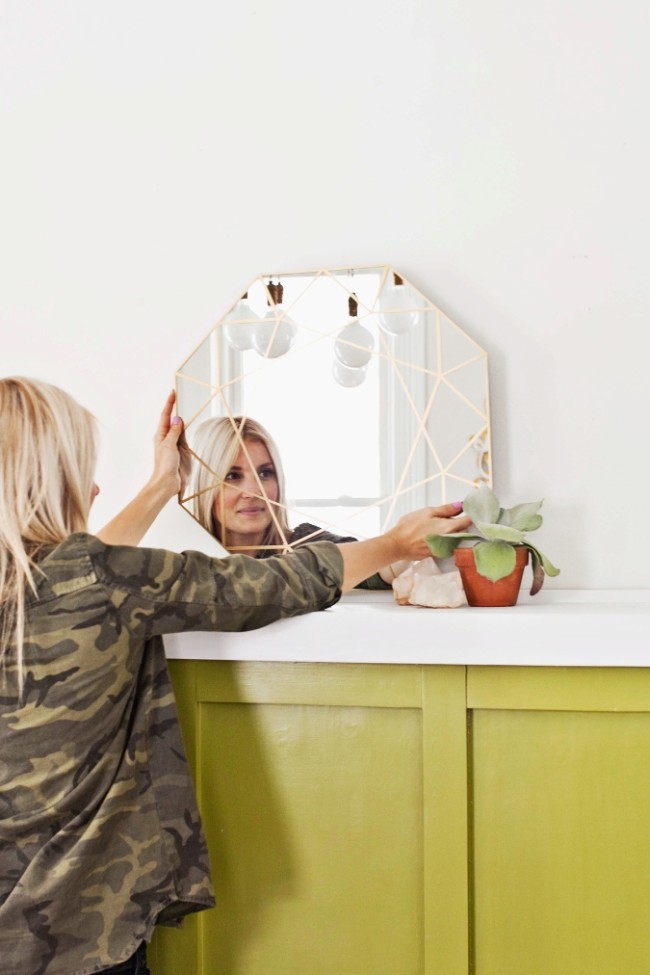

Master class number 6. Wire frame
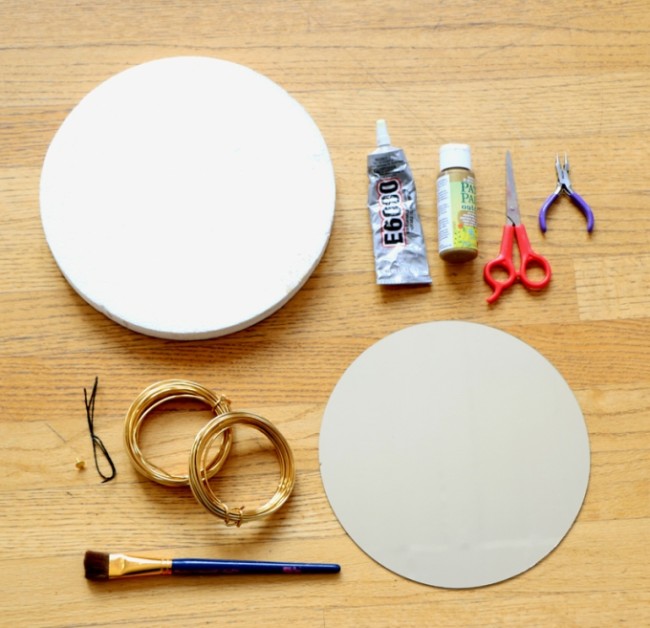
Despite the use of such a simple material at hand, like a wire, the frame for the mirror, made in this master class, turns out to be interesting, bright and unique! 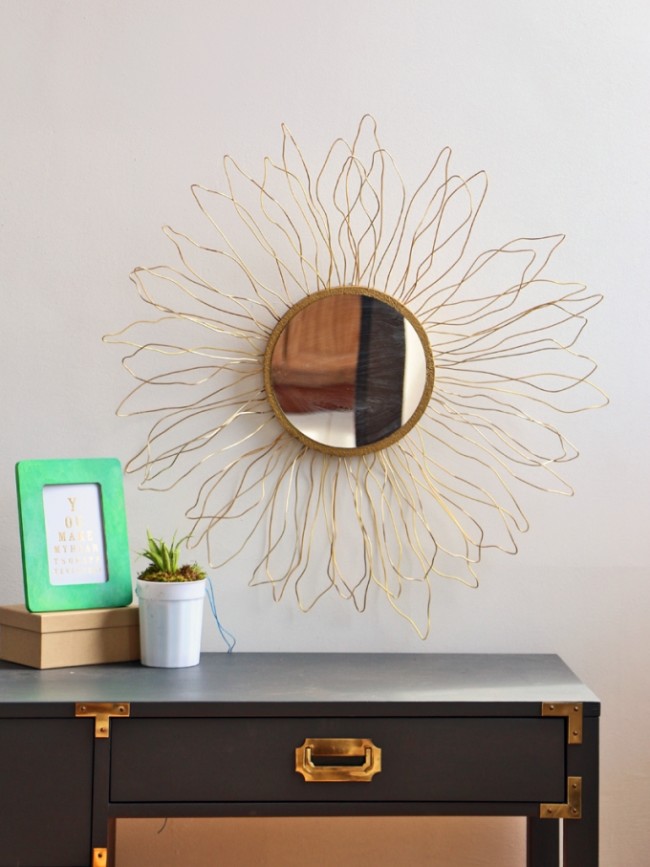 Materials and tools:
- Mirror;
- expanded polystyrene sheet (available at a hardware store);
- thick wires of gold (copper) color (5 packs);
- gold acrylic paint;
- pencil or marker;
- wire cutters (for wire);
- glue gun (hot glue);
- a piece of twine;
- short nail;
- knife;
- scissors.
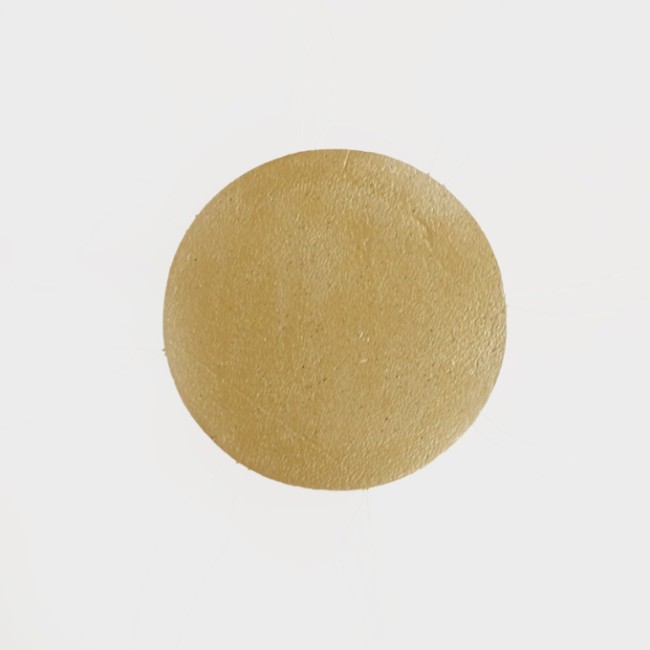
 The assembly process Step 1. To begin, prepare the basis for the mirror.
 Step 2. While the paint is drying, we take the wire cutters and wire and cut the wires 30-50 cm long. The length depends on how long you want to see the rays radiating from the frame. Keep in mind that the wire will be doubled.
  Step 3. We bend the wires in half, but not perfectly smooth, but with bends, as shown in the photo and as your inner voice advises you. When all the wires are bent, and the basis for the mirror is dry, we insert both ends of one wire into expanded polystyrene. You need to insert at one point and to a depth of 2-4 cm. So the material would be better to hold the wire-rays.
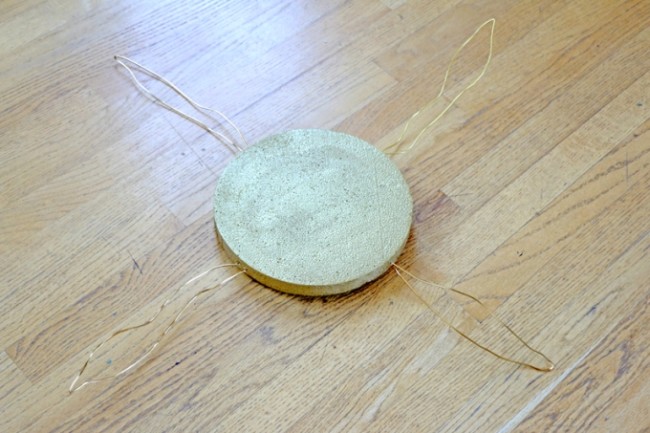
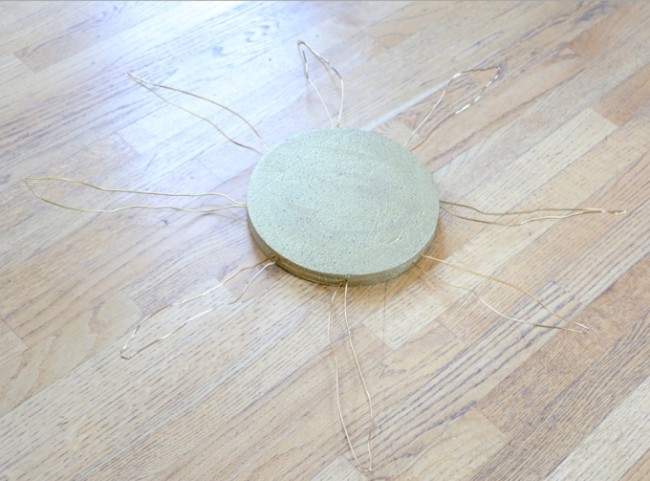
 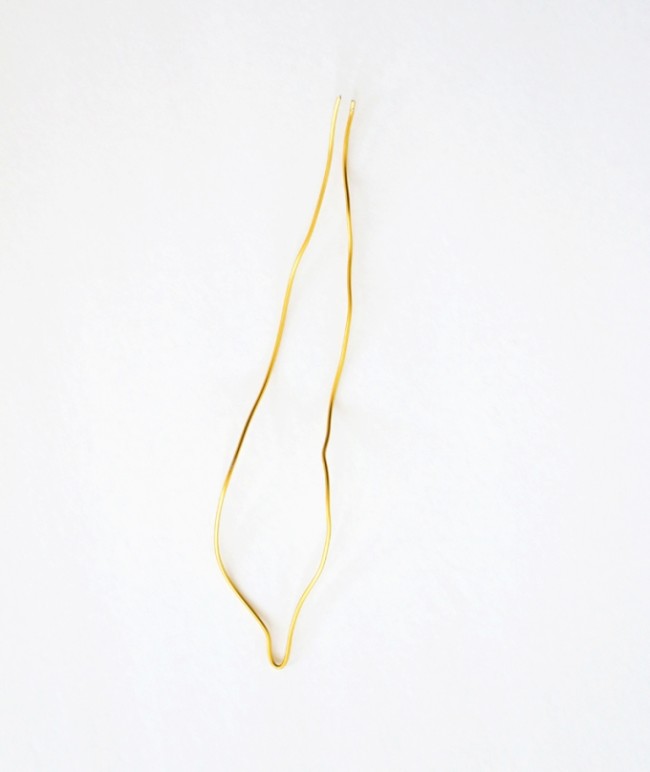 Step 4. We insert the rays on 4 sides of the frame with a cross, in the direction in all directions of the world. Then insert the rays between them. So we get a uniform distribution of rays in all directions. Do not be afraid of overlaps, it does not spoil the frame, on the contrary, the curved rays will add sparkling and diversity. After all, we are creating, and therefore irregularities are not blamed here, but are welcome!
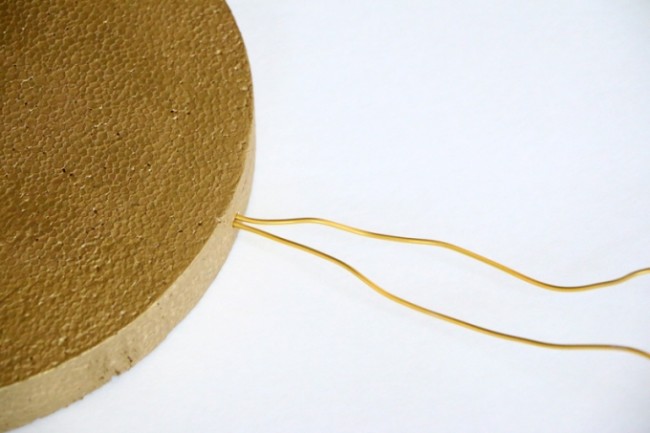
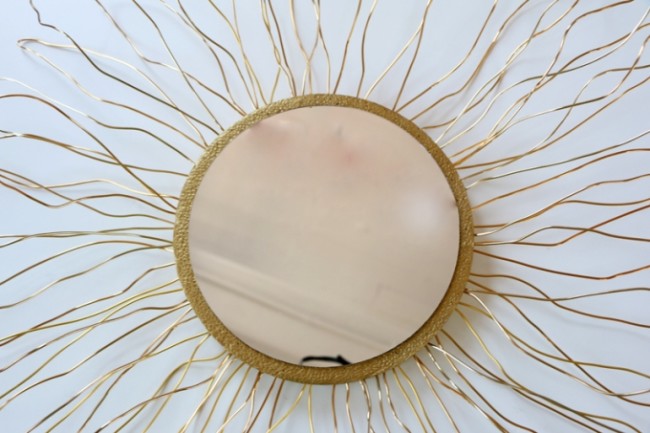
 Step 5. Fasten the mirror on the frame. To do this, apply hot glue on the back side of the mirror and place it exactly in the center of the gold circle. Press firmly so that the glue seizes and leave until the glue is completely cooled.
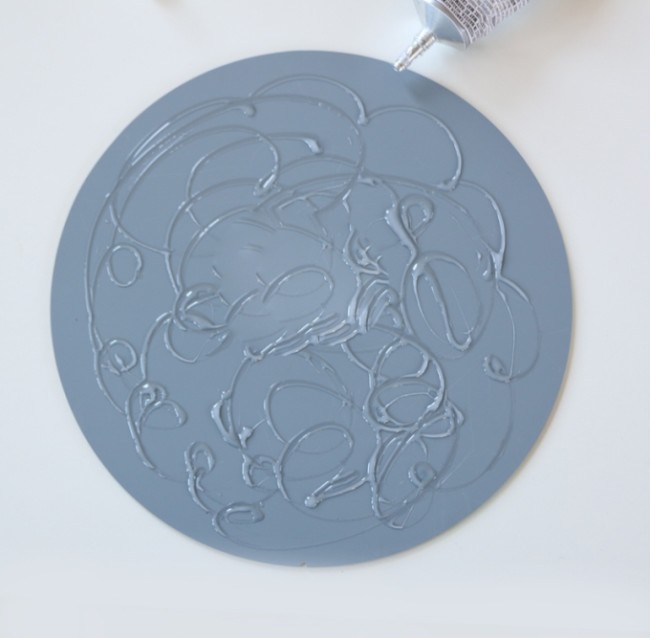
 Step 6. While the glue is cooling - we will make the final touch - the mount for the mirror from the twine. We measure the required length of the rope, cut it off and make a strong bundle.
  We slip a short stud (slightly less than the thickness of the gold frame) through the knot and fix it with hot glue.
  Immediately insert this carnation on the back of the frame into the foam. Better not in the middle, but at about 1/3 distance from the upper edge of the frame.
  Such a mirror can be hung on the wall in anyto the room - it deserved the title of universal thanks to the easy refinement, simplicity of the materials from which it was made, and the warm, golden, rich color.
Master class number 5. Frame for mirrors Cloud
Surely, all of you ever paid attentioninto composite mirrors, when one large mirror is divided into several small ones. Want to try to do it yourself? Welcome to the master class "Frame for a mirror with your own hands - a cloud". 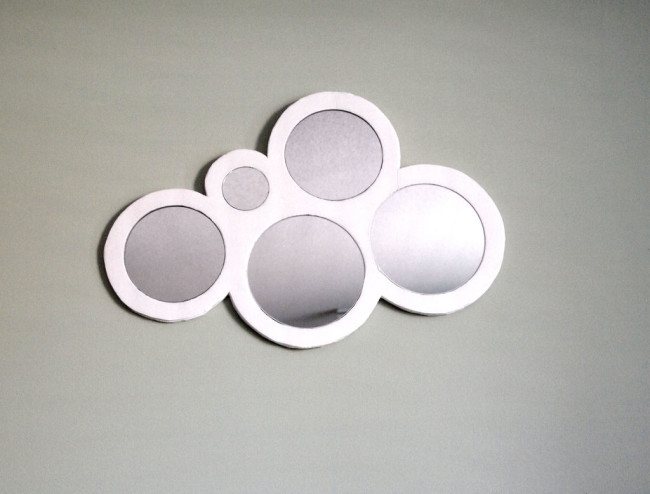 Materials and tools:
- several small round mirrors (they can be bought at fixed-price stores);
- foam board - plastic foam board (available at a hardware store);
- lids from pans (for circles);
- pencil or marker;
- newspaper or paper;
- scissors and knife;
- glue gun (hot glue);
- PVA glue;
- a hammer;
- nails.
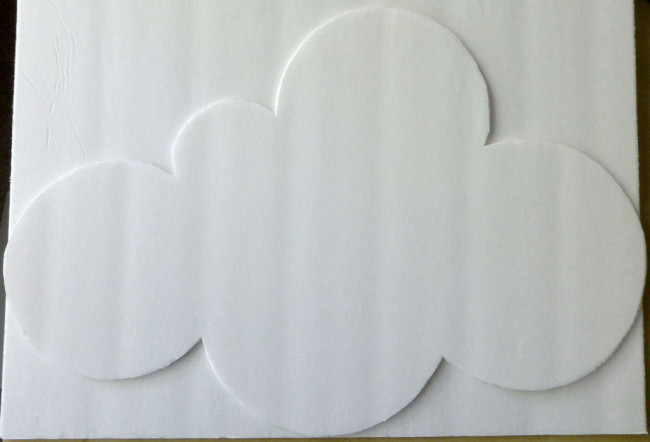
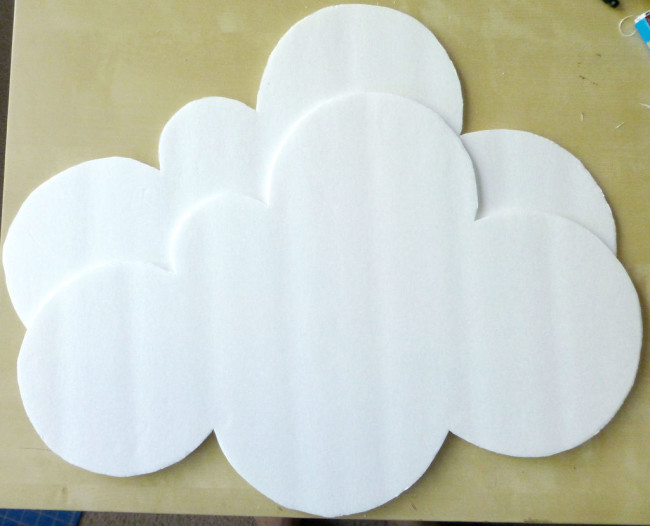
Stages of frame production: To begin with, we make templates for mirrors.
In our example, it turns out that the 3 largest mirrors are placed at the bottom in an arc, and the other two complement them from above. 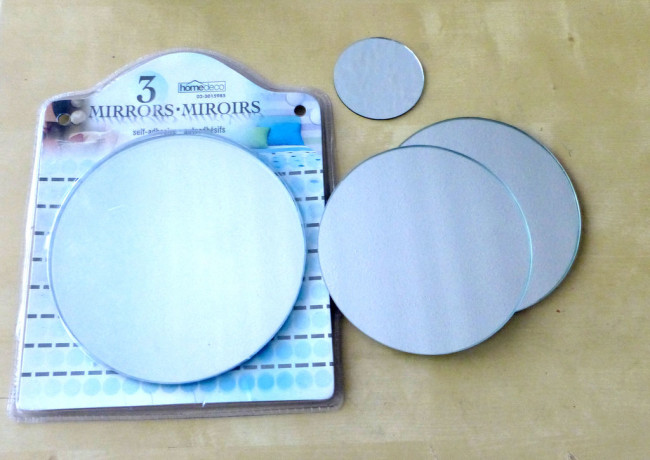 Step 2.


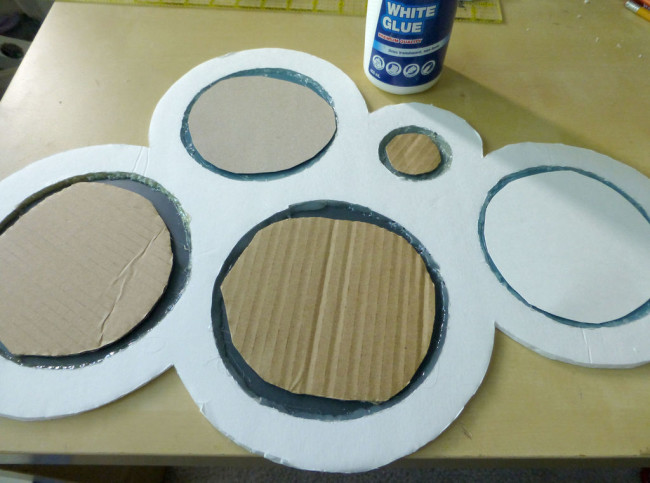
 Step 3. If you are satisfied with the shape of a cloud, cut a single piece from the foam panel with a knife from the outer edges of the template. This should be done smoothly and carefully, as this is the front side of the mirror.
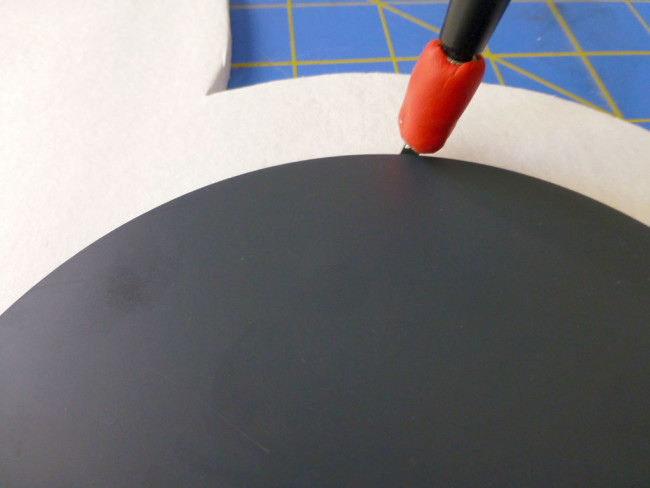
 Step 4. Making holes for mirrors. To do this, again, take a knife and make the sleeve under each mirror. They should be small in depth. But the most important thing is that they should be no wider, but a little bit longer mirrors, so that it fits snugly to its edges. ATTENTION! This should be done smoothly and carefully, as this is the front side of the mirror.
 Step 5.
- In two places where it is supposed to insert a mirror it is necessary to make fixings. This should be done before the end of the work with the frame, because after you mess up the front side of the mirror with holes.
- Determine the center of gravity of the mirror and calculate where the mounts will be located to evenly distribute the weight of the mirror. Note them.
- Then, with a pencil or an awl, make 2 through holes in the frame. And only after that proceed to the insertion of mirrors.

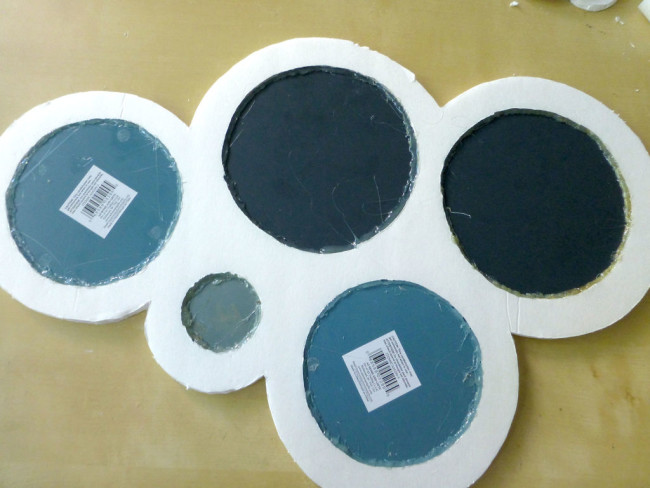 Step 6. We take the heated glue-gun and apply it on the entire reverse side of the mirror, firmly press it to the base and hold it a little. After a minute the mirror can be let go, soon the glue will cool. The same procedure must be done with each mirror.
 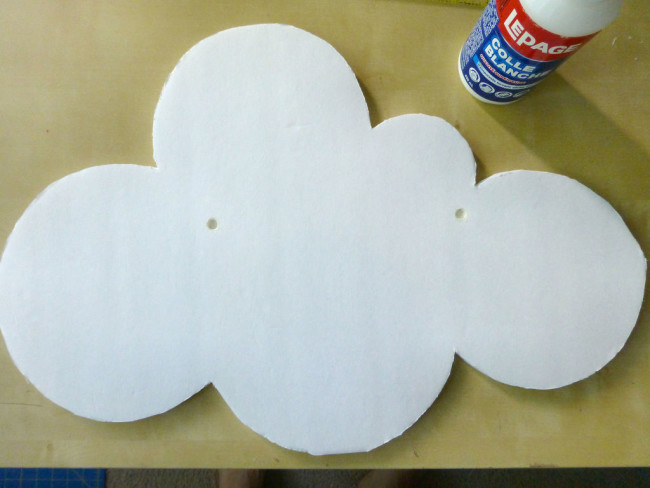 Hammer 2 nails at a distance made inframe holes. After that, set the frame. As a result, the mirror-cloud with their own hands is ready and hangs on the wall, delighting with its whiteness and highlights of adults and children. So different in form, material, size,color, style, price range ... mirrors for any home, for every taste and color. But there is no more unique and beautiful mirror than what is done with your own hands. In it - a particle of your creativity, your look, your handwriting, so to speak. Make a mirror with your own hands and change not only the interior of your room, but also your reflection in the mirror will become more smiling, you can be sure!
Comments
Related posts:
 Frame for the mirror with their own hands from cutlery
 Decoupage on the glass for a mirror by one's own hands - a step-by-step instruction
 Shade: designer mirror - lamp
 New Year toys with their own hands, how to independently make a toy for the New Year, New Year's crafts with their own hands, how to make Santa Claus how to make a Christmas ball with his own hands.
 Make-up mirror do it yourself step by step: photos and drawings