Easter egg from origami modules, master class, instruction / Toys with own hands, patterns, video, MK
If you run out of ideas, how you can congratulate your relatives for Easter, try making your own Easter egg from origami modules. 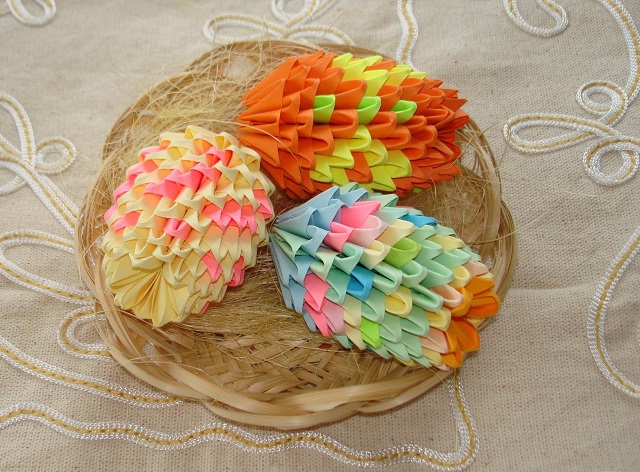 Modular origami - the easiest waydrawing up figures of different colors and shapes at will is akin to a children's designer. That's why the creation of holiday symbols with the help of improvised means before Easter will appeal not only to you, but will amuse your little ones.
Simple First Steps
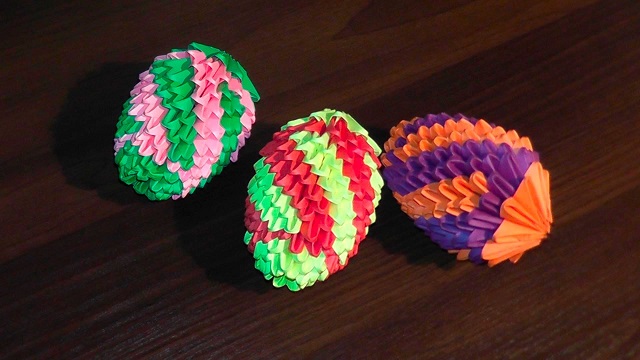
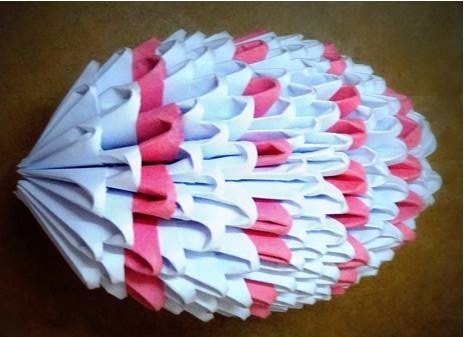
To master such a peculiar kind of origami,it is enough to understand the principle of folding paper modules. To add Easter ideas from paper leaves, you will not need anything, except for sheet-blanks and deft fingers. It will be better if the blanks are rectangular, close to square. After mastering the folding of the triangle modules from paper, you can start folding paper figures - Easter eggs. Typically, to fold an Easter egg from paper, use three or more colors to make their bright, colorful and painted. Below is a simple but very detailed outline of the origami "Easter egg", which even a beginner can lay down. For a simple three-color Easter egg, you need to do:
Tip: Never be afraid to make more paper modules than you need. Often paper does not withstand tension or compression and breaks, and the blanks themselves are sometimes lost.
- Take 10 modules of the primary color for the first row and lay them with bases inward.
- For the second row also take 10 pieces of the main color and with their help fasten the first and second row, closing the circle.
- For the next level, you need 20 main color modules. Now for one component of the previous series there are 2 pieces that can be put one by one on the pocket of the previous module.
- For the fourth row, you also need 20 blanks of the primary color.
- For the fifth level, take 20 pieces of additional color. Thus, with the help of such a design, the egg inside remains empty, only its contours are outlined.
- For the sixth row, take 20 pieces of central color.
- For the seventh row again, 20 additional color details are needed.
- At the previous level, put on 20 components of the main color. To construct further it was easier, turn the egg "bottom" down, and continue to put on the modules.
- The next row also needs to be made from 20 main color modules.
- For the tenth row, take 10 blanks of the main color and put them through the 2 tabs of the previous row.
- For the eleventh row also take 10 basic details. But they need to be worn without missing, but on the contrary - by investing in each ear of the workpiece 2 corners of the previous rows.
- The scheme of the next, last row also consists of 10 modules of the primary color.
Tip: to keep the modules tightly together, and the egg has stood longer, you can lubricate each triangle of the module with a droplet of glue.
Interpretations learned
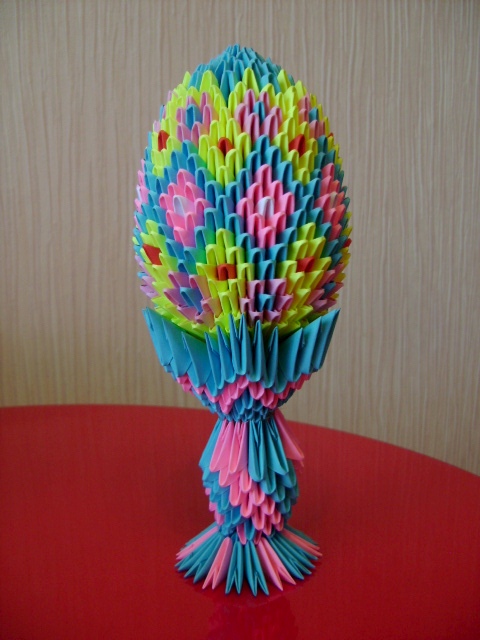
Below you will find several schemes for eggs from modular origami that will help make your Easter basket brighter for the holiday:
- Rainbow
 The easiest way to diversify the previous onescheme - use different colors for each new series. Let's say that the first row will be red, the second orange, the third yellow, and the fourth green. Just like in a rainbow! In the same way you can create color palettes for your taste.
- Bright foot
 Some masters of paper affairs notice thatThe preform module in the general folded pattern resembles a protruding bird's foot or heart. Let's fantasize over these ideas. Let's say that the whole egg is made from green paper modules, and in each level through 3 green modules put yellow. There is a feeling that chickens scattered on the grass.
- Ice cream
This method is not much more complicated than the others, butlooks more elegant. In the first row, together with the main color, put 2 additional color modules next to it. In the next level, put 2 of the same components under the previous ones, but by one by one. At the end of the modular egg assembly, you will have a pattern of a neat wave on the product. As if it's ice cream with a flowing jam. For this, the main part can be made light pink, and additional - bright red. Using this simple scheme of designing eggs from paper, you can realize any of your festive Easter fancies. Experiment with the tonality, size and shape of the picture, go to more complex schemes and give joy to the people around you.
Comments
Related posts:
 Master-class origami from the modules, a step-by-step instruction for creating pineapple from modules.
 Master class: Easter egg with mosaic
 Dry felting out of panda wool, master class / Toys with their own hands, patterns, video, MK
 Mask of the crocodile Genes on the head: options, master class / Toys with their own hands, patterns, video, MK
 How to weave a kitten from the beads step by step, diagrams, master class / Toys yourself, patterns, video, MK