
A simple master class for beginners will show you how to embroider an autumn leaf in the technique of "isolate".
Autumn is rich for holidays - Teacher's Day, Dayknowledge, Day of the elderly. And all this is only official holidays. A symbol of autumn holidays was, of course, the autumn leaf. Bright colorful leaf, it is very festive in itself. Autumn landscape of the "golden autumn" or "Indian summer" in color is the brightest and most saturated of all seasons. In its beauty there is something mysterious and at the same time attractive. Therefore it is quite natural, when on the postcard devoted to autumn holidays, we put a sheet. Techniques for performing an autumn leaf can be any. In this master class, I suggest you embroider a sheet of embroidered in the technique. It is quite beautiful and even elegant technique. In any case, the postcard will turn out beautiful and unique. For work you will need:
- a sheet of colored cardboard or velvet paper (on it embroidery will look chic),
- sheet of white cardboard (the basis of the postcard),
- sheet of writing paper,
- graphite pencil (simple),
- eraser (just in case),
- an English pin (for piercing holes),
- threads of autumn colors (shades of yellow, orange, red),
- sewing needle,
- scissors,
- glue-pencil, compasses,
- figured scissors.
Getting Started If you first encountertechnique "to isolate", then it should not be frightened. It is enough to master two techniques of embroidery: a circle and a corner. When embroidering a leaf we will need embroidery of a circle. First we will practice on a separate sheet to embroider a circle. 1. Draw a circle with a circle (small, about 8-10 cm in diameter). Divide the line into 16 equal parts (in half, each half in half, every quarter in half, and every 1/8 in half). 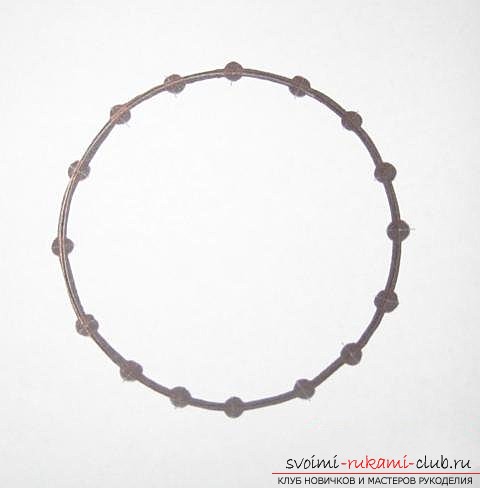 2. Number, as shown in the photo.
 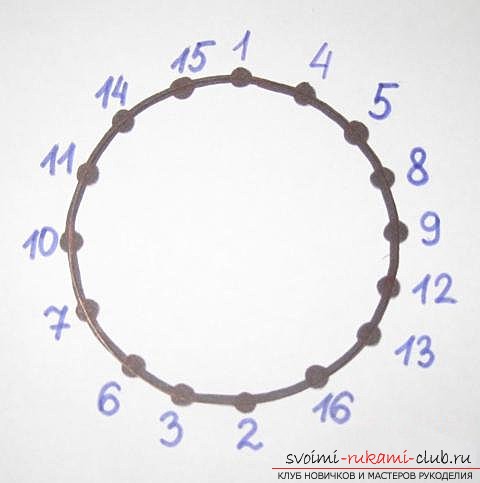 3. We try to embroider. The photo shows the direction of drawing of the thread with the needle. We pass the needle strictly in order, starting with 1, then 2, etc.
  4. On the front side of the picture should look like this (the green color in the photo is the color of the thread).
 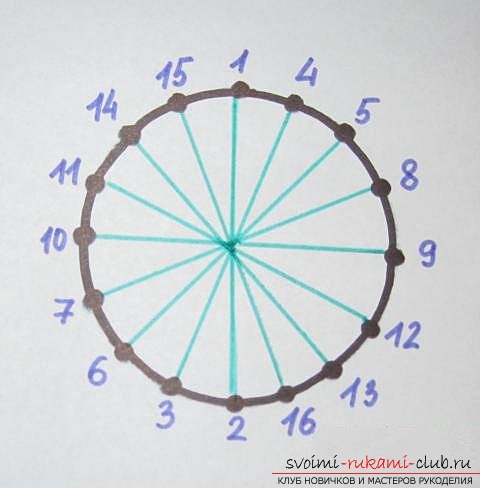 5. And here is how the pattern looks from the wrong side (black stitches).
 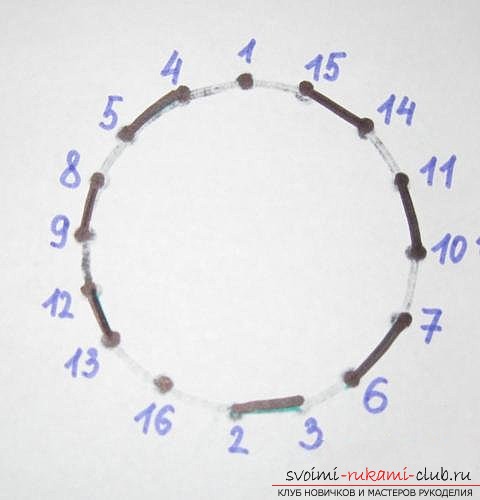 6. Now go to the card itself. Cut off half a sheet of colored cardboard or velvet paper.
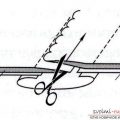
  7. Cut the edge of the figured scissors.
 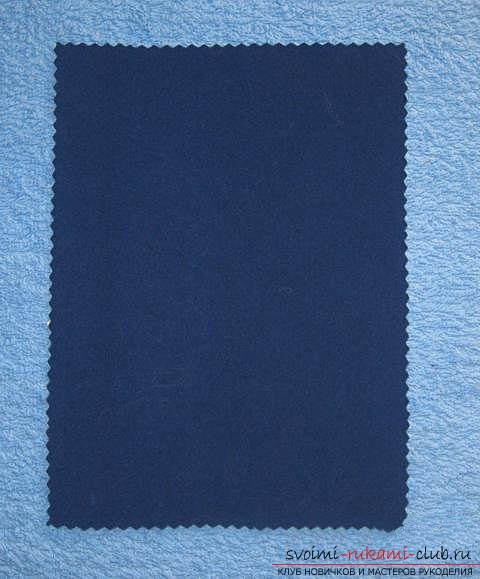 8. First, on a separate sheet of paper, draw a leaf and divide it with streaks into small areas. We will embroider each of these sites separately.
 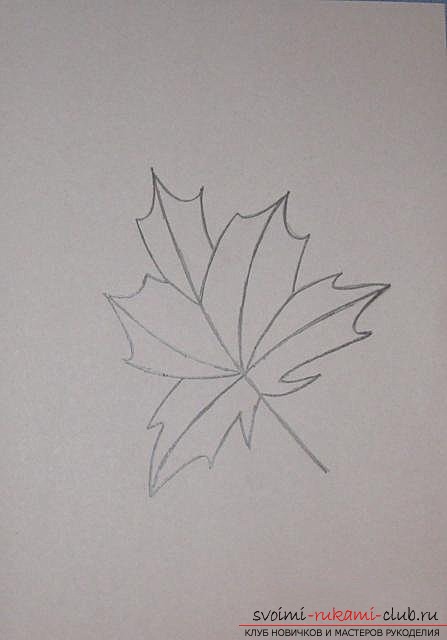 9. The scheme for embroidery to isolate each section will look something like this. But it is not necessary to follow it exactly. And then you'll see why.
 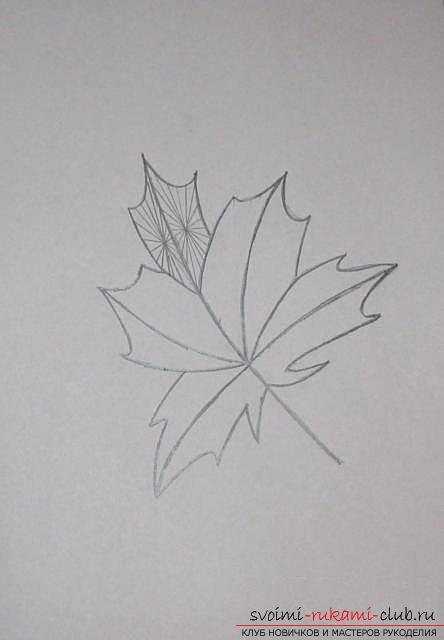 10. Transfer the drawing of the sheet to the back of the velvet paper.
  11. Choose the color of the thread to the color of the paper.
 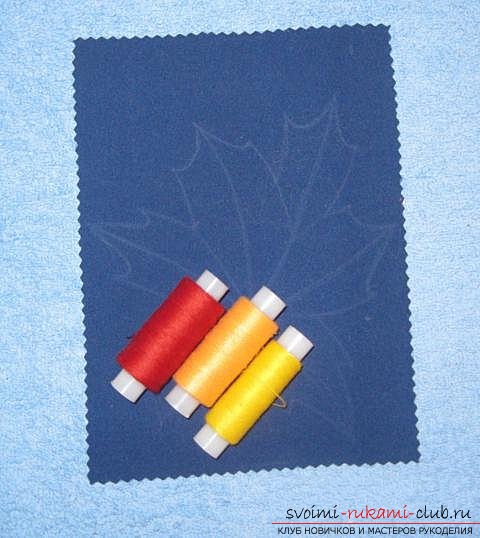 12. We begin to embroider. Each site is embroidered like a circle.
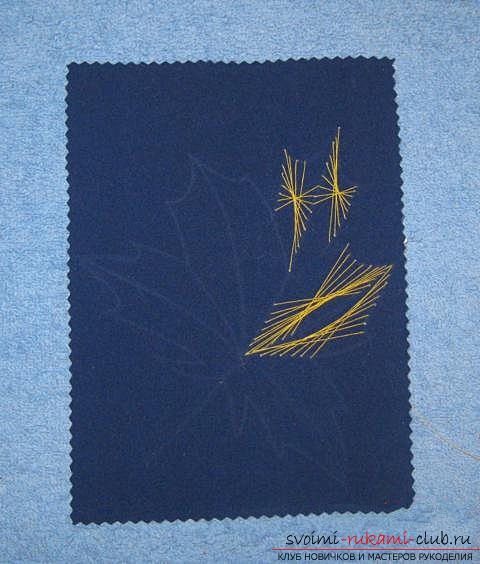
  13-18. You do not need to embroider the entire plot with one color. You can embroider every section with the first color.
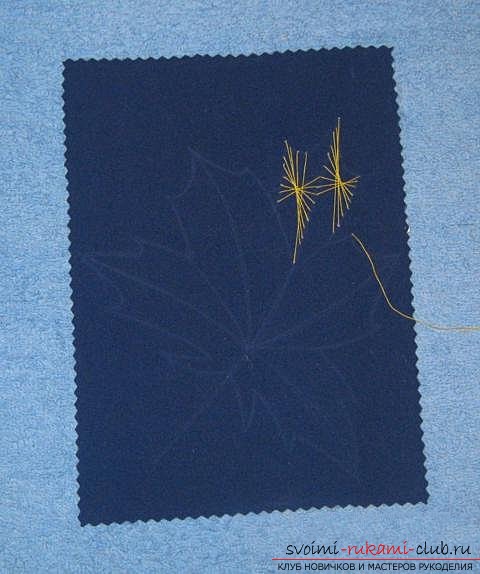


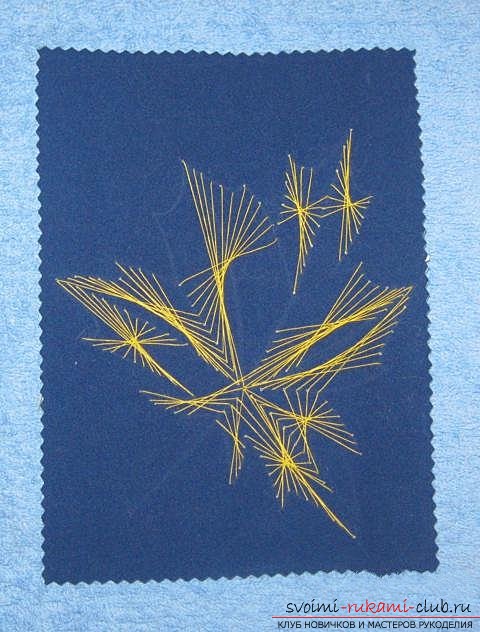 19. Take the second color. And they embroider the "under-inflated" areas. In this case, the embroidery of the second color can be superimposed on the embroidery of the first color.
 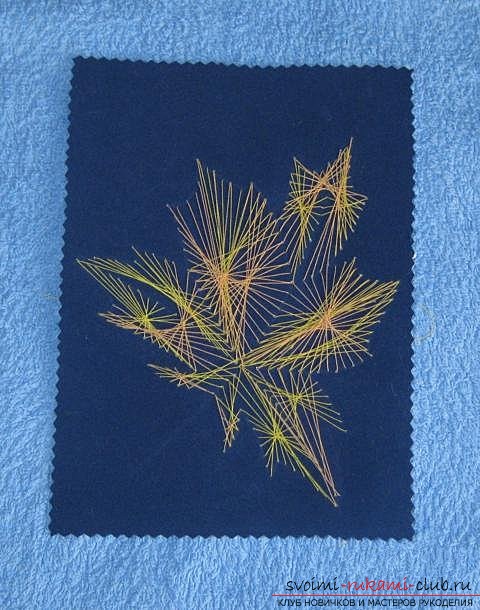 20. And the third color, the darkest, embroider the veins, the stem, the contour of the leaf. To do this, we pull the thread through the first hole, we enter through one into the third hole, we return to the second hole, then to the fourth, and so on.
  21. The basis for the postcard is bent across, in half. From the front side of the postcard, which opens from the right to the left or from the bottom up, we glue the embroidered sheet.
 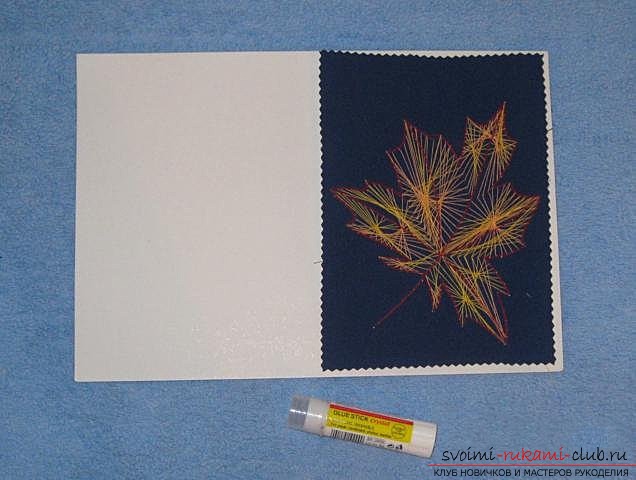 22. For some time, the postcard should be placed under the press (for example, under a stack of books).
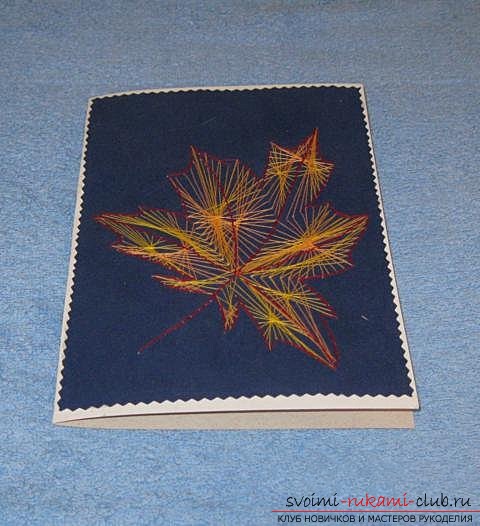
  23, 24. The card is ready. From the wrong side cardboard, as a rule, ugly. Therefore, inside the card you can glue a sheet of Xerox paper, the same color as the cardboard (if it is colored) or velvet paper.
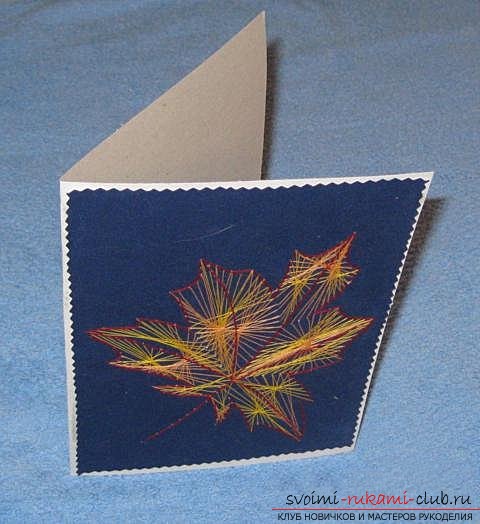
 That's all, you just need to sign and give this card!
Comments
Related posts:
 A simple and detailed master-class on work in technology is "isolate" for those who only make the first steps in this kind of needlework.
 A horse made of beads made by own hands will be an excellent gift to a friend. Our simple master class will show how to weave it.
 How to create handicrafts in technology, detailed instructions, diagrams with figures and photos of work, lessons on the creation of postcards for the New Year in technology to be eliminated
 We put a simple flower out of paper. A master class for beginners with a detailed outline.
 Master class for sewing blankets in the technique of patchwork sewing "Card trick" - a simple way to tailor the product