
Embroidery with silk and satin ribbons of buttercups, lilacs and roses for beginners, master class and lesson with diagrams and photos
Master-class on embroidery of buttercups, lilacs and rosesribbons Flowers created by embroidering ribbons, effectively look and on the original cushions, and on handbags for cosmetics and cases for phones, and not so long ago, mini-embroidery began to appear on various kinds of jewelry (brooch or earrings), which are styled for Shebbie chic . Today we offer to your attention a master class on embroidery with ribbons of flowers: buttercups, lilacs and roses. 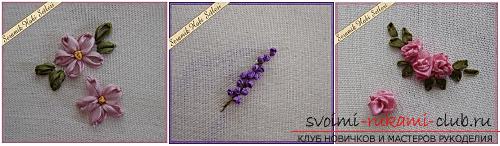 To embroider these flowers with ribbons, we will need:
- tissue base (canvas);
- embroidery frame;
- needle for embroidery, which have an elongated eyelet;
- tapes of satin fabric;
- natural thread (mulina);
- scissors.
Embroidery with ribbons of buttercups. To embroider the usual buttercups, it is necessary to choose ribbons of small width (two to four millimeters), yellow, tender pink, green hues. You need to insert a ribbon of a pale pink hue in the eye of the needle, then pull the needle to the front of the tissue base in the center of the future butterfly flower. Then it is necessary to withdraw the needle through the same hole in the center of the underside and stretch the ribbon slightly, while leaving a small loop for the petal. From the central part we recede the distance equal to the length of the petal, then we remove the needle from the back side in the same place, we pass the needle through the eyelet, through the same hole, we need to withdraw the needle to the wrong part, and then carefully pull the tape.  By the same principle, perform the remaining fivepetals. then insert a ribbon of yellow into the needle, and then take the needle to the front part in the center of the buttercup. Next, two times wrap the ribbon around the needle, pass through the center of the flower again to the purl and carefully tighten the ribbon. In doing so, we form the core of our flower. The leaves are embroidered with ribbons on the same principle as the petals. Embroidery ribbons of a branch of lilac. At the very beginning of the mulina we embroider the stem of our future branch of lilac. Then we put a purple ribbon into the needle and bring it to the front part near the stem. We wrap the ribbon around the needle, as we see in the photo, then we remove the needle to the wrong side through that hole and tighten the ribbon nicely. We repeat these knots along the entire length of the twig.
 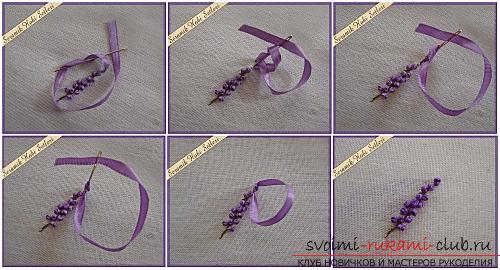 Embroidery with ribbons of roses. To embroider a rose, you need to choose a ribbon with a width of eight to ten millimeters. Needle along with the tape output to the front, wrap 1 time around the ribbon around the needle to form a flower bud. Approximately five centimeters of ribbon, which are closer to the fabric, we collect on a needle, as we see in the photo. After that, the needle is drawn to the wrong side, carefully tightening our ribbon, forming thus flower petals. At the end of the petals, carefully straightened. All! Our flowers, embroidered with ribbons, ready! Enjoy your handiwork.
Comments
Related posts:
 Embroidery with silk and satin ribbons of tulips, for beginners, master class and lesson with diagrams and photos
 Embroidery with silk and satin ribbons of flowers on the example of a lily for beginners, a master class and lessons with diagrams and photos
 Embroidery with silk and satin ribbons for beginners, master classes and lessons with diagrams and photos
Embroidery with silk and satin ribbons for beginners, x master classes and lessons with diagrams and photos
Embroidery with silk and satin ribbons for beginners, master classes and lessons with diagrams and photos
Embroidery with silk and satin ribbons for beginners, x master classes and lessons with diagrams and photos
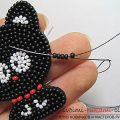 Embroidery with beads on the skin, brooch "Kitten" from beads, detailed master-class with diagrams, photo, for beginners