Beadwork embroidery technique execution by own hands (photo)
Content
- general information
- Materials and tools for embroidery
- Work on the icon »Saint Elena»
- We embroider the icon "Tenderness of the Most Holy Theotokos"
- Kazan Icon of the Mother of God
- Video: embroidery of the icon of Our Lady of Kazan
- Embroider personal icons
- We work with jewelry beads
- Video: master class on embroidery of an icon with beads
The most difficult, responsible and painstaking work is
Icons. This work requires the needlewoman both patience and perseverance, and a sincere faith in God. The difficulty of embroidering an icon with beads is that you have to accurately pick the beads in size and color and attach them to the canvas in a clear sequence. But the result is worth it. Adhering to some rules, you can create a real masterpiece, which, perhaps, will be the decoration of your iconostasis.


general information
The main difference between church embroidery and secular embroidery is that a person engaged in work receives not only aesthetic pleasure, but also seeks to fully reveal the inner meaning of the image.
The conventional method of embroidery has long been consideredFacial sewing, approximated by artistic expressiveness to the mastery of the icon painter. Work on the icon is a titanic work, first of all spiritual. Therefore, this method of embroidery requires not only the advice of the priest, but also his blessing.
Today, beads embroider icons in three versions:
1. The first involves the imposition of a paper icon on the fabric and the sheathing of only the salary and vestments.
2. Working on the second option, the foreman embroider beads with vestments, and face - with the method of face sewing.
3. The third way: you need to embroider a cross, according to the counting scheme. It is important to remember that in this case the work will not be considered canonical.
Preparatory stage Before you proceedTo such a complex and serious process as the beadwork of an icon, prayer must necessarily be read. This can be as a prayer "Before the beginning of any business", so it's an appeal to the Theotokos.
Great importance is played by bright light, as embroidery with beads implies both visual acuity and maximum accuracy.
Workplace Preparation 
It will be right to embroider at the table. Remember that it is important to create comfortable conditions for work:
1. Cover the work surface with a white cloth. If the bead falls from the needle, then it will not be difficult to detect it.
2. Put the beads in the kneader (each color in the "own" cell), for convenience, paste the numbers corresponding to the pattern on it.
3. On the right side of yourself put the scheme, which will work.
4. Using a thread, mark the material in squares of 10 by 10 cells.
Materials and tools for embroidery

To embroider an icon with beads you will need the following "ingredients":
- Canvas with a picture;
- Czech (or jewelry) beads;
- needle;
- Instruction (relevant for beginners);
- Hoop (square or round);
- Threads (for beginners the monofilament will perfectly suit);
- Stones (semi-precious and ornamental);
- Rhinestones;
- Beads (different sizes).
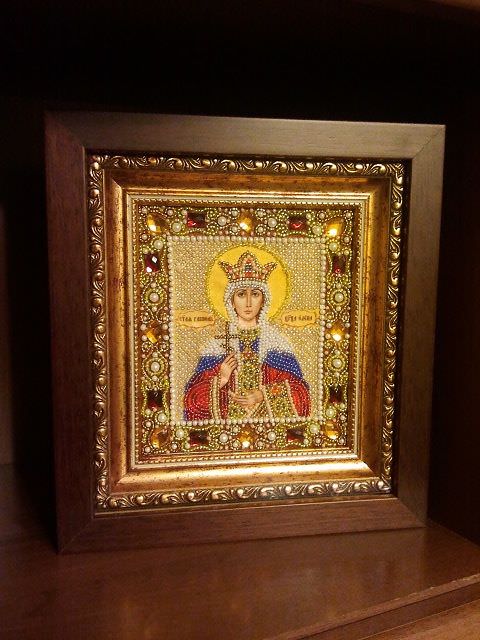
Work on the icon »Saint Elena»

The manufacture of the icon,That you can embroider in vertical and horizontal rows. You can start with both the bottom and the top. The icon "Saint Elena" is considered to be the simplest in execution.
According to experienced craftsmen, for manufacturingThe icon "Saint Elena" is the most correct to start embroidering from the upper right corner and move forward in horizontal rows. The thread is attached to the underside, then it is displayed on the "face" of the work in the lower right corner.
How to properly embroider the face of the icon "Saint Elena", will tell the master class. Follow it, and you will certainly succeed.
Process of work The process of embroidering the icon "Saint Elena" looks like this:
Bead (color matching) is threaded onto a needle;- The needle is inserted into the upper left corner of the canvas cell;
- The thread is carefully pulled and the bead sewn (when working with beads it is important to remember that the work does not "lead." For this, the first and last beads are sewn twice);
- A second bead is sewn, and thus the entire series is worked through. Carefully follow the order and follow the diagram. The color should be selected according to the scheme;

Further the process of embroidering the icon "HolyElena "implies the following in the opposite direction, from left to right. To do this, the needle is removed from the upper left corner of the canvas cell, and, after stringing the bead, is inserted into the lower right edge of the cell;- The location of the thread is of great importance. While working on the fragments, you should remember that the tightening of the thread on the wrong side can ruin the drawing;
- Embroidery in parts is very important. First you need to finish one side, then move on to the other.
Important to remember
If one row is longer or shorterThe previous one, you can sew the last bead twice, and then return to the wrong side and in small stitches reach the required area. If the color of the sewn bead was accidentally found to be unsuitable, then you can use round pliers or pliers. Accurately "biting" the wrong element, sew that bead, the color of which suits the picture.
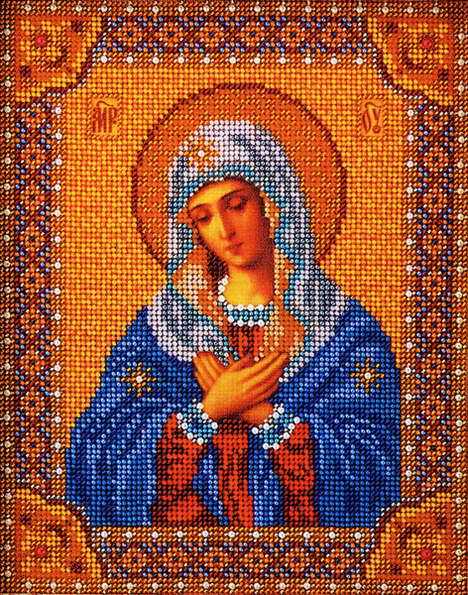
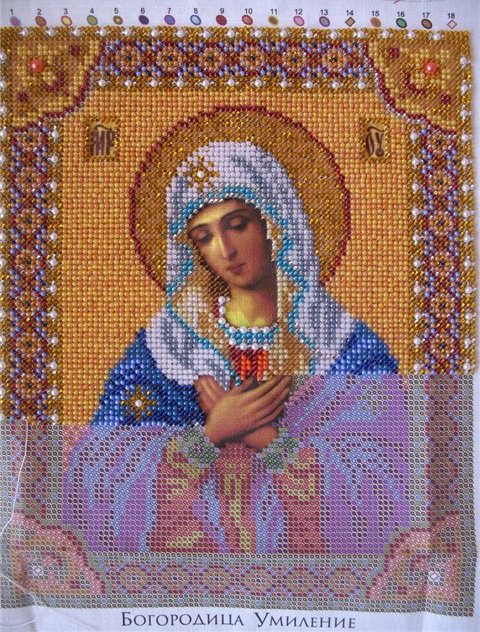
We embroider the icon "Tenderness of the Most Holy Theotokos"
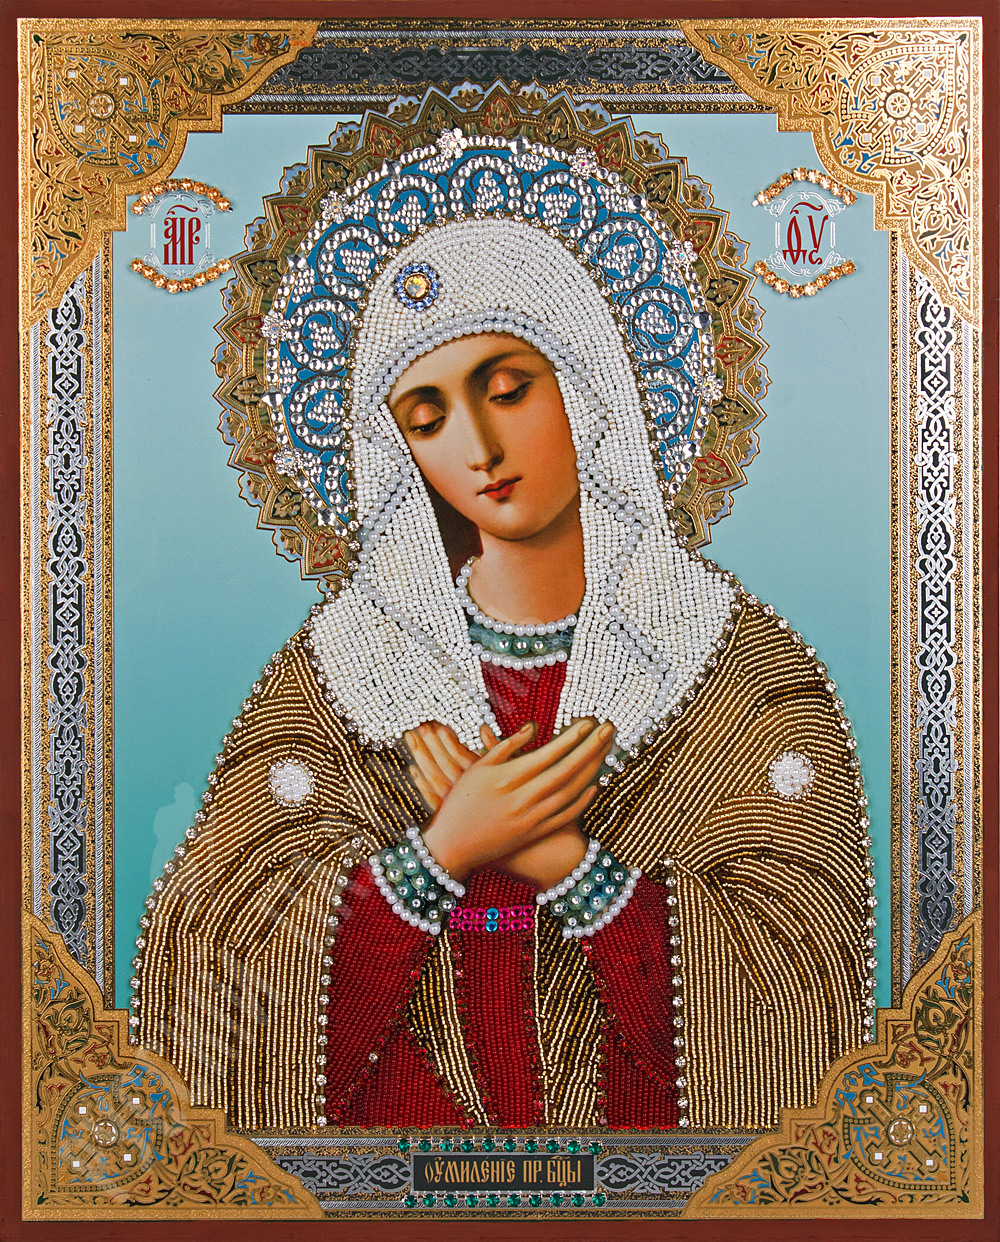
Icons from beads are often "involved" in the designThe Temple. Special love for believers is enjoyed by the icon "Tenderness of the Blessed Virgin", the prayer of which helps girls and a girl to pass through all the difficult stages of growing up. Embroidering this icon with beads requires some experience. In the photo, the icon, embroidered with its own hands, looks very impressive. The difficulty lies in the elaboration of small elements - the eyes, fingers and lips of saints. Schemes available for sale, suggesting the presence of printed on the fabric of faces, can cope with this difficulty.
To embroider the icon "Tenderness of the Blessed Virgin" with your hands the master class will help you. Do not forget that a special prayer should be read before the work.
Preparation for work Many schemes of icons are moreSuitable for cross stitch. But, judging by the recommendations of photos and video master classes, you can just pick beads for color and embroider icons from beads.
Experienced masters, sharing their secrets in the photo and video lessons, are advised to work on this icon to work with the canvas "Aida 14" and Czech beads number 10.
Process In order to understand what size of tissue is needed, you can count all the cells of the canvas and add one centimeter at the edges. Before work, you need to carefully place the canvas in the embroidery frame.
The width of the canvas is 149 beads, and the length is 150 beads.
The process of embroidering the icon "Tenderness of the Blessed Virgin" is as follows:
The icon "Tenderness of the Blessed Virgin" will be completely ready after you embroider all elements of the scheme. If you want, you can apply for work with quality pearls.
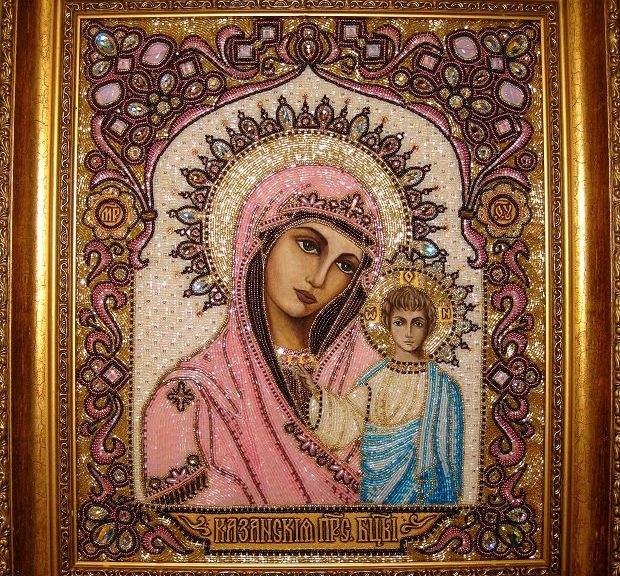
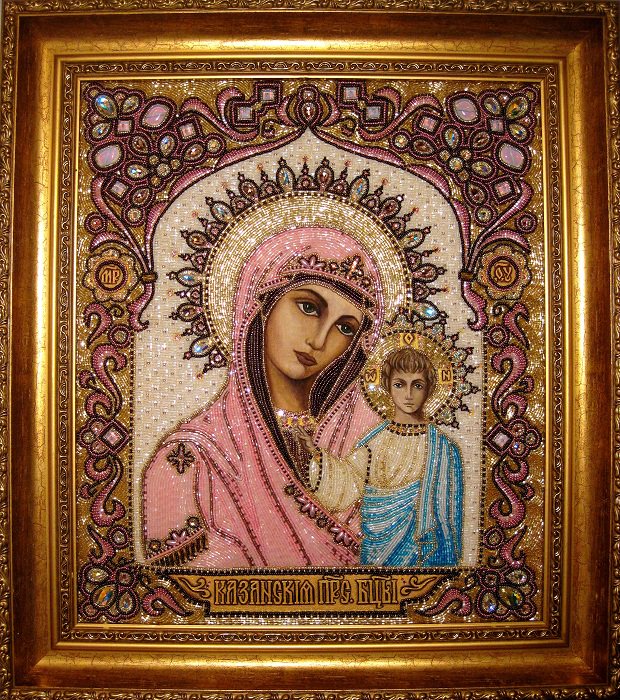
Kazan Icon of the Mother of God
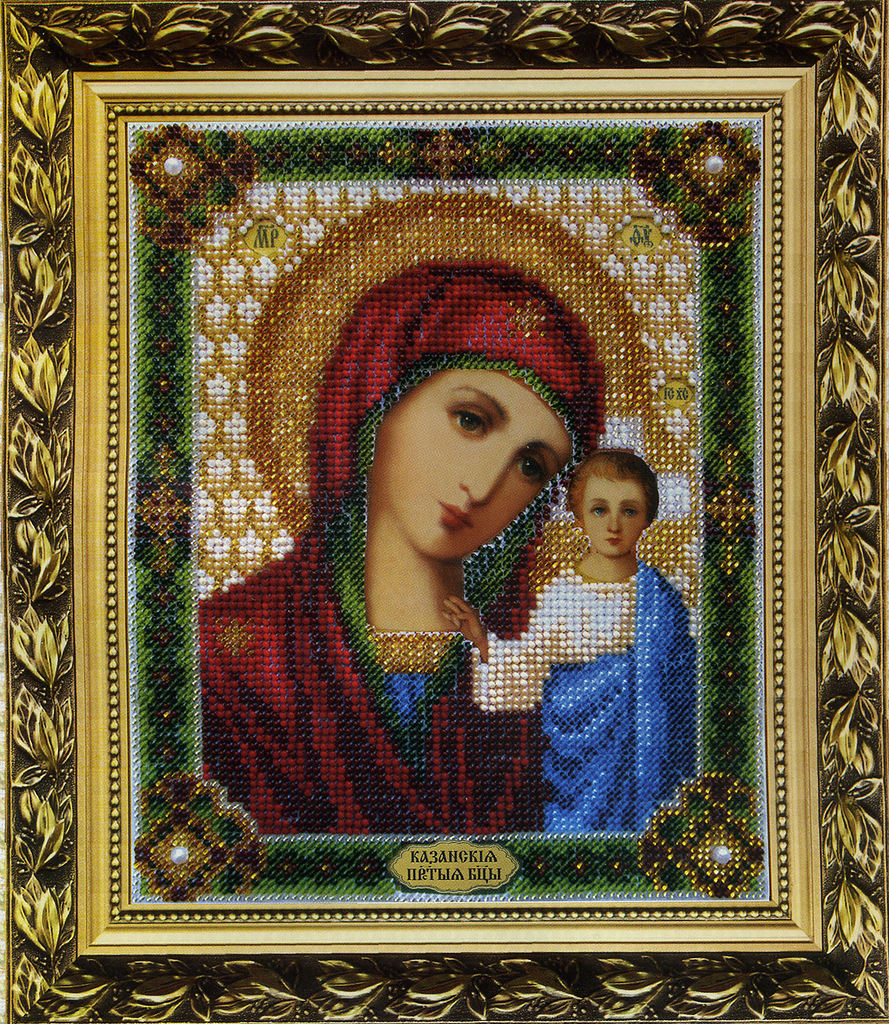
To create from the beads the icon of Kazan GodMother you will stick to mixed technique. By the same principle, the icon "The Inexhaustible Chalice" is also executed. Schemes are freely available, but also you can work with the picture found on our website. If you follow all the recommendations that the master class offers, then soon your work will please you and your loved ones.
"Kazan Icon of the Mother of God", as well as the icon "Inexhaustible Chalice", involves the use of mixed techniques of cross stitch and beads:
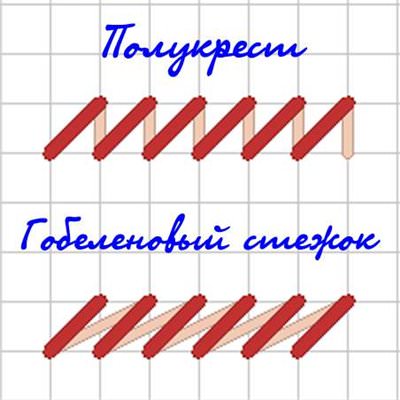
- Seams "elongated cross" and "simple cross";
- Seam "semi-cross" (countable embroidery with beads);
- Arched seam (countable embroidery with beads).
Process Before embroidering the icons "Kazan Icon of the Mother of God" and "Inexhaustible Chalice" a prayer must be read without fail.

After that, you can safely get down to work:
Video: embroidery of the icon of Our Lady of Kazan
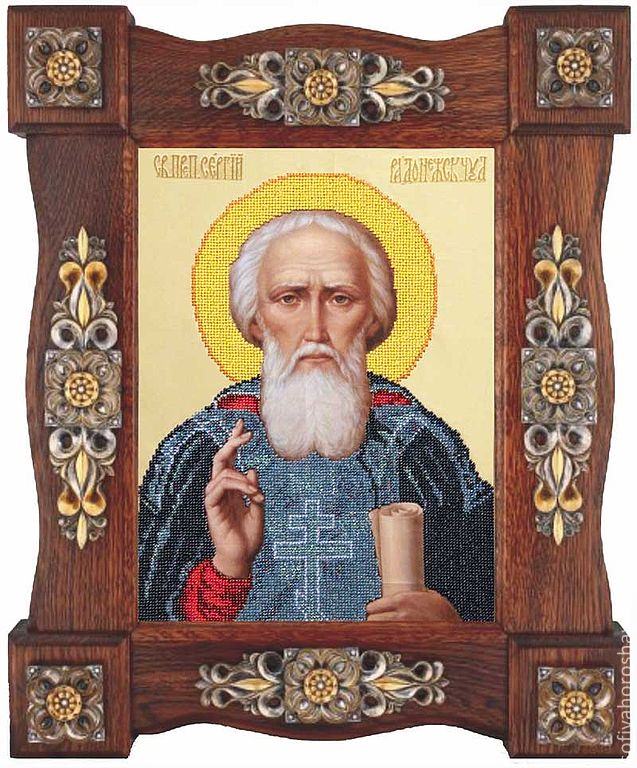
Embroider personal icons
Not so long ago, the enormous popularity of steelBeaded inscribed icons, or faces of guardian angels. It is important to remember that there can be several "personal" saints, so it is important to get a priest's advice before work.
Process 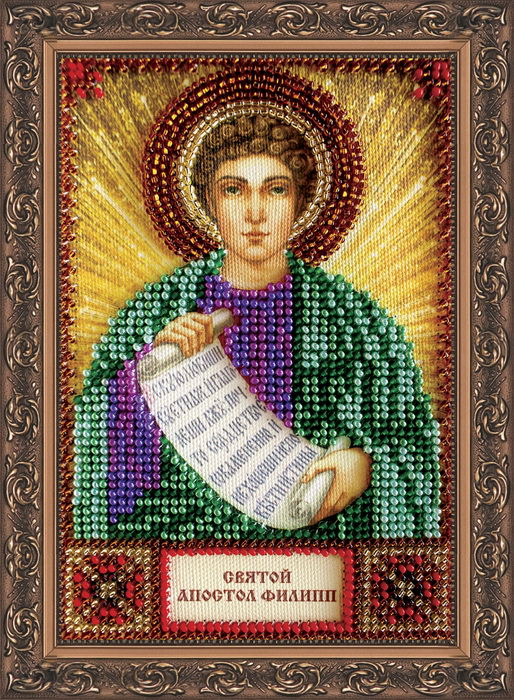
To make luxurious personalized icons that look great on the photo, the recommendations offered by the professional master class will help you:
Nominal icons do not imply the presence of broaches andNodules. In order to avoid annoying mistakes, you will need to embroider, forming a loop - in 2 additions. After the end of the thread, the bead must be sewn twice and "hidden" on the wrong side under several stitches.
Some tips In order for your personal icons to turn out to be ideal, remember that:
- The quality criterion is equal, and it is necessary to embroider diagonal or horizontal rows, producing input and output of needles in the same "point";
- If the nominal icons are safely "hidden" under the glass;
- Nominal icons should be embroidered on linen cloth.
Ready work can be decorated with pearls.
We work with jewelry beads
Beadwork of the icon is often compared withJewelry mastery. And in fact, working with jewelry beads requires not only perseverance and patience, but also certain knowledge and skills. In this case, the bead embroidery of the icon assumes the performance of the work, almost invisible to the eye.
Features of the work The beadwork of the icon is highly valued by art connoisseurs. In order to properly embroider the icon with jewelry beads, you must adhere to the following rules:
Embroidering a picture with a jewelry bead involves work not in colors, but in rows, in a direction from the top down;
Each element is recommended to be pierced with a needle.
Many craftsmen working with jewelry beads,Recommend paying attention to the material of Czech or Japanese production. The icon, decorated with pearls, can become a real decoration of both the home iconostasis and the Temple.
Some tips In order to embroider beads icons always pleased you and your loved ones, follow simple tips:
- Always bring the series to completion;
- Remember that with beads and pearls only the background and decoration of the saint is made out, while the face itself must remain untouched;
- Make sure that the length of the thread is sufficient for the end of the row;
- If you process the thread with wax, it will not be confused, and the work will be very strong.
Do not be upset if the beadwork of the icon does not come out right away. Remember that the most important thing in spiritual needlework is the process itself.
Video: master class on embroidery of an icon with beads
Comments
Related posts:
 Cross Stitch: performance equipment for beginners (photo)
 Beadwork Rooms' complete sets of machinery and circular