Embroidery with beads masterclass icons with photo and video examples
Content
- Tips on beaded embroidery
- Tools and materials for embroidery with beads
- Techniques of beaded embroidery
- Video: master class on embroidery of a beaded icon
- Embroidery of an icon with beads and stones without a set
- Video: embroidery of icons without a set of beads and stones
- Bulk embroidery with beads and floss
- Video: framed embroidered icons of beads
Our master class is useful to those who decided to do needlework, namely
. Today,
, Rhinestones and pearls. Let's take a closer look at how this is done, and learn a few techniques for doing this work. Our master class will teach you the basic techniques and tell you about the secrets, thanks to which the embroidery will be successful.


Tips on beaded embroidery
Seam "Semicrice" beads If you just start working with beads and want to learn how to embroider properly and beautifully, then follow the recommendations from professionals:
Tools and materials for embroidery with beads
Usually those who want
, Buy ready-made sets, which are now on sale a great many. Our master class will tell you how to embroider an icon with a set and without it.
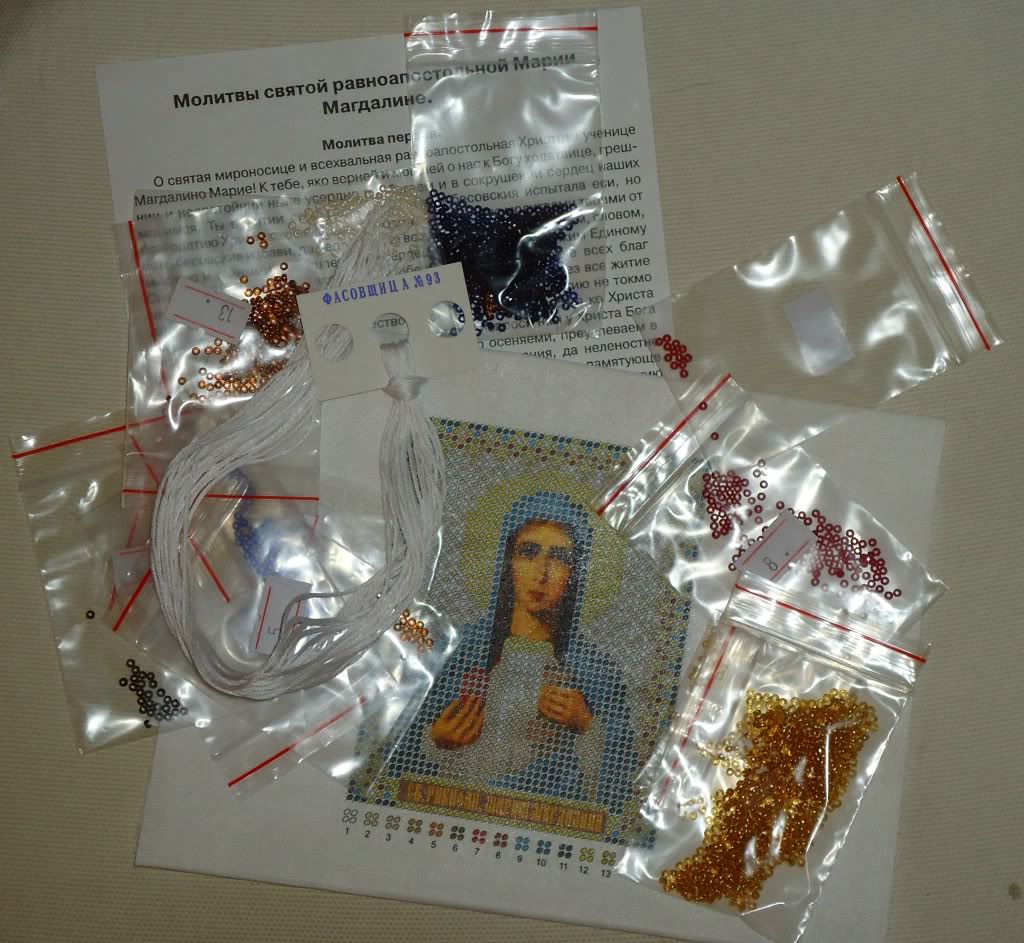
The kit includes everything you need:
- A canvas with a scheme on it and the face of a saint;
- Beads in the right amount and the right shades;
- Special needles for embroidery with beads;
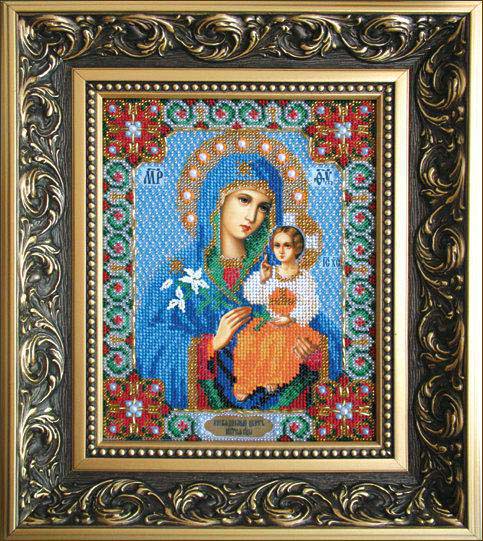
- Image of the finished work;
- The instruction with the detailed description.
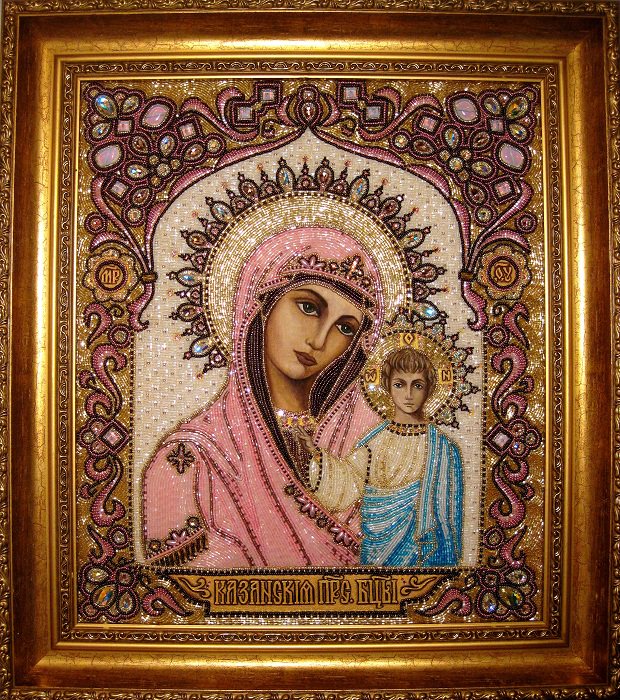
Some kits may contain not only beads,But also, for example, stones that are sewn in certain places. Paintings embroidered with stones and beads look even better, but it is worth more.
Techniques of beaded embroidery

Note that you do not have to work hard for one day, so you should tune in to it.
Classical Let's start a master class with a descriptionClassical technique. Before the beginning of the canvas is best to iron, then the beads will lie evenly. Then it is recommended to stretch the fabric on a frame made of wood and fasten it with buttons, or on hoops of rectangular shape. So your embroidery does not bend. If the hoop is large, then you can build up the fabric around the edges. For convenience, you can also arrange beads by color in individual boxes.

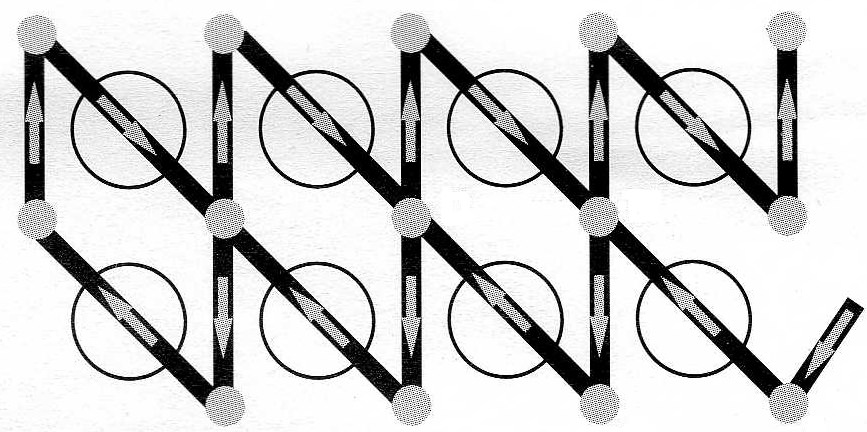
The first stitch should fix the thread on the fabric. To do this, thread two ends of one thread into the needle and make a stitchy stitch. Nimes you also fix the first bead on the fabric. You must start embroidering from the upper left corner, and then you go diagonally. The needle is pulled out on the front side of the picture.
The stitch is done this way - you put onBead of a certain color and stick a needle into the opposite corner. That is, if you started from the lower left corner, then stick the needle in the upper right corner.
At the end of the row, you also secure the bead with a doubleStitch. Then spend a needle in the second row in the upper right corner. Also pierce the bead and insert a needle in the lower left corner. Thus, you can embroider the whole picture in the forward and backward direction.
Attach 
Beaded seam "pasted" There is also a techniqueEmbroidery in the attachment. It allows you to achieve results in a shorter period of time and with less effort. In order to make a seam for fastening, first you need to thread the beads on the thread. Then this thread is stitched to the fabric with short stitches. In this case, the stitches are obtained, as it were, between the beads. The sewing technique makes it possible to finish the work much faster, which is very advantageous if the product is very large, and the work is to be voluminous. You simply lay a thread with a bead strung on it on a fabric, and another thread stitch it through each bead. You can not through each, but after 2-3 beads.
The embroidering of icons assumes the presence of the saint's face,Which you do not need to sew with beads. When you get to the place where the fabric is depicted face or hands, then the thread must be cut off. That is, you should do the same as if your series ended. This is necessary for two reasons. First, so you do not allow the appearance of constrictions. Secondly, you will process the face of the saint, and he will look neater. At the end of the work, remove the fabric from the embroidery frame or frame and iron it from the wrong side. Make a picture in the baguette.
Video: master class on embroidery of a beaded icon
Embroidery of an icon with beads and stones without a set
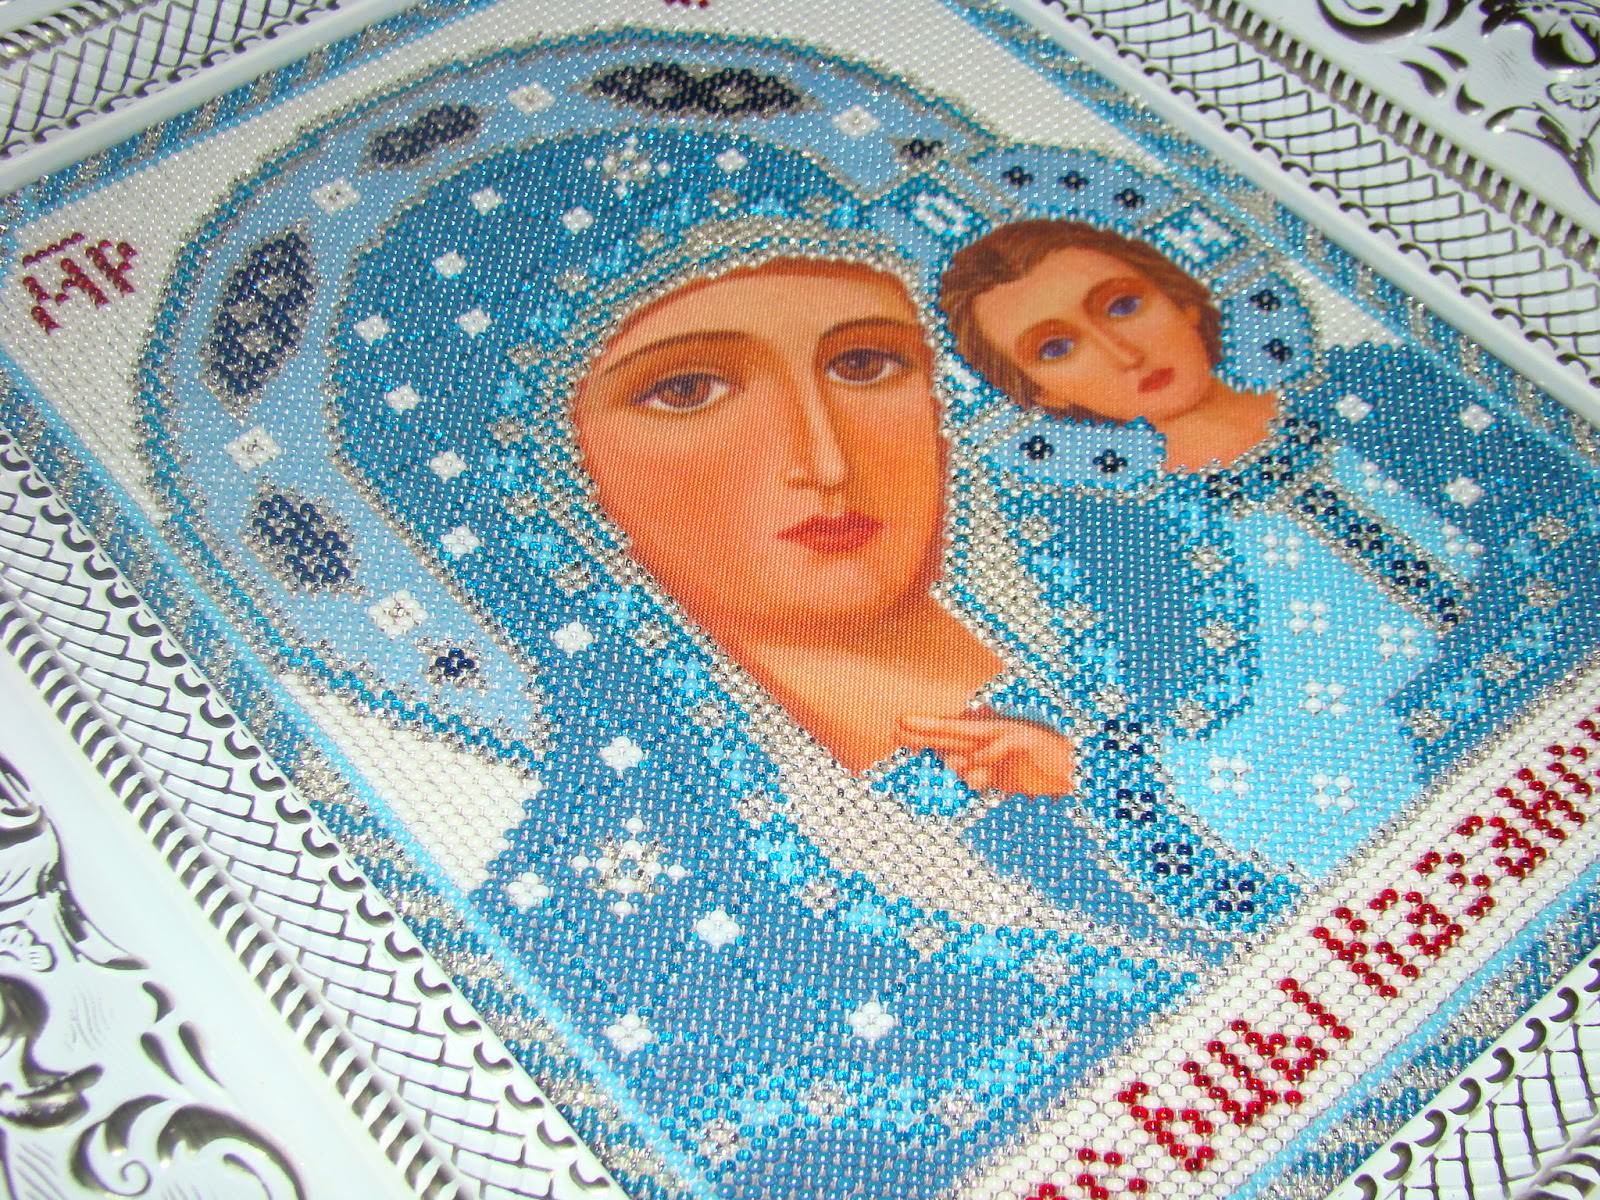
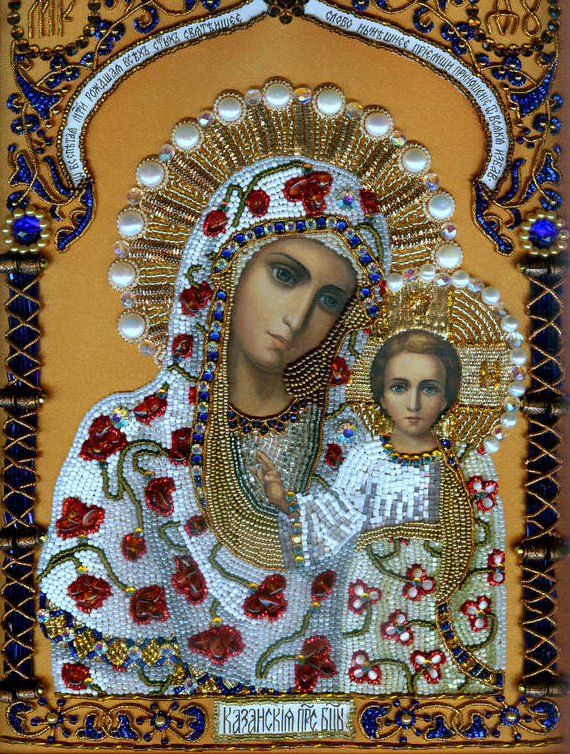
It will be difficult for novice craftsmen to performEmbroidery with stones, but eventually it will become possible. In addition, this master class will consider the option of embroidery without using a set. We will have only an image of a saint, for example on a calendar.
When you pick up the beads, notice,That the embroidery does not use Chinese beads, which most often have beads of different sizes. Beautiful and accurate embroidery will be obtained only if all the beads are one to one. Therefore, it is best to buy Czech beads, or Japanese.
For work, we need a calendar from which weTake the face of the saint, and on it we will select the coloring of beads and stones. Next, we cut out the image and translate it to the fabric. We make the marking of the main lines. Cut out the parts of the saint's body separately and his face. All this needs to be outlined on the fabric.
All the elements must be embroidered in a chaotic order. But you need to start with the attachment of large stones. They are then lined up in a circle. When you almost reach the parts of the body of the saint, that is, face and hands, for a couple of rows before, glue the previously cut preforms on the fabric. All this is covered with beads closely.
After the last row is completely finished, the lacquer and embroidery in the baguette should be opened.
A special mention is the embroideryMosaic or as it is still called diamond embroidery. It looks really impressive, due to the fact that all the elements there are made with rhinestones. Therefore, the work will also be poured.
Video: embroidery of icons without a set of beads and stones
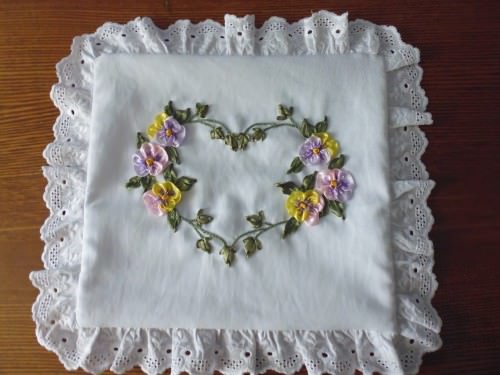
Bulk embroidery with beads and floss
It's hard to consider all the techniques that exist only through one master class, but still you can not fail to mention that there is an embroidery using
. This more work is even more voluminous than the previous one due to the fact that you need to embroider not only beads, but also threads.
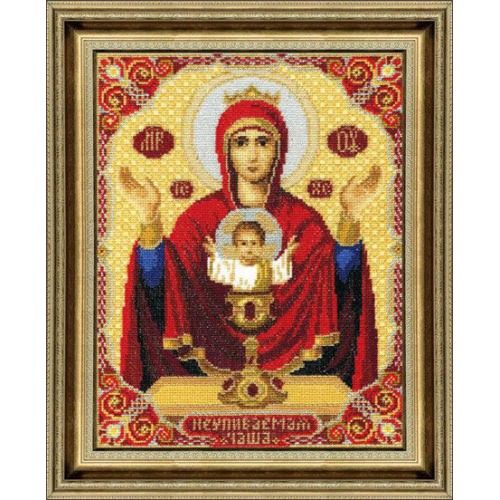
We need to take a ready-made diagram for cross-stitching. Then pick up the beads of the right colors. Nimes you will sew the holy garment. Threads of a mulina need to choose such shades which will approach for processing of the face and hands.
Embroidery of icons should begin with sewingAnd only then you can go to the beads. It should be remembered that if the canvas for embroidery has a smaller cell than the size of beads, then the picture can turn out wavy. An exit from this situation can be a preliminary designation of the beads of all circuits of the circuit. Then you just fill the space that you yourself have sketched.
Undoubted advantage of technology with applicationBeads and mulina, is that it turns out to be voluminous. Moreover, you can even save on such embroidery when selecting materials. After all, beads for embroidery are more expensive than threads. In addition, the finished work usually turns out to be somewhat larger in size than the one that is offered in the set.
Our master class considered three variants of embroideryIcons with beads. If you are just starting to embroider, then it is best to use the classic version, which our master class described first, or the technique of the attachment. After training, you can perform work with stones, not only with beads, as well as with large beads or rhinestones, or do three-dimensional paintings, and also study various more complex techniques of embroidery with beads. By the way, using the classical technique of embroidery, it is possible to create almost any paintings, not just icons. It can be landscapes and portraits. At the same time, the picture turns out to be a three-dimensional one.