Embroidery with beads on the skin, brooch "Kitten" from beads, detailed master-class with diagrams, photo, for beginners
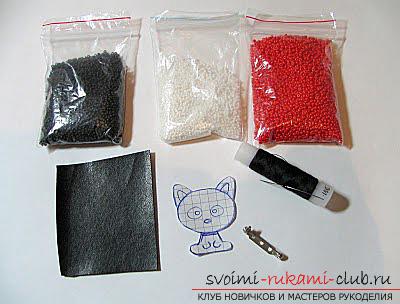
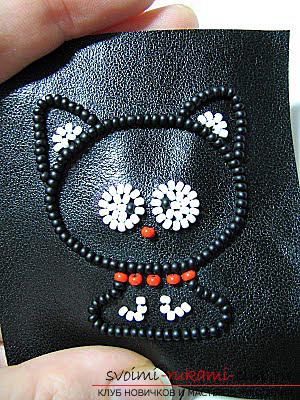
Master class on embroidery with beads on the skin: learn how to make a brooch "Kitten" To embroider with a bead such a brooch, as in the illustration, you do not need to have extra abilities. 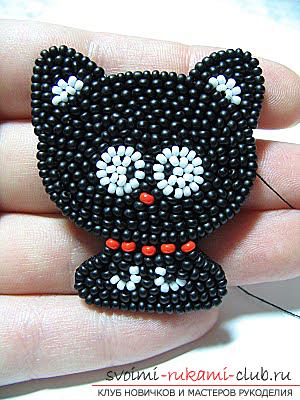 It is enough to carefully study this master class and stock up certain materials and tools:
- two pieces of black leather or a substitute;
- non-woven fabric;
- needle for beads;
- beads №12 black and white, № 10 - red;
- black thread 33LL;
- The basis for the brooch is 3 centimeters long.
 First you need to draw a seal on the paper andcut out his figure. Then we put it on the previously prepared skin and circle it with a pencil or pen. Now we fix the cat with a thread for which we make a series of stitches. Such fixation of the cat is necessary for a clear outline drawing. Gradually making a brooch from beads, the contours will need to be redrawn, due to the fact that they are gradually erased.
 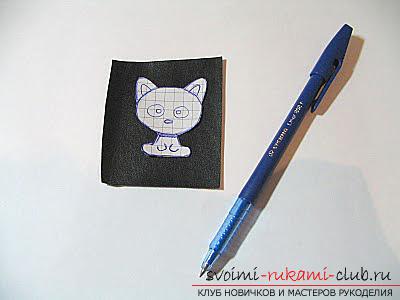 Already on the skin we draw the cat's eyes, ears and paws.
 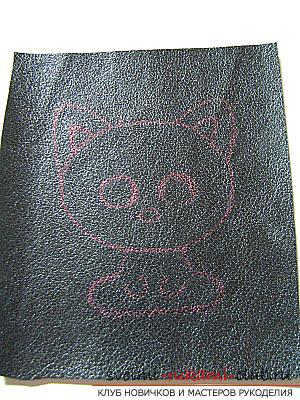 After that, take the needle for the beads and insert into theit's a thread, but it does not need to knit on it. We pierce the skin on the contour from the wrong side and draw a thread with a needle on the face, we collect beads on it. Now pierce the wrong side, only consider the length of the beads, which must be very tightly connected to the piece of skin.
  Our needle is now on the wrong side, so now we pierce it back to the face, slightly receding from the fixed beads.
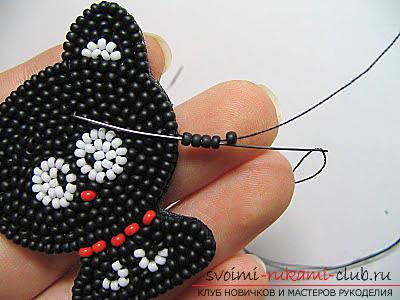
 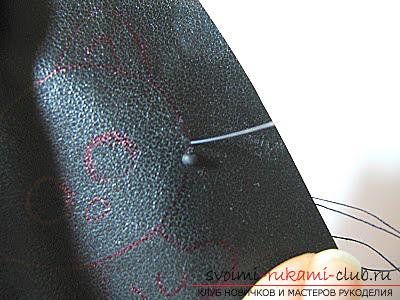 We type on a needle one more black seed beads andwe carry a needle from right to left into the sewn bead itself. Then, without making any indentations, you need to pierce the needle from the face to the wrong side of the first bead. Again we stick the needle from the wrong side of the face and bring it to the right of the bead sewn, the second sewn. The distance between a needle and a bead should be equal to the length of the bead. We string another black bead on the needle and drive a needle into the beads sewn by the second, from right to left.
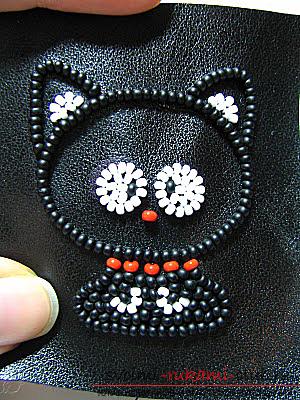
  Now the needle is located on the face side. We pierce the needle between the beads. Similarly, with how the first beads were sewn, we sew all the rest along a certain contour. Then the thread is carried through the sewn beads along the line of the future product. Just below the contour of the muzzle of our pet we sew red beads, forming a kind of collar. The preliminary result can be seen in the illustration:
 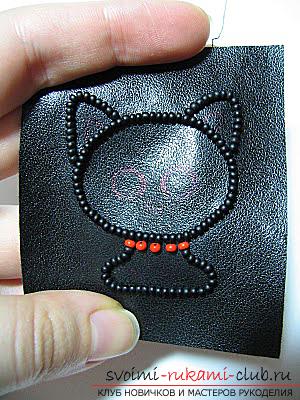 Similarly we embroider ears, only we usethis is white beads. We turn to embroidering the eyes, paws and nose of our brooch. Using two black beads, we form pupils (1 per eye). For the nose, take one red beads. After you have performed the embroidery of the contour of the brooch, including the ears, paws, collar, nose and eyes, you can proceed to fill the cat's body inside. To do this, sew as tightly as for the previous details of black beads. They are sewn separately and so that the skin is not visible. Sewn they are sewn in an arbitrary order, while through the previous bead needle is not required. Similarly, the contours of the ears and head of our brooch are filled.
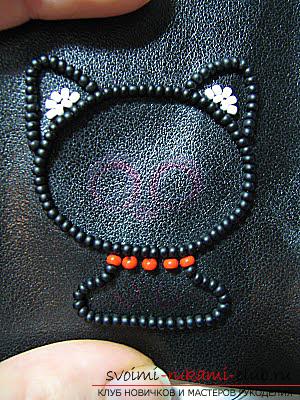
 Next, very carefully cut out the contour of the brooch,trying not to touch the thread. When sewing beads in the head of a cat, you can bring out a thread on the face, from which then you get a mustache. They are preferable to perform at the very end, when the brooch will be almost ready.
 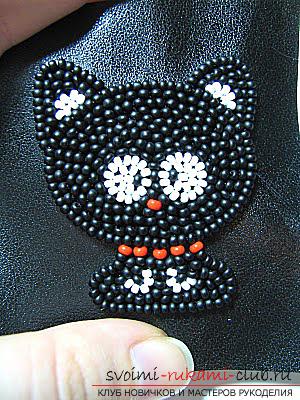 We begin sizing the brooch. To do this, turn it upside-down and glue all the threads. This is done in order to better secure the threads, which should not be blossomed. The adhesive is applied very slightly, so that it does not go to the front side and does not damage the look of the brooch. We now turn to the formation of the base of the brooch and its fixation. We put a brooch on a piece of non-woven fabric and we circle our head. Inside the resulting ellipse, we draw one more, only retreat from the previous 1.5-2 mm.
 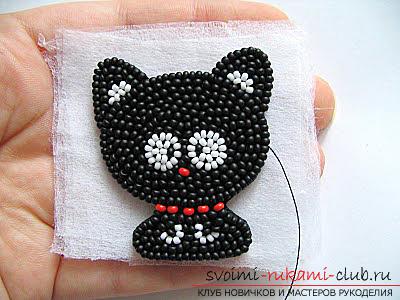 Apply the base of the buckle to the smaller ellipse andmark out its position. Then apply it to the skin and outline the location of the ends. Make carefully two holes in such a way that this piece can be put on a pin.
 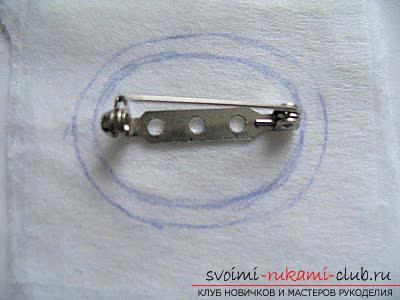 Sew on the fleece base, guided by the following illustration, and cut out on the side of a smaller ellipse.
 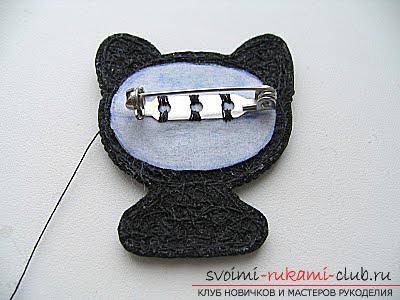 After that, the interlining is glued together with the brooch. This is best done with a quick-drying glue, for example, "Moment". The back of the brooch is smeared with glue and the fleece is pressed against it. The glue must immediately grasp. After the glue dries, the inside of the brooch is re-missed and a second piece of non-woven fleece with marked holes is pulled on the unfastened pin. We let the glue dry well. The following illustration shows the appearance of the face of the brooch. Next carefully cut out the brooch and lubricate the edges of the two layers of skin with the help of PVA glue. It is most convenient to do this with a wooden toothpick. After drying, the glue will be transparent and invisible, the edges of the skin will harden. Finally, you can take care of the cat's mustache, for whichwe left threads in advance. For each thread string 5 black beads and pass the needle back through 4 beads. Similarly do the rest of the mustache. We fix the thread in beads and admire the finished product!
Comments
Related posts:
 Beadwork embroidery, detailed master-class with diagrams, photo, for beginners
 Embroidery with beads paintings or icons, detailed master-class with diagrams, photo, for beginners
 Embroidery with beads, detailed master-class with diagrams, photo
 Beadwork of the flower "Field moth", detailed master-class with diagrams, photo
 A lesson on the beadwork of icons, a detailed master class with diagrams and a photo for beginners.