Cross Stitch: performance equipment for beginners (photo)
Content
- Popular embroidery techniques
- Video: how to embroider crosses
- Video: how to embroider the Bulgarian half-cross
- Video: rice stitch
- Additional equipment
- Video: half-cross stitch and gobelin stitch
Many needlewoman, even doing embroidery more than one year, do not realize how diverse it can be. And it is not different pictures and patterns that just obvious. Just
not limited to one technique. In fact, they more than a hundred. All, of course, impossible to master, and it is not necessary. However, skillfully using and combining them together, you can achieve amazing results. Such work is already can not be included in the category of simple, but it's worth it. By learning
and other techniques, you will be able to surprise their works even experienced craftsmen.

Popular embroidery techniques
Among all the available techniques are the following cross stitch:
- a simple cross;
- direct cross;
- Prolong the cross;
- Bulgarian cross;
- Rice seam;
- Italian cross;
- goat;
- star;
- Rhodes seam.
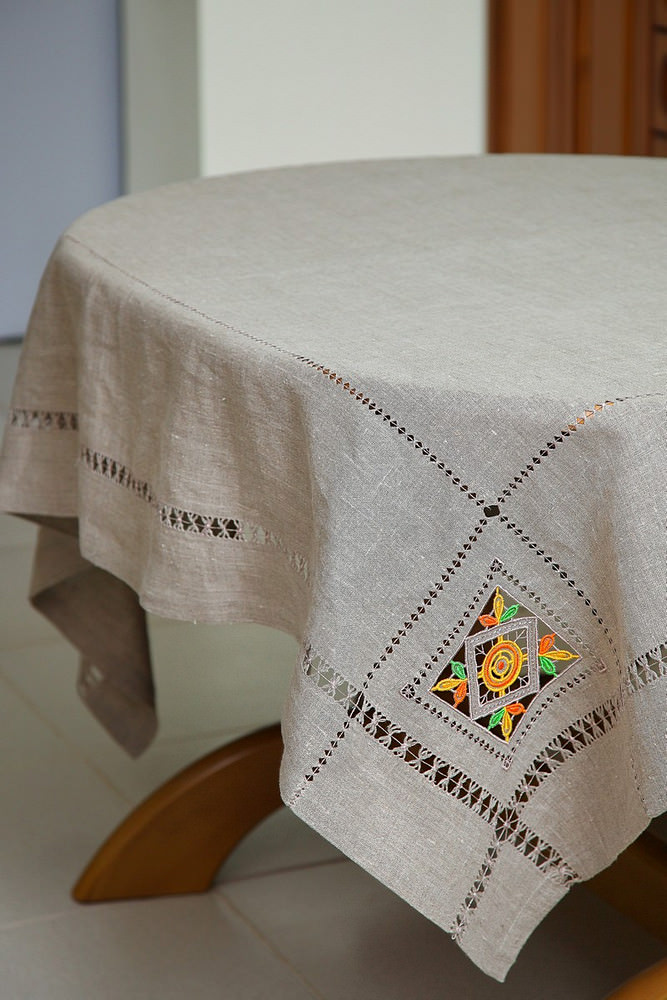
Also for decoration and finishing of the finished
, Petit and stitch "back needle". According to him the individual lessons will be given.
Of course, use all of it does not work in the sameshould not even for security reasons. However, the combination of 2-3 different types in one picture is possible. In addition, many of them are used for embroidery wipes his hands, towels and gowns.
Simple cross Perhaps this is a technique thatfamiliar to all. That's it mean when they talk about cross stitch. First of all, it is popular because of the fact that it is easy to learn and it can help to embroider almost anything. However, it has its drawbacks. When inept embroidery works produced flat. In addition, to emphasize the delicate features and contour shapes using other techniques - stitch "back needle", for example.
So how do you performed a simple cross stitch? In this technique, two runs inclined stitch made so that they constitute two strands reticle. That is, the floss is first necessary to withdraw yarn from the upper right to the lower left corner, and then from the top left - to the lower right. There are many methods of how to embroider a simple cross. But basically two uses - by color, and "parking". This example explains its all about embroidery.
Driving performance of a simple cross 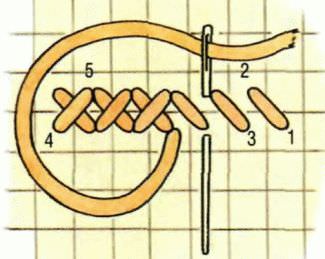
Driving performance of a simple cross
Video: how to embroider crosses
Direct cross 
Direct Crestview Unlike the previous technologyembroidery cross, this is the intersection of two straight lines. Running it as follows. First the horizontal stitch from left to right, and then vertically downwards. If done correctly, the back side will be a series of parallel oblique lines, similar to goose-step. This embroidery technique is very easy to learn, and therefore can be recommended
. Direct cross can be used asalone or in combination with other techniques. The most characteristic folk art such embroidery for Scandinavian and Germanic tribes. She decorated the clothes, towels, tablecloths and more.
Elongated cross This technique is very similar to embroiderywith a simple cross. Unlike the last stitches are vertical weave 2-3 and horizontal - only one. The result is elongated in cross height. There are several varieties of it. The most popular among them - is an elongated cross stitching and Hungarian cross. Now you can learn all about the embroidery of these crosses.
The elongated cross 
Elongated Hungarian Cross First executedin the same way, only added a short horizontal stitch. But Hungarian cross to embroider a little more difficult, especially for beginners masters. For its implementation is very important to floss thread is flat and is not twisted. Embroider should be left to the right. From the lower-left corner to bring the floss strand 2-4 weave canvas. Then make as usual, straight stitch. And the right lower corner of the cross complete so that the thread was exactly in the middle of the previous cross and so on. The result is that the crosses are superimposed on one another.
Usually elongated cross and its variants are used to decorate the finished cross stitch.
Bulgarian Bulgarian cross cross, in fact,It is a combination of simple and direct cross. However, it looks more embroidery and bulk air. Therefore, this technique is usually used for decoration cushions, curtains and scenery. For some, it even becomes a hobby. The folk art is often found in the southern Slavs, not only the Bulgarians.
Embroidery classic Bulgarian CrossIt begins with diagonal stitches and then applied on top of the vertical and horizontal stitches. Thus each element is sewn separately. It works quite time consuming, but it is worth to follow the advice once, do it, and have used this technique more often.
Bulgarian cross 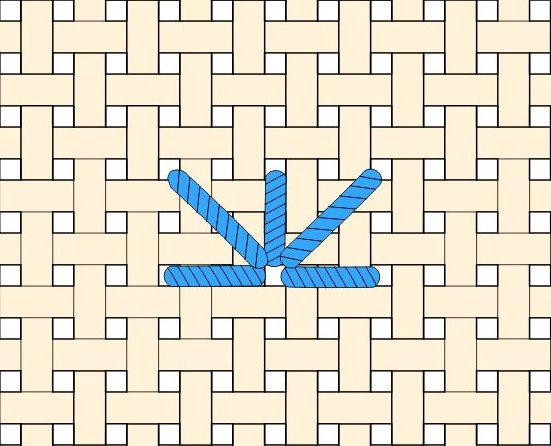
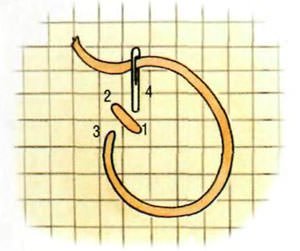
Bulgarian half-cross In addition, there are moreBulgarian vertical cross, where, on the contrary, performed first direct cross stitch, and then simple. Also, more isolated Bulgarian half-cross, which is similar in appearance. However, its embroidery is done quite differently. All the stitches are made from a single center in a circle. What is the technique of its execution, you can see in the following video.
Video: how to embroider the Bulgarian half-cross
rice seam 
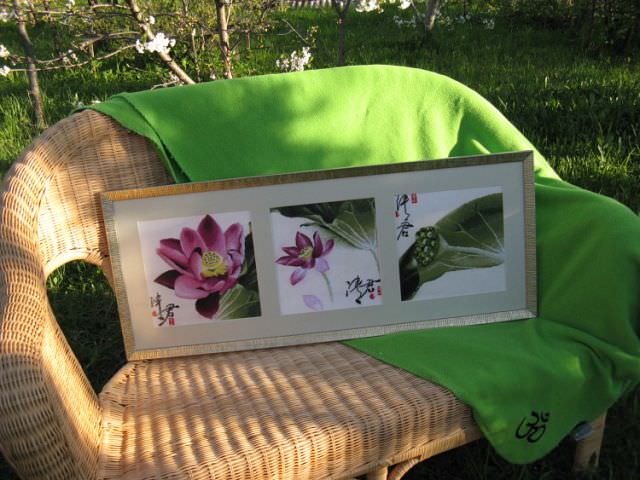
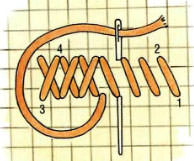
Rice shovV this style is usually taken to embroiderlarge geometric shapes, edging from dresses, blouses and skirts. Also it can be used to do with their hands on the original embroidered picture frame. At first glance, the rice stitch sounds complicated, but in fact it is suitable even for novice masters. It consists of a simple half-cross and cross superimposed on each other. More clearly the technique of its implementation can be rassmotert video.
Its stitching is performed in 2 admission. First, run a simple tic large (minimum of 4 filament weaving). Then, already half-cross embroidered risks across the bottom lines of the cross. By the way, this is why it is called rice. Very impressive it looks, if the bottom of the cross taken floss thread of one color, but for the top - the other, to 2 shades lighter or darker.
Video: rice stitch
Italian cross 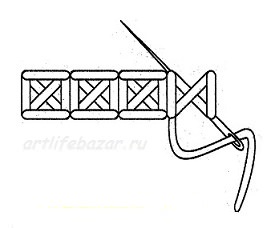
Italian krestIz all represented the mostcomplex embroidery technique. That is why it is very rarely used, and are used mainly for decorating small products (napkins, towels and waffle t. N.). Italian cross performed in 6 receptions, first thread embroidery floss simple cross, then straight and now only vertical and horizontal stitches around the circle.
Of course, the Italian cross is not suitable for beginners, as they do with their hands something like this would be difficult. This technique cross stitch requires maximum concentration and patience.
"Goat" 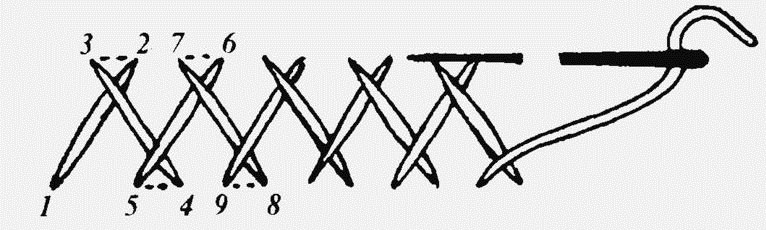
"Goat" But "goat" in contrast to the previousone of the most basic stitches, which can be done by hand. It's very pleasant to embroider those who tired of fighting with irregular cross. For the "goat" - this is a rough cross.
First the long stitch 3-4crossing the thread from bottom left to top right, and then the needle is displayed so that the top was the intersection is narrower than the bottom. And at the end of long runs of the same stitch. Then everything is repeated until the end of cross-stitch. For more details you can see in the video.
"Goat" is only used to decorate the finished cross stitch. Also, it is sometimes called Russian or witch.
"Star" 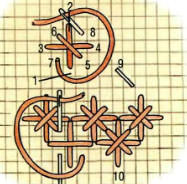
"Zvezdochka" This technique although it is not oneof the most popular, but it can come in handy when you want to cross-stitch stars. After she received its name because it is very similar to them. Her performance of his hands reminds the Bulgarian embroidery cross. But unlike it is in the middle of another small diagonal stitch and the lower straight cross is slightly more than the other stitches.
Since the seam "asterisk" - very voluminous seam, itMore used to the tradition of embroidery thread depth and texture. But this is not limited to the scope of application. With the help of "asterisks", you can create an interesting edging in towels, tablecloths and napkins.
Rhodes seam Perhaps the easiest seamwhich will create a three-dimensional embroidery thread. Although at first glance it looks difficult to perform. But not even cross stitching. For it is sufficient to perform 8 stitches inclined so that the center was in the same place. Rhodes seam is very easy to do at any countable fabrics, other than the popular canvas Aida. This is due to the fact that it is too tough for him.
This technique is great for beginnersskilled workers who want to create a three-dimensional embroidery, but yet difficult to master other techniques. For example, if the description stated: "Make a star or sun", you can use the seam Rhodes. Particularly impressive it looks, if you do the embroidery thread color or metallic lurex.

Rhodes seam 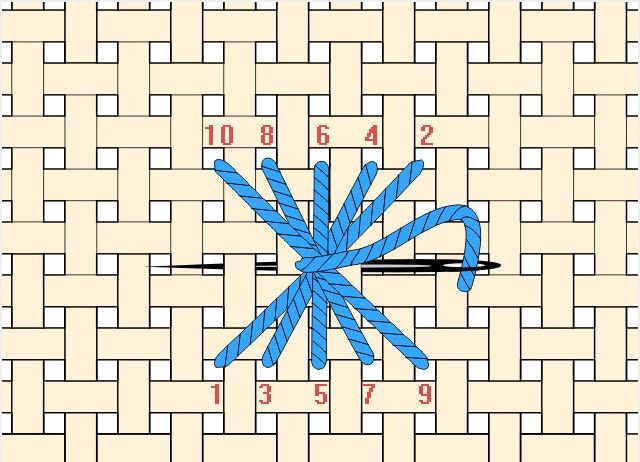
Rhodes seam 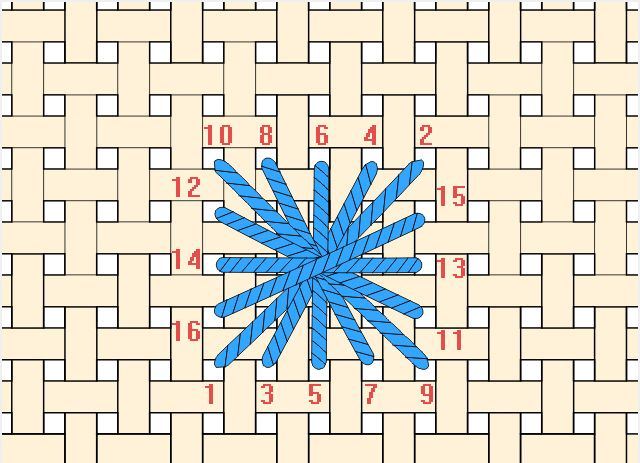
Rhodes seam course, to tell all aboutcross stitch and all available techniques, are not enough for a great book. However, if you can learn at least 5 of them, we can already consider yourself a high-end needlework. After cross-stitch seams with different looks much more expensive. In addition to her say that such work from the category for beginners, no one can. Some gifted needlewomen hobby becomes a source of income.
Additional equipment
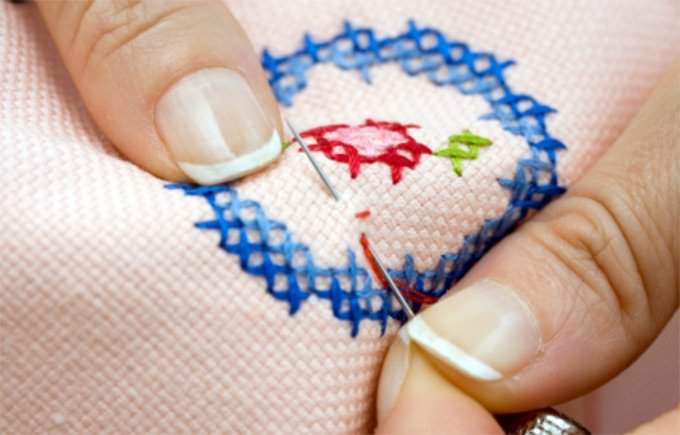
Seam "back needle" However, even a simple embroiderycross sometimes requires the use of additional techniques that have no direct relation to it. So often in the instruction indicates "do-stitch" back needle "or half-cross, but as they are executed, there is no explanation. In addition, cross-stitch is often combined with tapestry.
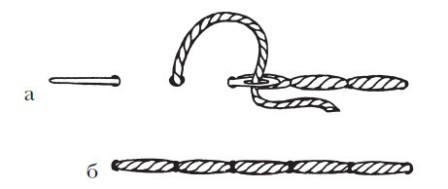
The most simple - a stitch "back needle". To learn how to do it, do not even need to take special lessons. It's simple. This vertical stitches that run from right to left, while he goes, as it were in the opposite direction. Therefore, such a name. He has another name - bekstich (backstitch)
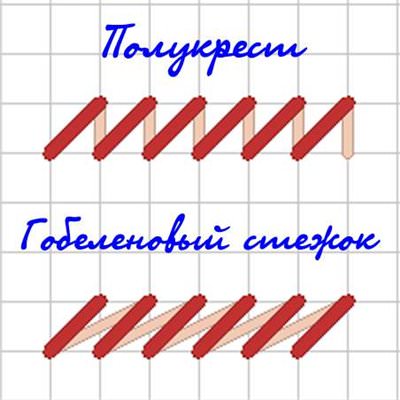
As evident from the name, half-cross - half ofconventional cross. Actually he and sewn: Just do one slanted stitch. On the reverse side are parallel to each other vertical stitches.
very similar to it, but in contrast to the half-cross and on the front and on the wrong side will be sloping stitches.
Both techniques are used when you need to do to achieve halftone or translucent effect. So, embroidery thread runs clouds, shadows, reflections in a mirror, and the like.
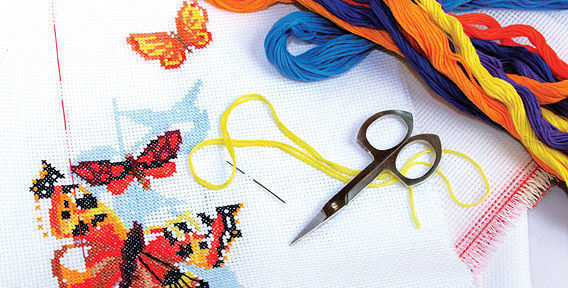
When they want to know everything about embroidery, evenrealize how many things need to learn. It's crafts - one of the oldest in the world. Having learned the first lessons and technology, we should not seek to use all at once. Activities performed with his own hands, even with a minimum of colors and thread look impressive. Also do not forget that this hobby requires a special approach to security. It is used for embroidery needles and scissors.
And the last. It is better to master just one technique rather than try to learn all about embroidery and not finish any work. It is not necessary to turn your hobby into a race for quality and quantity. The painting, made with their own hands, can decorate the house for many years, and no one will notice it minor flaws. Unfortunately, many of these lessons only reach a few dozen of embroidered work.
Video: half-cross stitch and gobelin stitch