Cross-stitch horse embroidery: schemes of excellent horses
Content
- Inventory for embroidery
- Stages of work
- The process of embroidering
- Performing additional stitches
- Execution of work
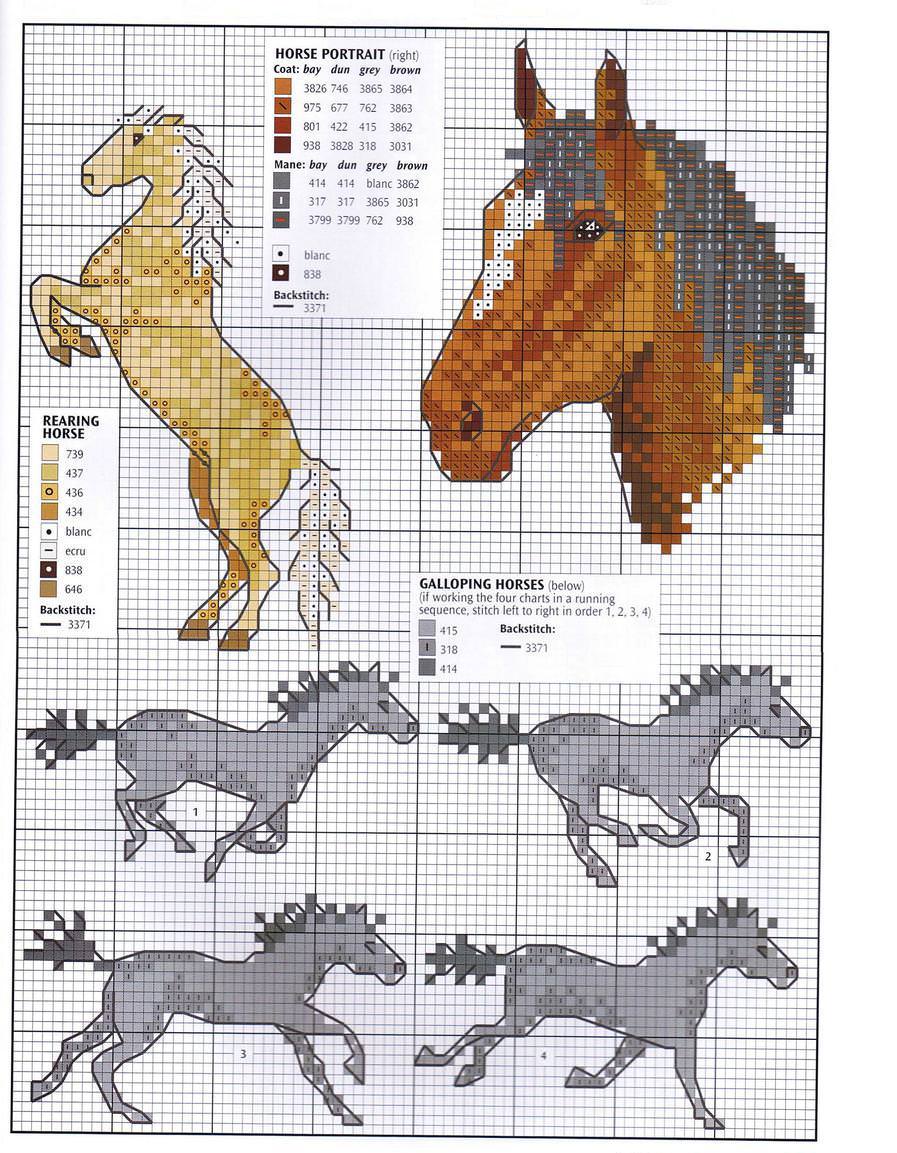
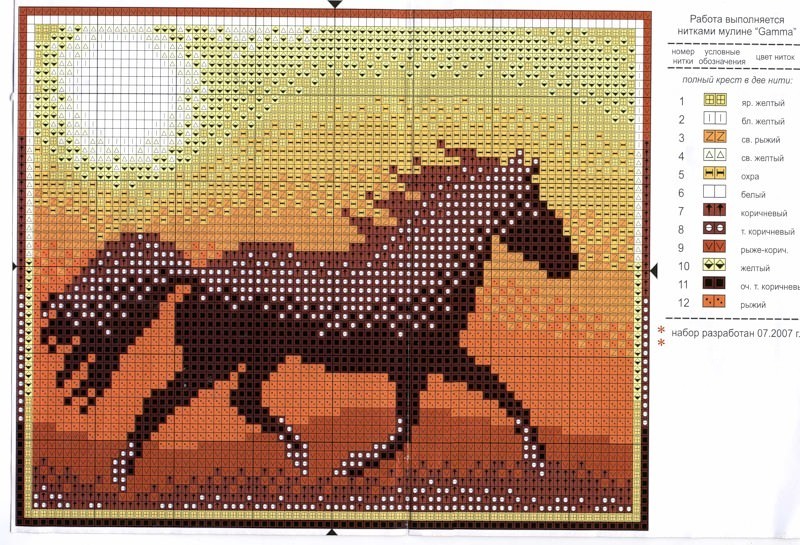
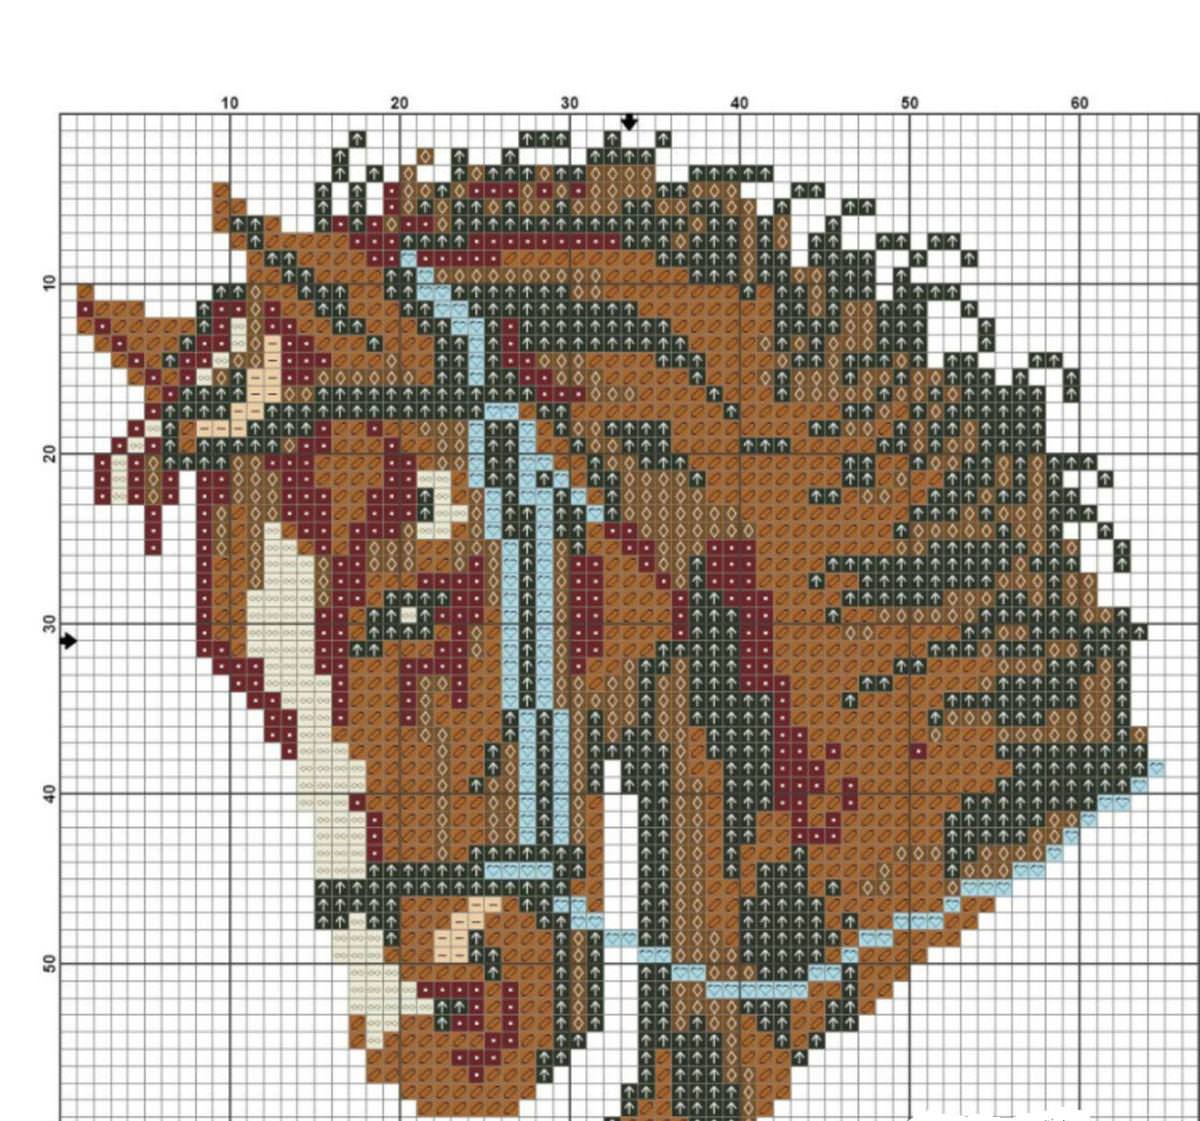
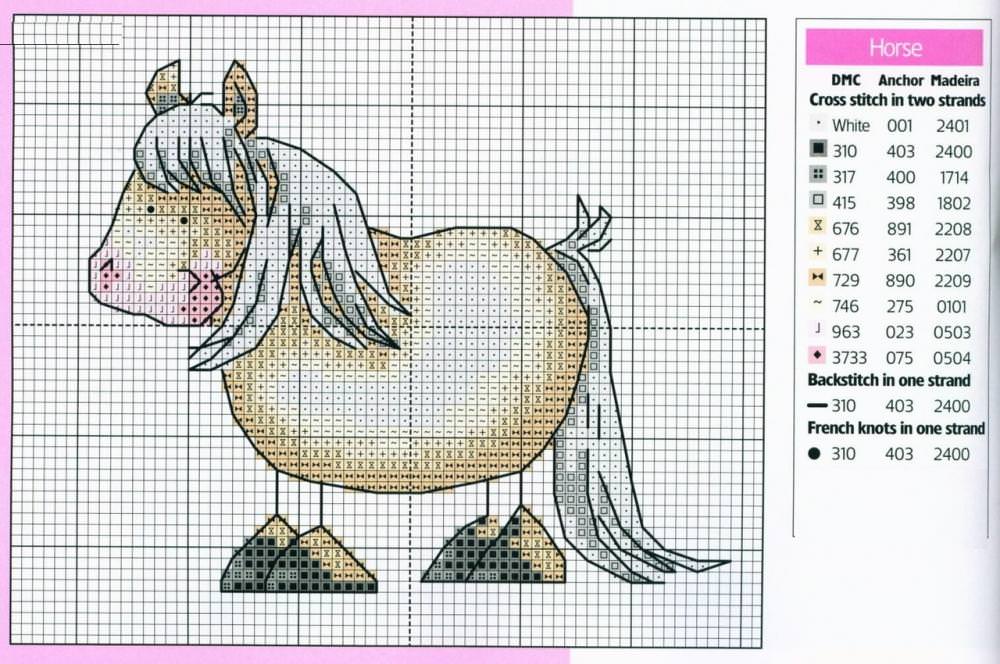
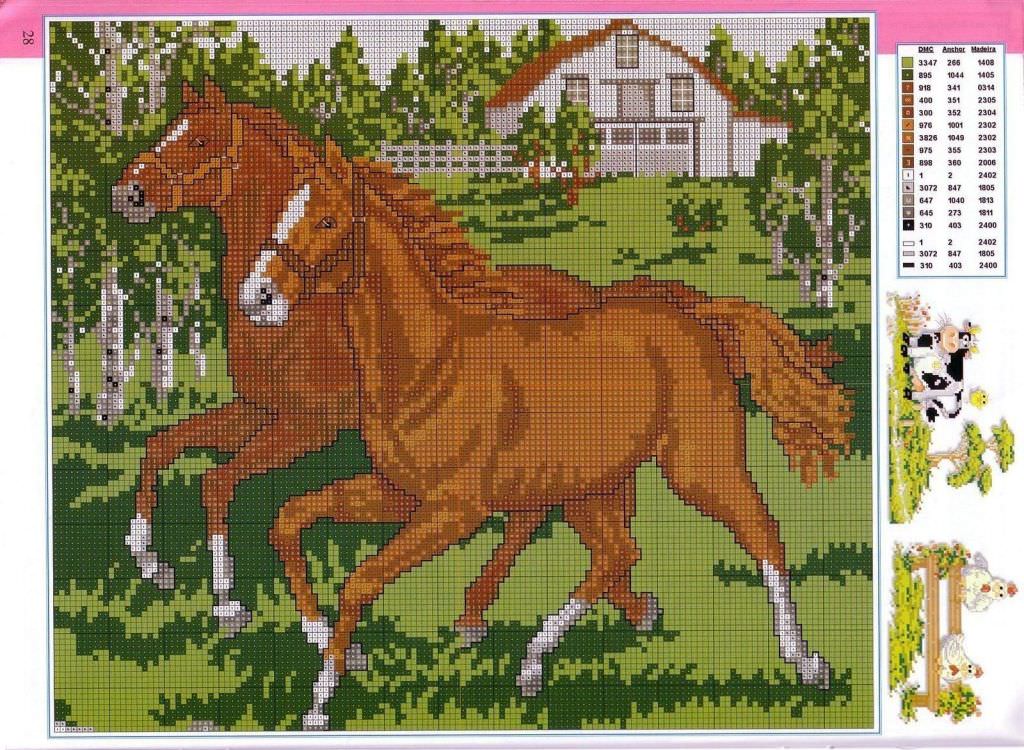
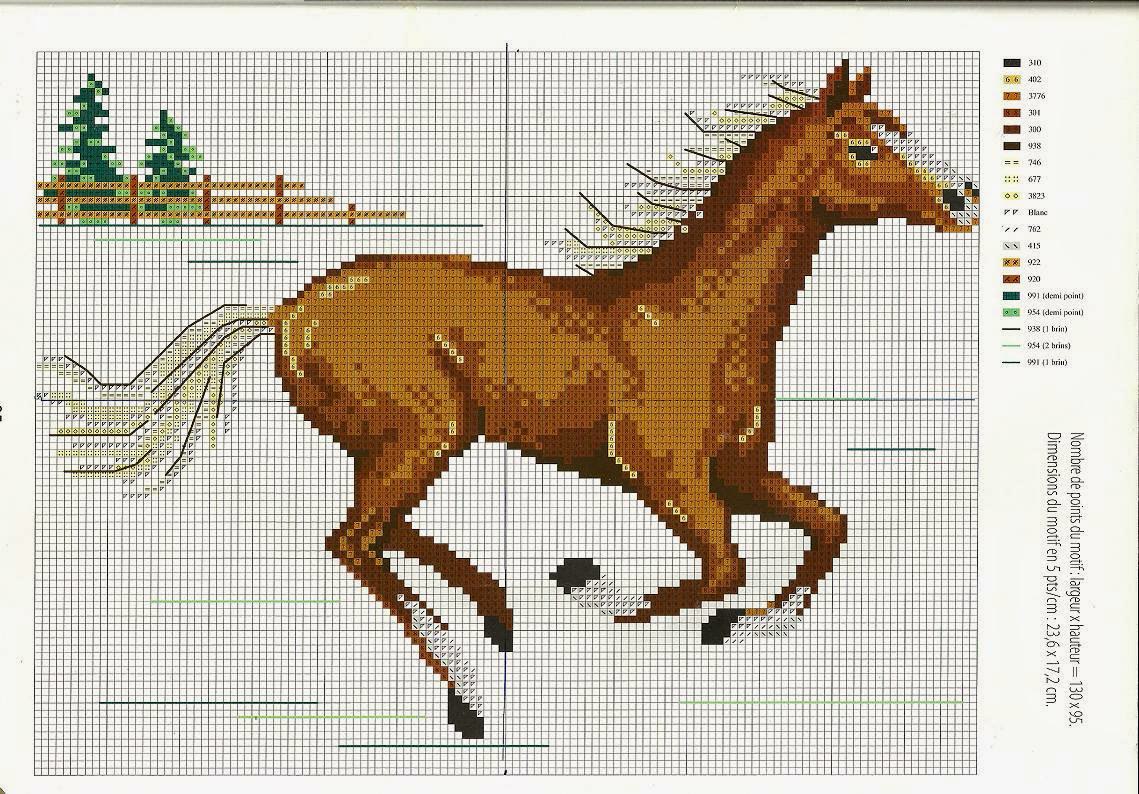
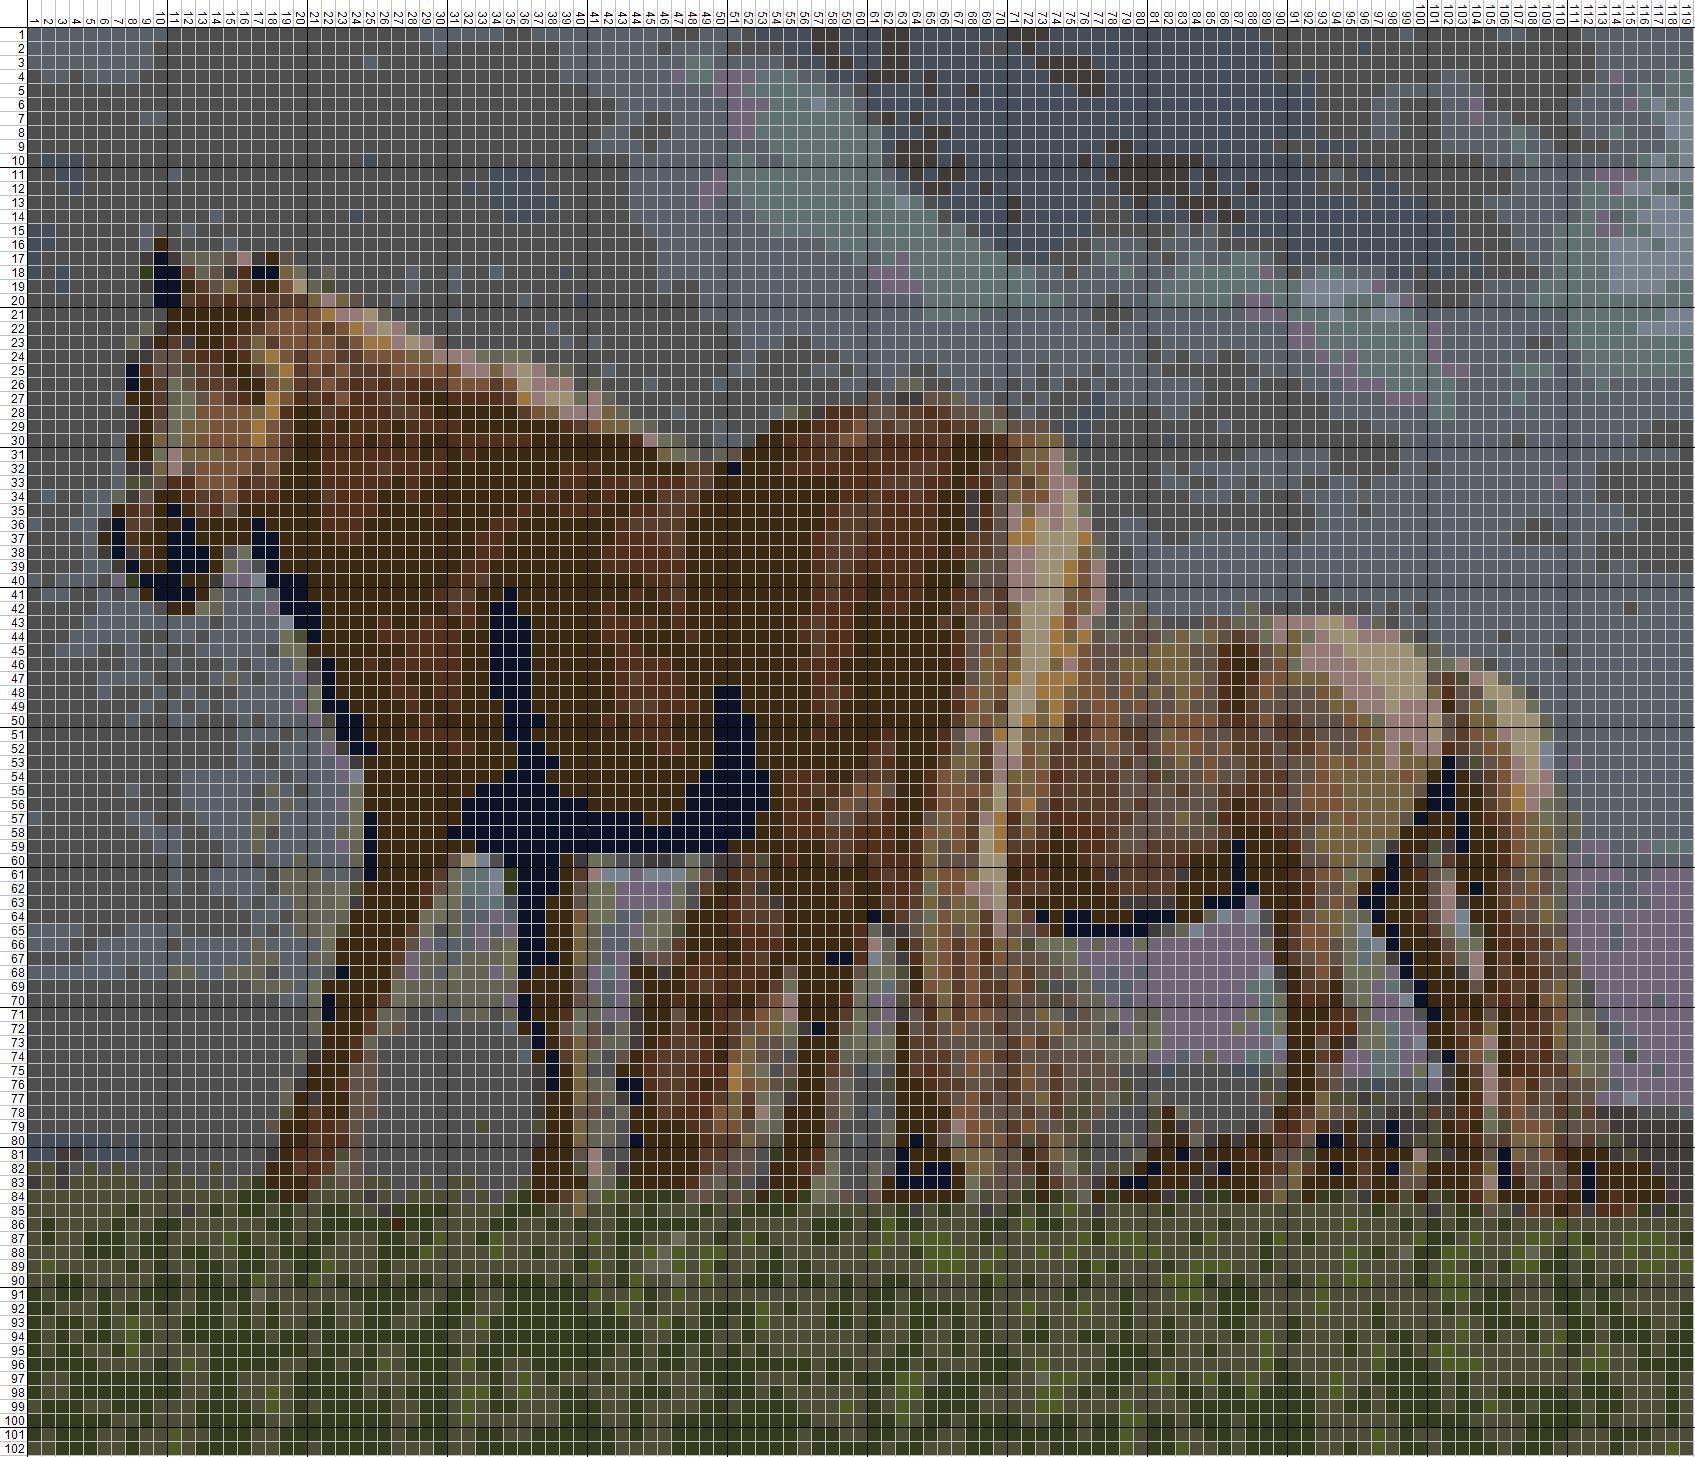
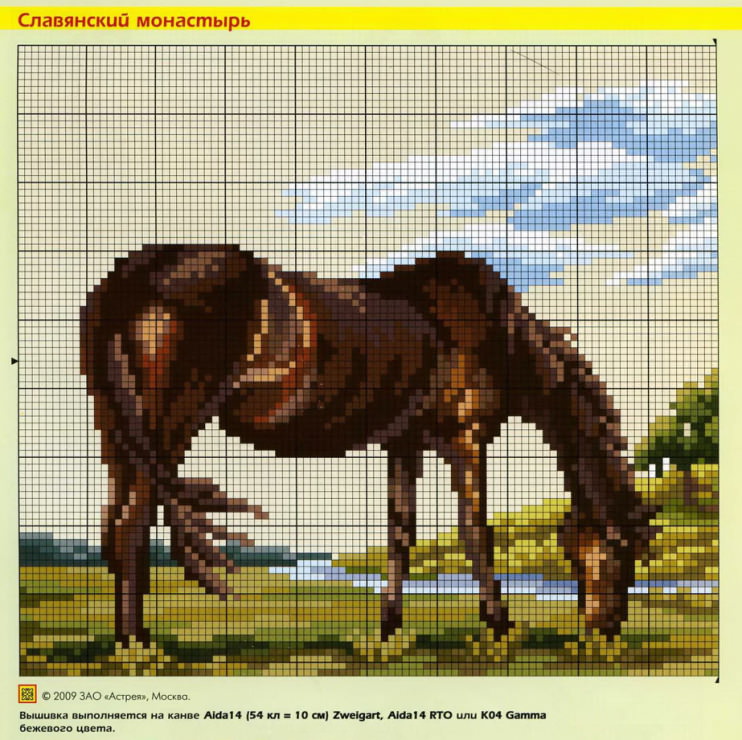
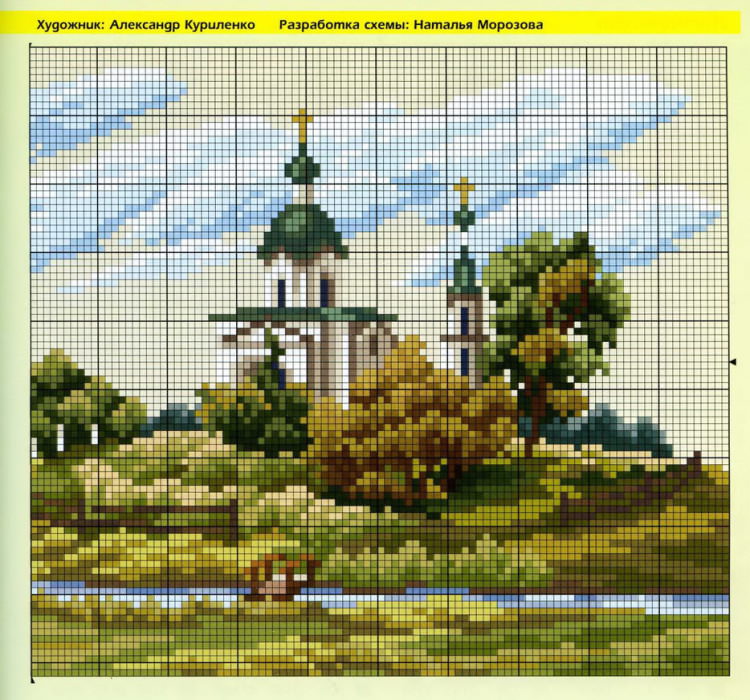
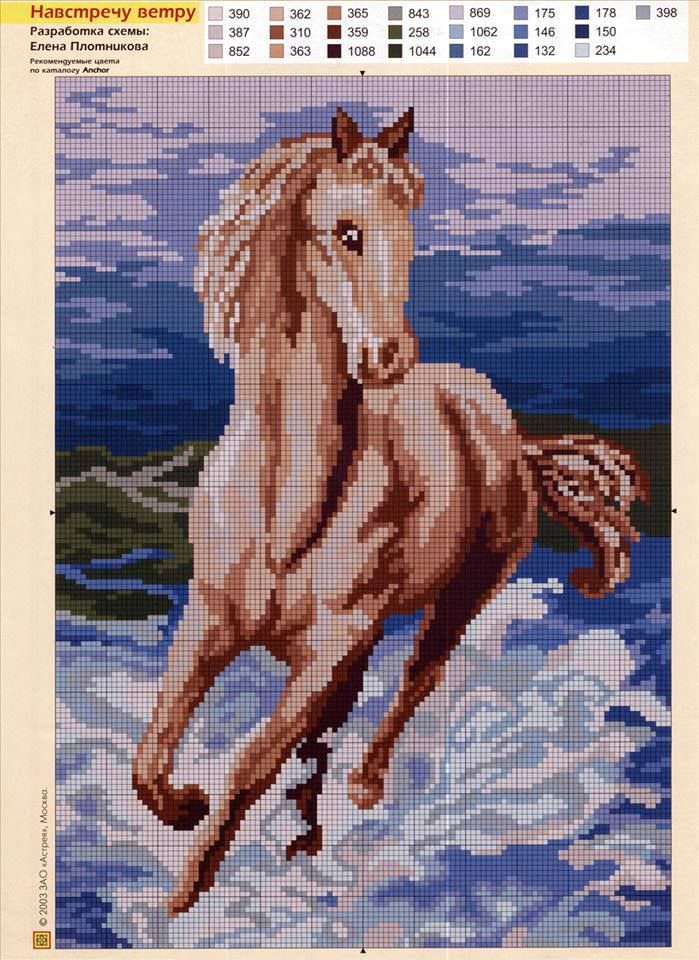
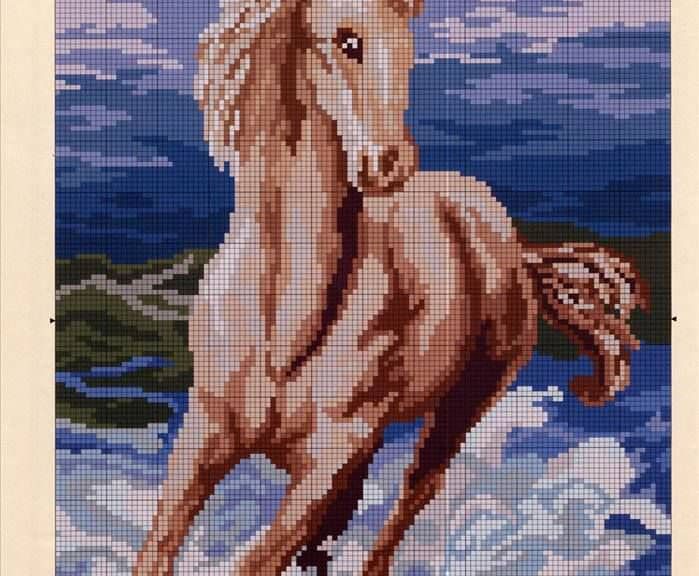
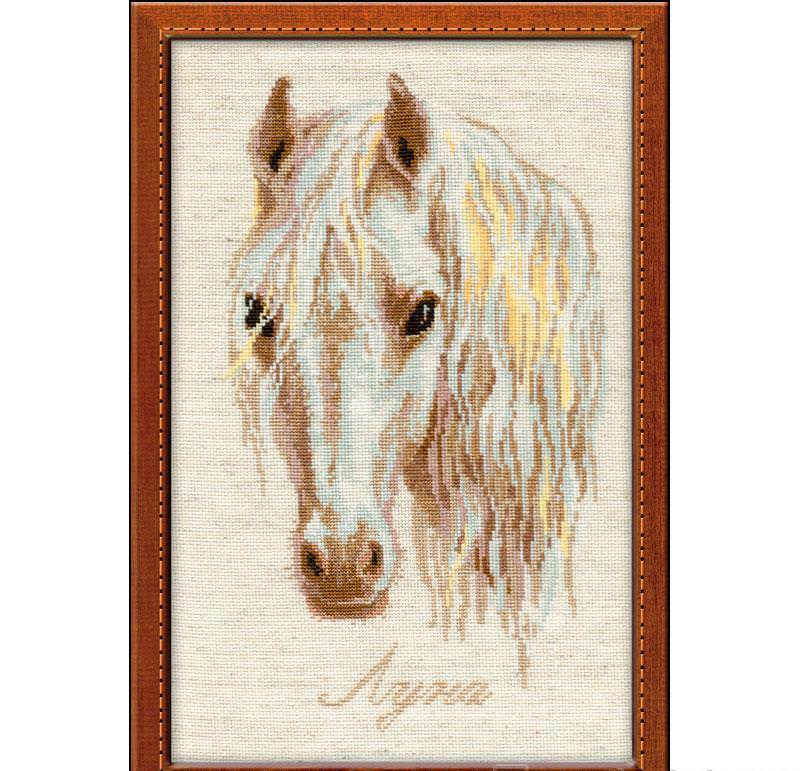
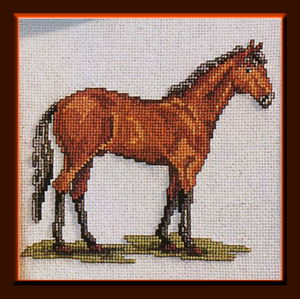
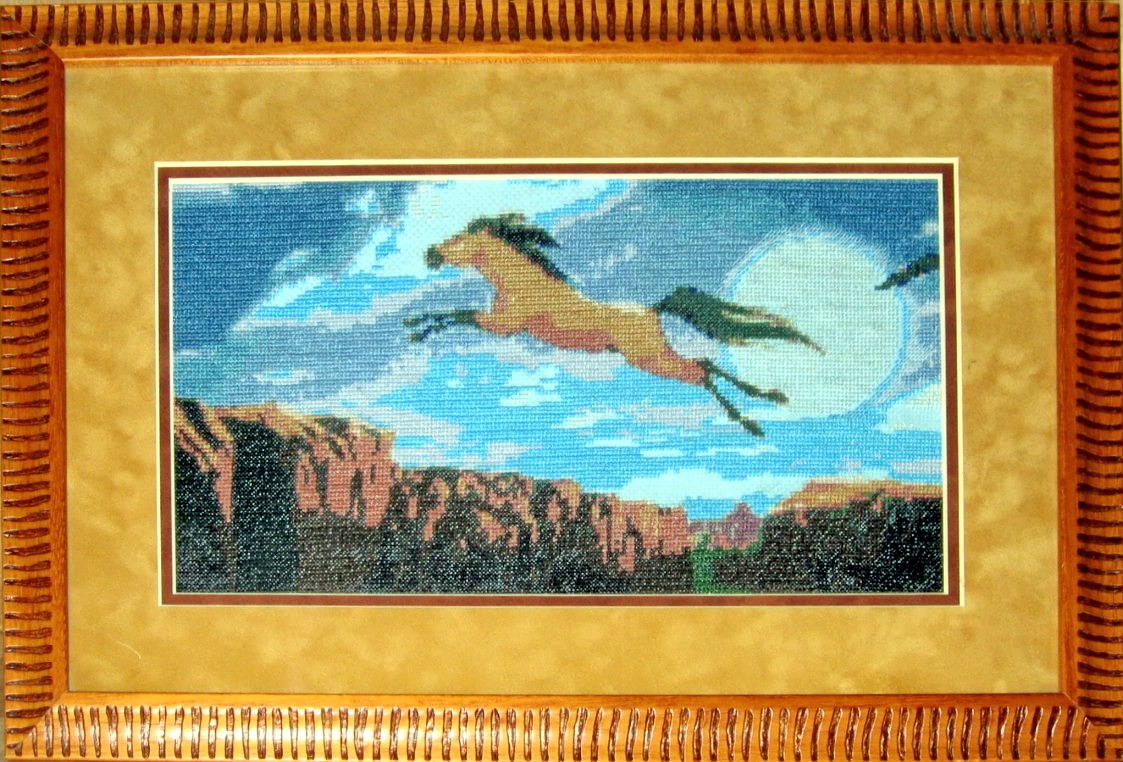
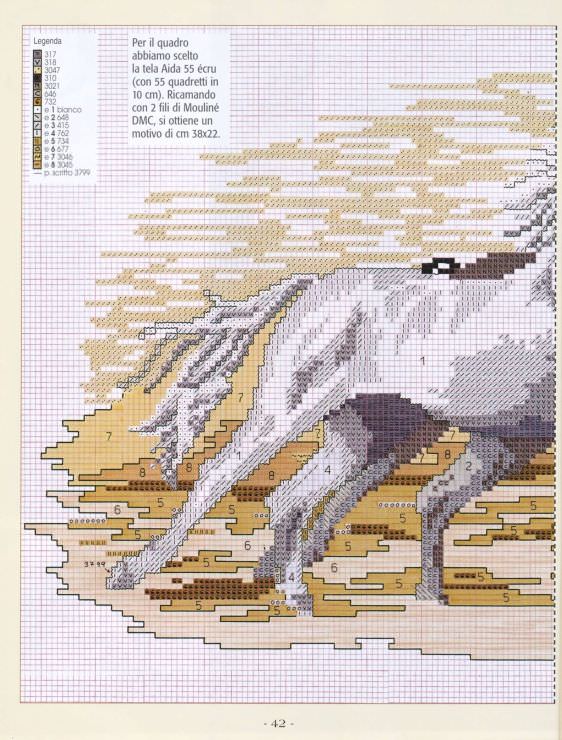
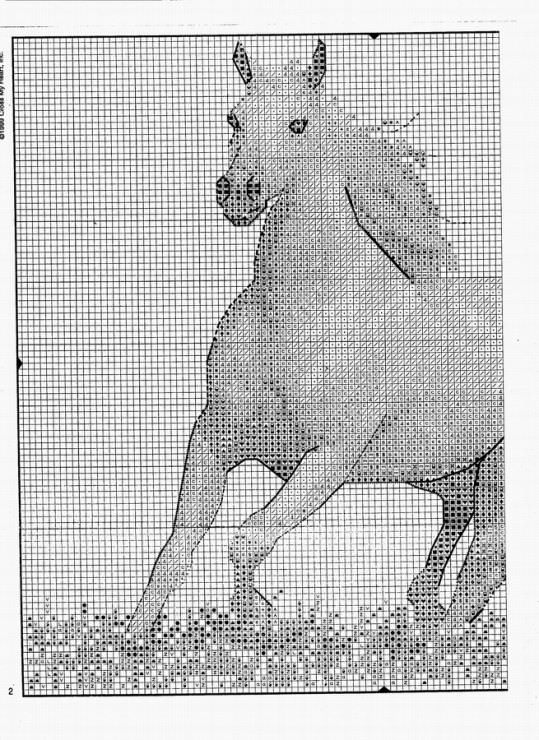
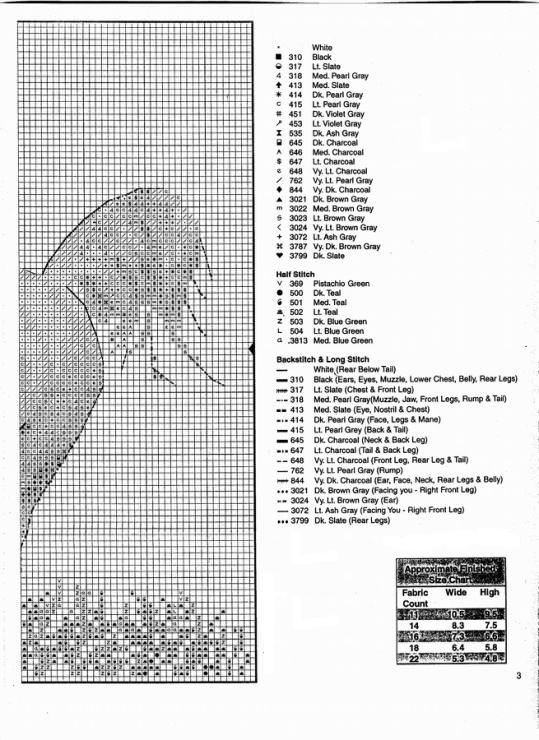
- Embroidery schemes for horses
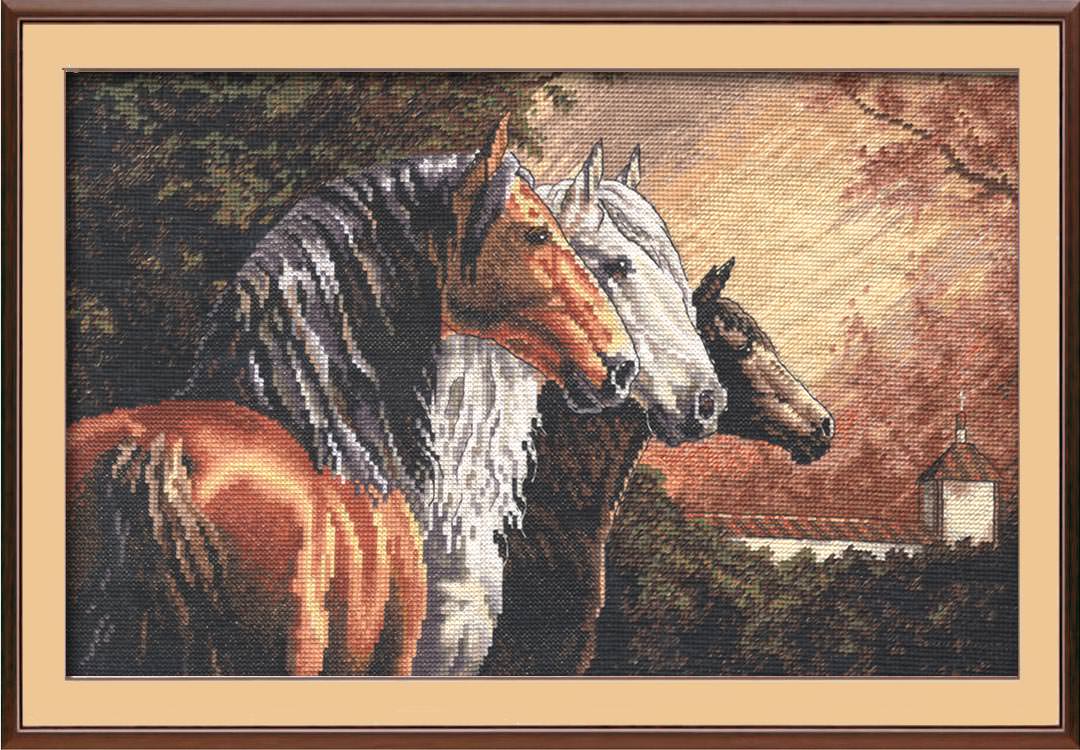
Despite the fact that there is a technologicalThe twenty-first century and cars came to the aid of man, he continues to admire horses - the most perfect creatures of nature. Embroidery of a horse, created by own hands, can be used as a panel, a picture or a large postcard. Schemes of embroidery are very simple, and even the beginning needlewoman can understand all the intricacies.

Inventory for embroidery
To create a beautiful embroidered picture with a horse, you need to "arm":
- Scheme;
- Canvas;
- Suitable threads (preferably use a mulina);
- A needle;
- Embroidery frame.
Stages of work
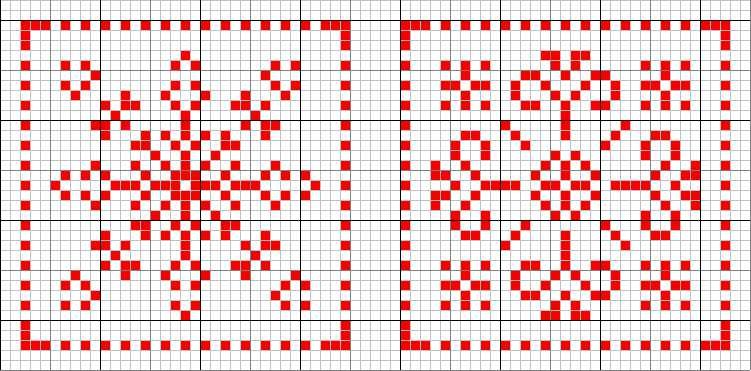
There are a variety of schemes for embroidering horses. Schemes designed for making cute and cozy cushions are very popular. Also, these beautiful animals look great on tablecloths and bed linens.

The preparatory stage is as follows:
- Fold the canvas fourfold, thereby defining the center of your work;
- Remember that the circuit is not designed to reflect the finished size of the work, and its cells correspond to the squares located on the canvas;
- Use a double thread for embroidery.
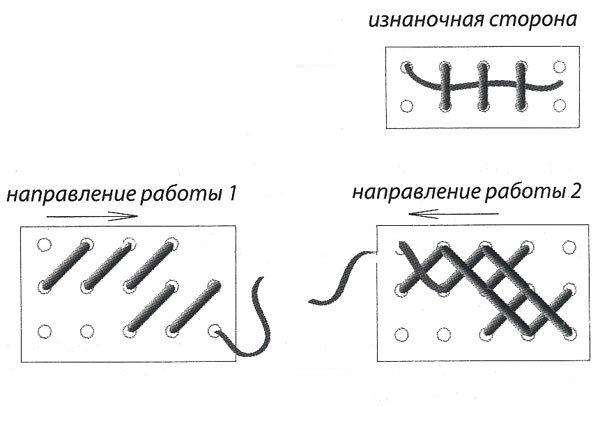
The process of embroidering
Getting started is best in the center, andMove slowly to the edges of the embroidery. To begin with, work on the basic stitches - half-crosses and crosses. Then start working on additional elements - French knots and a lowercase stitch. You will need to act as follows:
- Fix the work thread on the wrong side;
- Fill in the fragment as the schema suggests;
- Complete the piece by threading under the finished stitches (to avoid unevenness and distortions, do not make knots);
- Embroider best in horizontal rows. It's quite simple. To do this, you will need to first apply the lower stitches in one direction, and then, in the opposite direction, the upper stitches;
- The embroidered horse will look neat and beautiful if you stick to the same order of stitching;
- The cross will be bulky if you track the tension of the thread. It should not be too loose or tight.
Going to another piece of work, notStretch the thread from the wrong side more than three centimeters. Otherwise, the work will not look aesthetic. Carefully cut the thread and secure it to another area. Having made a mistake, "arm" with a needle and carefully dissolve the canvas. Scissors should not be used.
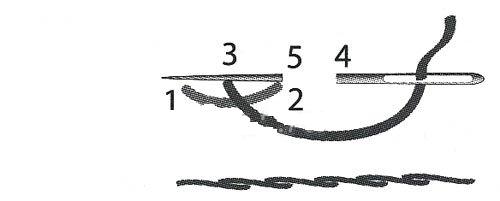
Performing additional stitches

After you have completed the main crosses,On top of them you will need to sew extra stitches. For the execution of individual elements, as well as for giving the horse expressiveness, a stitch-stitch and a stalk seam are used. The scheme assumes that the stitch-line is represented by thin delicate lines. The seam is made as follows:
- Pass the needle to the front side, and then return to the underside (in the diagram there are prompts with which points you need to work);
- Embroider, following the pattern, breaking large stitches into several small ones.
Execution of work
A harmonic addition to the picture is herdecor. To do this, it is important to correctly select the shade of the passepartout, as well as the style of the frame. Passepartout can be made independently or ordered in the workshop. To make the interior of what it lacked, can be made by hand embroidery cross. The horse will look great both in a bachelor apartment and in the children's room. Of course, for the manufacture of a child's horse, you will need other schemes.
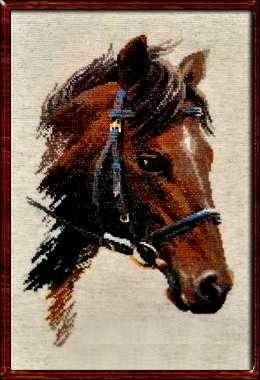
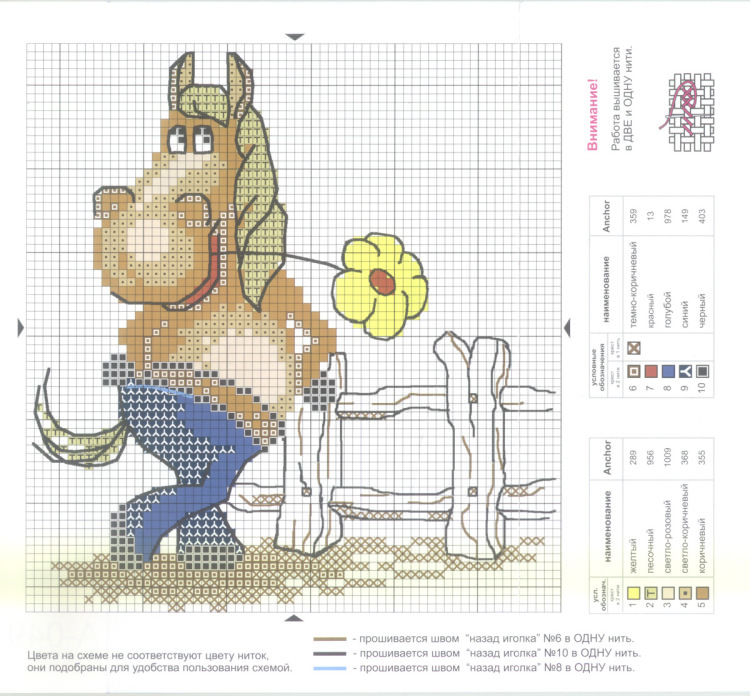
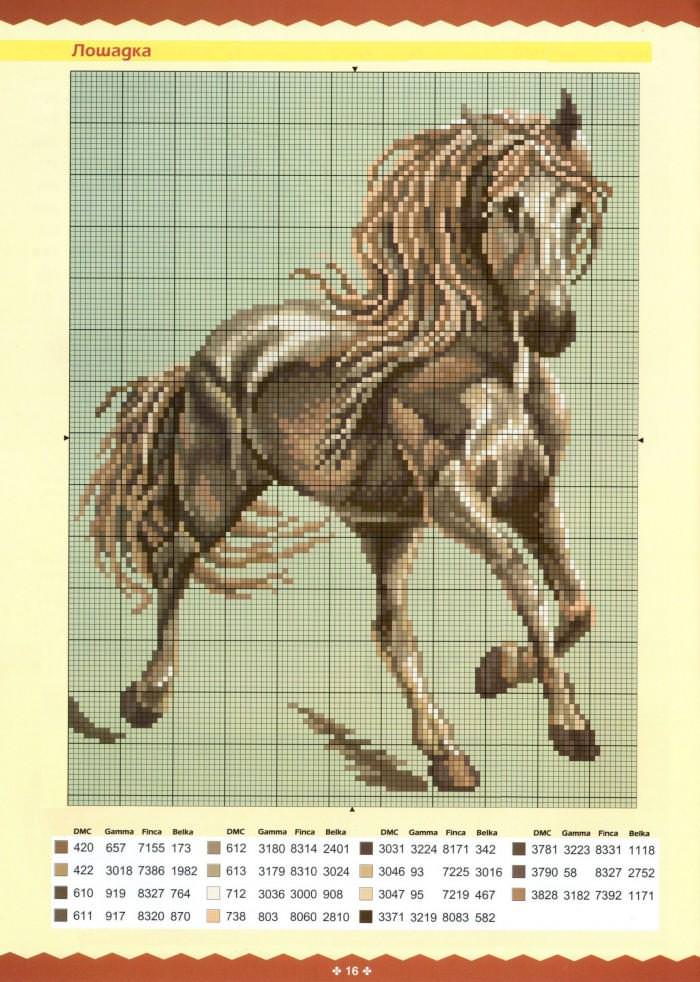
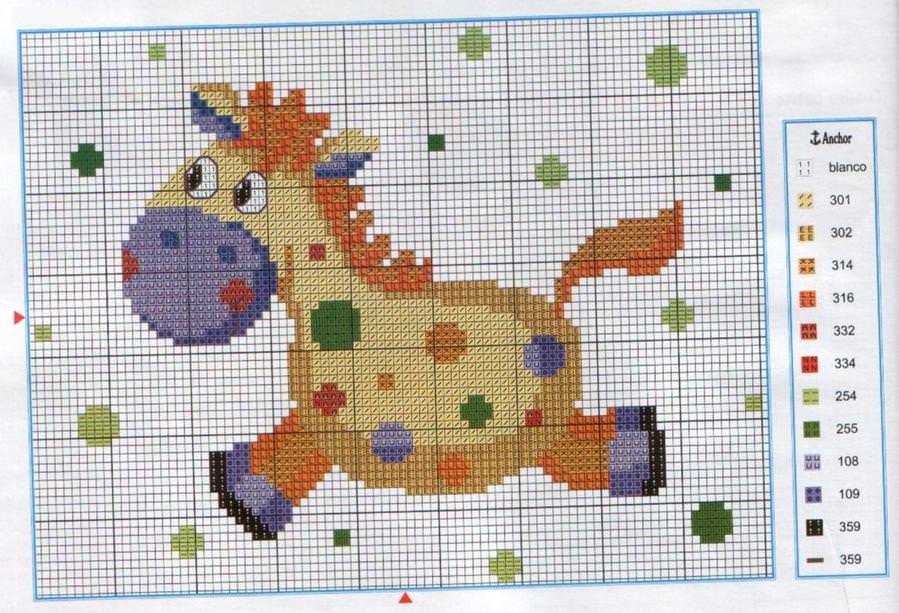
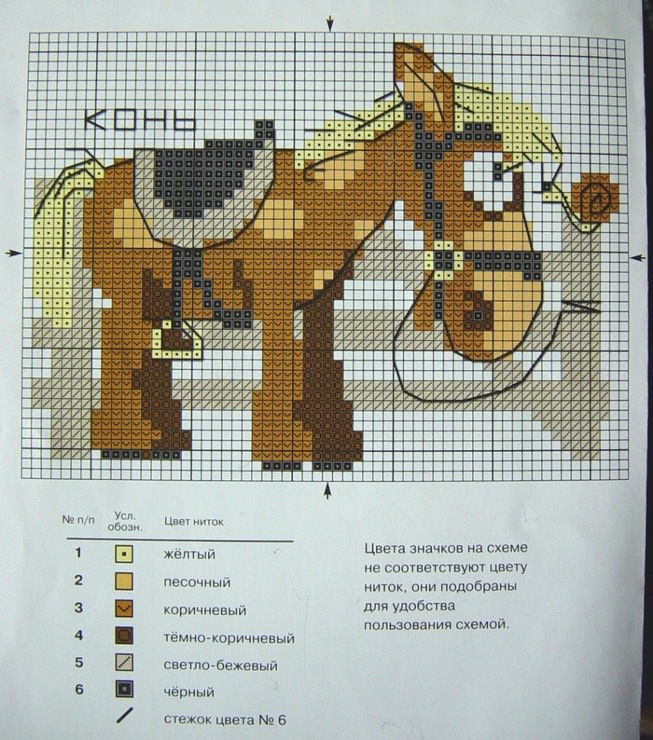
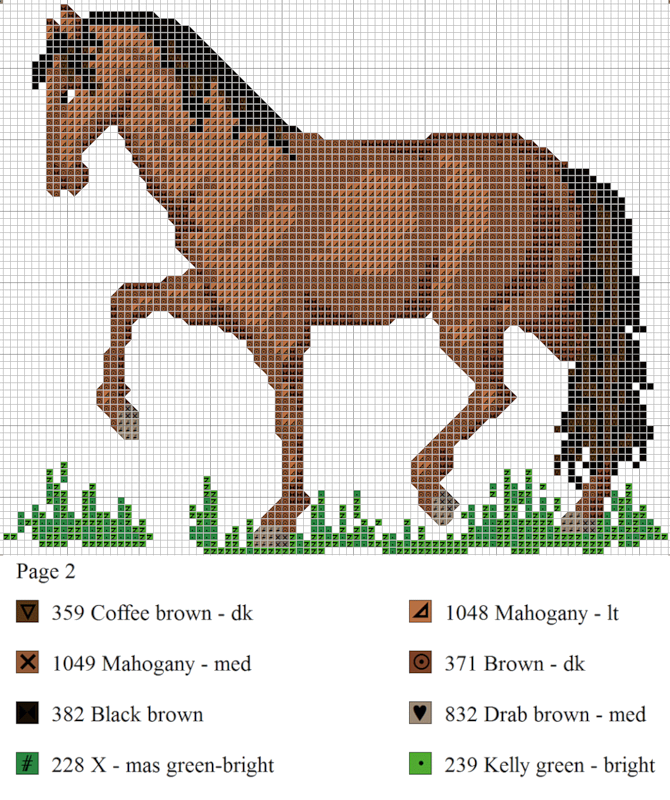
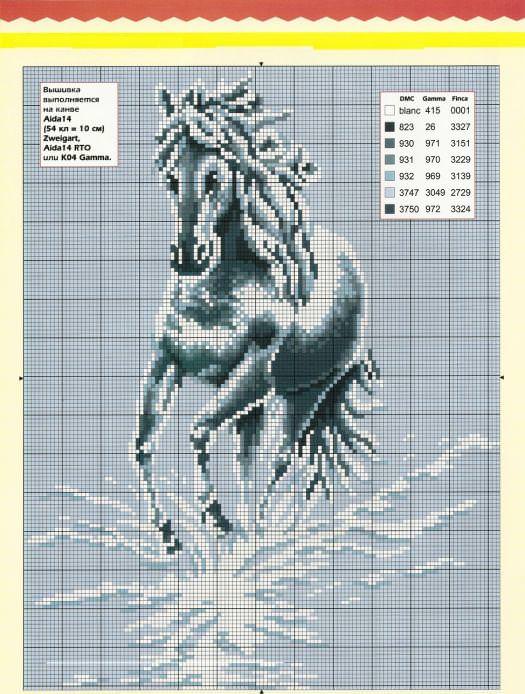
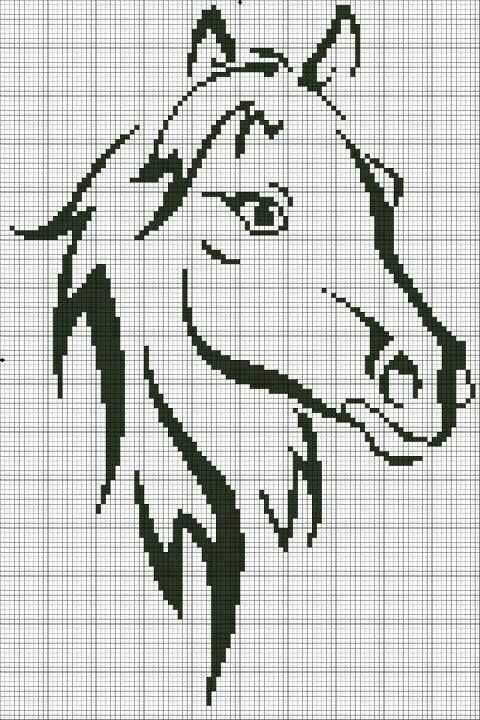
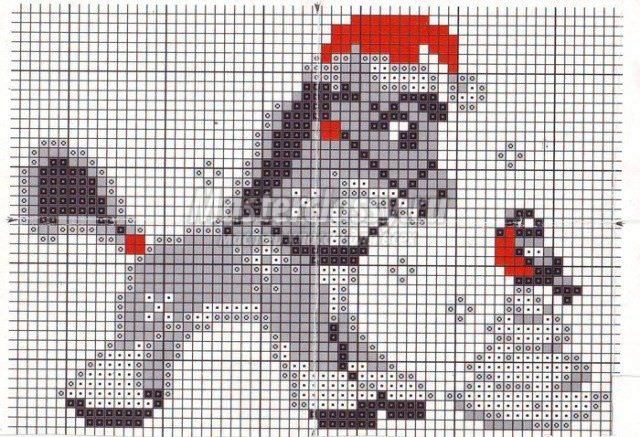
Embroidery schemes for horses