Cross-stitch embroidery: queen flower schemes
Content
Of the many types of needlework, many todayChoose the good old cross stitch. And the most popular motif for embroidery was and there are flowers, in particular the queen of flowers - a rose. A great gift can be a pillow or a picture with scarlet roses embroidered on them. Well, if the pillowcase on the pillow and, accordingly, the background of the picture will be white or light color, this once again emphasizes the beauty and brightness of the embroidered flower on them.
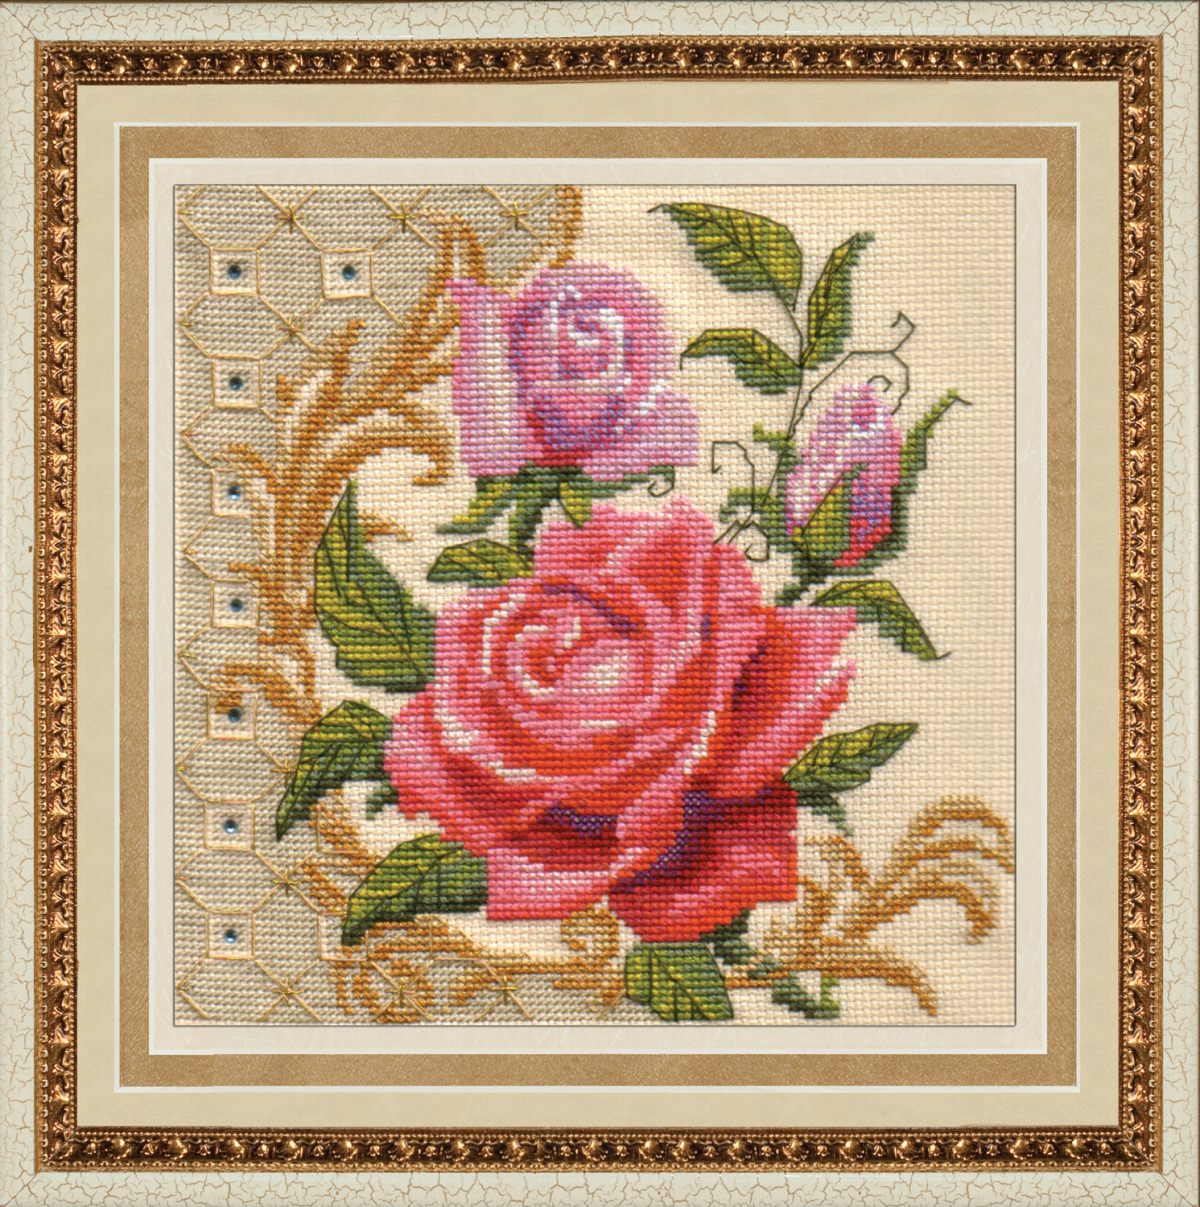
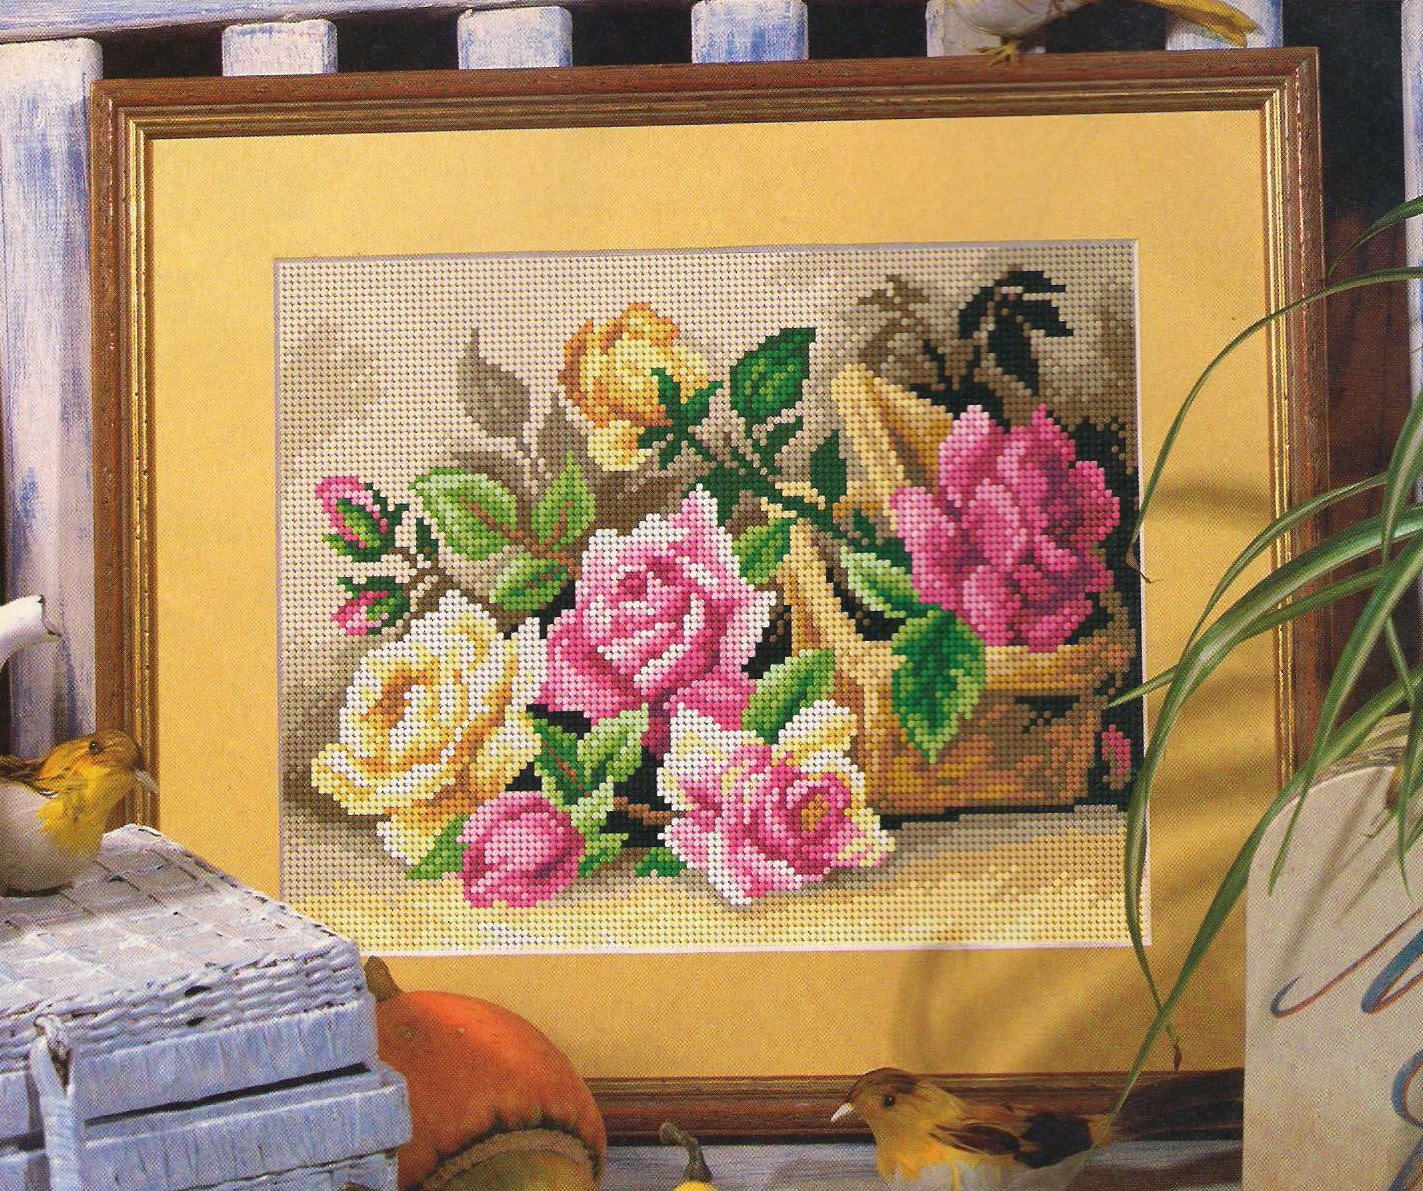
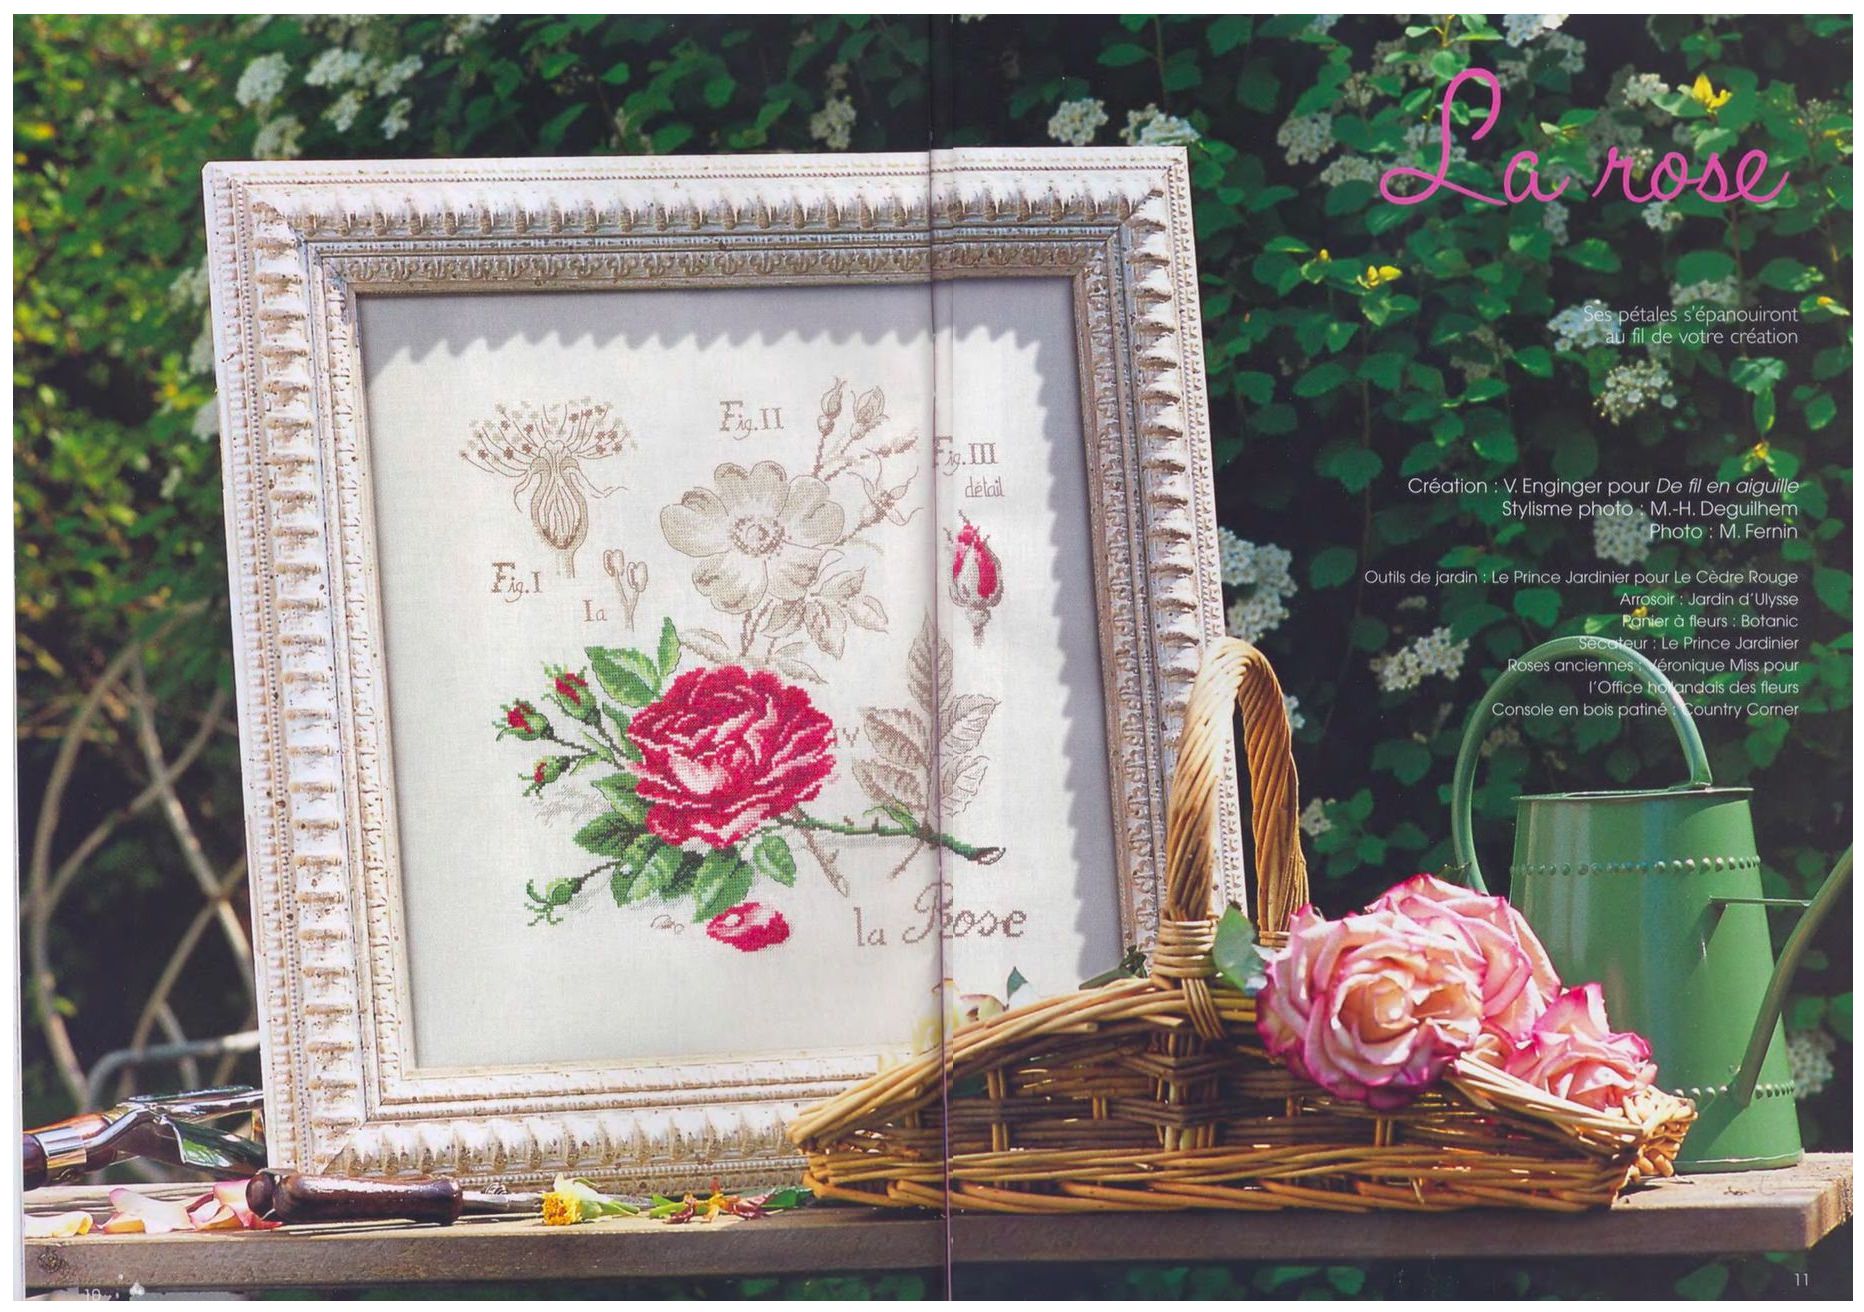
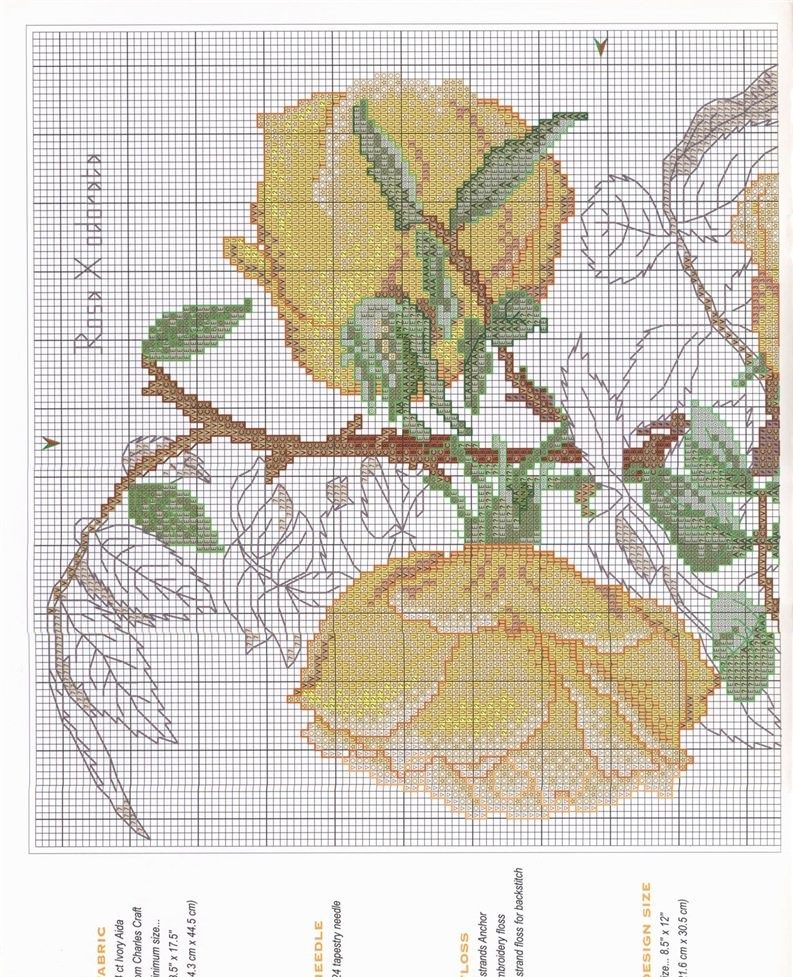
Painting with a rose
Materials for embroidery paintings
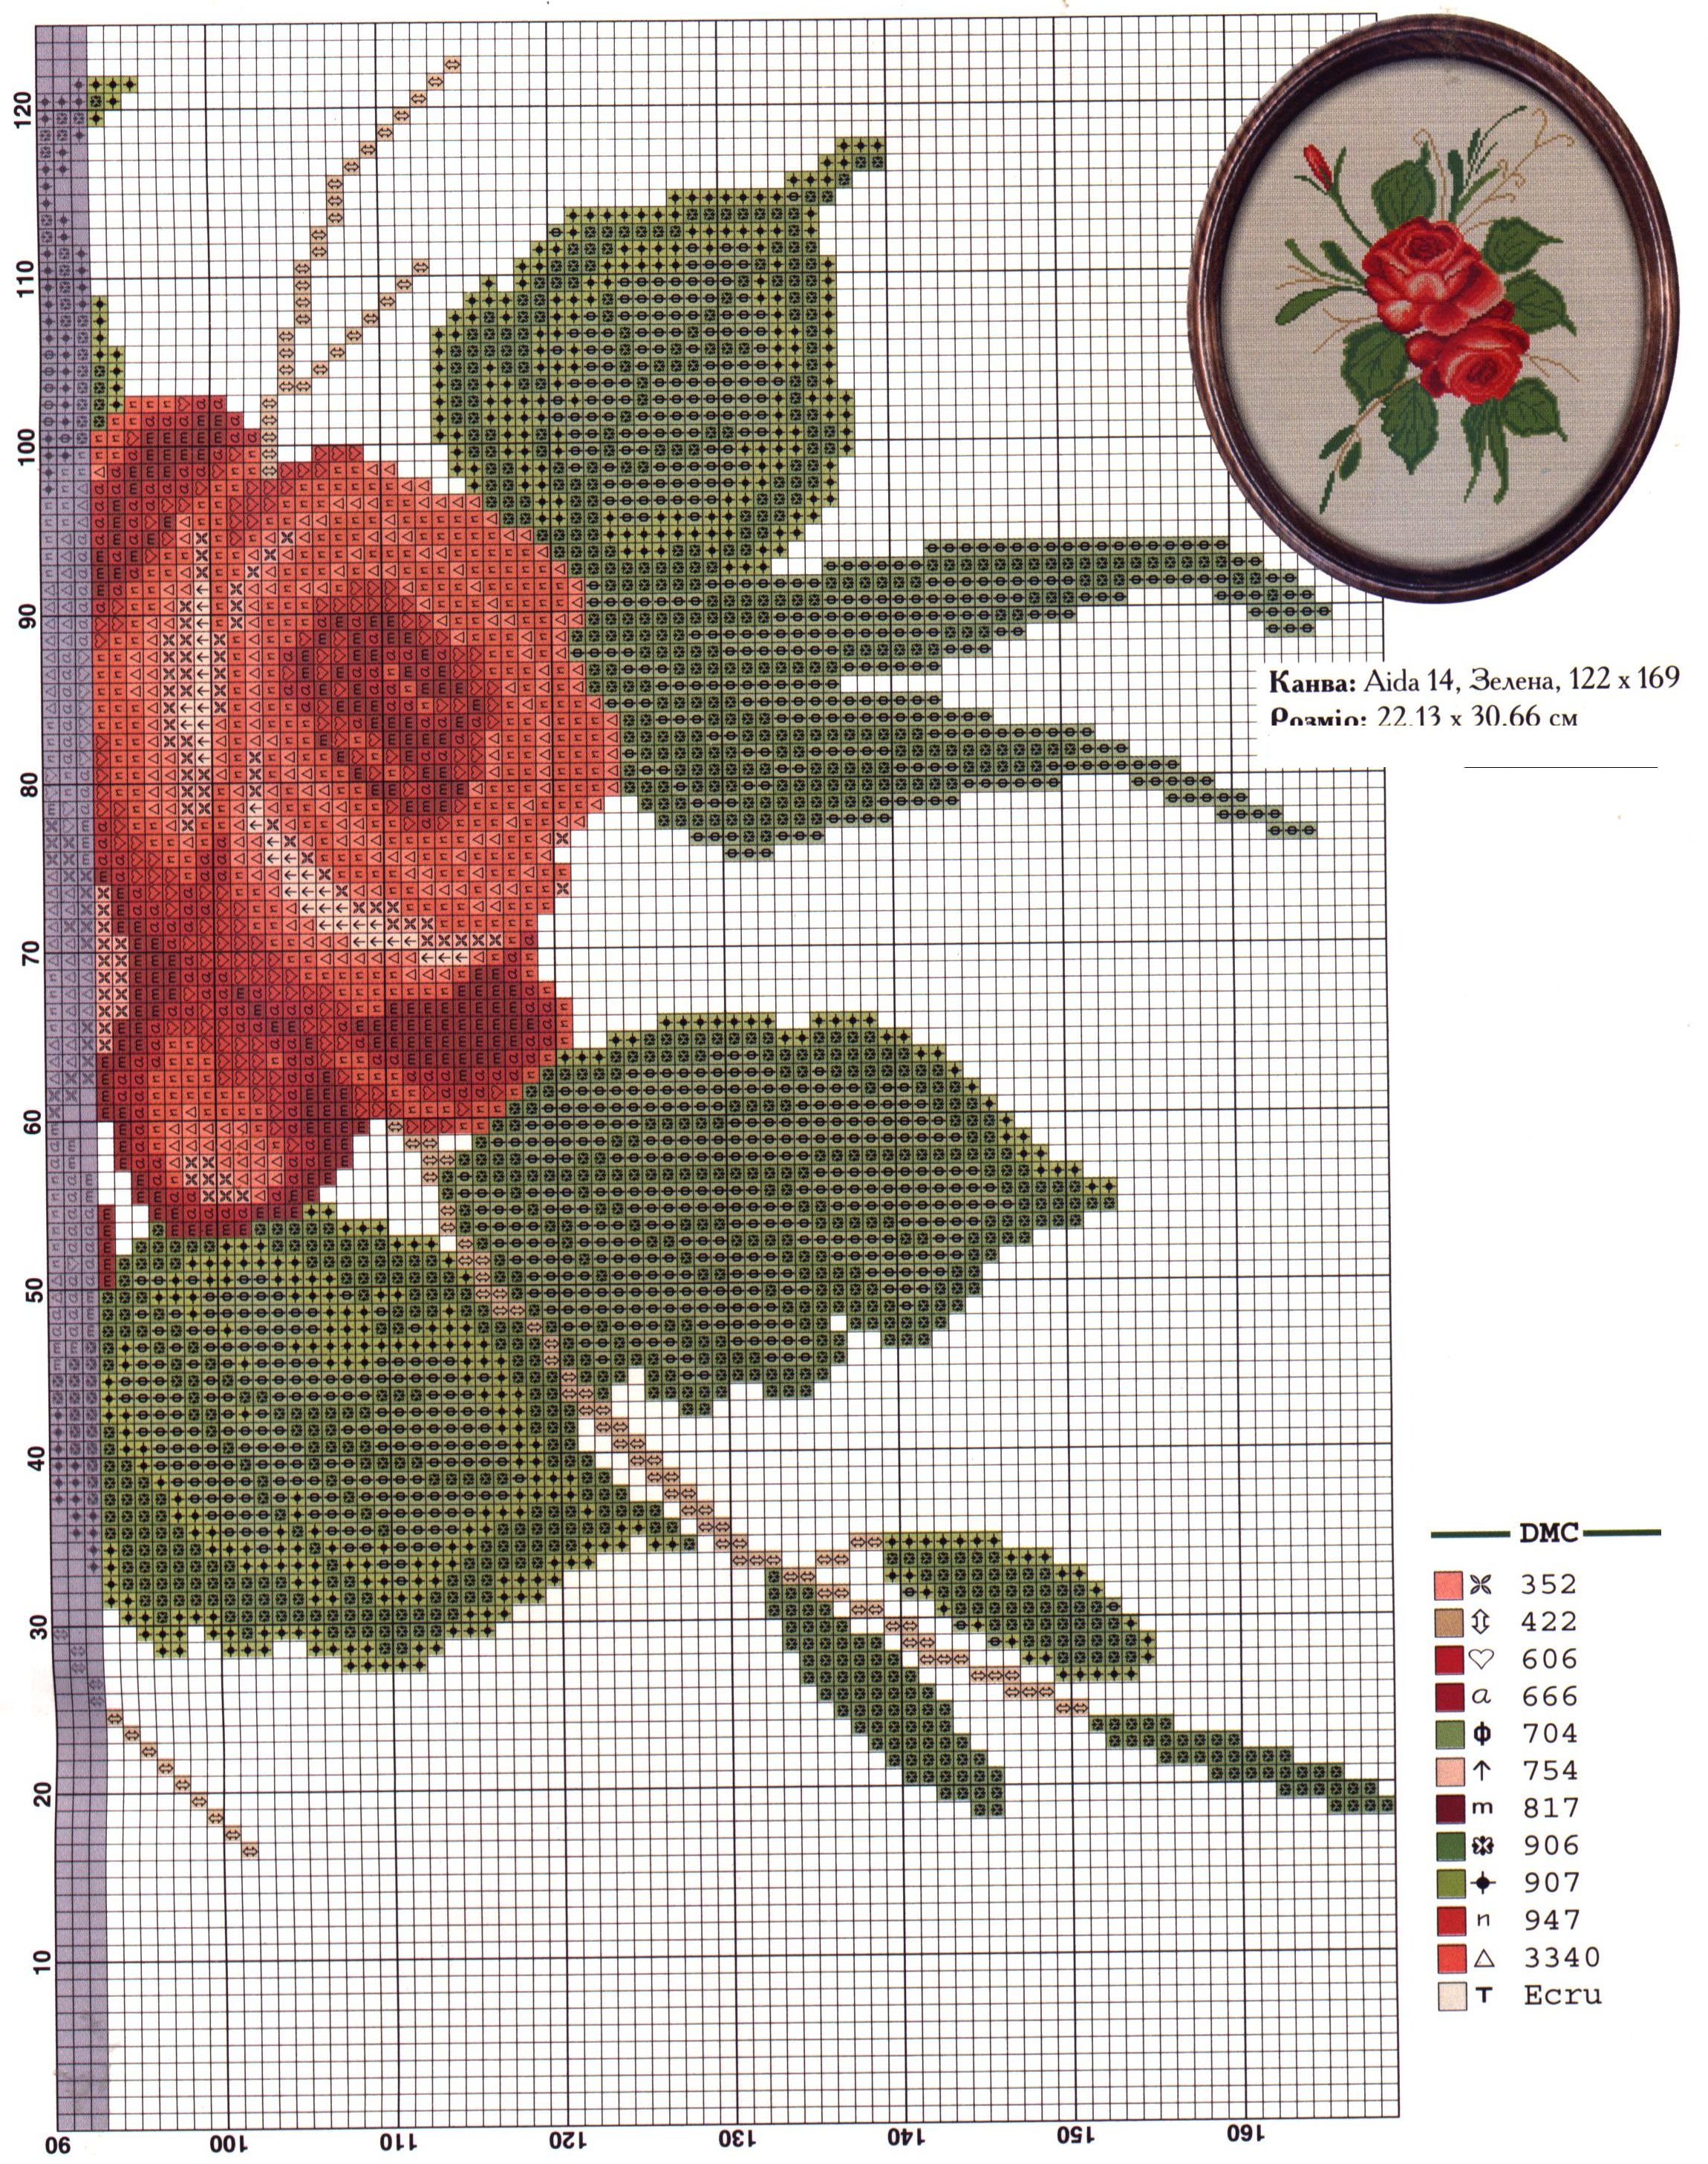
First we suggest you to embroider a wonderful cross with a rose. To produce it you will need the following materials and tools:
- Canvas Aida № 14 - snow-white color;
- Threads of a mulina of various colors and shades, selected according to the scheme;
- Needle for embroidery with an oblong ear;
- Embroidery frame, or frame for embroidery;
- A simple pencil or special marker for marking out canvas;
- Snow-white sewing thread and ordinary needle;
- Color scheme of embroidery in printed form;
- Decorative frame for the finished picture with a rose.
After preparing all the necessary materials and printing out the diagrams, you can proceed to the very embroidery of the rose.

Embroidery of roses
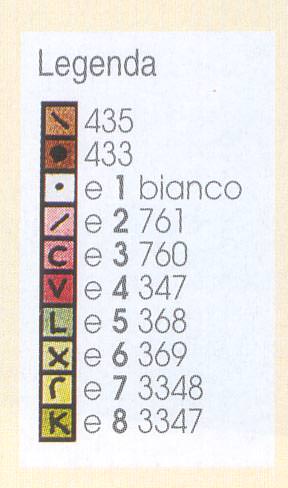
Start by selecting color threads. To do this, use the key that is provided with the circuit. Prepare the canvas by carefully ironing it with an iron. The canvas for embroidery is a loose thing. Therefore, it is necessary to take measures in order to prevent the shedding of its edges by treating them. If you have an overlock, then stitch the edge of the future embroidery on it, if not, then perform the sewing stitch by hand, using the usual sewing thread in the color of the canvas.
It is also possible to take some measures,To facilitate the process of work on embroidering roses. To do this, using a marker for needlework or a simple pencil, apply a canvas on the canvas. The size of the grid cell should be 10x10 cells of the canvas. This will save you from having to constantly count the crosses and not get confused in the circuit.
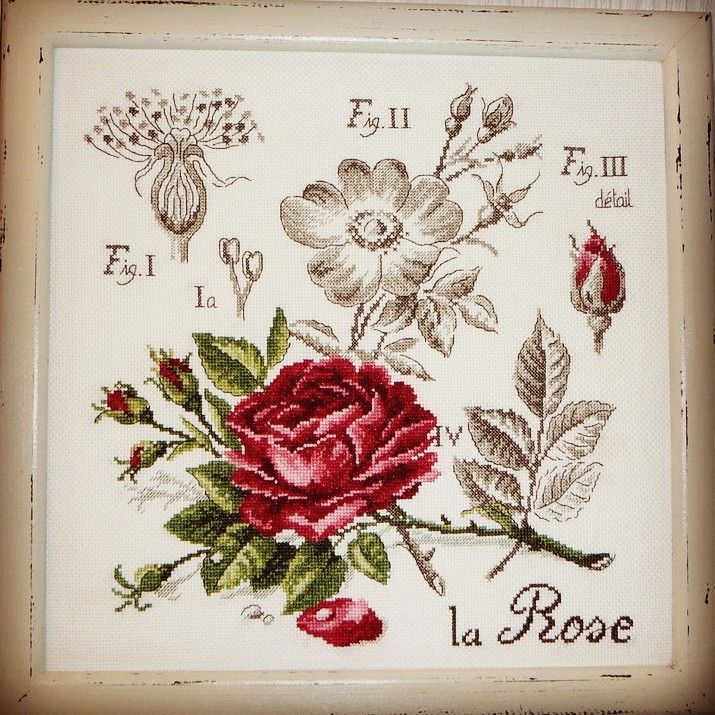
After that take the canvas and pull it onEmbroidery frame or a special frame for embroidery. You can begin to embroider from the corner of the picture with a rose, which you liked more. All work is done with a cross, and after the last cross is finished, proceed with the plating of the rose with the "back needle" stitches. All stitches of this type are indicated by appropriate designations in the diagram. Completing this seam with all the contours of the product, you will get a clearer and more contrasting picture.
And in order to make a picture of the rose andIt is necessary to flash all the lines and contours of the picture with a thick thread of the corresponding color, or the same floss, but using a thread with a large number of additions.
A ready picture with a rose needs to be washed inSoapy water. Then it should be dried on a terry towel of light color. When the embroidery is a little dry, iron it with a non-flammable iron, protecting the fabric with a light cloth. After that, you can proceed to insert the picture into the frame. You can do it yourself by stretching the fabric on the orgalite workpiece, fixing the edges on the reverse side and inserting the work into the frame, or trusting professionals from the baguette workshop.
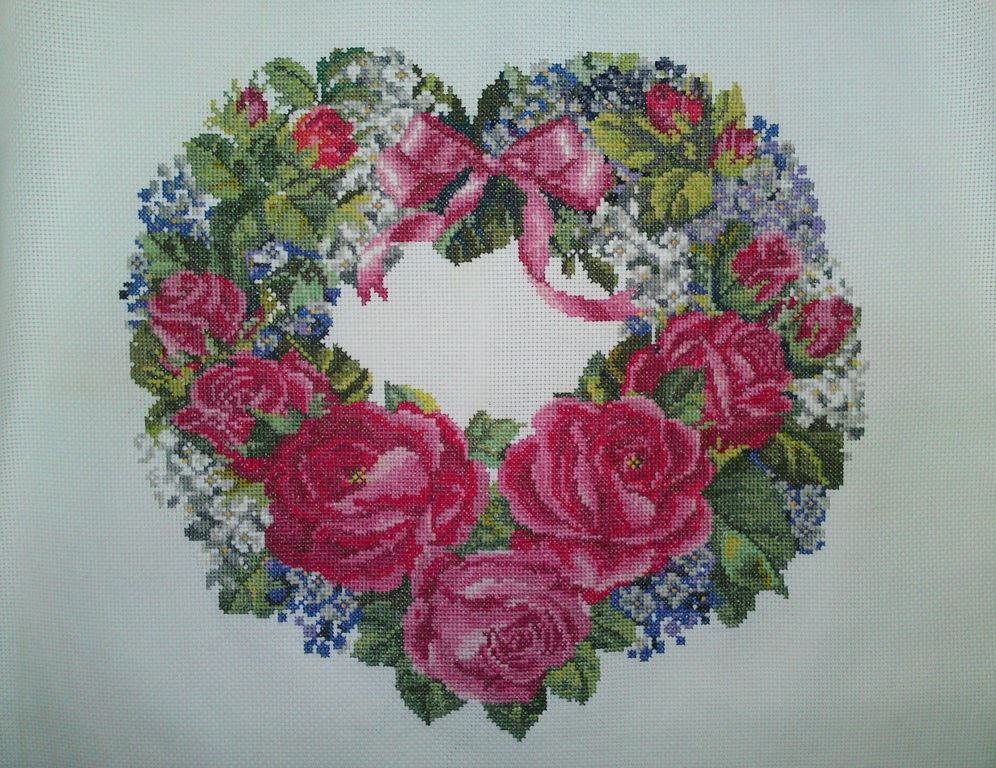
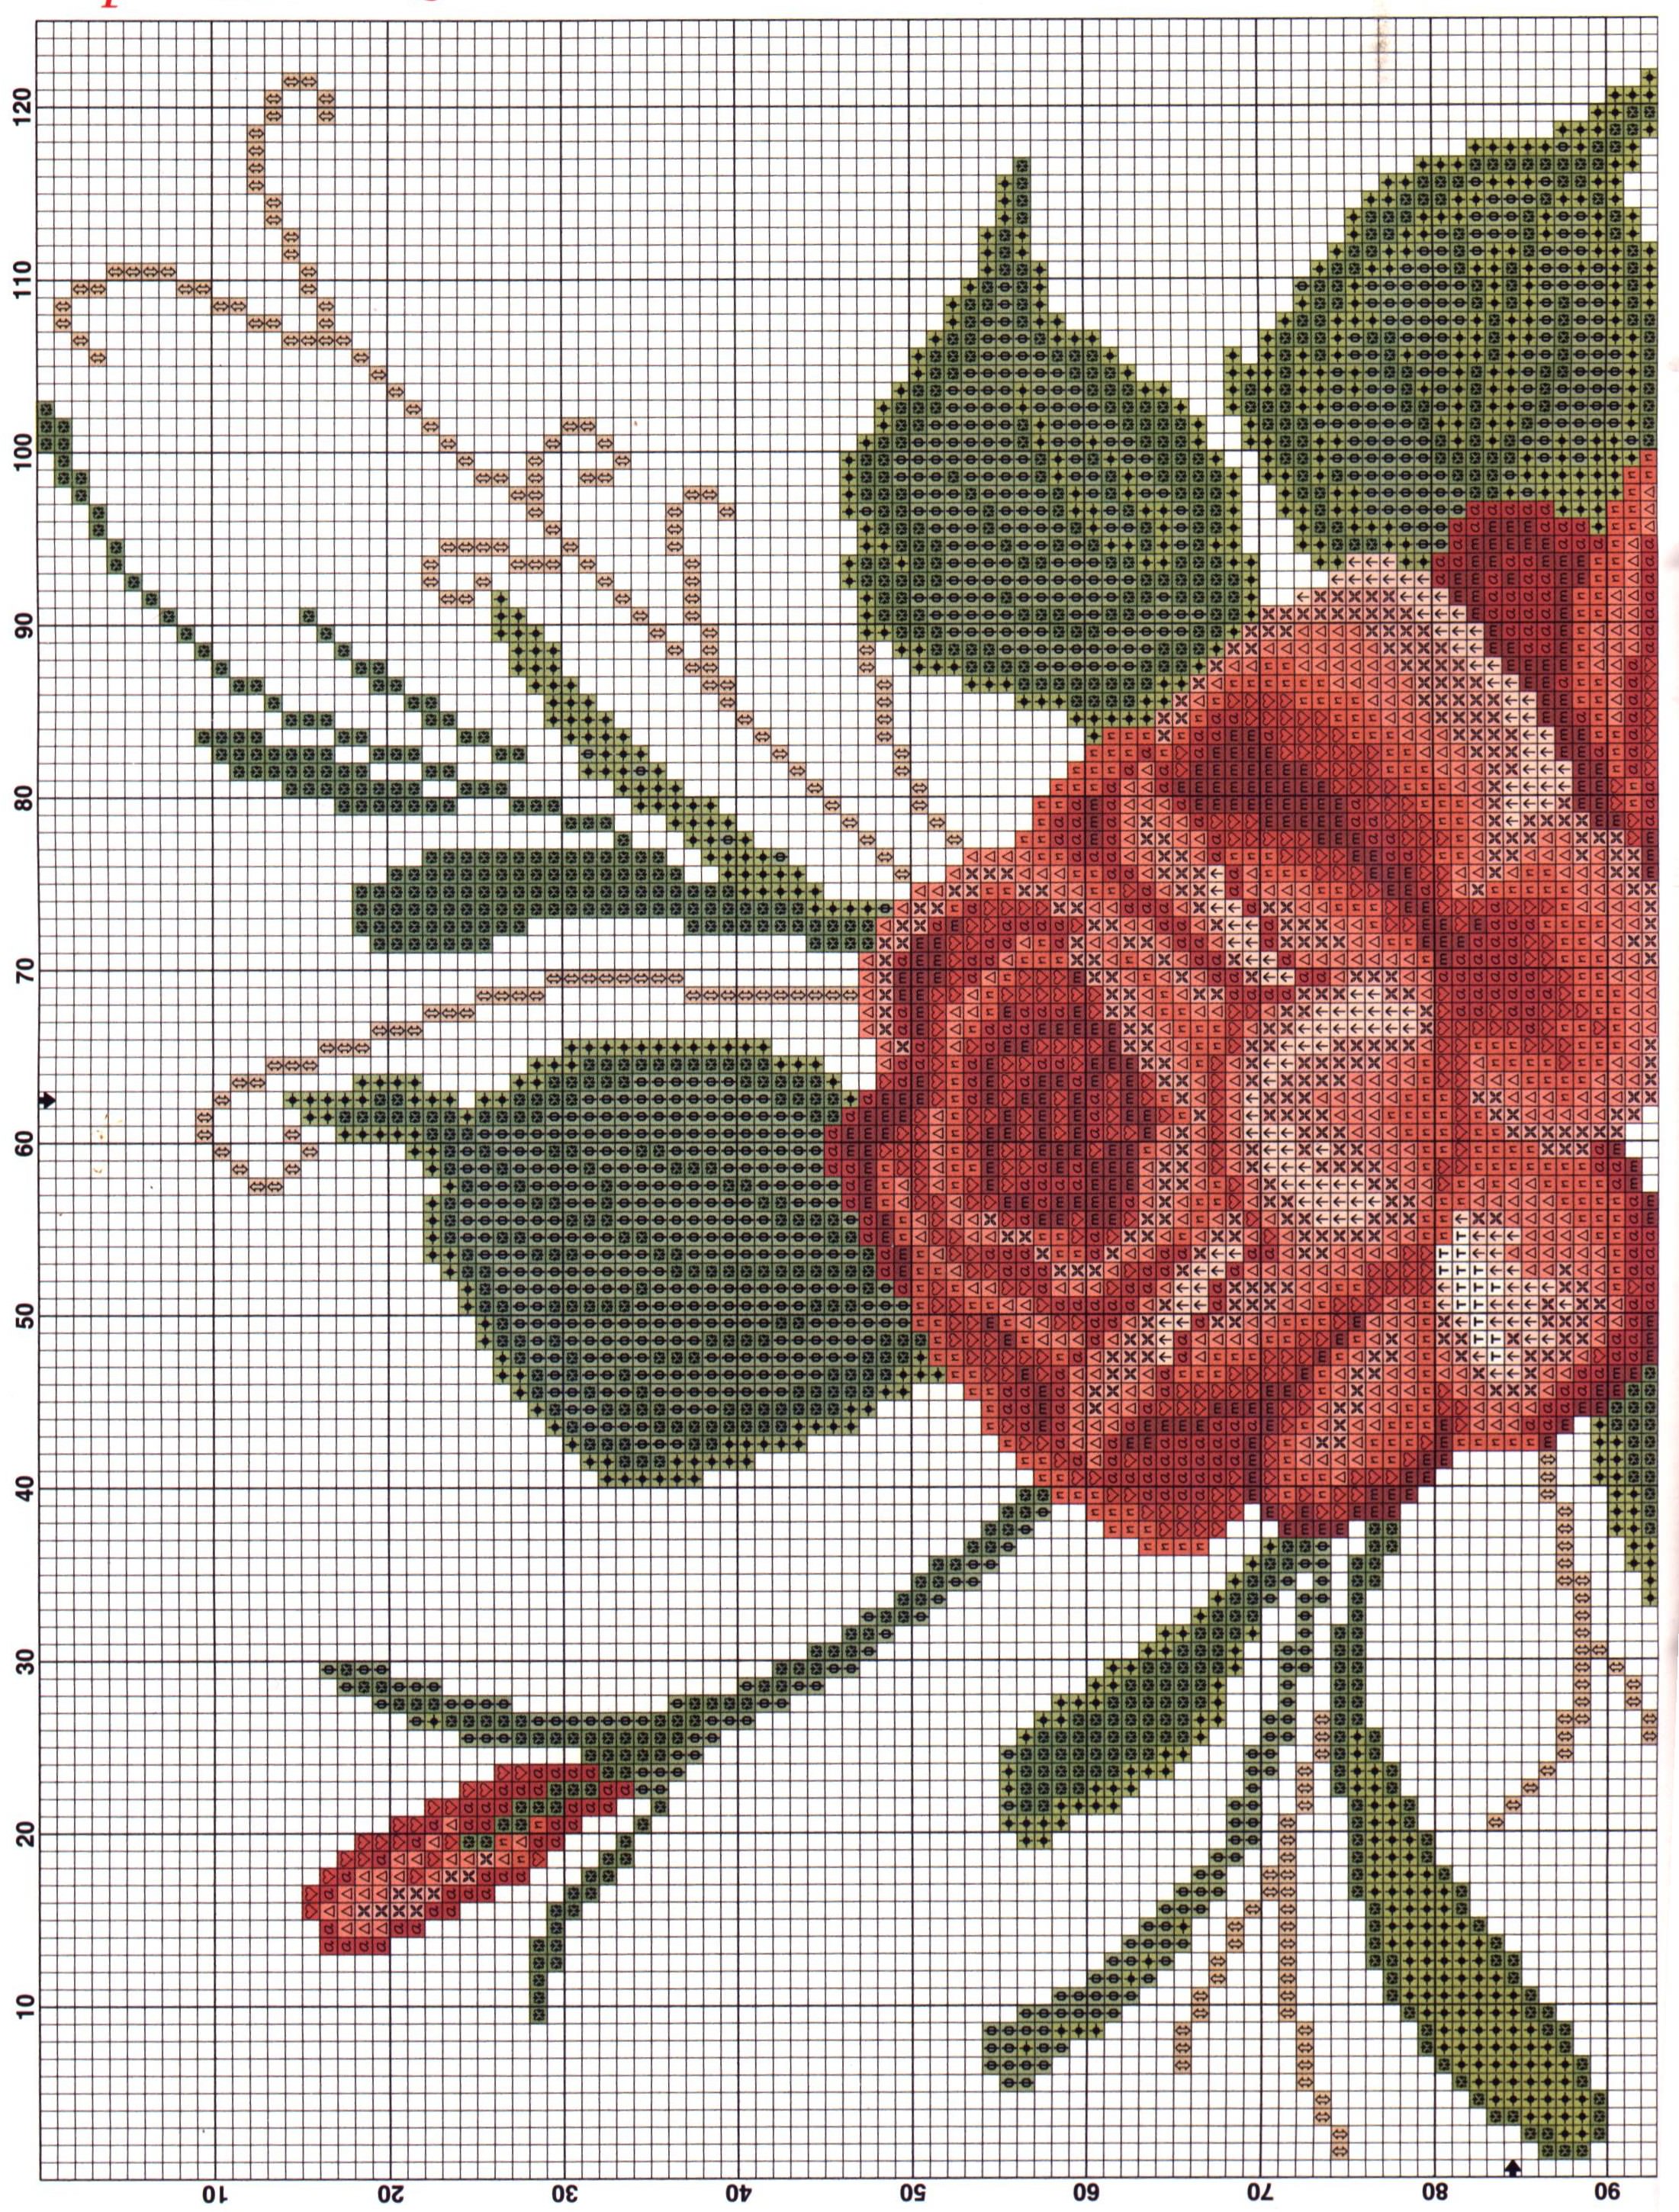
Embroidery of pillowcases with a rose
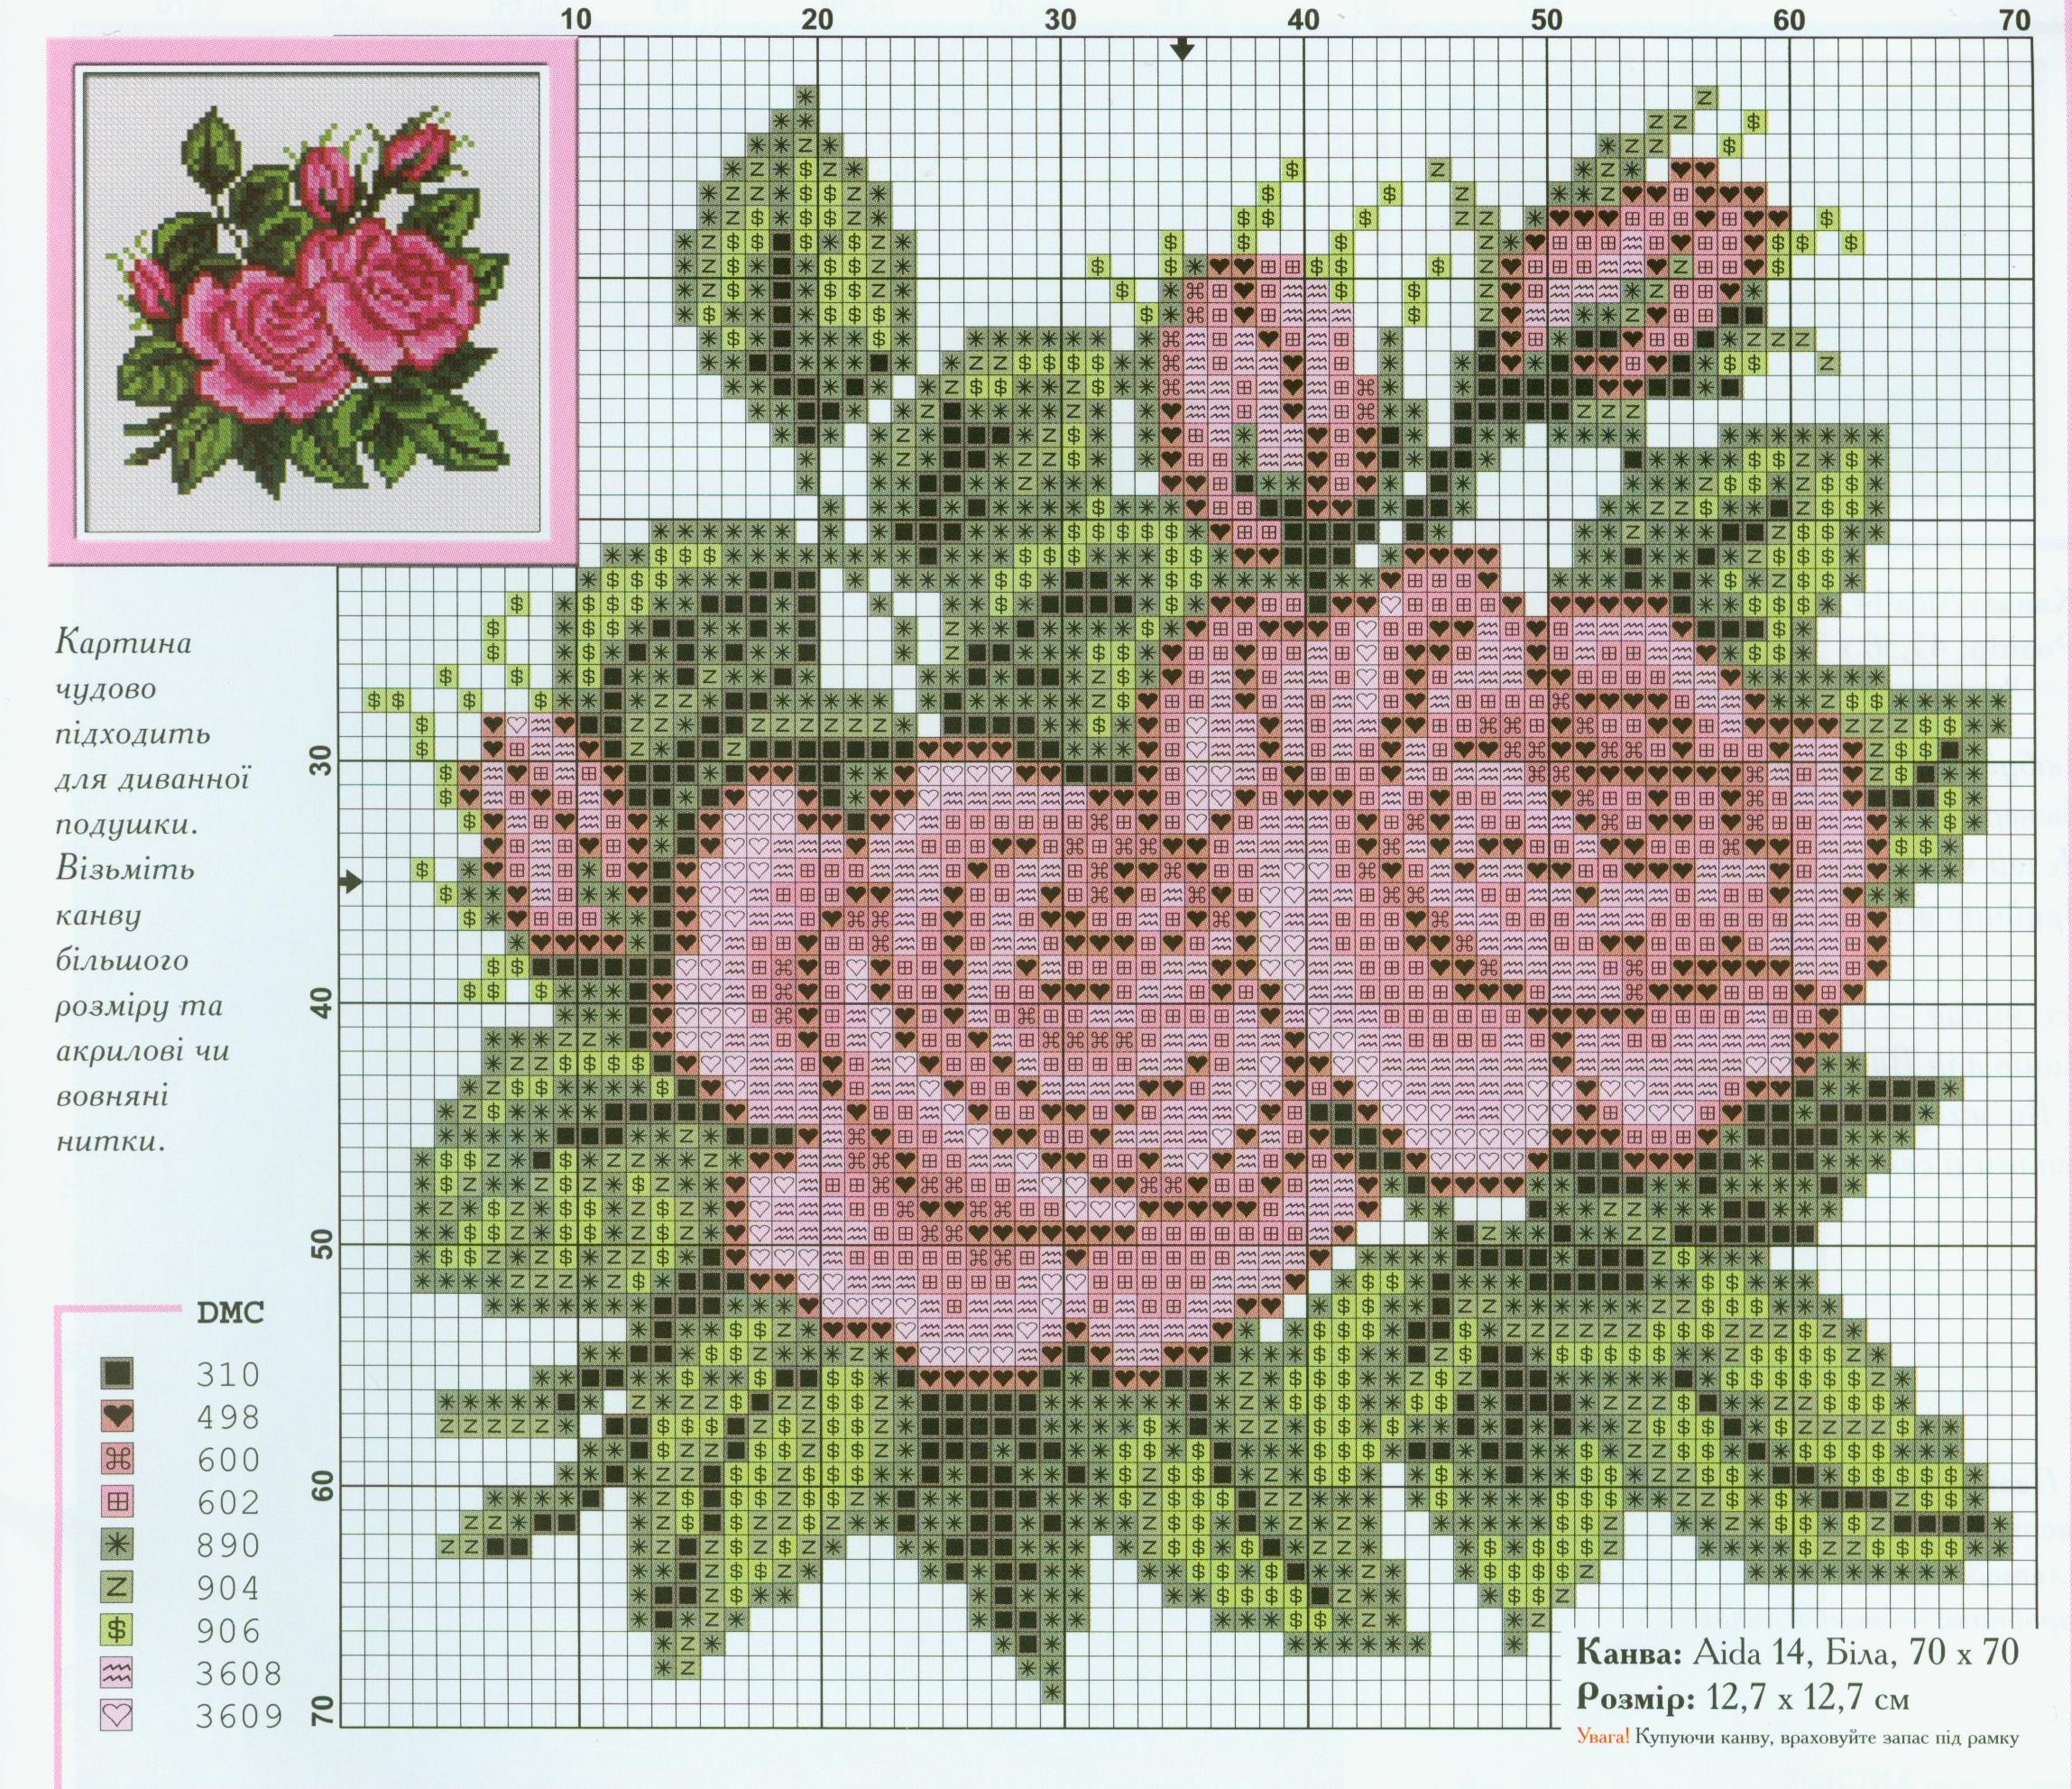
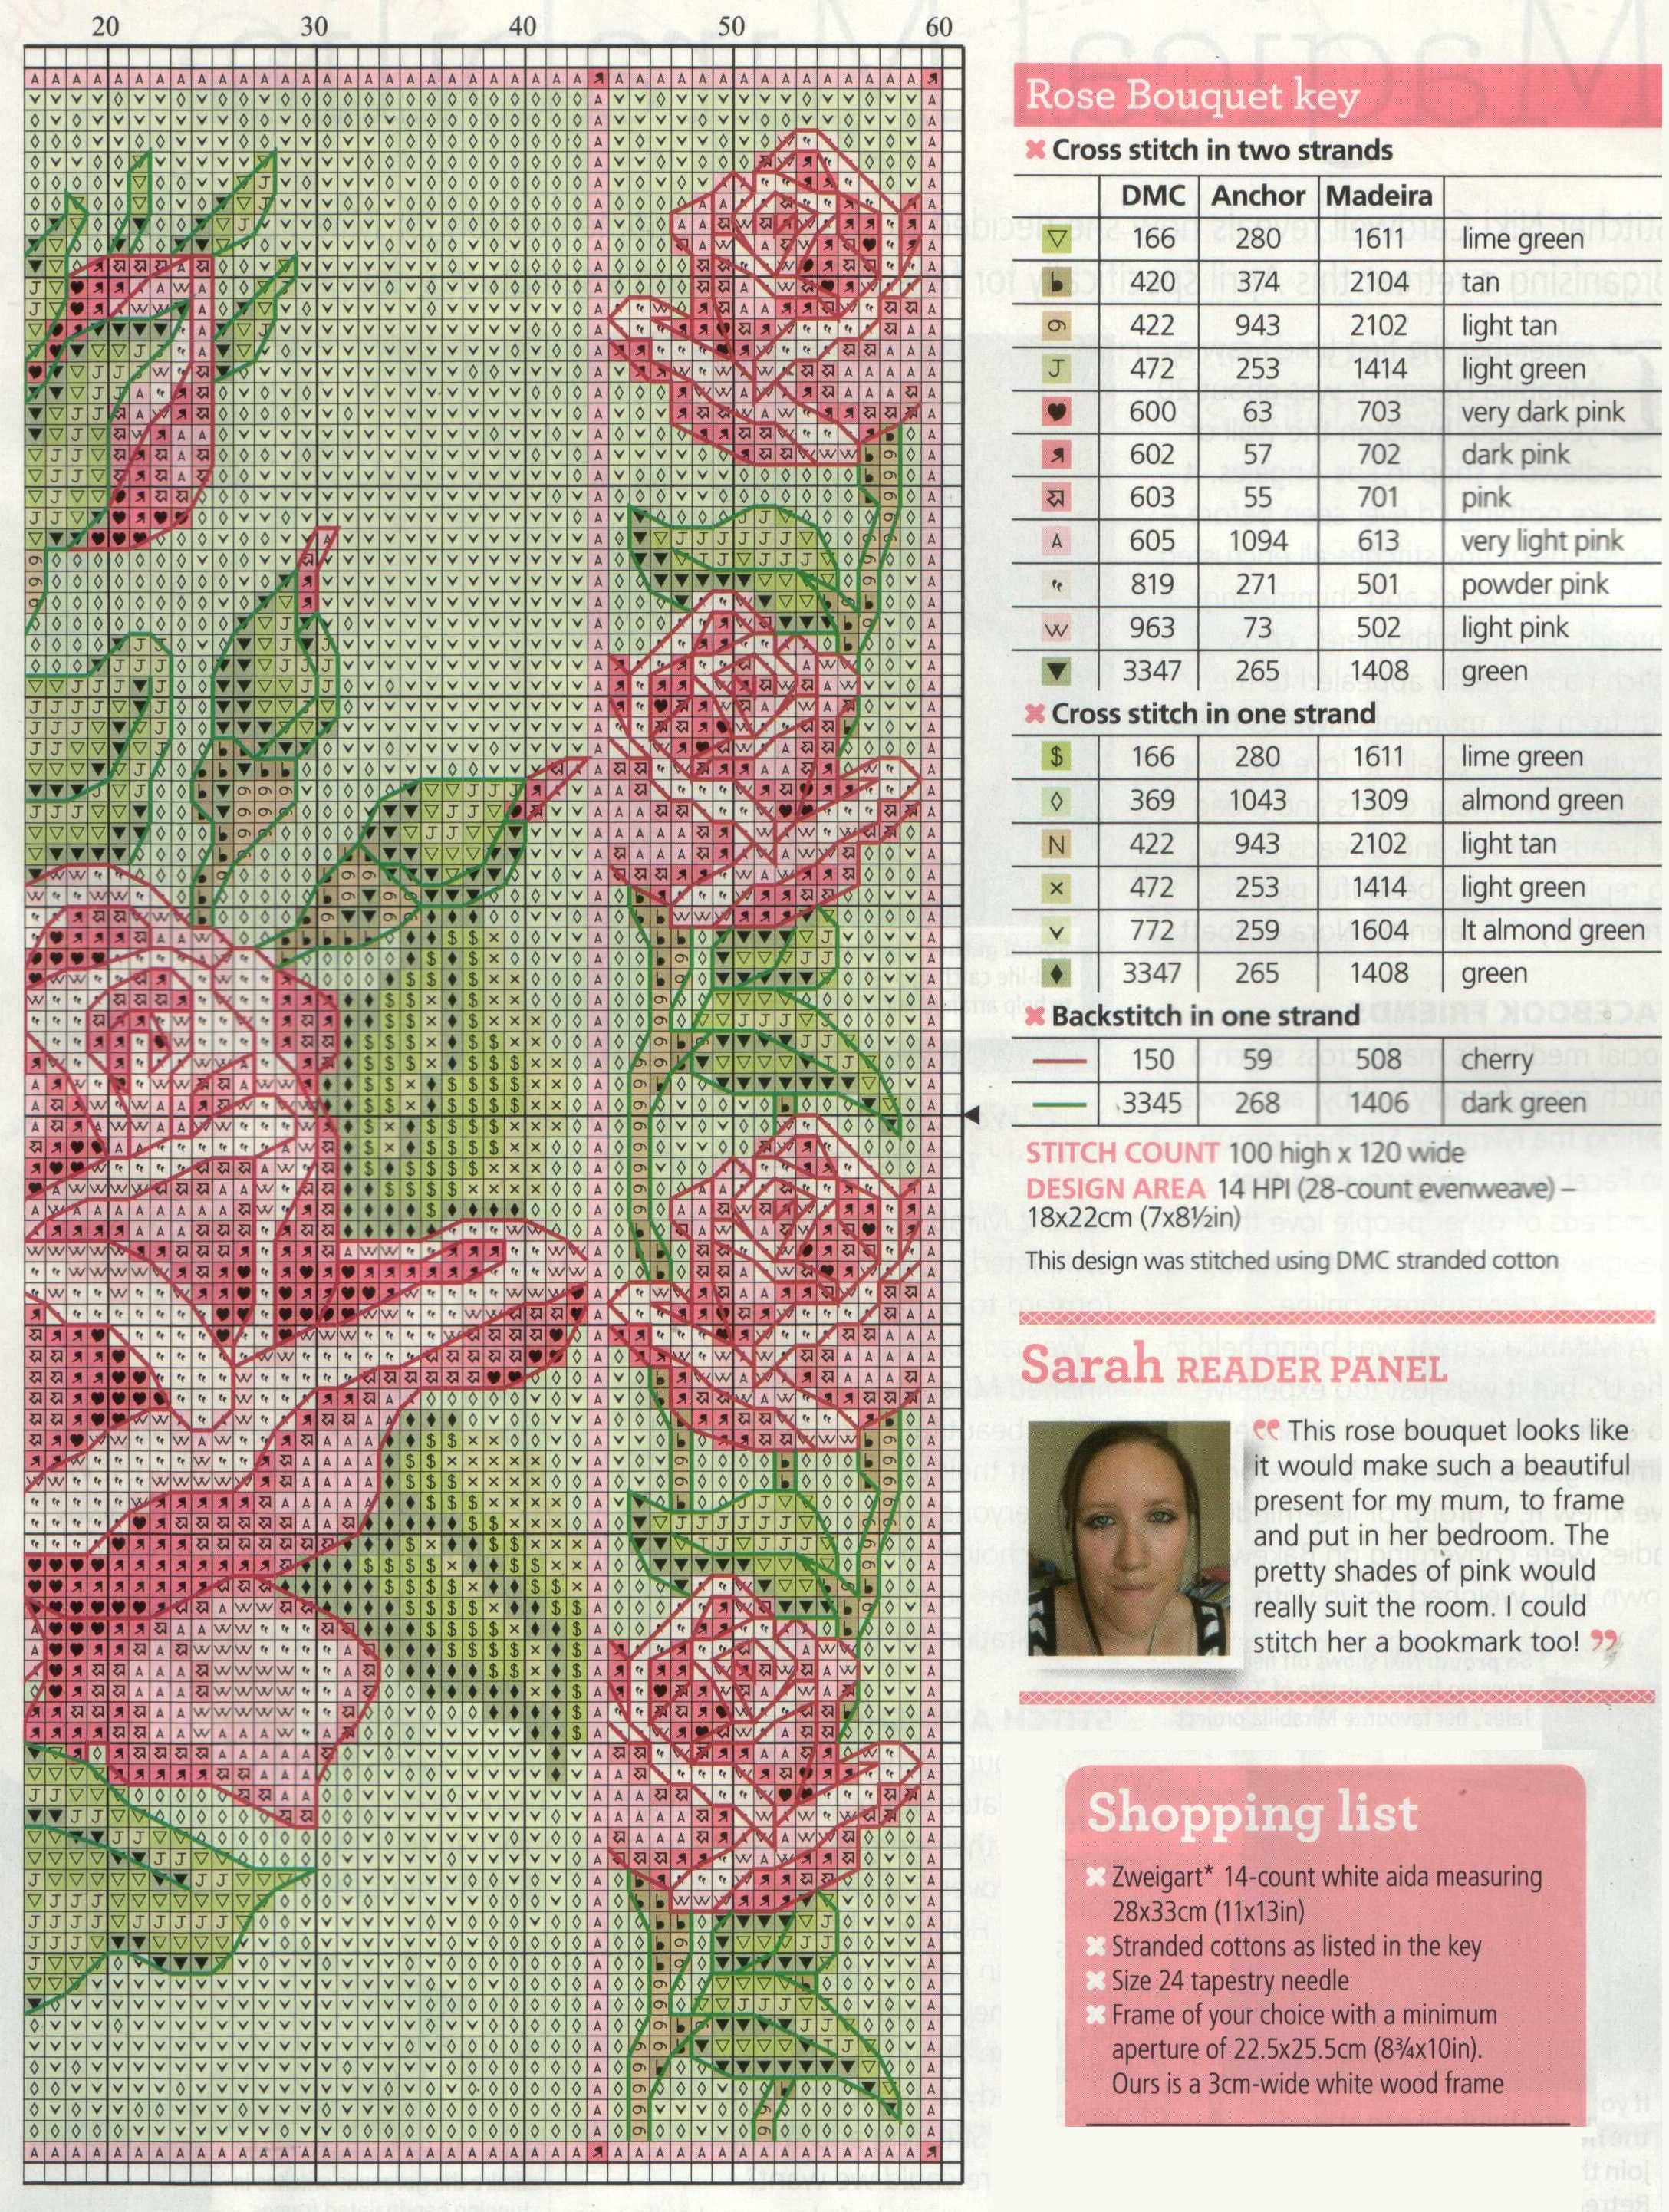
To many experienced embroiderers this scheme will seemVery simple and affordable. It can be done quite quickly, several hours will be enough. The choice of thread also does not take much time. After all, this scheme of roses involves the use of only nine different shades for its embroidery. So, you will need:
- Mmulin of red color - three combined with each other shade;
- Mulina green - three shades of warm tone and three cold;
- Fabric on a pillowcase - dense with gloss, 30x35 cm;
- Satin ribbon of red color;
- Needle you embroidery;
- Embroidery frame.
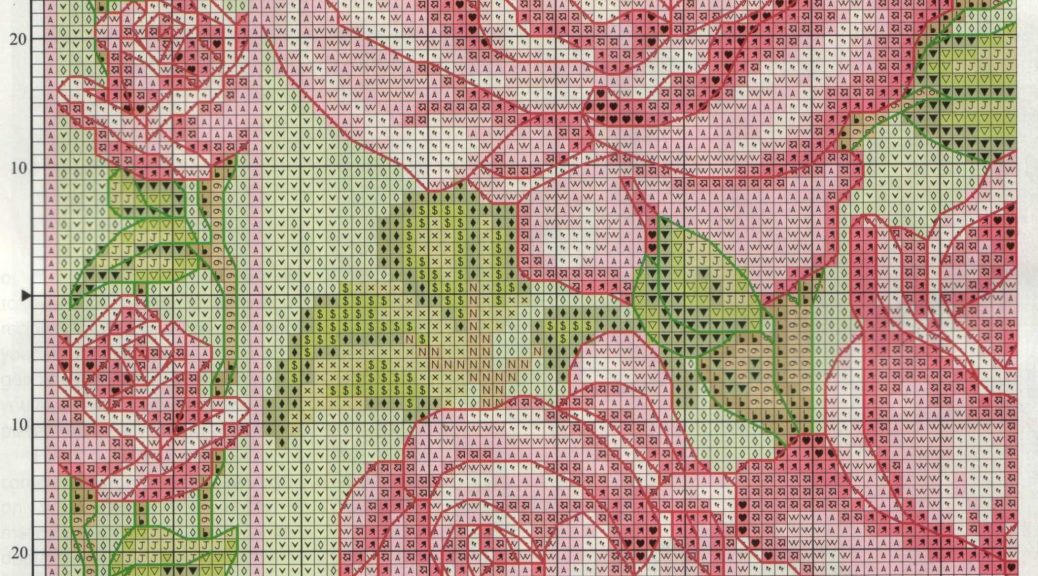
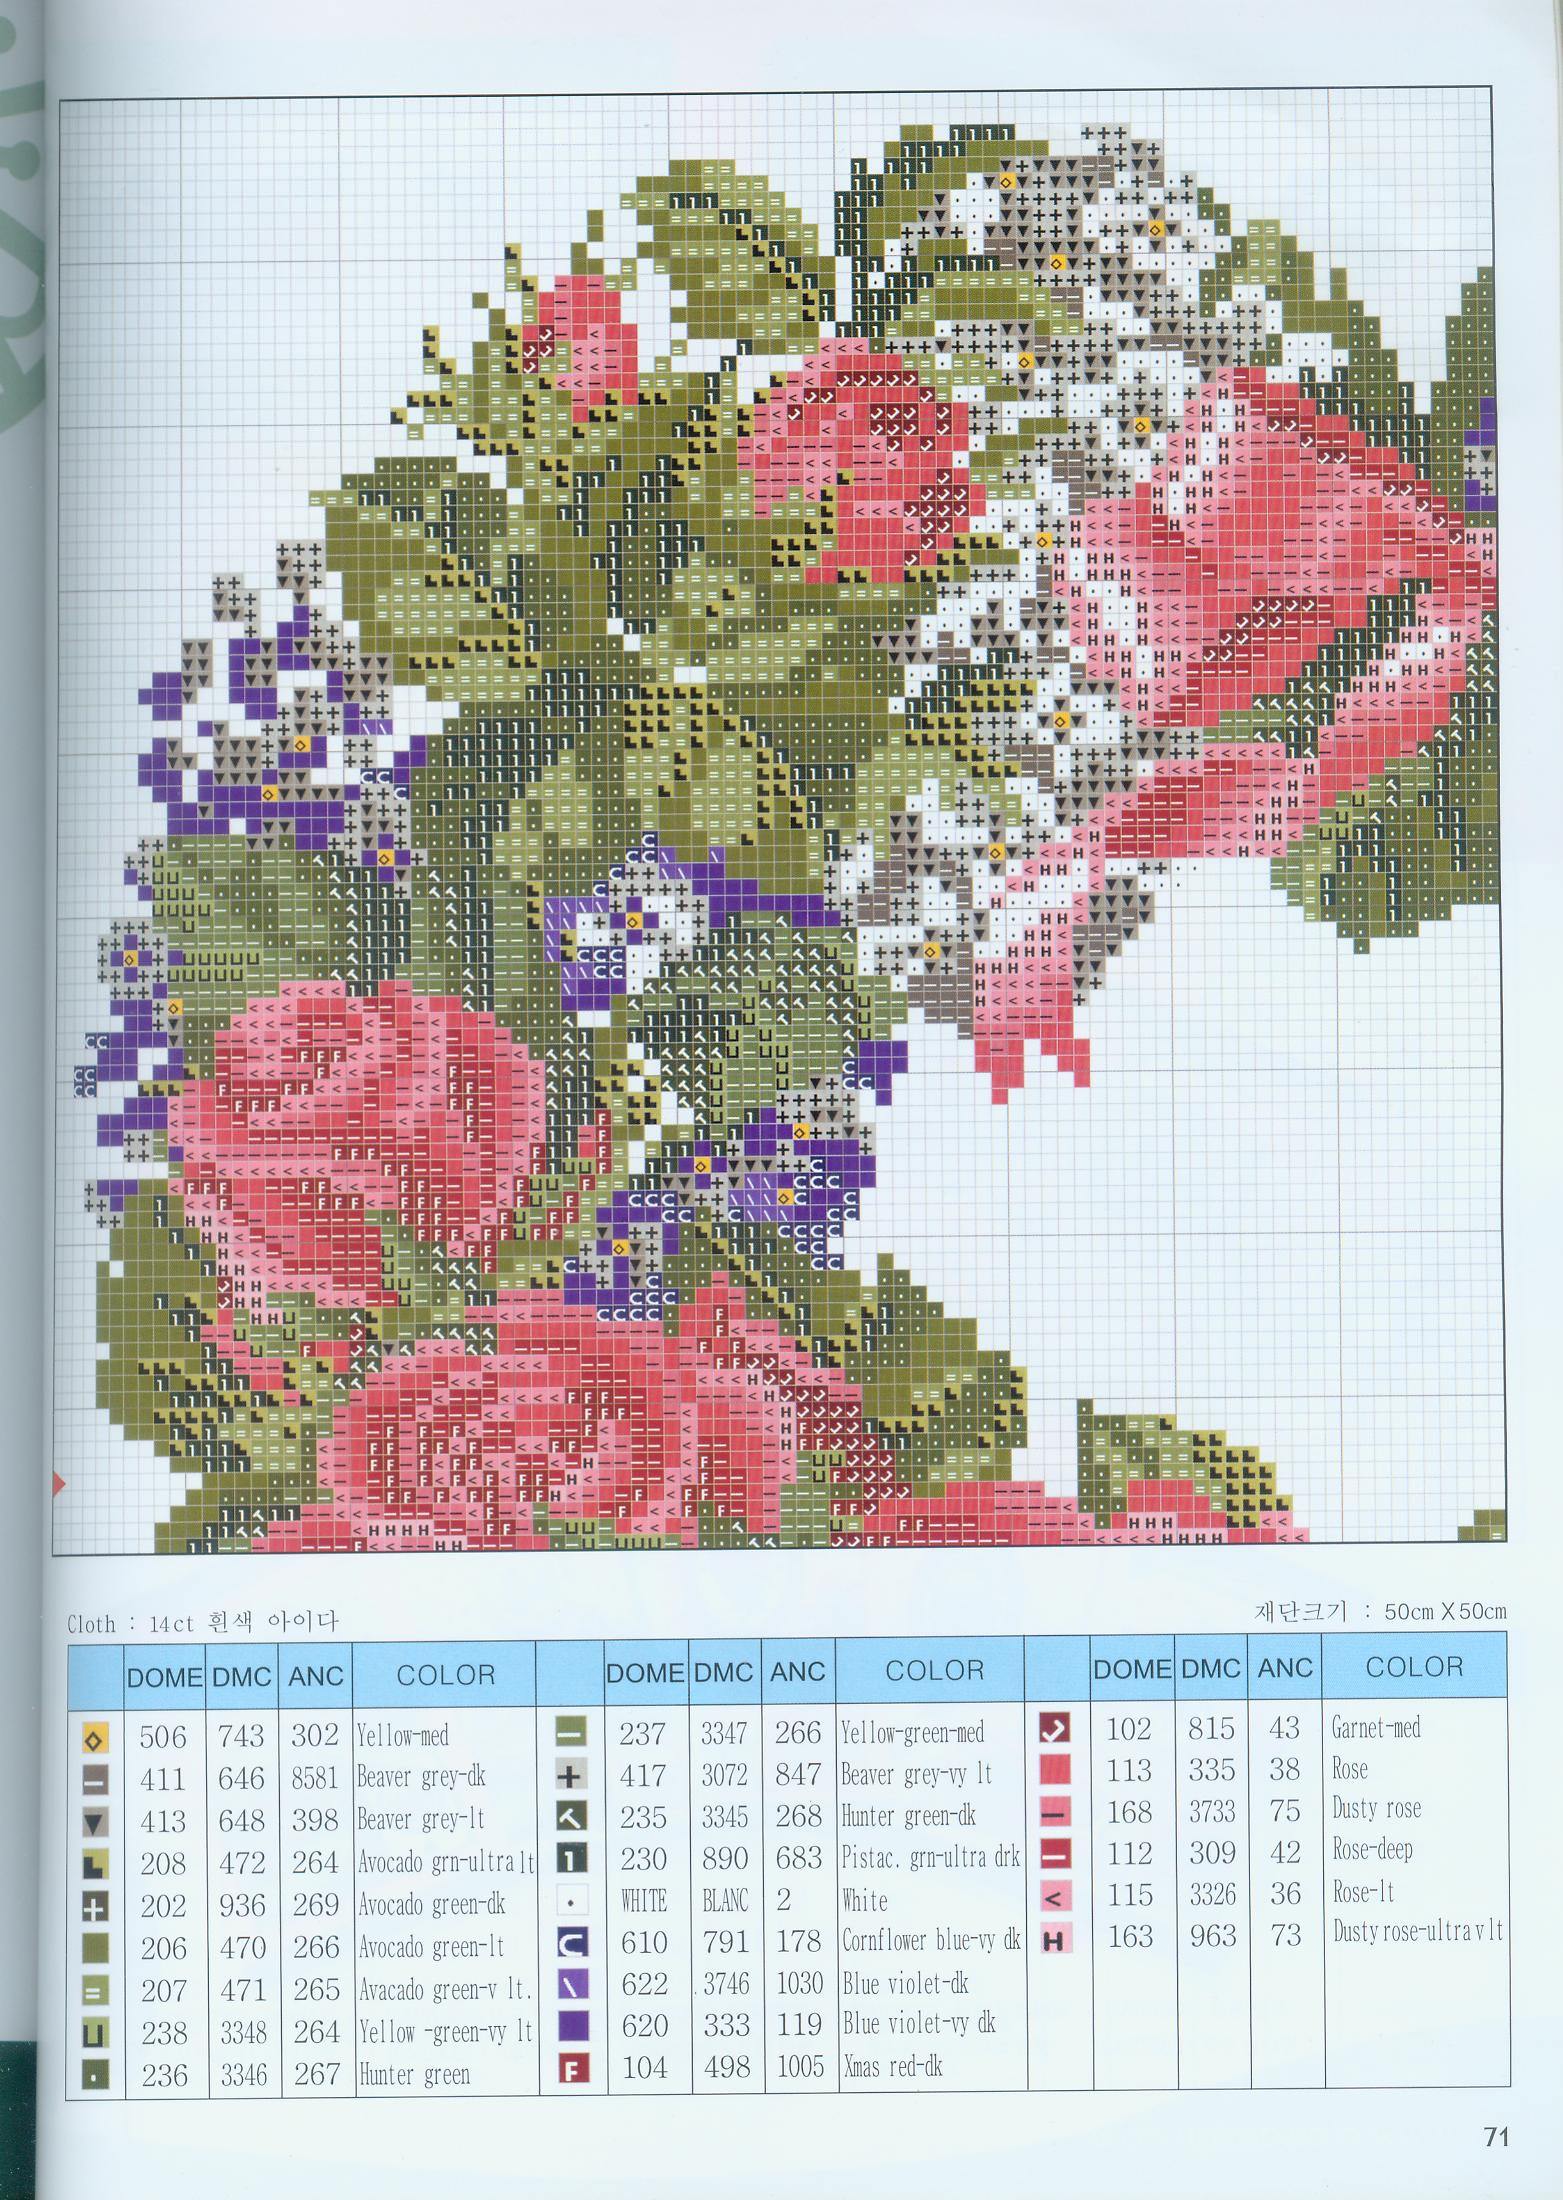
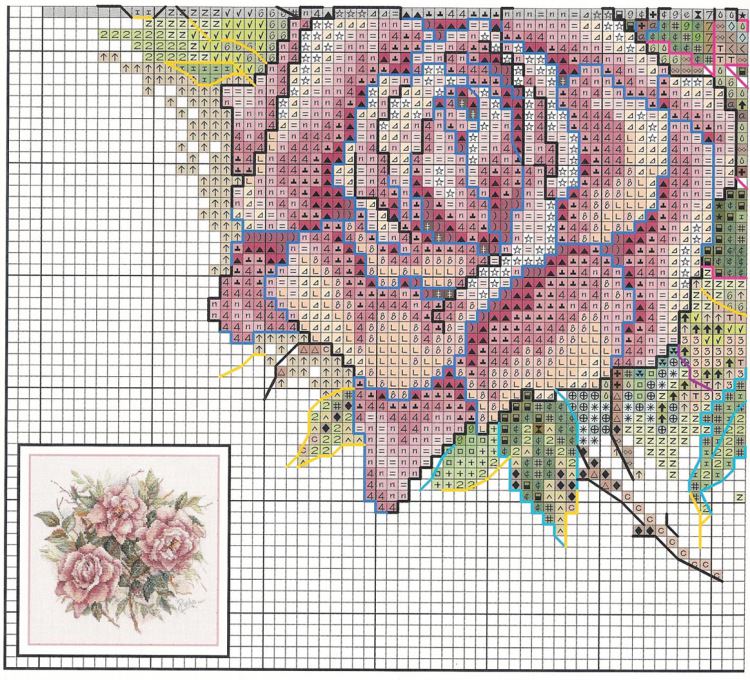
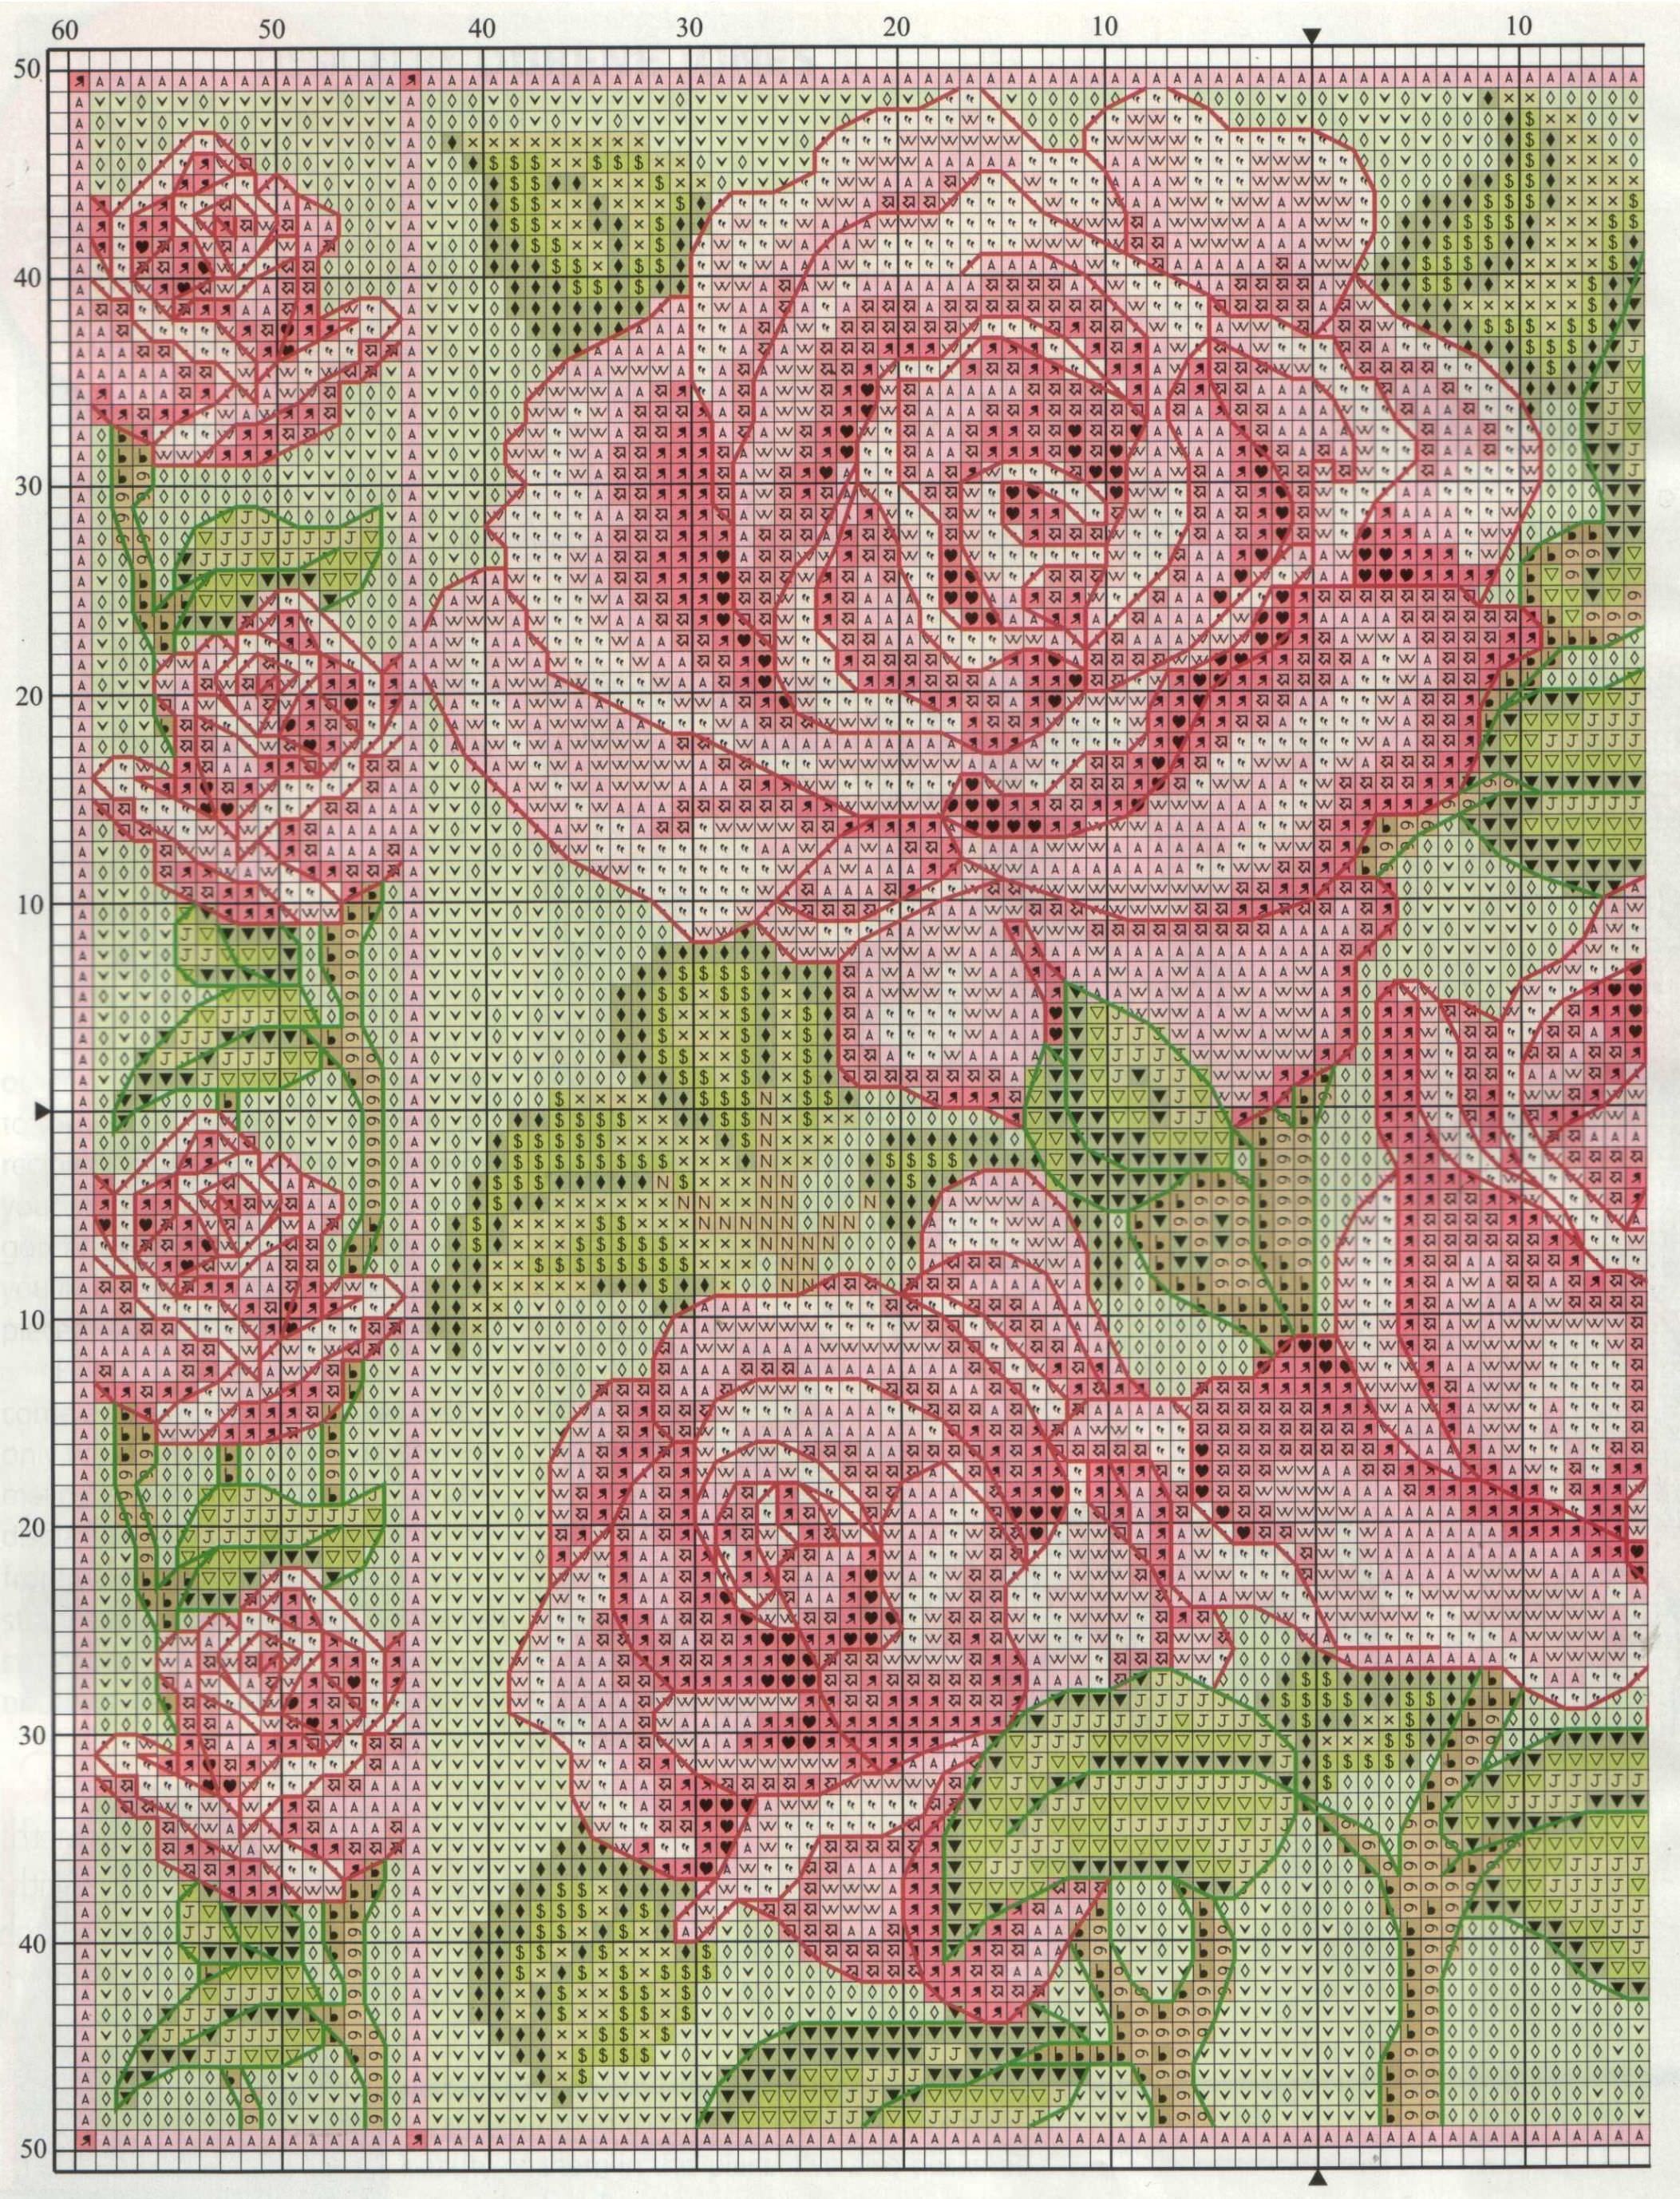
You will also need a rose scheme, shown below.
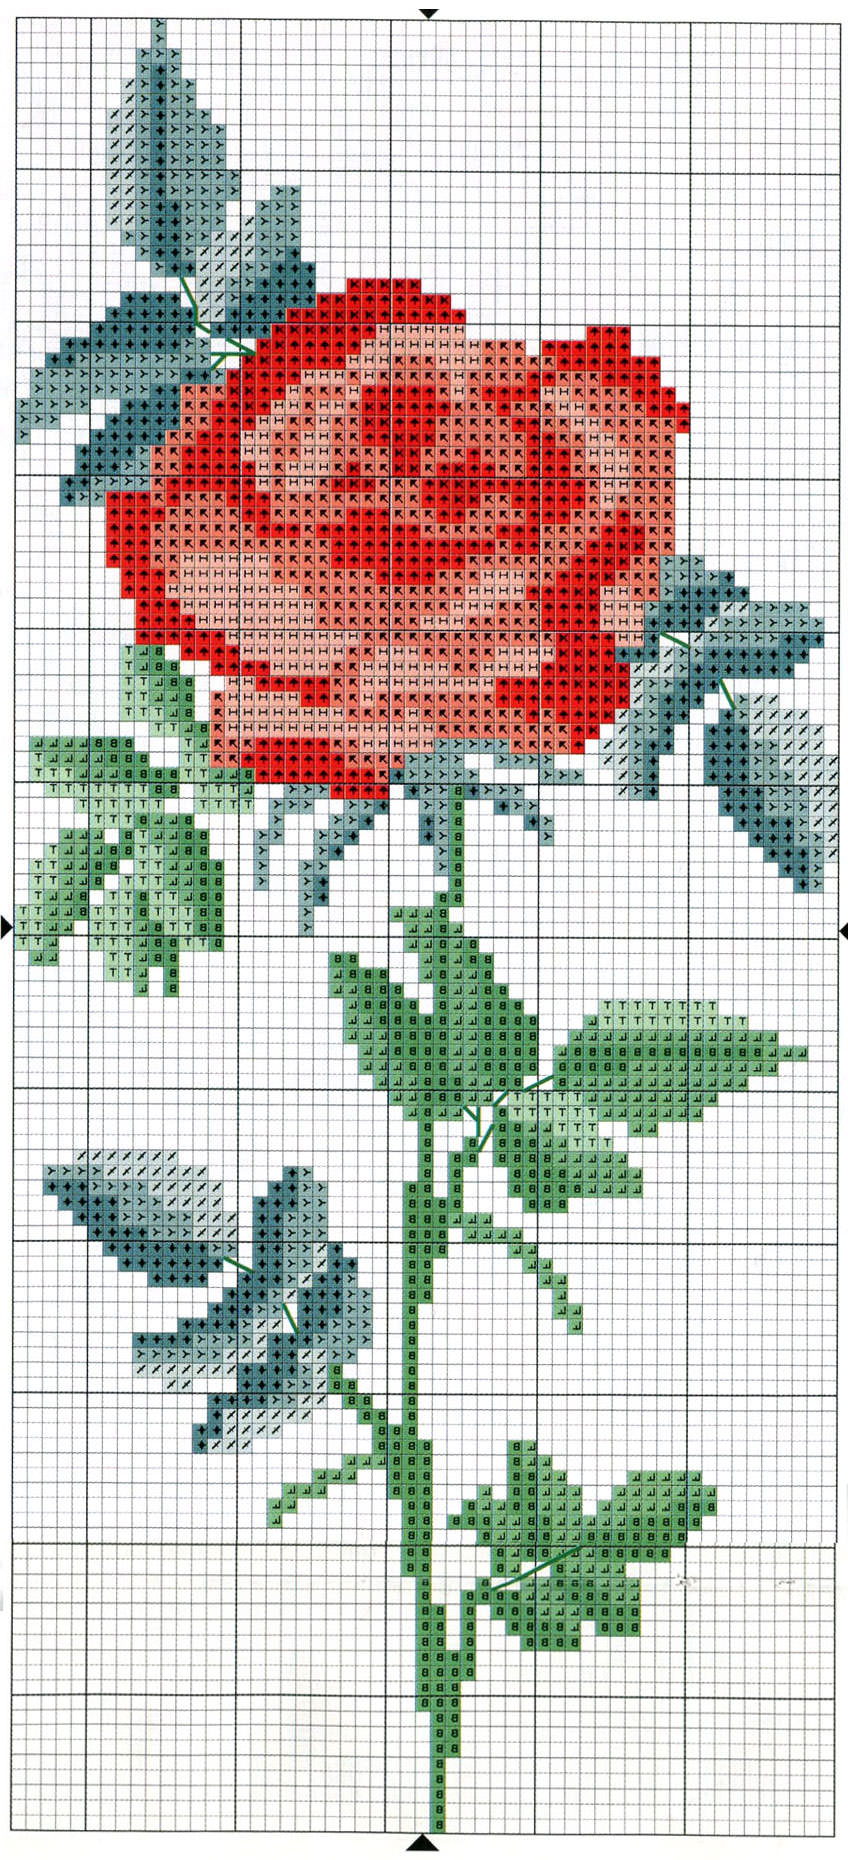
You can start embroidery with a cross with the top or withThe bottom extreme point, or as advised by many skilled workers, you can outline the central point and transfer it from the scheme to the canvas. From this point and you should begin the cross stitch.
After the rose is ready, you can enclose it in a smart red frame, using a satin ribbon. The width of the border should be about 5 cm.
After the finished embroidery, they take care, as described inThe previous case. The pillowcase must be stretched in a little warm soapy water, dried, spread out on a towel, and ironed with an iron at medium temperature through a light rag.
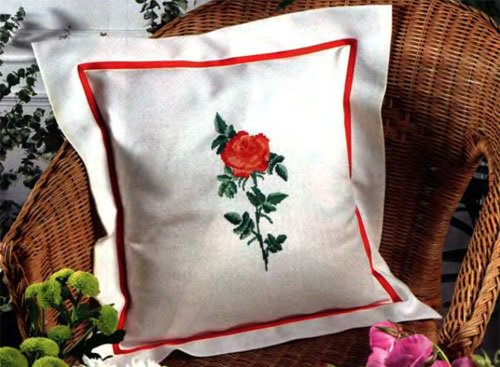
So, you have two wonderful works,A picture and a pillow case for a pillow with roses. Both works are made with the simplest seam of a cross. Both items will perfectly decorate the interior in your house or become a wonderful gift to your friends and acquaintances.
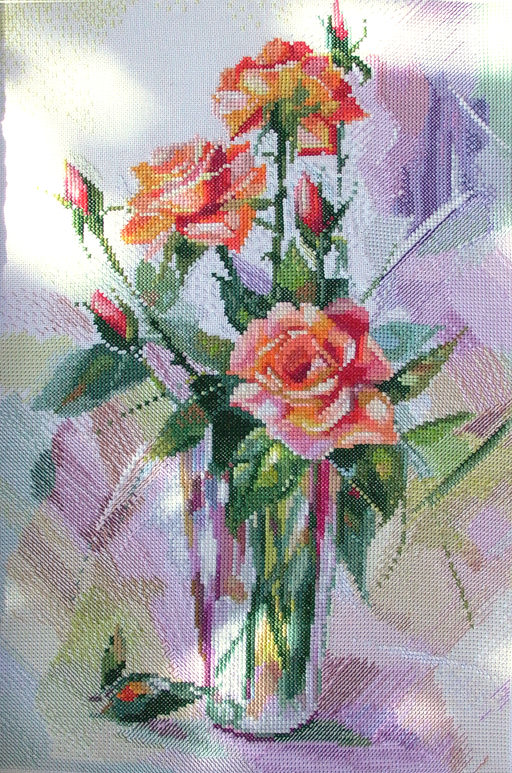
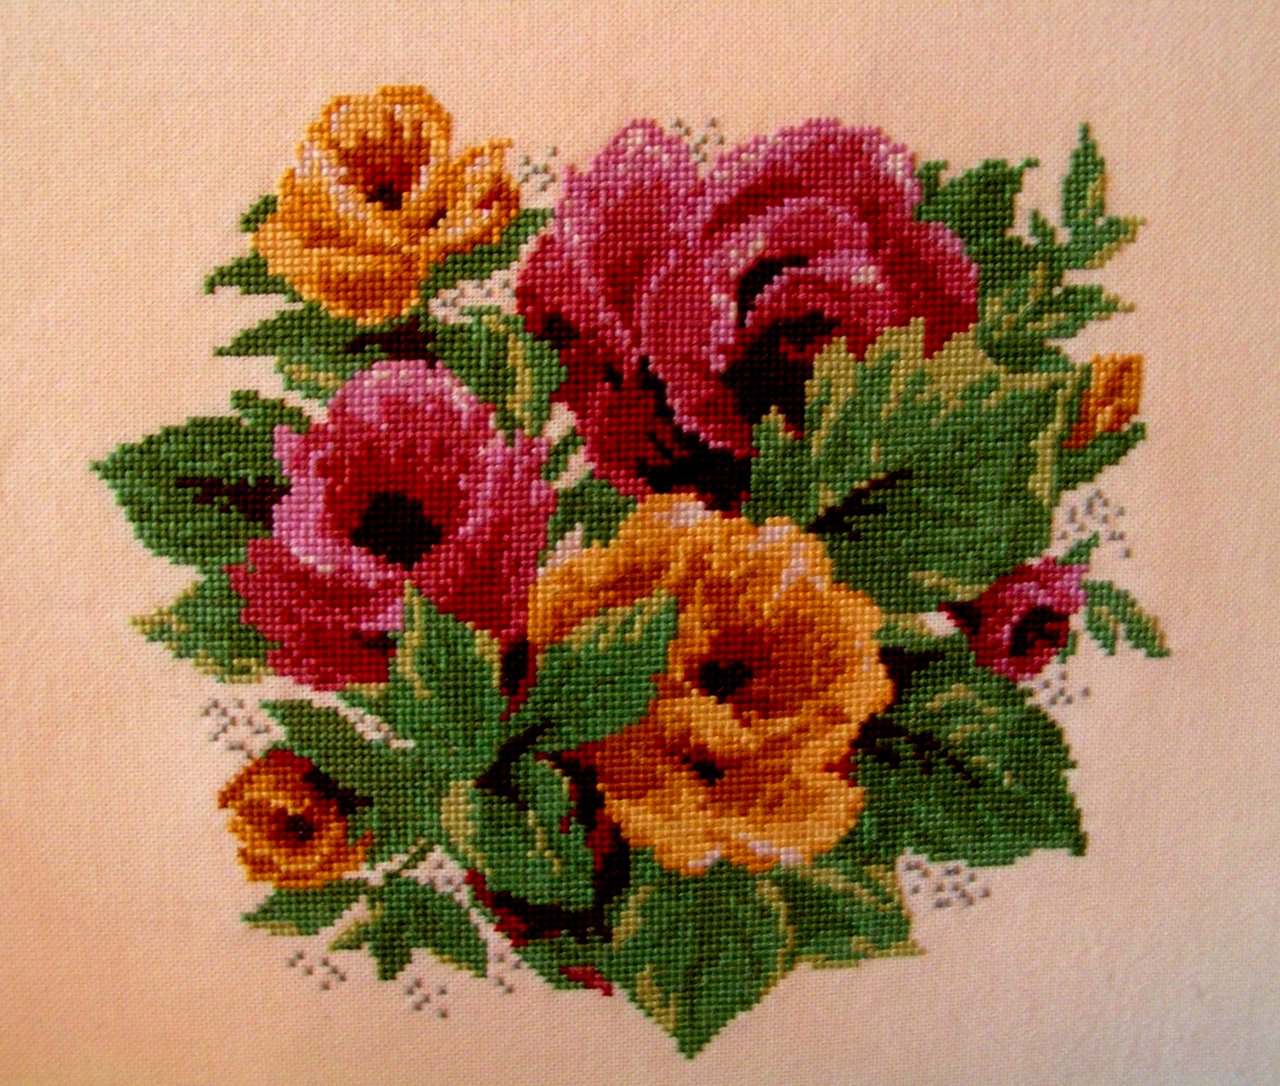
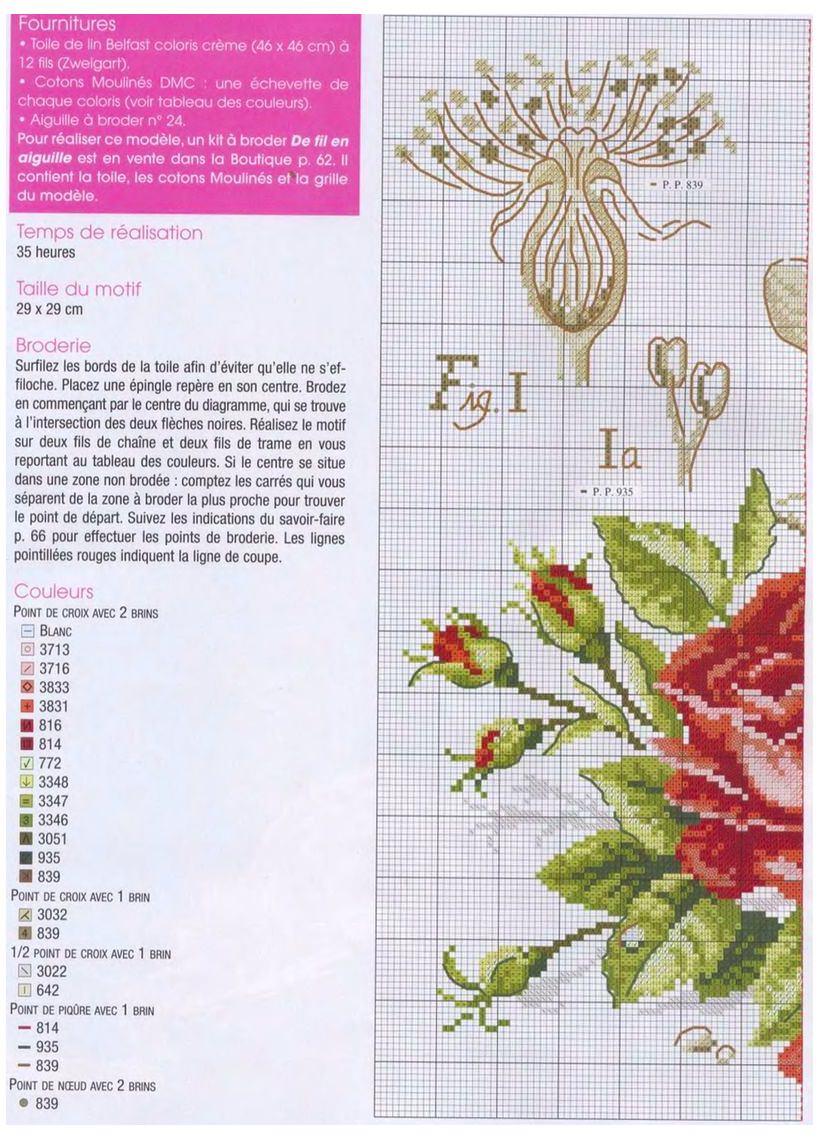
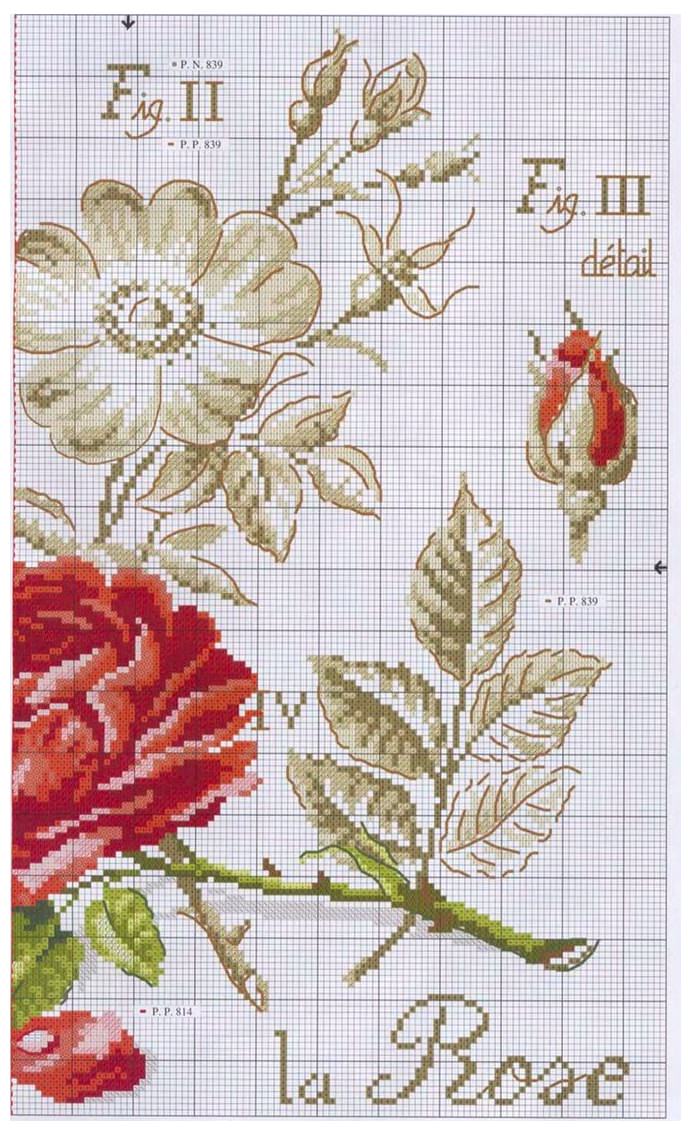
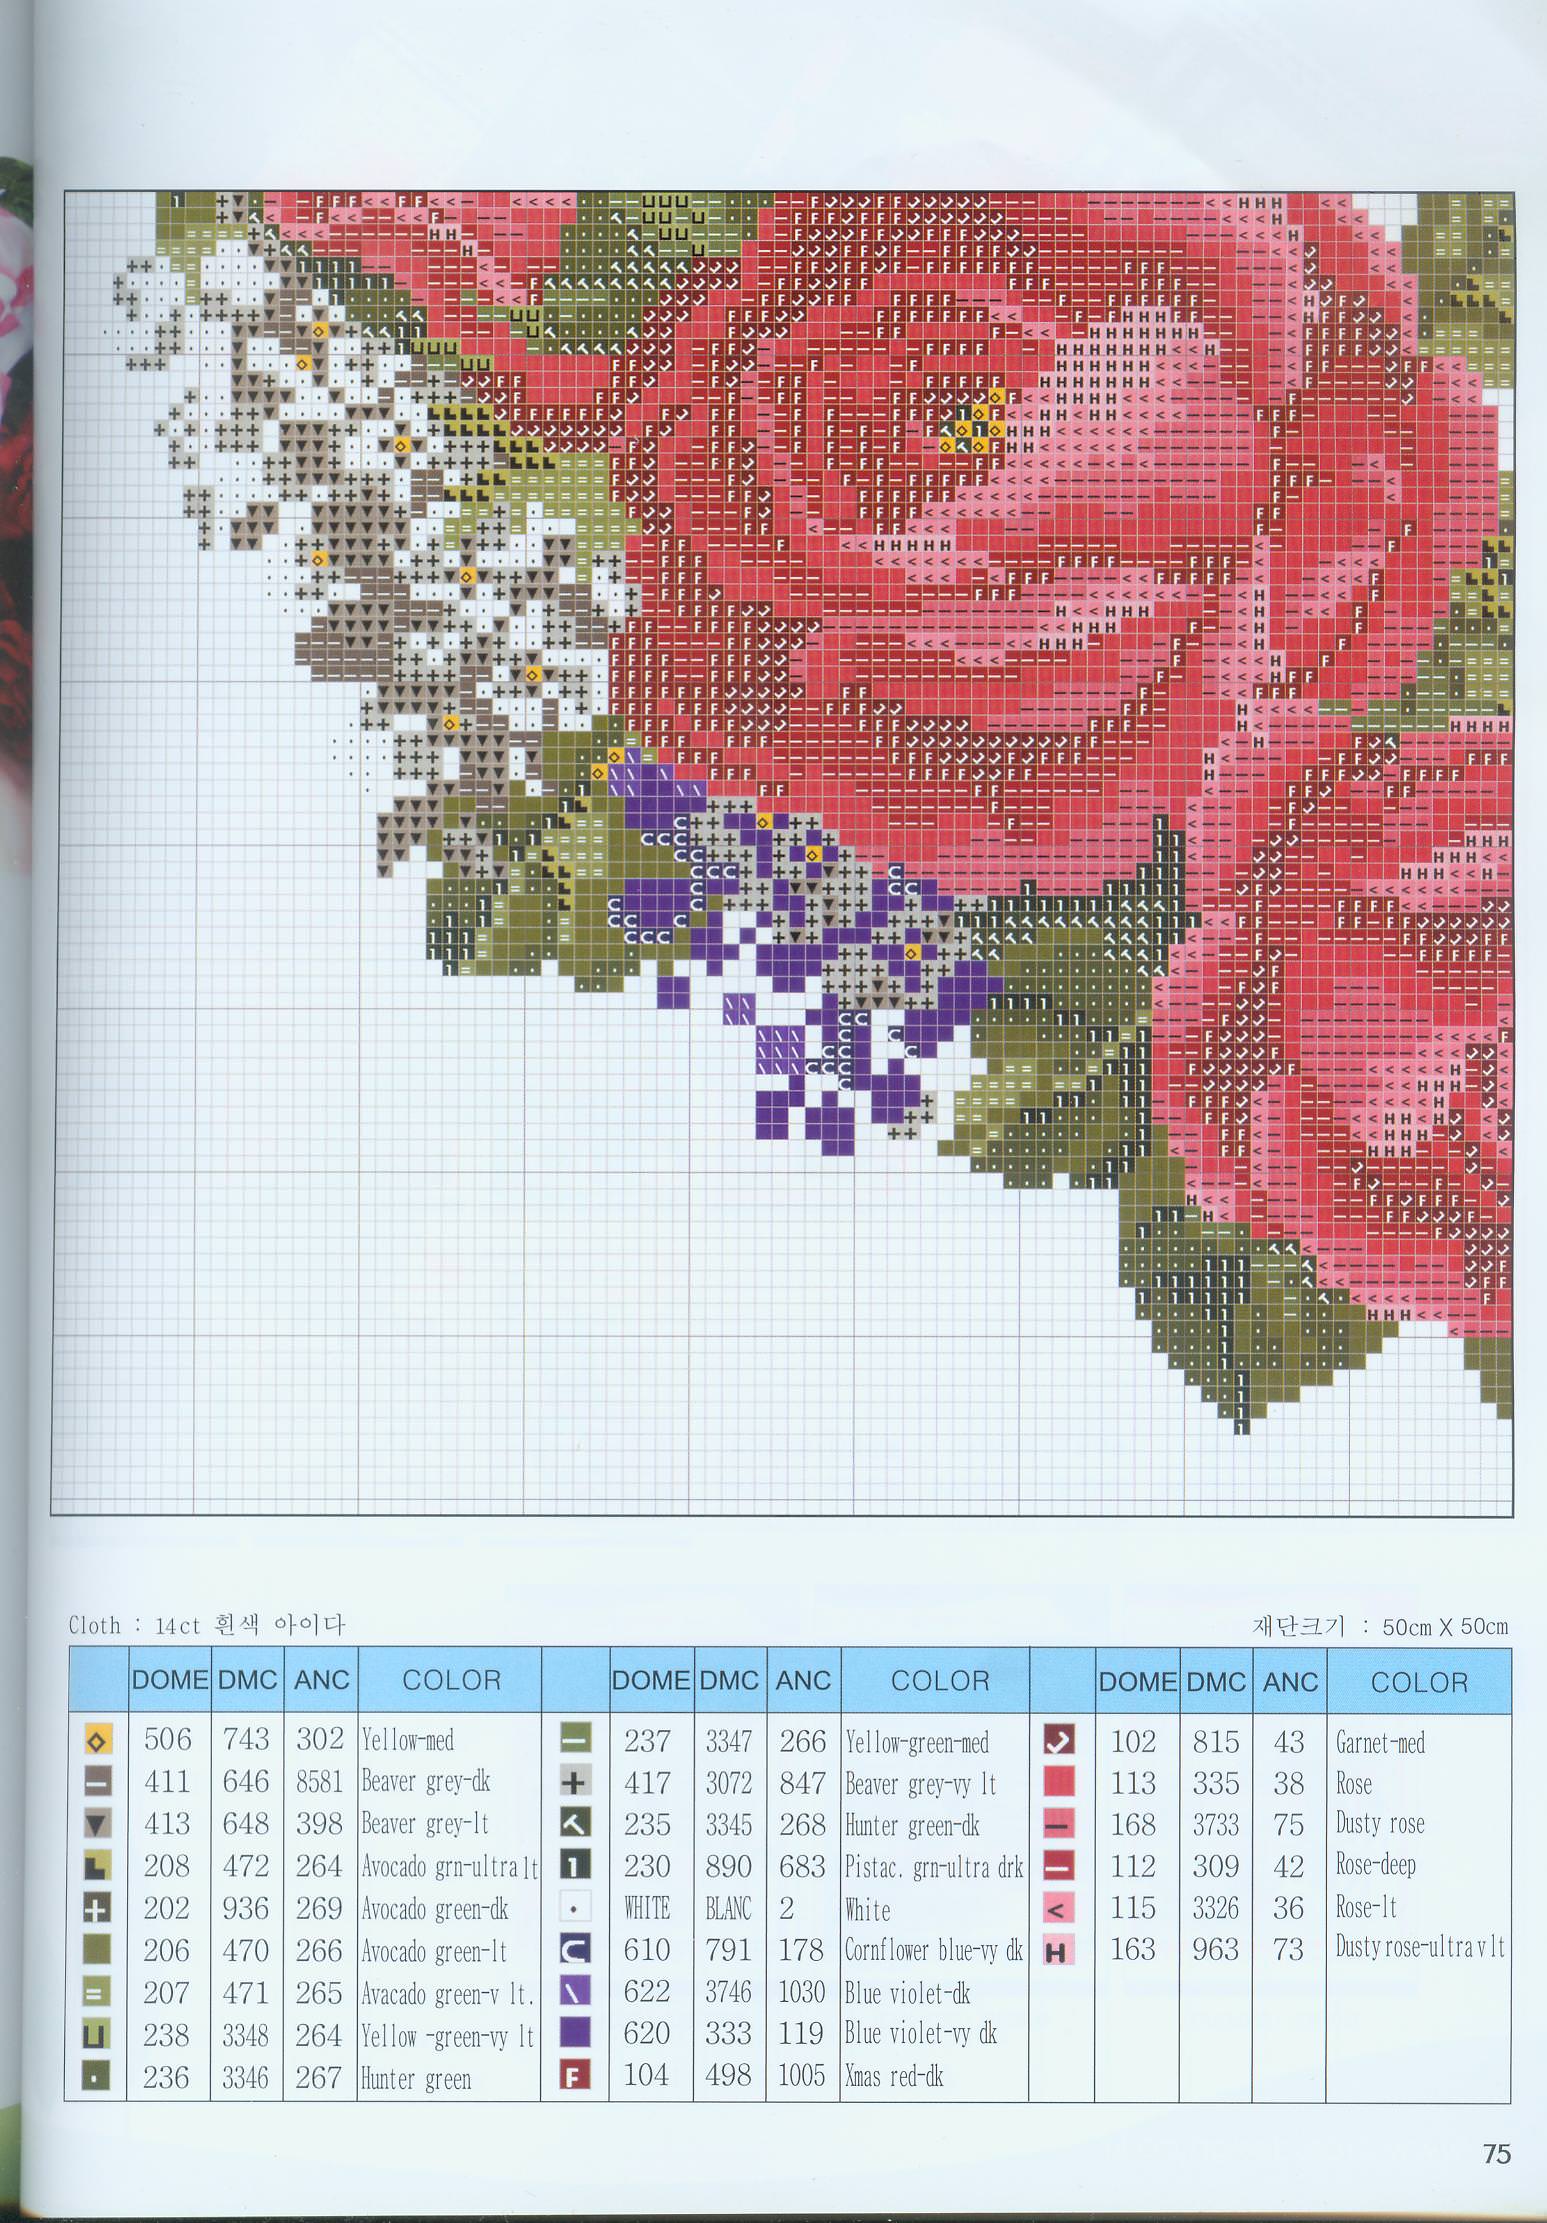
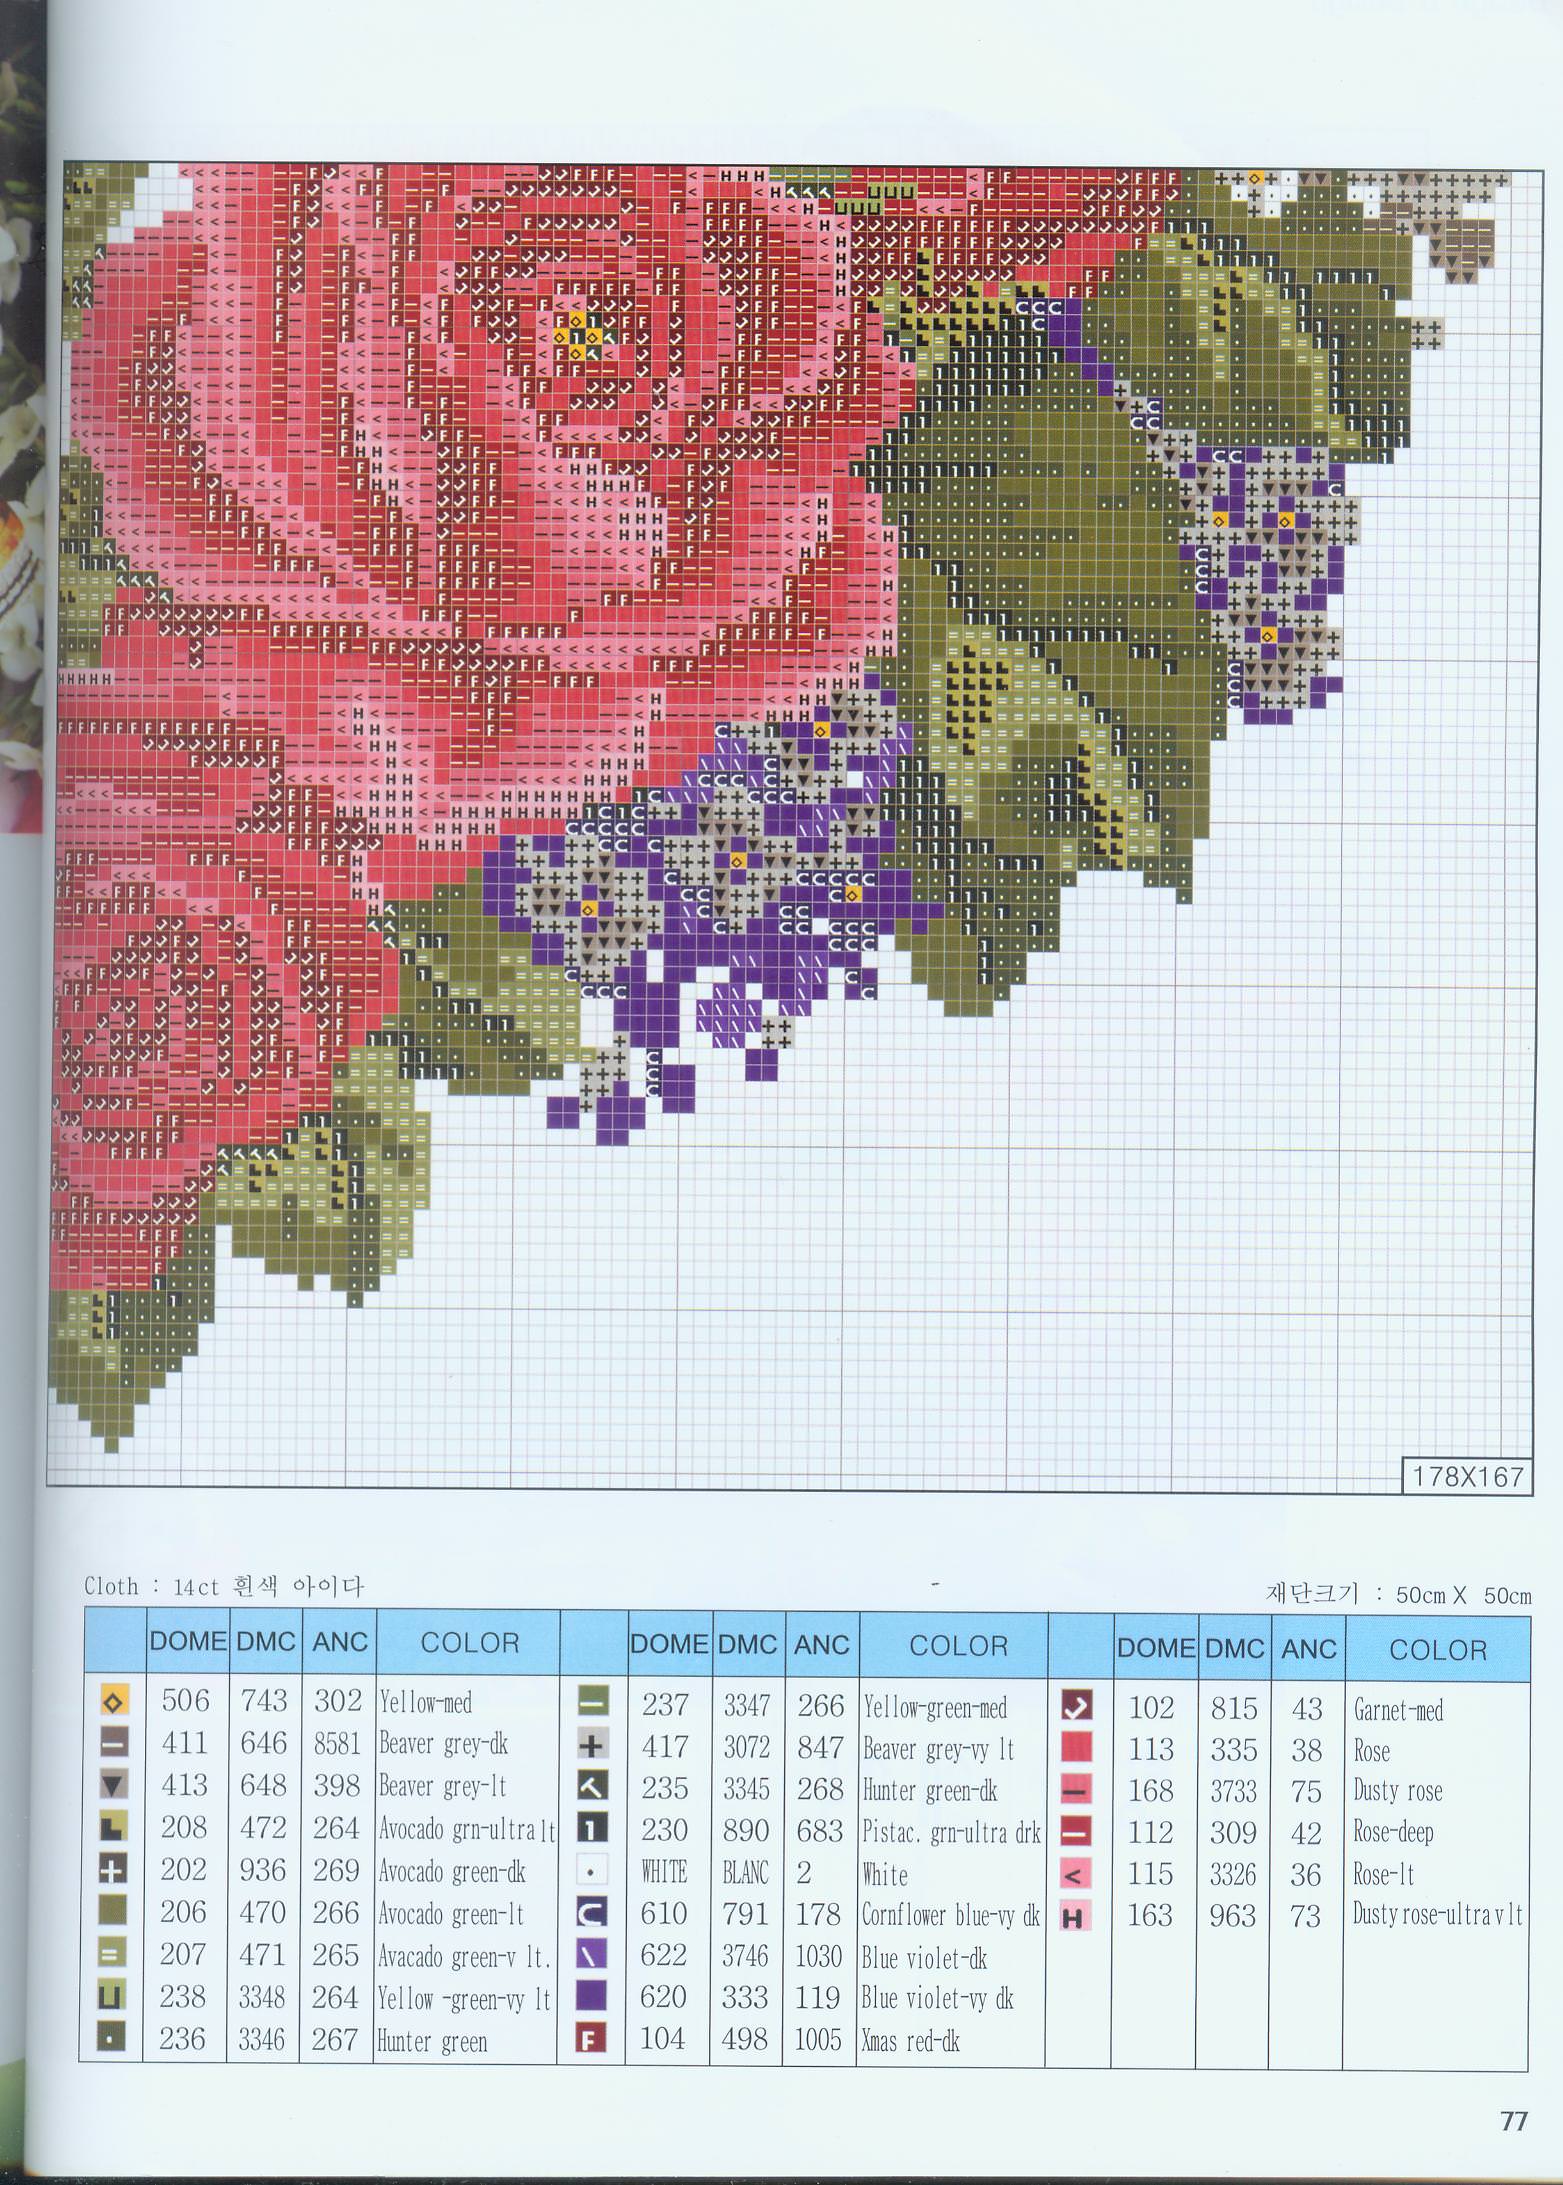
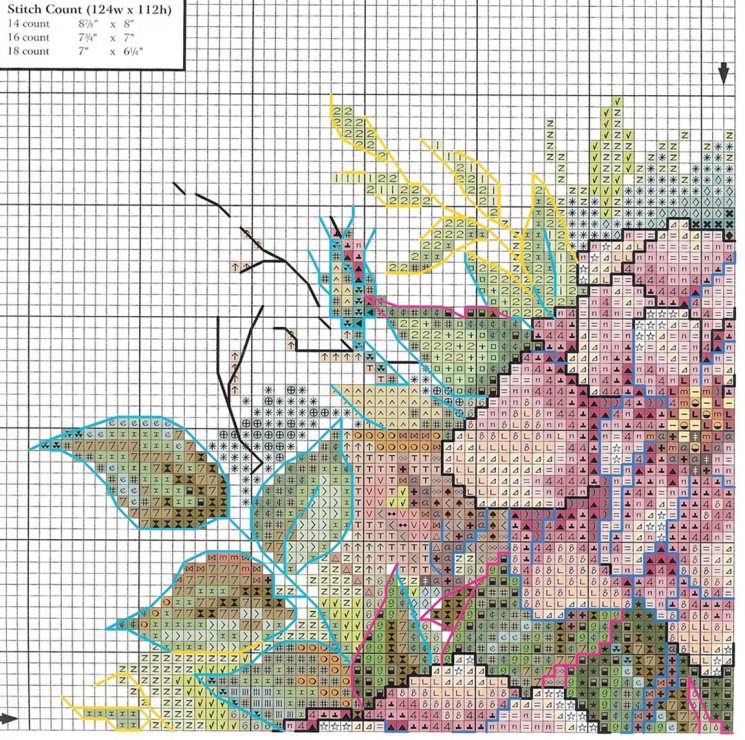
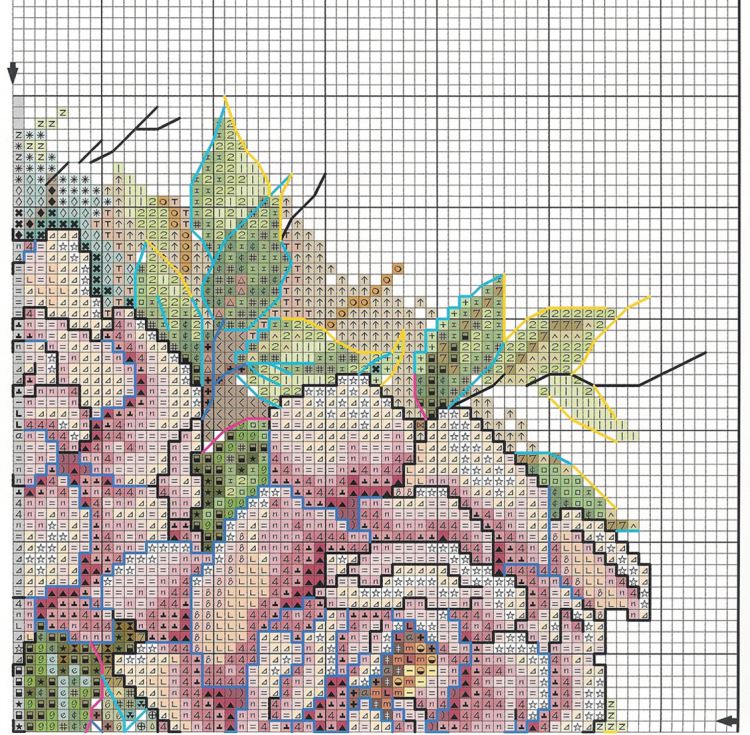
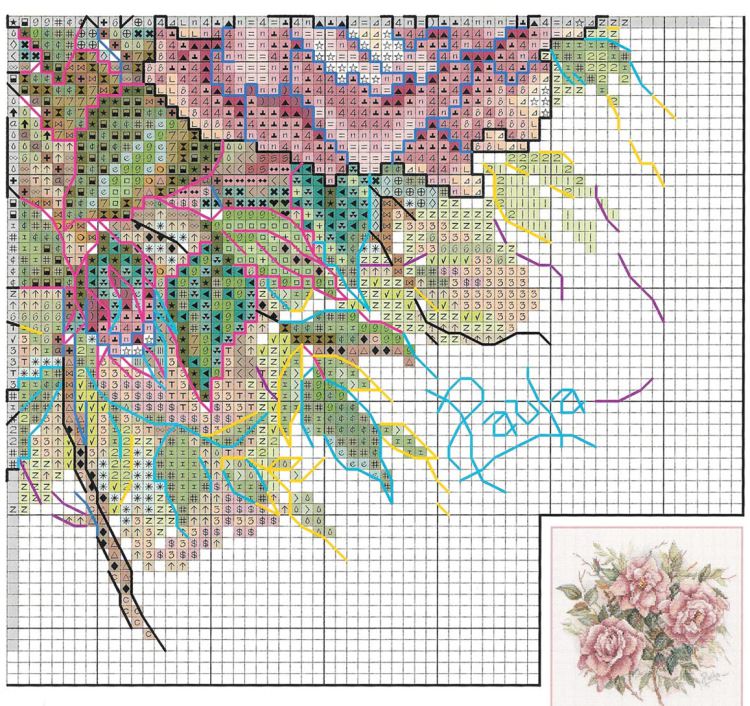
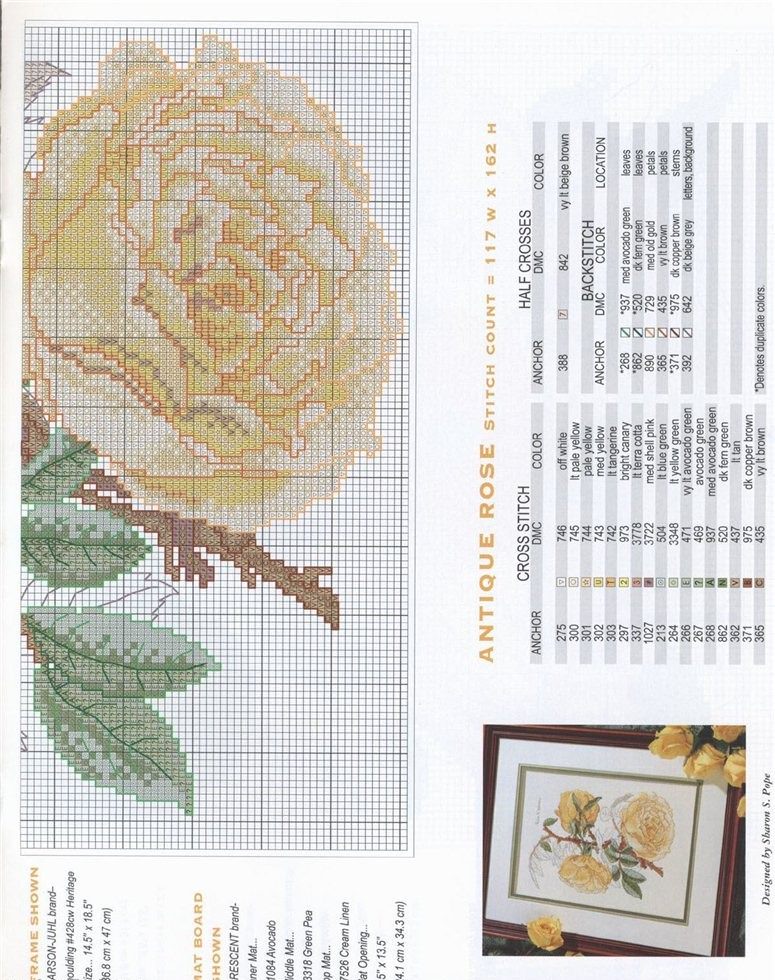
Schemes for embroidery of roses


Comments
Related posts:
 Cross-stitch embroidery of pions, cross stitch patterns with a description and a photo for beginners.
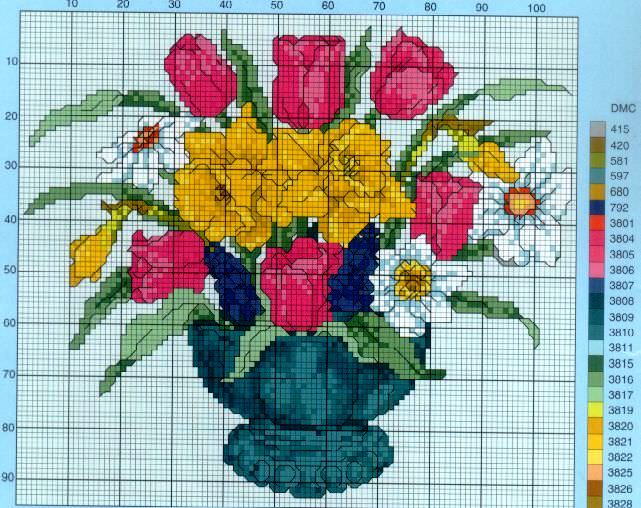 Cross-stitch bouquets of flowers scheme flower arrangements
 Cross-stitch embroidery: schemes for creating bright colors
 Cross-stitch embroidery: Lynx for the 2015 Competition, cross-stitch
 Cross-stitch embroidery designs for embroideries, cross-stitch embroidery on roses, free cross-stitch patterns for embroideries, a masterclass for embroidering pillows with roses according to the scheme