
Embroidery ribbons for beginners master class rose (video)
Content
- Choice of materials
- Roses for the lazy
- Video: master-class of the most simple roses from tapes
- The basics of embroidery
- Video: learn how to embroider roses with satin ribbons
- Embroidery on threads
- Video: how to embroider a rose with a ribbon of ribbons
- Embroidery according to schemes
- Basket of tapes
- Video: a lesson on embroidering a basket with satin ribbons
- Video: embroidery with ribbons of roses Helen Erickson
Every year the popularity of this kind of needlework, like
, Is growing steadily. Make a small
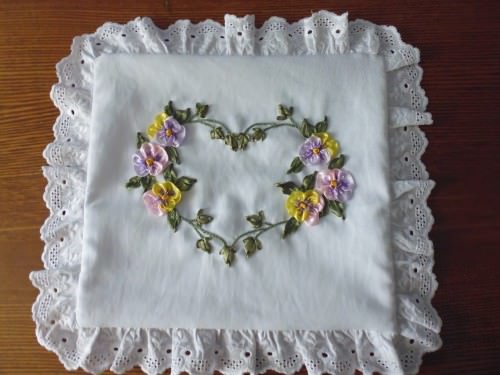
So simple that even a smallGirl, but it will look great! With the help of such embroidery, you can decorate not only the cushions or a small napkin, but also give a new life to clothes or a favorite bag. Most often as a figure choose flowers, especially popular roses. If you have long wanted to do something beautiful with tapes - learn a few videos, learn at least one master class and go ahead, you have to get it!


Choice of materials
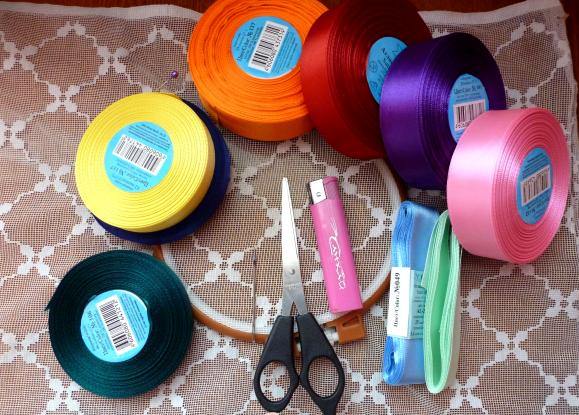
Before embroidery, you needPrepare all necessary materials. The fabric will suit anything, from a dense plaschevki to a delicate organza, but to begin with it is better to be trained on a canvas or sacking. The needle should have a wide eyelet and, preferably, a sharp tip (a needle with a blunt end will work conveniently only on the canvas). The width of the tape you can choose to taste, but do not forget that it is ideal for
Width of 1.5-2 centimeters. For some embroidery methods, you also need a thread - choose the most similar to the ribbon color, so that the work looks neat and elegant.
Roses for the lazy
If for some reason you do not dare to undertake embroidery of flowers, but strongly want to - try to make this basic option for
. You just need to twist the desired number of roses and their buds from
, Sew them and lightly light a cigarette lighter from the bottom. If the unruly ribbon does not want to curl up into beautiful flowers - look at the photo or master-class on this topic and repeat step by step. Now, from a wide tape with sharp scissors, make several leaves. Cut the edges with a cigarette lighter. Beforehand, presenting exactly how all the parts of the bouquet should be located, tightly sew them to the fabric. Complement the composition can be free loops tape or a scattering of tape knots.
Video: master-class of the most simple roses from tapes
The basics of embroidery
Before embroidering anything, it is necessary to makeOn a tape a bundle so that it fits well on the fabric and does not jump out at the most inopportune moment. To do this, insert the tip of the thread into the needle, at the opposite end, bend several centimeters of tape and pass through this place with a needle. Be careful if the needle is fairly thick, it can damage the narrow satin ribbon.
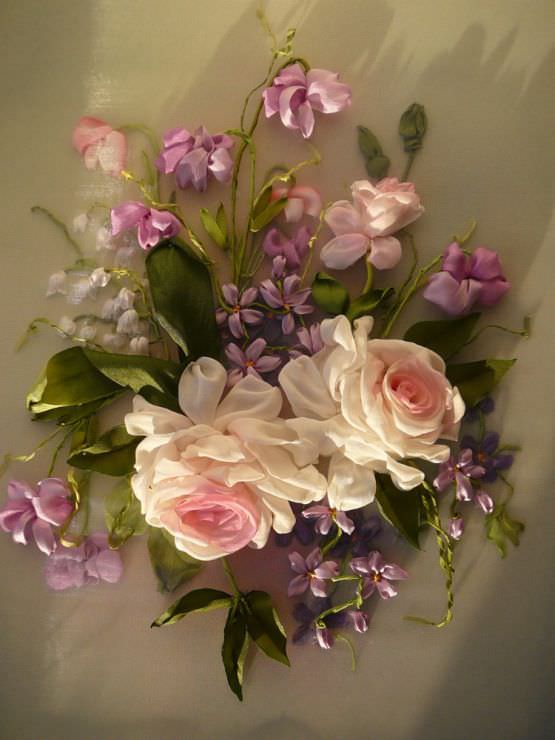
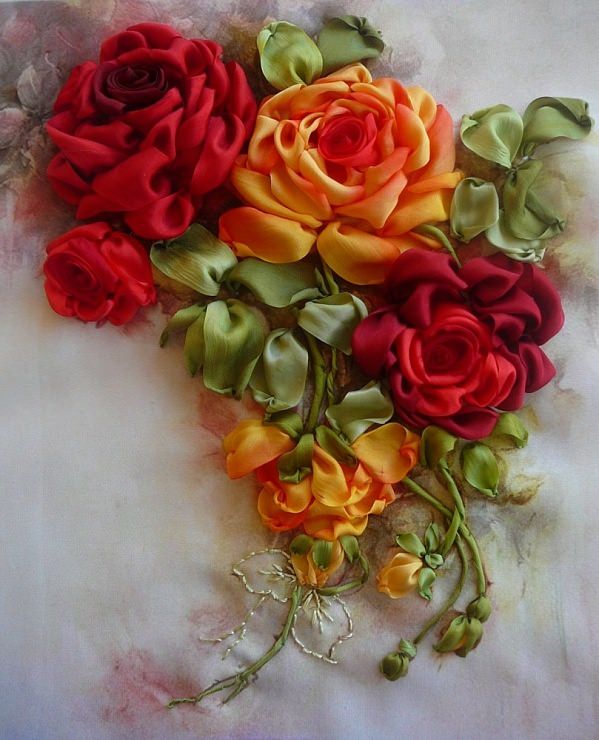
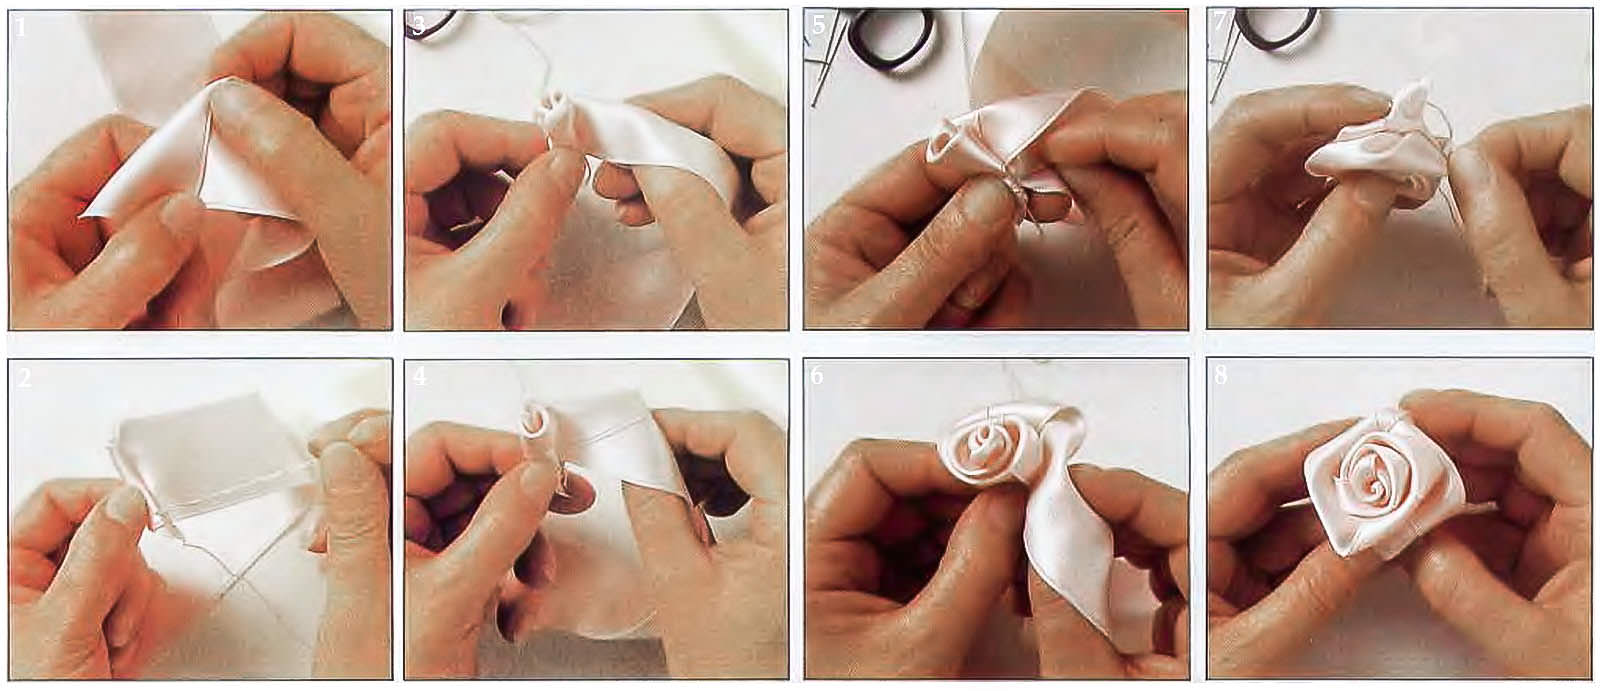
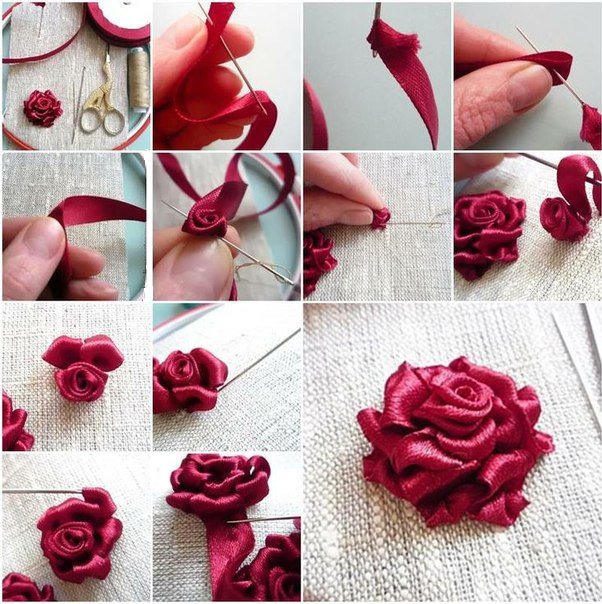
To make a simple rose from satin ribbons you can,Even if they never considered embroidery your skate. Take the ribbon in hand and near the end try to twist a small rosebud. It will become the middle of your flower. To the tape does not creep, gently sew it from below with a thread and sew it to the fabric. When the bud is fixed, work directly with the ribbon and create a flower. Use a tape about two meters long to create a lush rose, for a small, respectively, enough smaller piece. Slide the ribbon into the needle and start "wrapping" around the bud, making small stitches. Make sure that the shiny side of the tape is always on top, otherwise the picture will not be so bright. After training, try to create a rose from a wide tape - it will be more voluminous and will become a good accent in the composition. See the photo.
Rose can not immediately turn out the way you areIt would be desirable - the tape will be twisted, ugly to lay down or you can not form the ideal flower from the first. Do not despair, you need only a little practice. To help the flower beautifully "lie down" on the fabric, try additionally lightly flashing it with a thread. Watch a few videos to better understand how to handle a naughty ribbon.
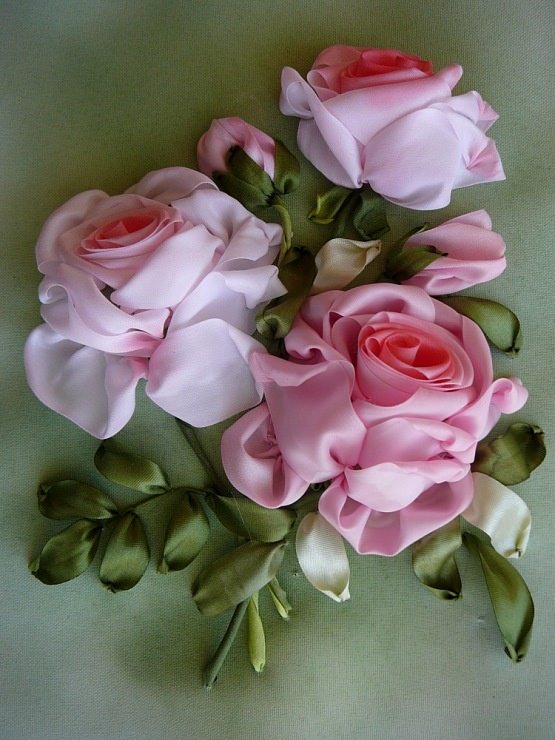
Do not forget to make your flower stem andleaves. The leaves are embroidered with two stitches of thin satin ribbons, or with one stitch, if the ribbon is wide; Similarly, sepals are created. To embroider a stalk, it is necessary to twist a narrow ribbon and sew in the form of a thin sausage. To decorate the picture and give it a complete look, sew a few small buds on the side, make green threads "grass" or decorate the flowers with "dew" from small transparent beads. Perhaps at first it will be difficult for you to imagine exactly how all the pieces of embroidery should be located - training videos or photos will help you to solve this.
Video: learn how to embroider roses with satin ribbons
Embroidery on threads
This variant of the rose is also suitable for beginners andCompletely embroidered on the fabric, that is, twist at the beginning does not need the middle. Fix the thread on the canvas and from this point make five identical stitches along the length in different directions, like a star. The length of the stitch will depend on the splendor of your flower. Now pull the ribbon to the front side near the middle of your "star" and start circling it, alternately under and above the stitches. Do not over tighten, otherwise the flower will be very tight. Instead of a thread, you can immediately use a tape, the main thing is to do everything carefully, so that the embroidery does not turn into a process of damage to the tapes. A rose created in this way will be more voluminous and interesting than the flower described in the previous version. For clarity, view the photo and video.
Video: how to embroider a rose with a ribbon of ribbons
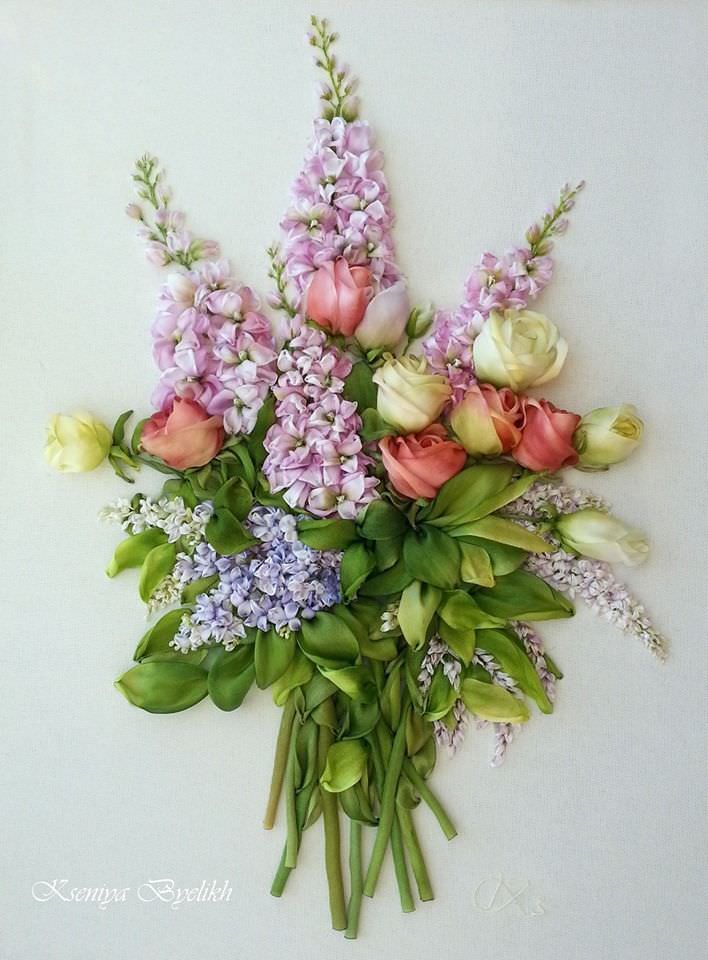
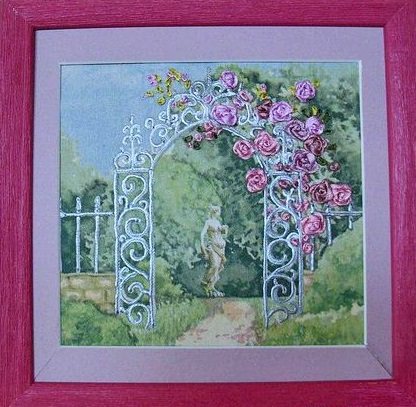
Embroidery according to schemes
Experienced masters, creating paintings with
, Use different schemes that are transferredFrom paper to fabric, and then used as a contour for embroidery. Probably, for beginners this method will seem frighteningly difficult - but do not rush to conclusions. Try to choose a small picture with a bouquet (for this purpose not only schemes, but also painted bouquets or photos are suitable) and with the help of carbon paper or chalk to transfer it to the fabric. You not only will be easier to imagine where there will be an element of the composition, but also control the size of flowers will be easier.
Basket of tapes
To make the flower arrangement even moreInteresting and complicate the task, you can "put" a bouquet of satin roses in a basket or vase. To do this, you will need to find the appropriate pattern and carefully transfer it to the fabric. Stock up with ribbons of necessary colors and embark on embroidery.
To create a realistic basket, youYou will need two shades of brown tape. With a lighter ribbon, embroider the basket with flat horizontal stitches. Now take another color, twist it in a tourniquet and pass through one horizontal strip with even stitches. Calculate the distance so that these vertical bundles are at equal distance from each other, and do not forget that on the front side they should appear in staggered order. To make a pen, first draw the small contours of the same color on the drawn contour. Now take a long section of another color and go through each stitch on the front side, as if winding a ribbon. Similarly, you can make a basket of satin ribbons of several colors. See the photo.
You can embroider a basket in a simpler way. To do this, you need a wide tape, which must be stacked in vertical stitches, not reaching the top and bottom edges. Thus, the stitches will then narrow, then expand along the edges, and the middle will be the same. Do not forget that the tape should not be strongly tightened, it will destroy all the lightness of the picture.
Video: a lesson on embroidering a basket with satin ribbons
This master class contains basic techniques,Used for embroidery of roses and useful tips for creating a flower arrangement. After watching the video or finding interesting and understandable lessons on embroidery of other colors, try adding them to roses and creating new combinations.
Video: embroidery with ribbons of roses Helen Erickson
Comments
Related posts:
 Embroidery ribbons for beginners video lessons and master class
 Embroidery with ribbons master class pansies video and photo
 Embroidery ribbon paintings in the photo and video master class
 Tablecloths embroidered ribbons in a master class (photo)
 Embroidery of maki with ribbons in master classes (photo)