
Envelope for money on March 8 do it yourself
 In today's master class we will tell you howDo it yourself on March 8th. A simple spring card with a neutral floral design is a great design option for a cash present to a friend, mother or grandmother, colleague or teacher. By the way, it is not necessary to do it in the form of an envelope: a postcard of such a plan will look no less cute.
To make an envelope on March 8, you will need:
designer cardboard with a floral print;(click on the link to download such a file); narrow white lace; three half beads (or buttons to match the color of the cardboard; can be replaced by circles from the same cardboard); a piece of paper for cutting out a flower pattern; PVA glue; double sided tape; Super glue; cutting mat; breadboard knife; simple pencil; eraser; ruler; knitting needle or toothpick for basting folds; a small compass or cap with a diameter of 3-5 cm or so; scissors simple and curly; clip for papers. 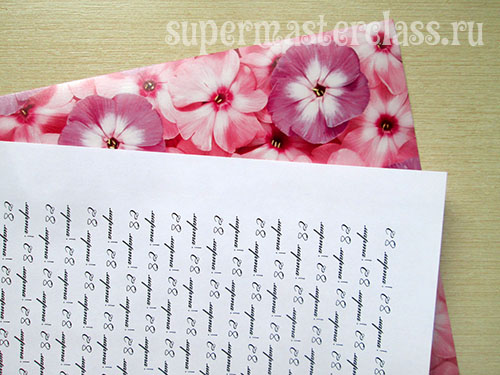
Envelope for money on March 8: master class
Envelope on March 8 do it yourself: Cutting On a sheet of A4 design paperboard, we draw a pattern for a future envelope for money on March 8th. By the way, if you do not have such a motley cardboard with a floral motif, you can take any solid colored or even white cardboard. It will be more concise, but no less stylish. I built the pattern based on the size of the bill: it should be free to enter, but, of course, have no chance to fall out of the envelope. 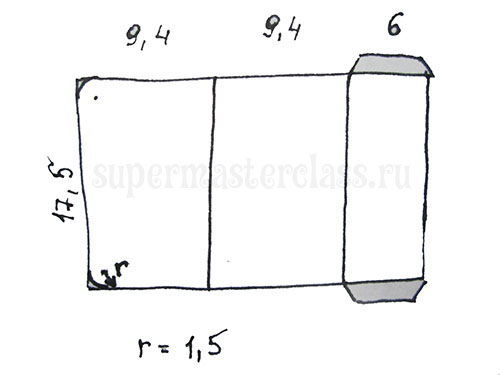 At a distance of 1 cm from the edge we draw a horizontala straight line on which we mark points at a distance of 9.4 cm, then another 9.4 cm, and finally, after 6 cm. From this mark we draw a vertical segment 17.4 cm long. At the bottom, lay down the same. On that side of the rectangle, which is 6 cm, draw wings for gluing.
 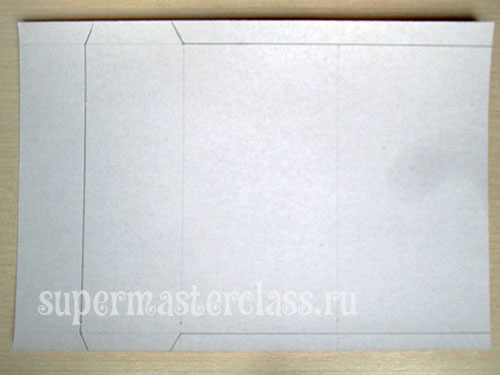 I decided to round the envelope cover. For this, I measured the point for the compass needle and drew a quarter of a circle with a radius of 1.5 cm.
 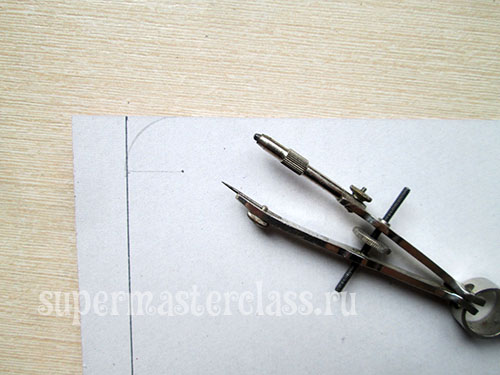 Cut out the scan along the contour with straight scissors; I cut out the edge of the pocket for the bill with curly scissors. Immediately we outline the folds under the ruler with a thick needle, a toothpick, or a writing pen.
 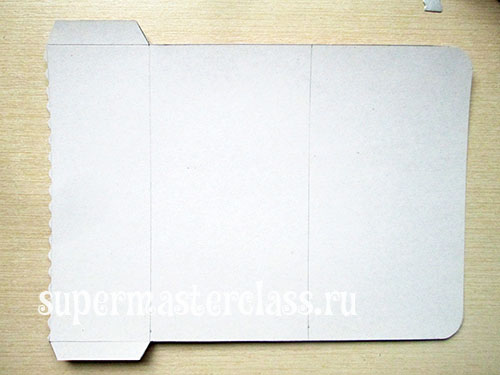 All folds well rinse under the line. Eraser erases unnecessary lines.
 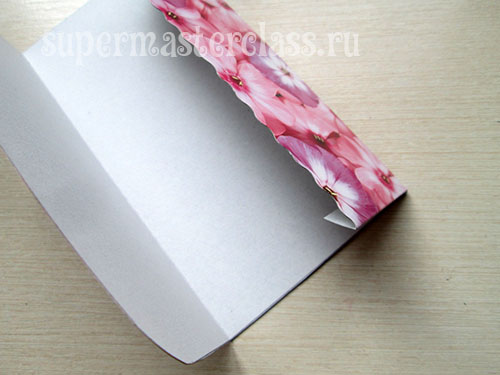 How to make an envelope on March 8: assembly and decoration On the wings we glue strips of double-sided tape or apply any glue suitable for your work. If you plan to decorate this part of the envelope with lace, it's time to paste it at this stage (I did it later and faced some inconveniences).
 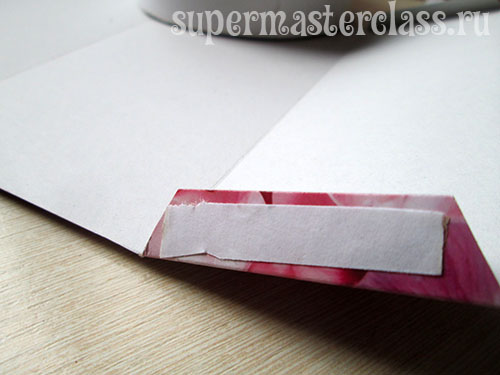 We glue.
 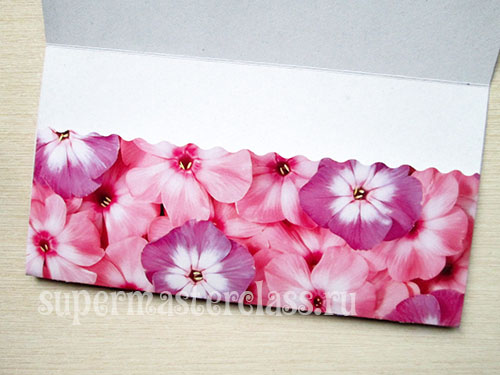 Check how convenient it will fall into the pocket bill. If necessary, adjust the size and continue to work.
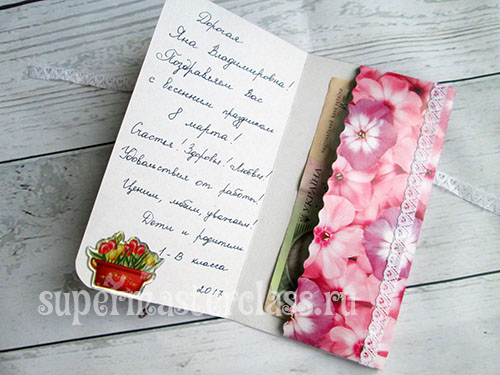
 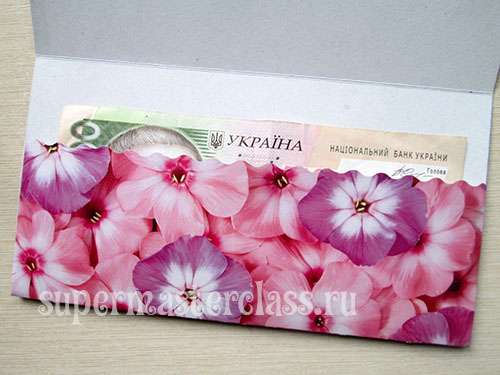 While the outer part is not acquired convexelements, make a greeting inscription on the inside of the postcard-envelope on March 8 is convenient now. Decorate arbitrarily, you can paint or add a thematic sticker.
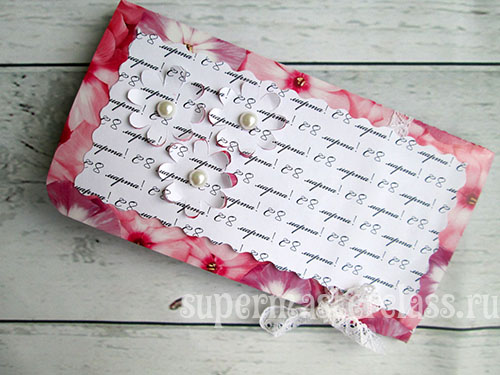
 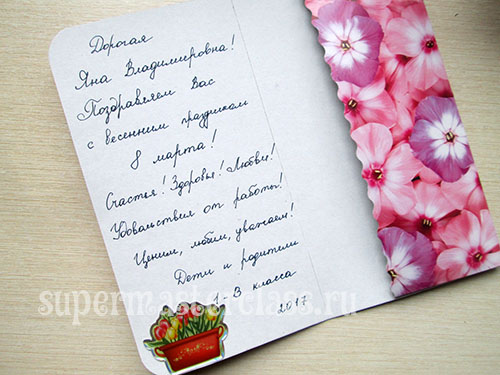 We make a cover. We make a rectangle out of paper with the March 8 print, each side of which is 1-2 cm shorter than the corresponding sides of the cover. I have its dimensions - 15.5 x 7.4 cm.
  This rectangle is cut with the same curly scissors as the pocket cut. If there are pencil basting, wipe them.
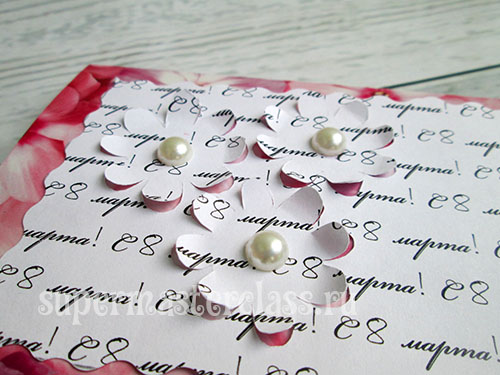
 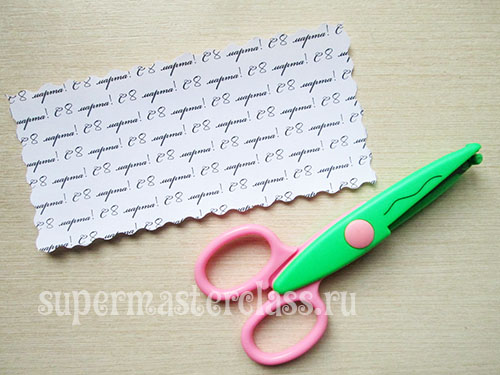 From a folded leaf 8 times (as for a snowflake)cut a simple little flower. It is only important that the petals are spaced apart and elongated. Everything else is up to you. From the seamy side of the white rectangle draw three flowers in simple pencil with a pattern.
 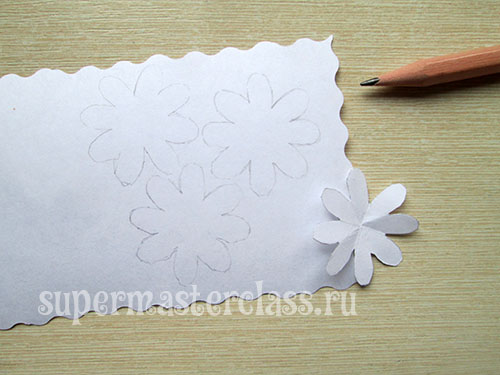 We place our rectangle on the cutting mat and cut petals with a model knife. The secret is that the slots from each petal do not go into the slots of the neighboring petals!
 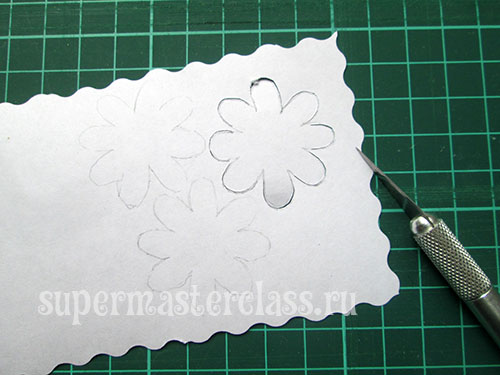 Cut through all three flowers in this way.
 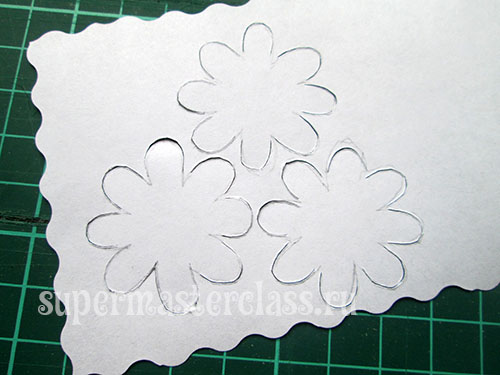 We return to the knitting needle or toothpick, with which we marked the bends, and with its help twist the petals upwards.
 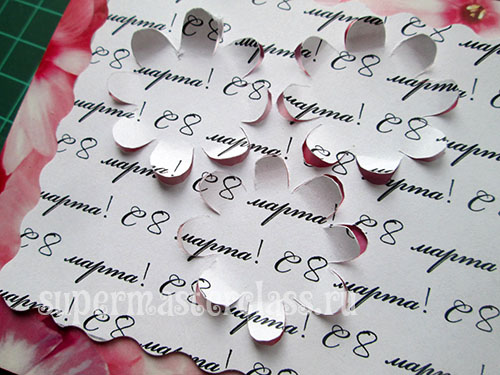 Not very interesting yet. Add in the middle - semi-beads under the pearls. Glue them best with superglue.
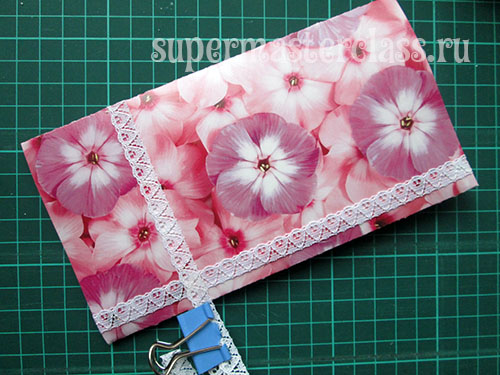
 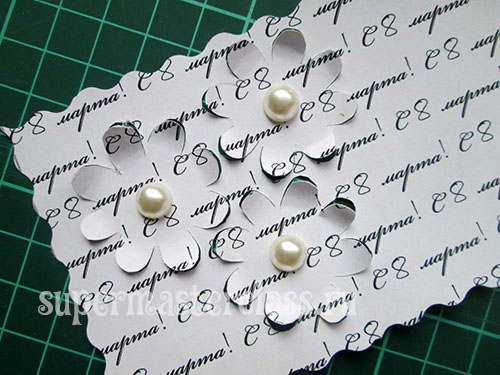 I remembered the lace and wrapped it in my pocket outside and inside the envelope, tucking the edges into the gluing points.
  Now in a knotted condition, the back side of the envelope will also be smart.
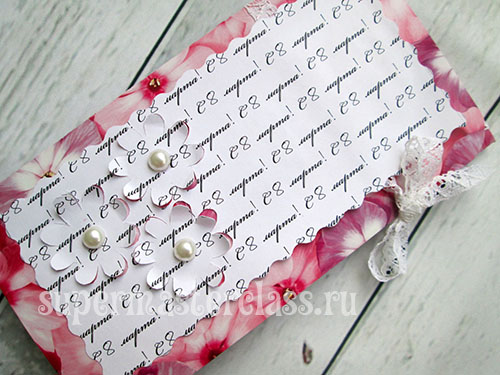
 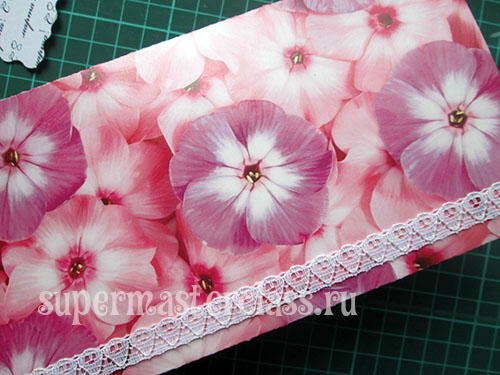 I did not immediately determine how the outset would go,on the outer part of the envelope or on the inside. If you want to put it on the inside, you need to make 2 notches across the width of the tape. If on the outside - cuts are not needed.
 We put around the envelope tape for tying. I did not lead her in the center, but shifted to the right third. I determined a suitable place for the tape and secured it with a clip for papers. Now turn the parts with flowers. How to lay it - straight or at an angle?
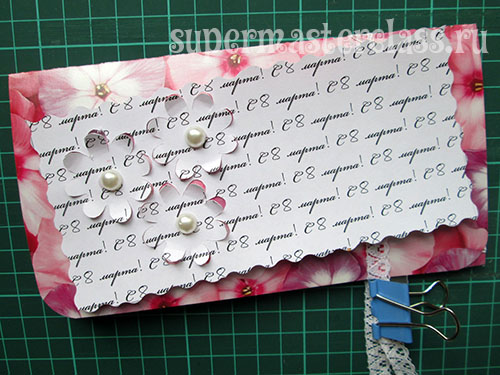
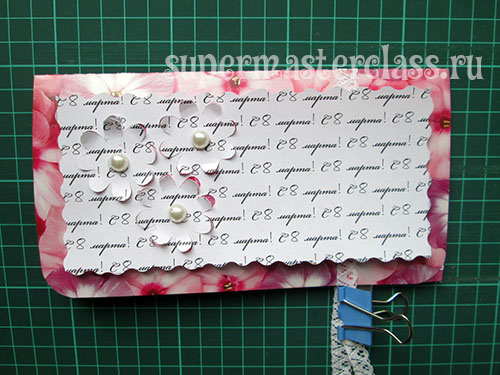 On both sides we glue the pieces of double-sided tape - so that the tape does not enter the slot and at the same time fix the tape.
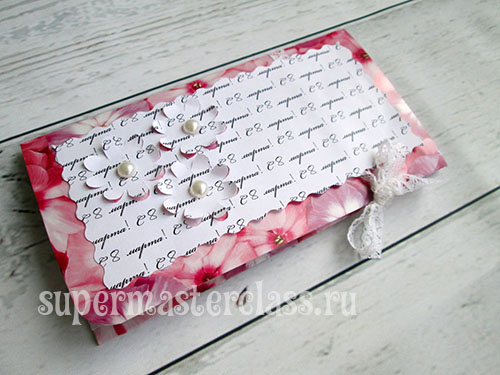
 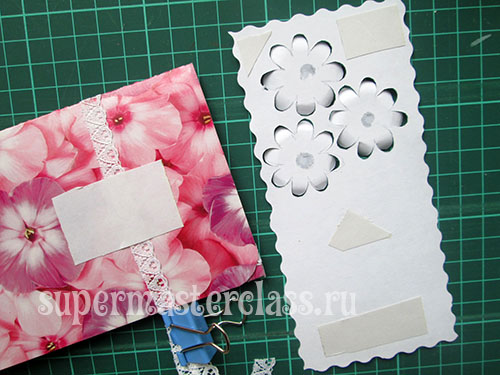 Glue the floral part, put the bill, tie the ribbon on the bow - and the envelope for the money on March 8, made with your own hands, is ready.
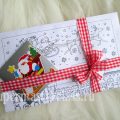
 Eva Casio specifically for the site Workshops on needlework Previous article: Next article:
Comments
Related posts:
 How to make an envelope for money: master class
 A simple gift envelope for money: a master class with photos
 New Year's envelope for money with their own hands (with a template)
 Envelope for money do-it-yourself in the style of Minnie Mouse: master class
 Original envelope for money with your own hands, advice and recommendations for its creation.