
Flowers from beads production and weaving machinery (photo)
Content
- Lessons of creating colors from beads according to schemes
- Beading of trees and ornaments
- Video: Plait flower for brooch according to scheme
Today we will look at some of the simplestSchemes for beginners weaving masters from beads. These schemes with the description will help you understand the basic principles of creating fragile and delicate colors from beads, on the basis of which you can invent and make your own unique bouquets. Each such schematic picture is a small master class for beginners and experienced needlewomen, if you learn how to read beading patterns, then you can easily weave any flower, guided only by a scheme without description.
Lessons of creating colors from beads according to schemes
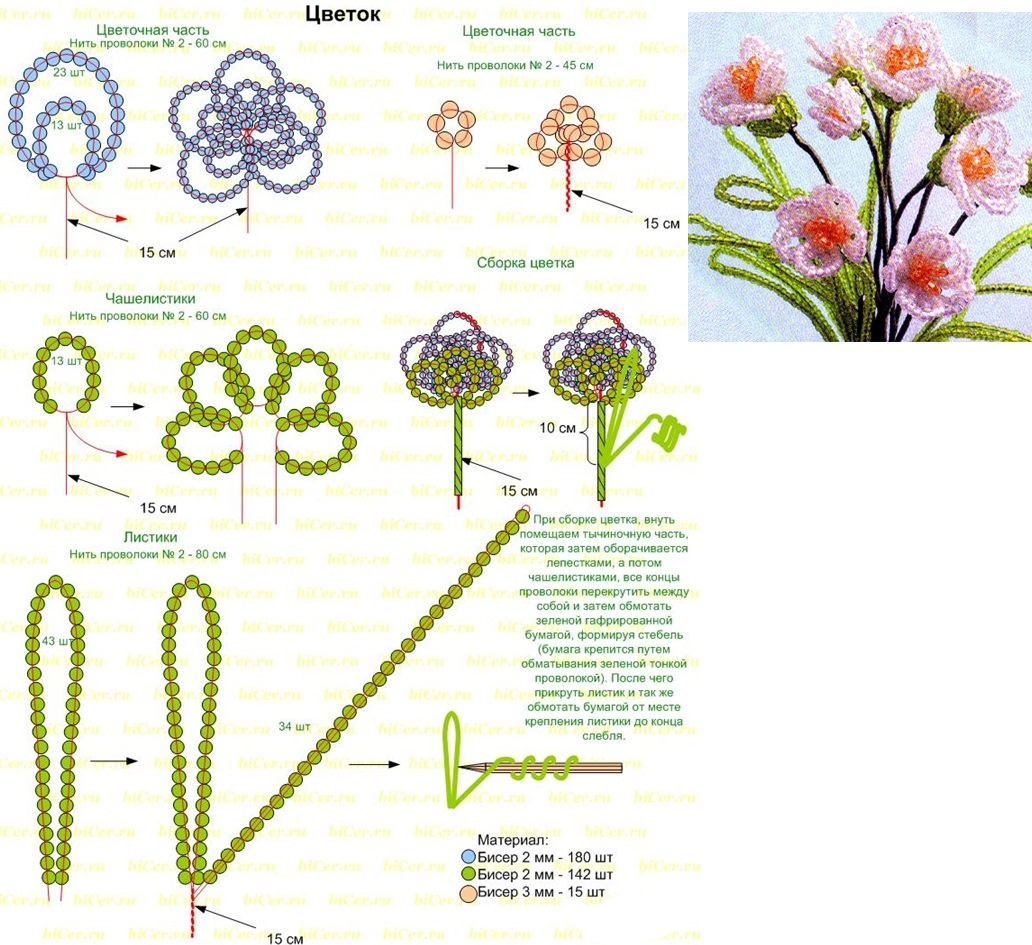
Master Class No. 1: Forget-me-nots 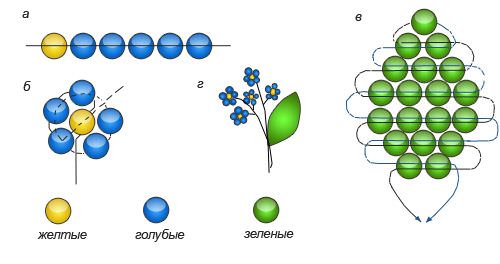
Remember the lovely and touching flowers - forget-me-nots. For these colors, three colors of beads are used: dark blue or bright blue, yellow and soft green. The flower is absolutely simple. At the length of the wire (about 10 cm), 6 beads are strung: 1 yellow and 5 blue, as seen in the diagram. The free end of the wire is cut into the second, third, fourth blue bead, then into the yellow one. The ends of the wire are twisted under a yellow bead. The flower is ready. Green leaf is performed according to the scheme "in": a cross weaving in 7 rows. Combine several flowers into one stem, attach the leaves and the mini-bouquet is ready.
Master Class No. 2: Chamomile 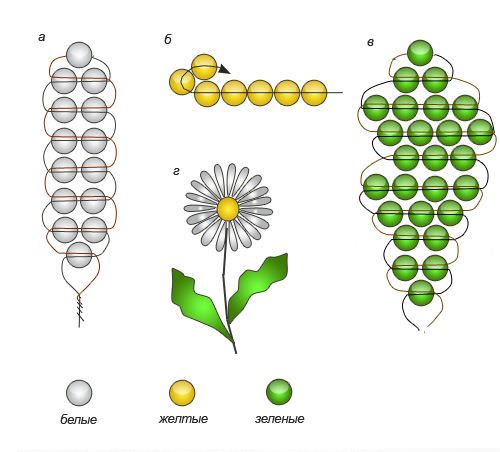
For a bouquet of wildflowers, you mustYou will need chamomile. To create a field chamomile with their own hands will take more time than forget-me-nots. But no flower will repeat the true Russian beauty of the charming chamomile. The bead set is almost the same, only blue beads, replace it with matte white.
Of white beads, 10-12 petalsScheme "a". The wire is better to take silvery. The core can be made according to the same pattern as the forget-me-not flower. Chamomile leaves are more complex and carved than in the first scheme. The more interesting it will look like a ready flower.
Master-class №3: Bellflowers 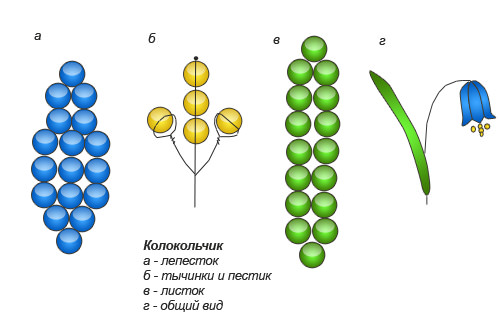
Wild flowers are beautiful and simple, like herselfnature. If you collected flowers in the field, you certainly ran into fragile and naive bells. Their natural color varies from pale blue to dark purple. Therefore, you can choose beads of this color, which you prefer. According to the scheme "a" it is necessary to weave only 5 petals, since you will assemble them into a cup, repeating the shape of the bell. Then you need to make a stamen out of yellow or burgundy beads, depending on the color of the petals. The wire itself, on which the stamen is formed, will become the basis for the entire flower. Therefore, its length should be sufficient. A small bell gathers around the stamen, and a green leaf, made according to the "c" scheme, is attached to the stalk at the bottom.
Master class № 4: Lilia Successfully completes your first bouquet, completely created by yourself, a gentle and shy snow-white lily.
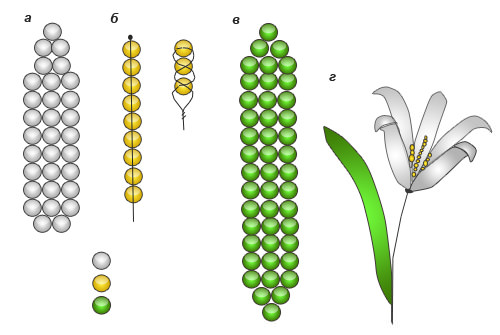
To make a lily, you will need the same setBeads, as for chamomiles. Only the lily is a larger flower, which means that more beads will be required. The patterns of the petals and leaf for the lily are similar to those of the bells. Only the flowers of beads differ in stamens. The lily has three, one long and two shorter. Scheme "b" shows the number of beads for the stamens, and to make them thicker, the wire with yellow beads twists along a tight spiral.
Now that all the flowers for the bouquet are ready, youYou can make of green beads additional greens of any format to revive wildflowers. You can pick up a bouquet in a vase or a basket arbitrarily, moreover, you can make different variations of bouquets depending on the mood and the case.
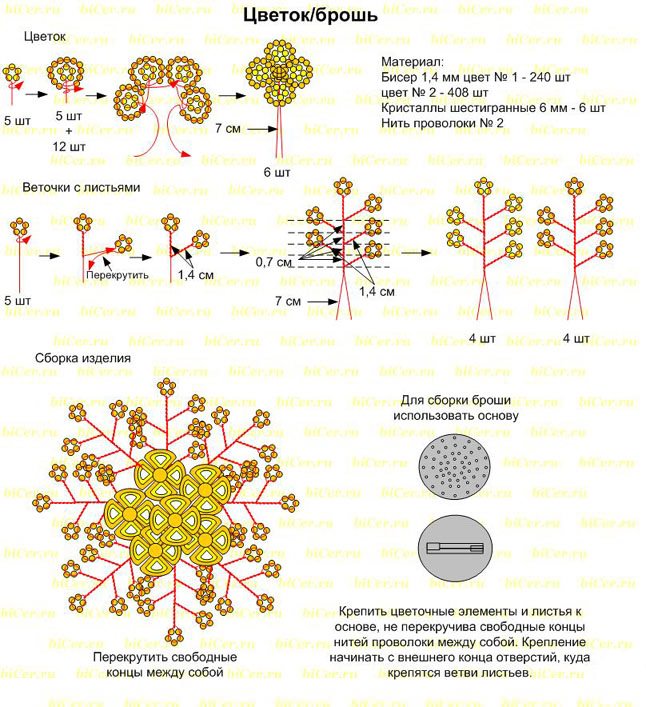
Flower of beads and bugles 
We present you a photo of a flower made in three rows of bugles and beads. Seredinkoy serves as a large bead.
Scheme of weaving for such a product is not required, as the photo shows very clearly how a flower is made. Varying the size, color and type of beads, even on this pattern, you can create different flowers.
By this principle, you can do anything. Elements of missing greenery, wings of a dragonfly or a flower for hair clips and brooches.
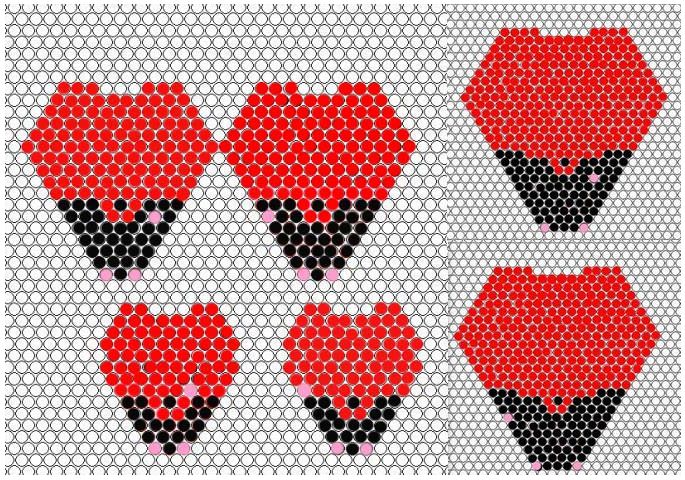
Schemes are required for complex compositions, for example for techniques such as mosaic weaving.
Master-class № 5: Rose in mosaic technique 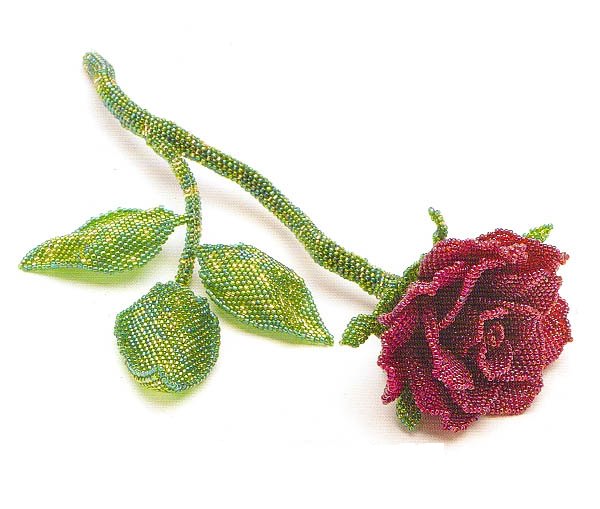
It should immediately say that such a flower from beadsIt is not quite easy to do. The work will be painstaking and complex, but the result is worth all the effort. The rose turns out to be voluminous and alive, especially if you use 2-3 shades of red and green beads to create a flower.
For a beautiful and natural rose from beads you will need:
- Needle for beadwork;
- Thread from nylon or fishing line;
- Beads of red and green in different shades;
- Base for stem (rod or wire thickness 2-3 mm);
- scissors;
- A round base with holes.
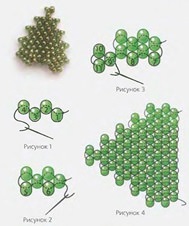
Let's start our master class with the description of the manufactureLeaves for the rose. The size of such sheets can be made different. You can strictly follow the scheme presented below, using two shades of green beads. Moreover, the color can range from dark green to light green. For our case, we will slightly change the color scheme. We mix two shades of bright green pearl beads and we will dial beads on the needle in any order.
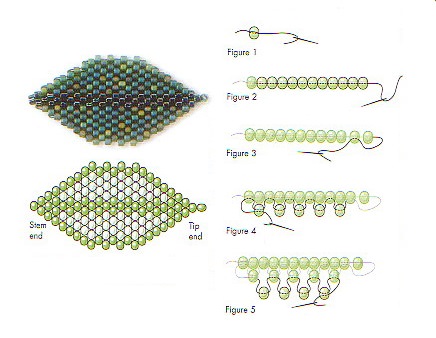
The rose will need three leaves, whichSewn to the side branch, as seen in the photo. To make the leaves and petals better keep the shape, use a thread or fishing line 0.2 mm thick. When you begin to weave some details, the first row will not be exactly flat. So it should be, continue the weaving according to the scheme, and after 2-3 rows the element will start to take the desired shape.
Next, the master class goes on to weaving the greenSheet. You need to start from the middle. First one half of the sheet, then the second one. If you use more than two shades of green, make sure they are close in tone.
Then we begin to weave sepals. The roses are elongated and thin. To weave them will not be difficult. They are sewn at the very end of the work along the perimeter of the finished flower.
Now let's talk about the petals. They can be of different shapes, you can create a scheme for them yourself. They are woven the same way as the leaves, starting from the center to the edges. First you need to make one half, then the other. On two pictures you see two bright examples of mosaic beadwork of rose petals. You can try any of them, everyone is worthy of attention. They differ somewhat in shape and color scheme, but each of the schemes will help create a beautiful rose from beads. Now let's take a closer look at weaving the petals.
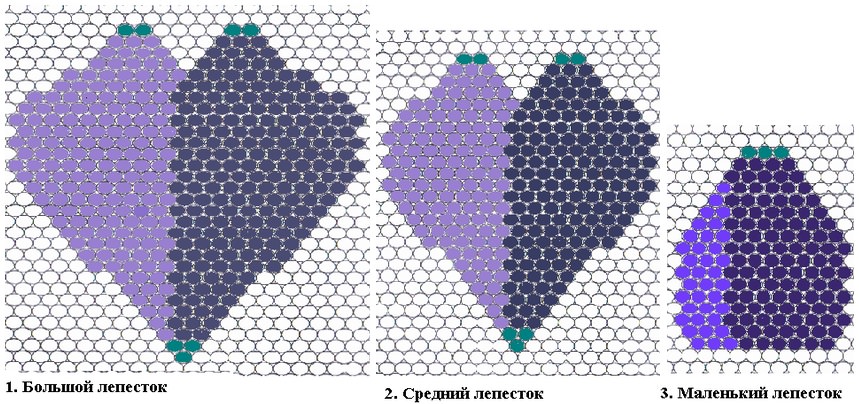
If you want to make a rose presented onPhoto, then you will need the following number of petals: one small, three petals a little more, five medium and seven largest petals. The first petal of the rose is vertically twisted into a tube, the remaining petals are assembled in order around it.
For weaving a pink bud you can takeThe diagram below. It shows in detail the step-by-step execution of the petals. The petals shown on other schemes are woven in the same way. Often on one branch a rose and an unopened bud are found. Do not forget to shape your sepals with sepals, like a full-fledged rose.

You can decorate a stem for a rose in many ways.
Examples of weaving by mosaic technique 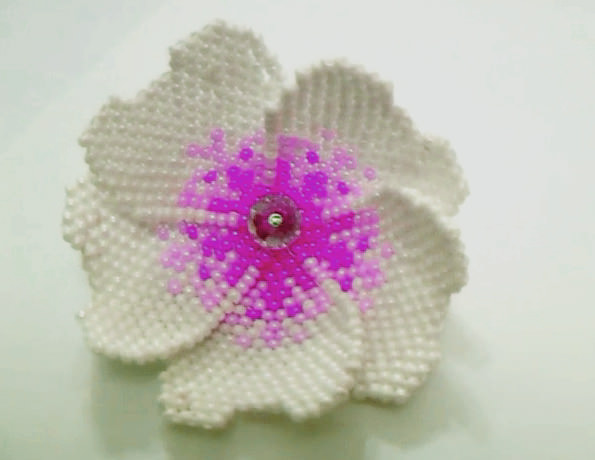
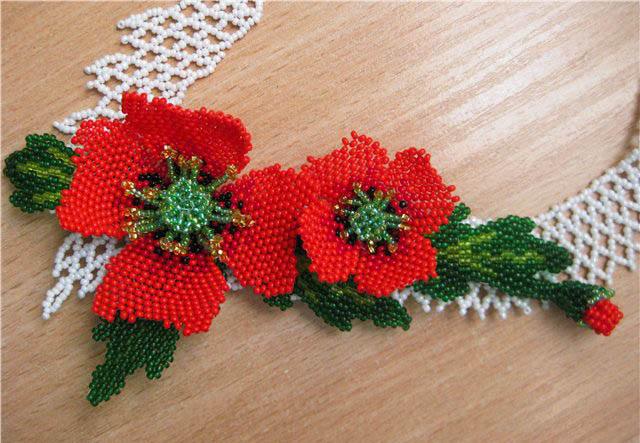

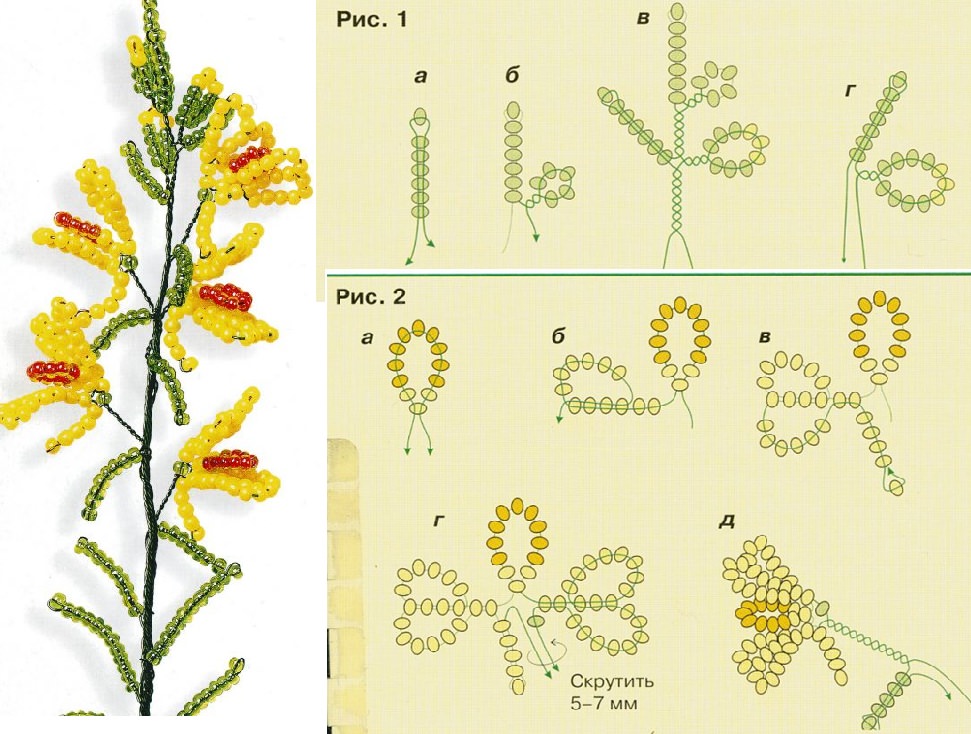
In mosaic technique, not only roses are performed, butStill a lot of flowers and trees. And the same kind of flower, made in different techniques and color shades is good in its own way. Very original look in the technique of mosaic maki, dahlias, asters, gladiolus, apple blossom and sakura. Flowers because of dense weaving and carefully thought out color solutions look extremely natural.
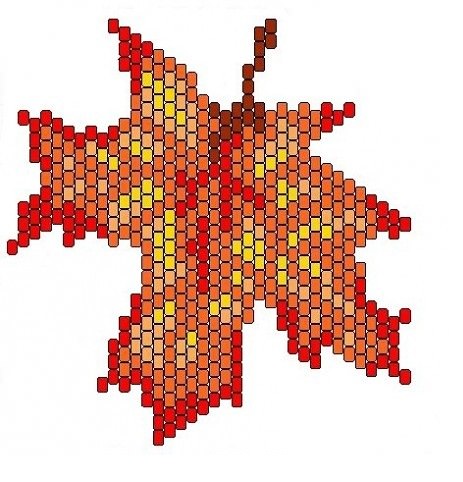
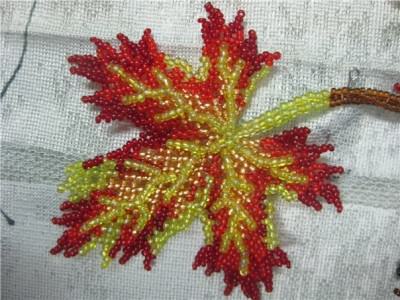
Not only flowers, but also green leaves of treesExecuted in this technique look plausible and colorful. If you are bored and have a lot of free time, make a maple leaf from the beads, which will please you with its colors even in the most gloomy and inclement weather. And the fact that you made it with your own hands, will warm and reassure in bad weather.
Thus, flowers, trees and branches with beading will appear in your collection.
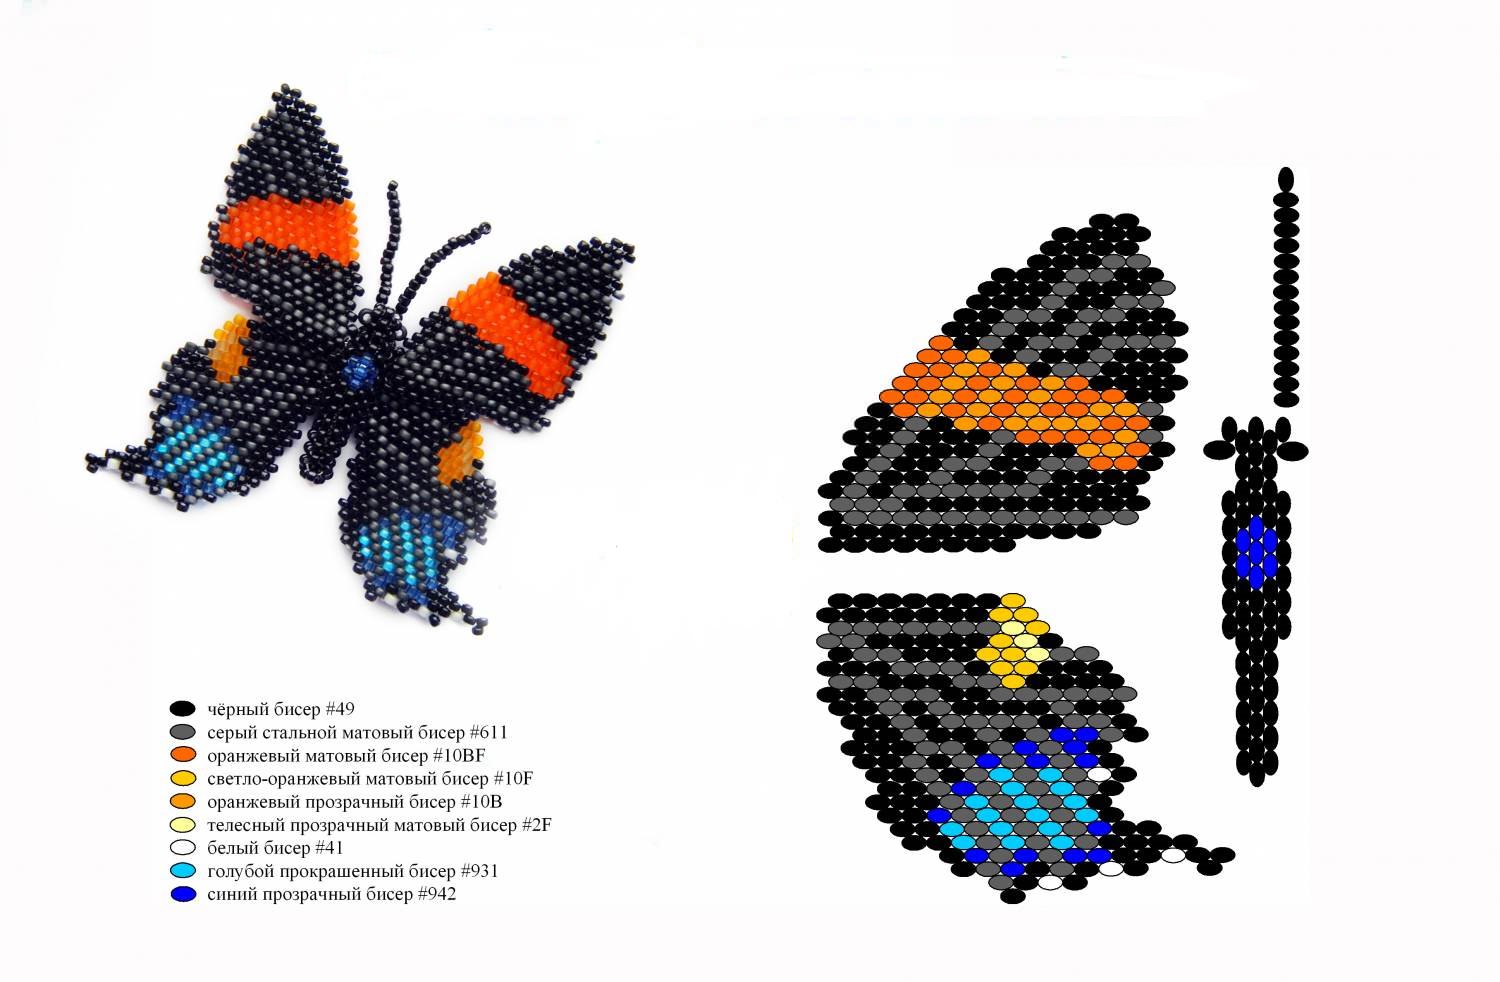
You can also weave from beads the most charming butterfly or bright beetle.

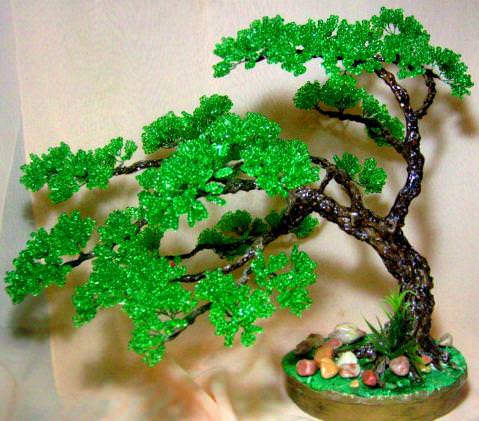
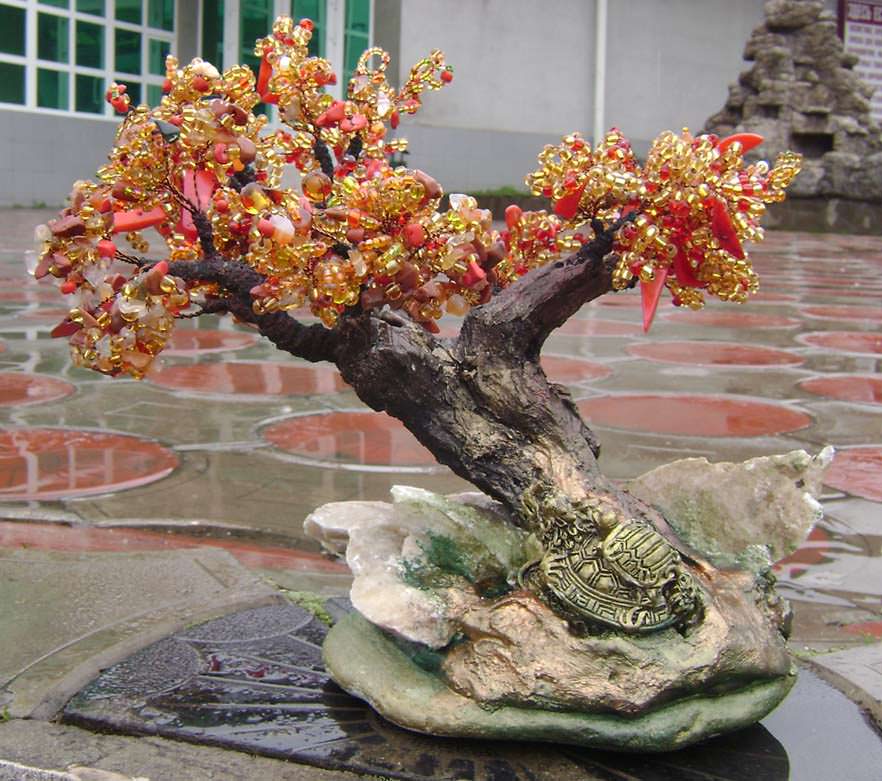
Beading of trees and ornaments
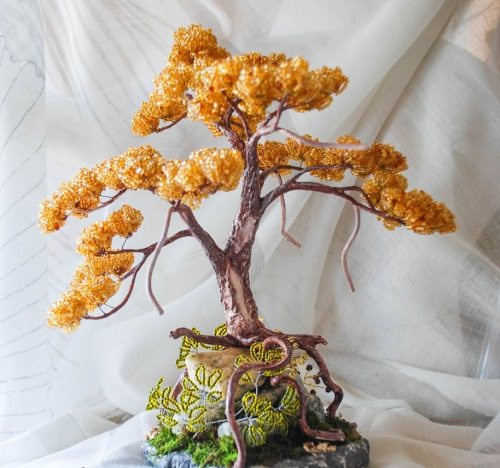
Another direction of beading becameArt of bonsai. Small trees in pots will be appropriate on any desk, and care does not require any. A tree in a pot can be presented or weave for sale, now the handmade is very much appreciated.
Make jewelry yourselfPossible with beading. Moreover, ornaments can be made in any color and under any style of attire. Very beautiful look a necklace of flowers and curly earrings executed in mosaic technique or combined from small elements into three-dimensional compositions.

At our site you will find a lot of lessons and master classes on different types and techniques of beading. On their basis you can create something new and unique.
Using video training, you can in dynamicsTo consider this or that technique of weaving. But this does not mean that you do not need photo-instructions, they will also help you to study a new kind of needlework for you, but on the other hand. If in the video you do not consider all the steps of the weaving, then in the photo make it much easier. In this video lesson is accompanied by offscreen comments and more detailed explanations of technical subtleties.
In our time people are spoiled by different techniquesAnd decor styles in the interior, but only beadwork makes it possible to create almost any imagination in a voluminous performance, which helps to fill the boring interior with picturesque and unique details.
Video: Plait flower for brooch according to scheme


