Gifts for your loved ones with your own hands
My early childhood was still in Soviet timestimes when in shops especially do not clear up with a choice of gifts. I remember that my sister and I got carried away with papier-mache handicrafts, and there were a lot of newspapers and magazines like "Murzilka" at home. For those who do not know: papier-mâché this French word papier mâché translates as a jelly paper. Invented this art as early as the beginning of the 16th century in France. The first items from papier-mache were dolls. Production scale production of dolls reached only a century and a half later. Peter the Great brought Peter the papier-mache to Russia, like many other European trends, and industrial production (mainly lacquer boxes and snuffboxes) began in the 19th century, and continues, by the way, until now (in many stores you can find souvenirs from papier mache). 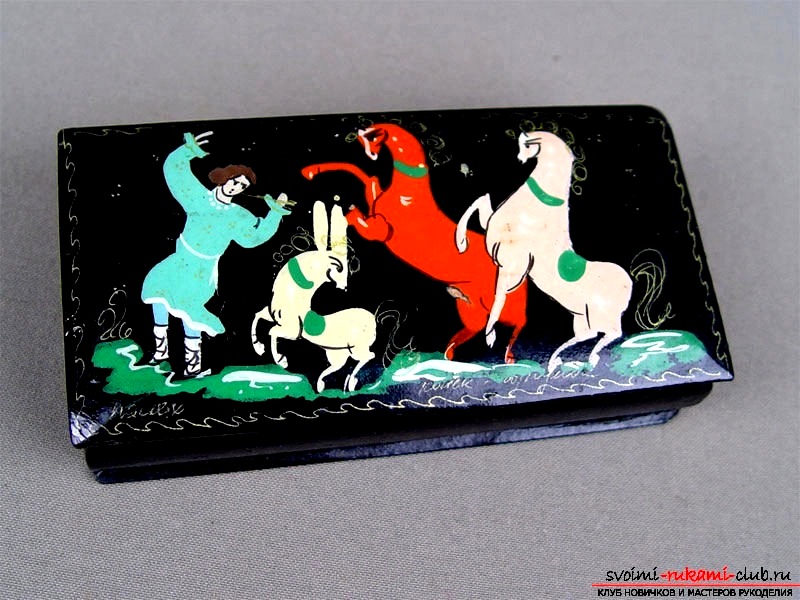 For one New Year's holiday we even madeseveral toys by yourself. In general, any small child can be attracted to such entertainment, many children like to fiddle with paper, and when it can be kneaded as a dough and then painted - no baby will stand. Such an exercise develops fine motor skills, it makes you connect fantasy. And how much pride will be, when the master masterpiece is hoisted to the most honorable place. Believe me, this is the best alternative to TV and gadgets. Do not be afraid, everything will be easily washed and cleaned after your work. When I have children, I will certainly introduce them to this fascinating procedure. So, let's try to make from a papier-mache the most usual casket and perhaps, in the simplest way. We will need:
- dense sheets of cardboard - the basis for the inner walls and lid;
- newspapers or other unnecessary paper;
- a small jar of PVA glue or starch;
- two small overhead loops (sold in stores "with your hands" or the like) or scotch tape;
- colored paints.
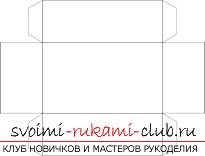
 Let's get to workthe table that you have. Be sure to cover it with a newspaper or an oilcloth, which is not a pity to spoil. Also for work you will need dry rags to wipe your hands, get rid of sticky mass. The base of the box As shown in the diagram, cut out a piece of cardboard (if the cardboard sheets are small, you can glue them togetherseveral). You will get a box without a cover. For the lid, cut out the cardboard rectangle of the same size as the bottom of the box. Prepare the mixture and give the volume to the box. If you use starch, prepare the paste. Tear the paper into small pieces and mix with glue (approximate proportions 2: 1, respectively). There should be a mass resembling clay or easily dough. We enclose the outside with an adhesive substance our base (except the bottom) so as to create a convexity of the walls (how much the box will be figured, you decide). When the product dries, you can attach the lid. If your violent fantasy does not give you rest, you can cover up the lid to perfection (like real caskets), stick with the same mass. Attaching the lid I attached the lid for my first and only casket with the usual white gum for clothes (I also tied my mittens to the coat so that they would not get lost). I glued pieces of gum from the inside from both sides: all ingenious is simple! Some made small holes in the lid and in the base and tied with threads. You can leave the lid free, making it with the sides. Now we can buy special mini-loop for hand-made articles. Screw the hinges to the lid and the base. Something is missing? Painting a product How to paint a box with its own hands? Yes, as your heart desires! Inspiration can be gleaned from the Internet, from your own head, from the outside world.
Comments
Related posts:
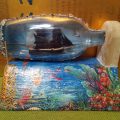 Creative gifts - a ship in a bottle Black pearl at the 2015 contest, creative gifts with your own hands
 Gifts for mom with their own hands, how to make a gift on March 8 with their own hands, advice and recommendations for making crafts with children.
 Crafts with children by May 9. Gifts for themselves on the day of victory.
 Gifts for March 8 with their own hands. Children's hand-made articles for women's day.
 What a gift you can make to dad. Gifts for February, 23rd own hands.