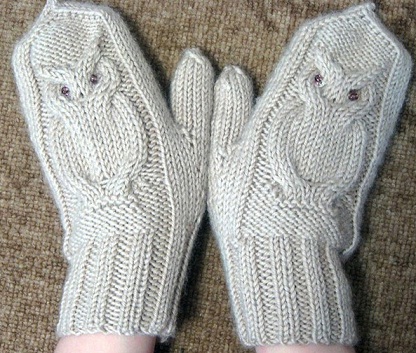
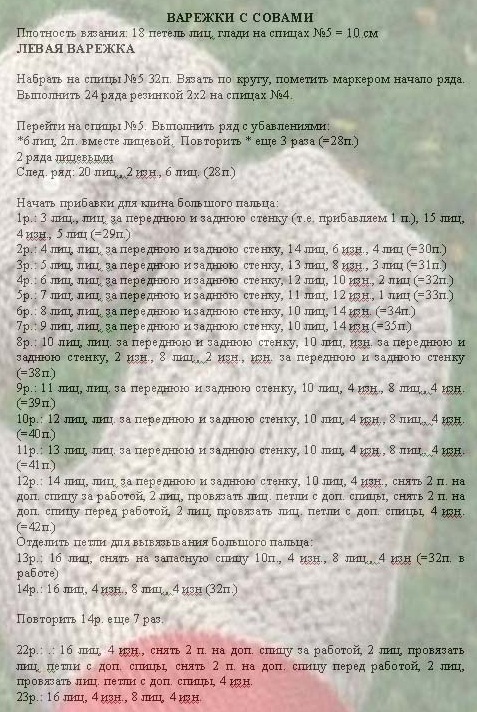
Mittens needles: knitting on the basis of the master-class (photo)
Content
- What features has the circular knitting
- Model selection and pattern
- Stages of knitting mittens
- Photo Master mittens knitting classes
- Video: Mitten with beautiful pattern
Knitting mittens - simple and interesting task for handy people. You will be able to deal with it, if you know what are the different kinds of simple loops.
In this master class, we knit mittens usingspokes. For such a task needlewoman often choose circular knitting, known even by our grandmothers. This technique involves the use of four working spokes and five spokes, which is free. Each needlewoman before starting chooses schemes which seem easy to implement them, so that will be able in the shortest possible time to tie a beautiful, warm mittens.
What features has the circular knitting
The first and important task - to understand the characteristics of the art, according to which will be carried out knitting mittens needles. For this useful video tutorial, complete with a detailed description of the handmade process.
It is assumed the foundation for successful work: mitten made vyvyazyvayut in a circle, trying to avoid seams. Tabs must be positioned evenly in the four spokes. At the same time the last, fifth, needle-free hold, as it sometimes will be attracted to change others.
Alleged lack of edge loops. This facial loop (LP) should provyazyvatsya for the upper parts of the lobes created when you create patterns, allowing the thread to work. Row (F) includes only the loops (P), with which the workers knit needles. Desiring to facilitate the task, mentally set number for each spoke.
Videos: Circular Knitting for Beginners
Model selection and pattern
Before you start, decide the visual performance of the accessory and the optimum pattern.
Cuffs traditional knitted pattern gum, but this stage even for beginners needlewomen promises to be simple.
What yarn stocks required to buildbeautiful knitted accessories? The exact amount is determined by the size of the yarn, as well as the selected pattern. For beginners, it is desirable to use the most simple scheme, because mittens to tie spokes with an unusual pattern is not so simple. In most cases, it requires from forty to one hundred and fifty grams of yarn.
Before knitting calculated amount of loops. It is recommended to link the first sample: about 14 P in width and 10 in height P. The sample is then vote, as this will help you understand how dense can be mitten. Wishing to facilitate further work, knit pattern for gum produced by the accessory, as cuff depends largely on how tightly to sit mitten on the hand. In addition, it is recommended to link the sample to the main picture, because it will help you understand how adequately and properly handmade work begins masters will be performed.
Take measurements of the wrist and the palm of the parameters. All figures should be recorded as such an approach would successfully follow the scheme of the creative process. Focusing on performance, it is important to gain the optimal number of loops, which will be a multiple of four. Mitten traditionally knit cuffs scheme alone, or two by two.
Video: Simple mittens needles
Stages of knitting mittens
First step
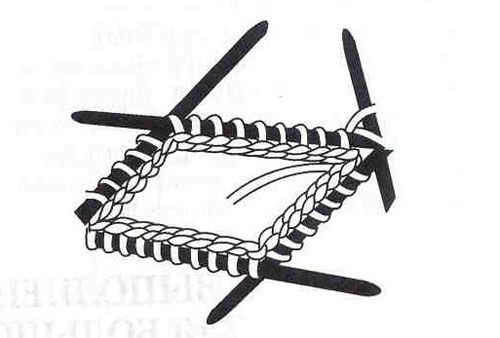
- f. recruit the first two spokes. Subsequently, they will be divided into four parts, which must be the same. Provyazyvaya n-tuple, you need to create a vicious circle;
- how close the circle? For this strand ends different glomeruli are connected with each other. This scheme creates a square, which is the basis for the mittens;

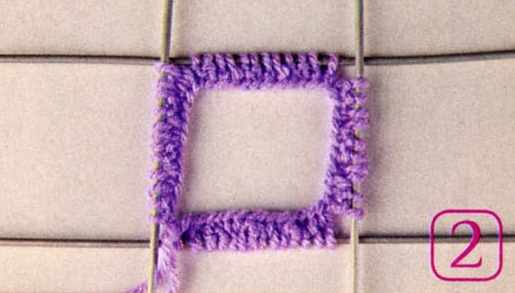
- . N are removed from the free spokes;
- knitting is performed without change of direction. Regularly the spokes have to replace each other;
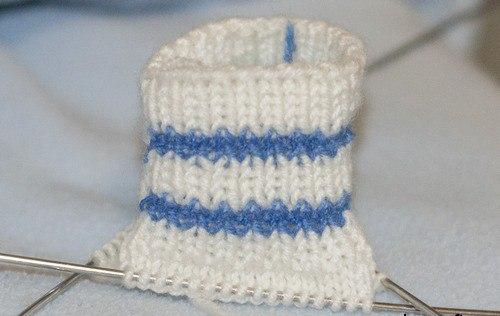
- the main objective of the first stage - the creation of the cuff mittens (about 7 centimeters);
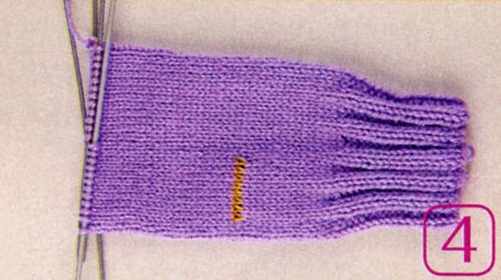
- It is now allowed to do the main part. Instructions will link the warm mittens with a suitable design, but for beginners it is desirable to choose the easiest option and gradually hone the skills of needlework;

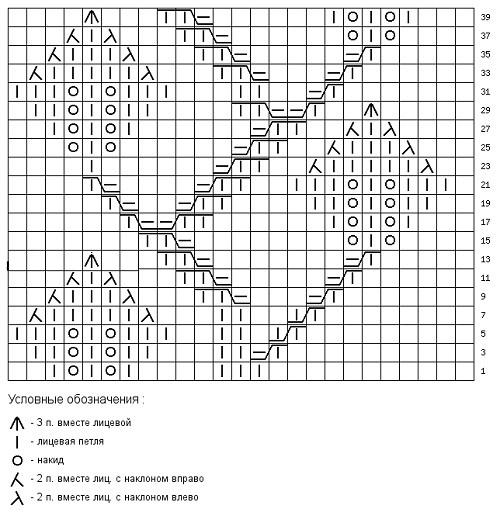
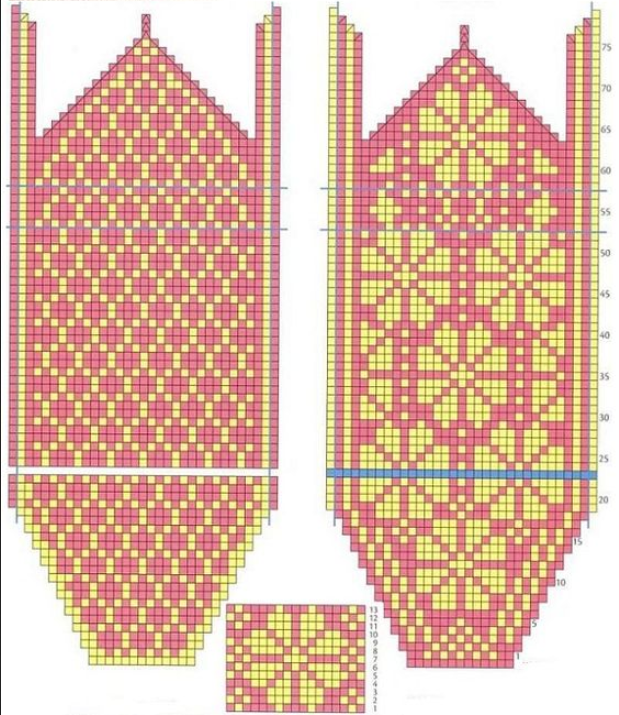
- distance that stretches between the cuffand the thumb will represent a pattern. Taking into account the difference in knitting techniques, it is possible to understand what the possible nuances better taken into account. If the pattern is obtained narrow, add each spoke on P;
- after mitten will dovyazana created by the line, leave the hole and go to the second stage of the handmade process.
The second stage opening for the thumb alwaysThey deserve special attention. Description of the task involves two options for creating stylish holes. In the first case needlewoman hole left open in the second case - closed:
as it is possible to leave open the hole? Provyazyvayut first P, which will be a place for fingers. The remaining P must be removed. It is assumed the use of a pin in the English style. Then, on the right needle type air P, and their number should match the number on the P pin. After work, you can knit the last P-ku. After watching the video, we can see that the beautiful open mittens manages to create with surprising ease;- how to create a closed model? In this case, the first n provyazyvayut thread used by the glomerulus. Then all P communicate face to the other thread. Ideal - is the thread, characterized by the colors. They were then put on a third needle and provyazyvayut main thread. According to this scheme, you can create whole cloth, characterized by the presence of colored shtrishki in keeping with the pattern mittens.
Then knit mitten basic pattern.
Stage three 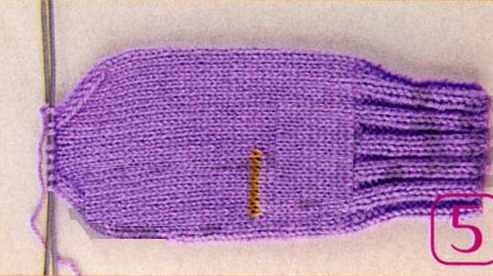
The next step - the creation of the toe mittens. Needlewoman go on a round or tapered. To this end handmade process reduces the amount of P:
- rounded shape. Otherwise, the pattern will be broken and beautiful accessory for the winter will remain a dream. For subtraction P on a rounded shape are as follows: on each work spoke first two P-ki provyazyvayut. At the same time guided by the front, main, side and bottom of the generated slices. Each P-quant in P Bates to the last two remaining on each R F (the total number of P - 8).
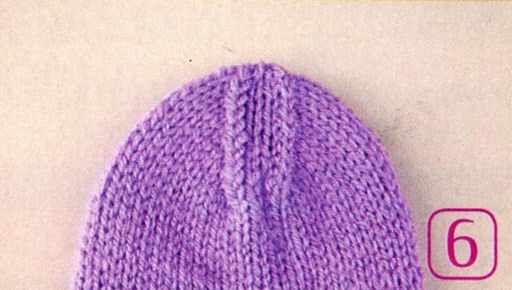
How can I get at the pointed end of mittens? The first two P with each spoke provyazyvat need to face together. When this is executed following scheme: 1.3 spokes assumed tilt hinges to the left side, at 2 and 4 - to the right.
The fourth stage Description create beautiful wintermittens knitting is not possible without the thumb. To do this, use only three spokes, dividing the number of all n only 3. Look video tutorial, you can see that frightened the final stage should not be. Everything will pass away:


- what to do if the loops were removed onpin? Now P must be removed at the needle. In addition, for the top eyelets P need to dial the new. It is recommended to add two side PA must act in a circle, reaching the nail. Only then P is gradually reduced. The remaining 6 P collected on a thread. Wrong anticipated consolidation;
- the second method involves pulling a colorthread. Open P gather at the spokes. Depending on how wide or narrow aperture turned thumb otporot can add or P.
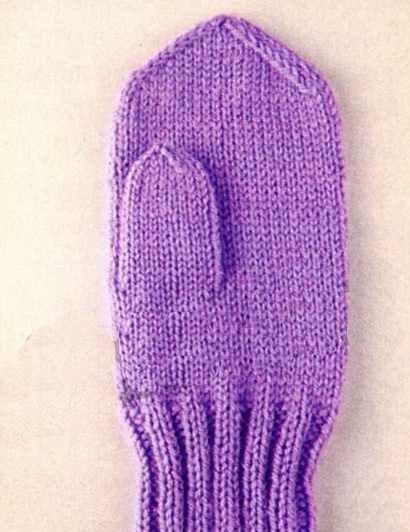
Assign stylish and warm, comfortable mitten needles can be five-spoke, because this version is classic and video proves the ease of the task.
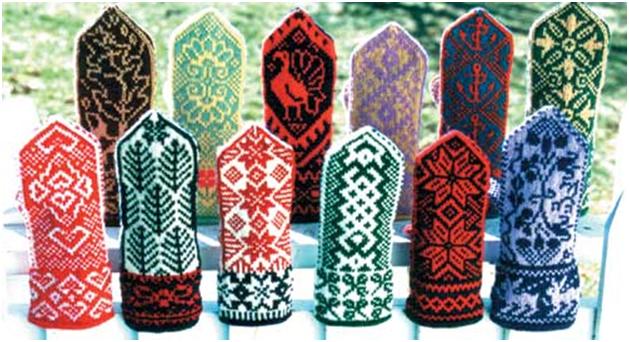
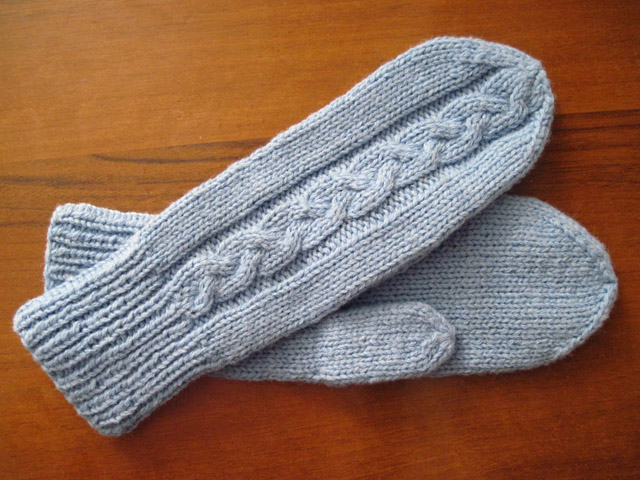
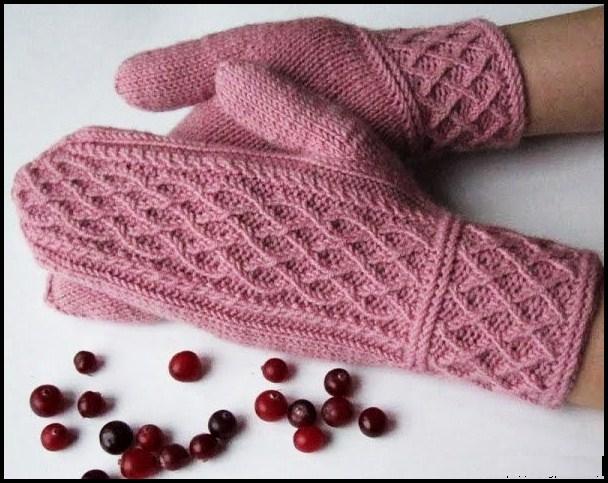
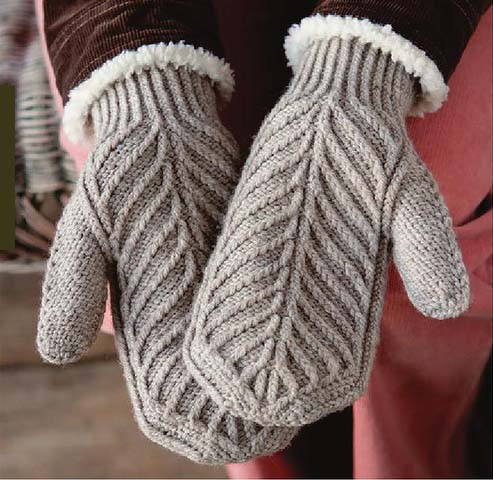
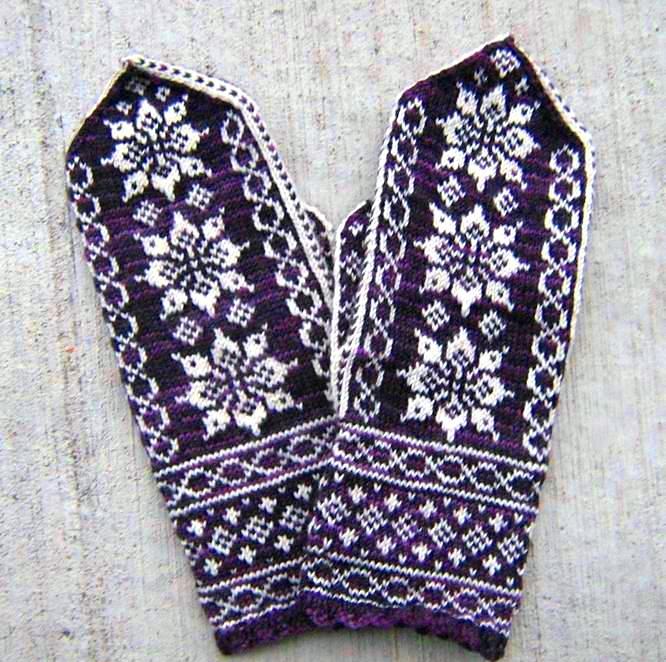
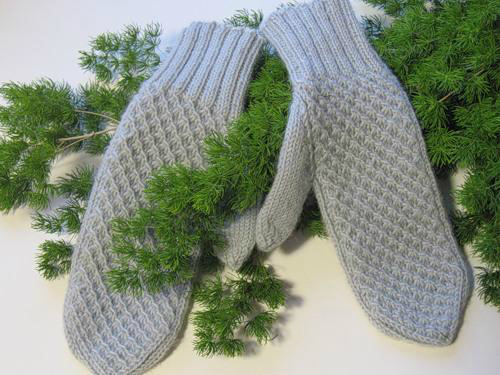
Photo Master mittens knitting classes


Video: Mitten with beautiful pattern
Comments
Related posts:
 Mitenki knitting needles on the basis of the master class (photo and diagram)
 Knit socks with knitting needles based on photos and master-classes
 Male scarf with knitting needles: knitting by master class (photo and video)
 Knitting slippers with knitting needles with description: master class (photo)
 Knitting needles socks slippers for photos and videos master class