Heather Bead own hands for beginners (photo and video)
Content
- Necessary materials
- Options weaving sprigs of heather Bead
- The design and decor of the composition
- Video: Lesson on beading heather
Today's workshop we decided to dedicateto the finest evergreen shrub with delicate flowers, put the name of the first autumn months in Slavic languages - the heather. So, our lesson will help you not only more love beading, but also to develop new techniques to make the heather of beads by hand.
This plant is by its nature a very hardy andunassuming, and at first sight impresses with its charm and unique aroma. And let us not under force to convey the smell, but to realize, with the help of weaving tenderness and beauty, thus getting rid of the remnants of beads, we have a very able.
Using our master class, you can create a luxurious composition of heather, and photos and videos from the design ideas will be for you a great addition and help in this process.
heather Beading is particularly simple. The only thing that can be a little tiring, monotonous repetition of the same is carried out by numerous elements.

Necessary materials
To begin, prepare all the materials that we need to work:
- copper wire thickness of 0.3 mm -0.4 mm, preferably brown or green in color, that Bush was more natural;
- wire cutters;
- cotton fabric for the job, so the beads are not confused;
- any beads, colors preferred by you, the main thing- They must be in harmony with each other, creating a natural picture. The more colors used in the work, the richer and more refined to obtain a composition;
- line;
- a sponge;
- Materials for decoration composition: a basket, pot, decorative sand or pebbles;
- plaster, stucco or plaster finish to secure the bush;
- PVA glue.
Options weaving sprigs of heather Bead
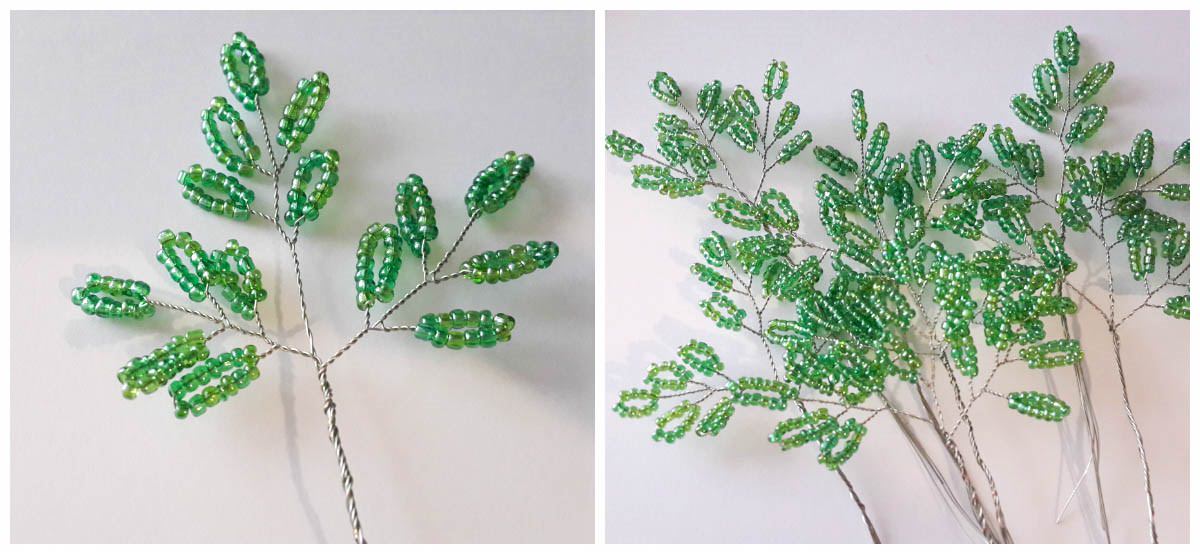
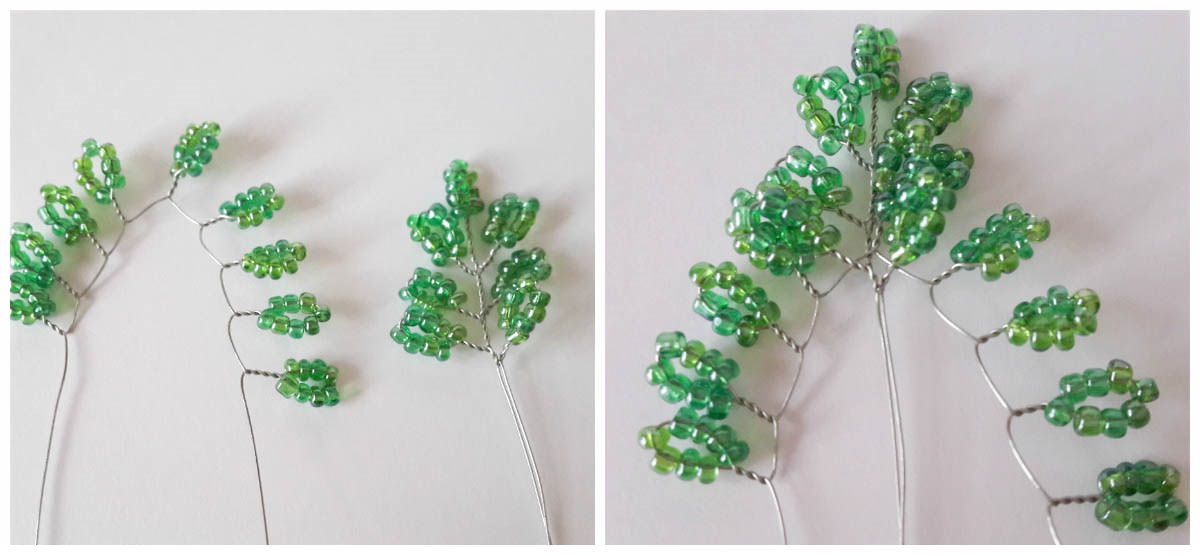
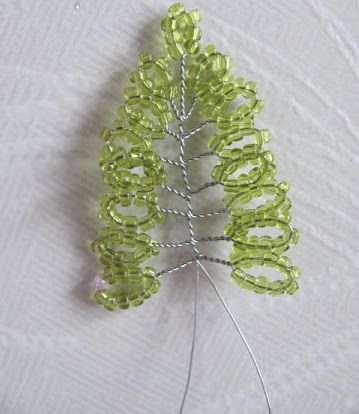
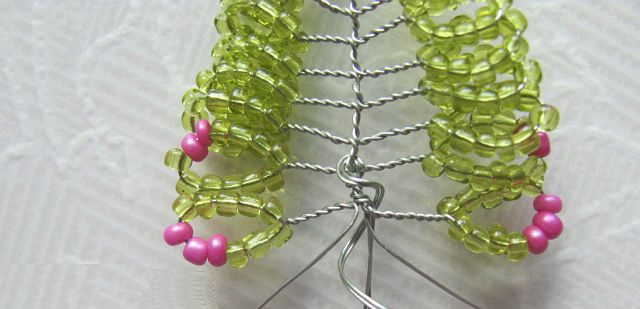
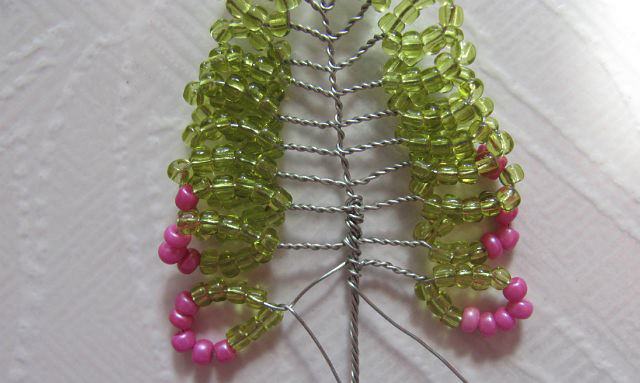
Heather bead is unique in that its shapeleaves and flowers are absolutely identical. That is why the use of any unnecessary circuits in operation. Our entire workshop will be based on the looping technique. At the same time we would like to show a few ways possible implementation of candles, so that you can choose the more convenient. We will start our beadwork with sprigs of greenery.
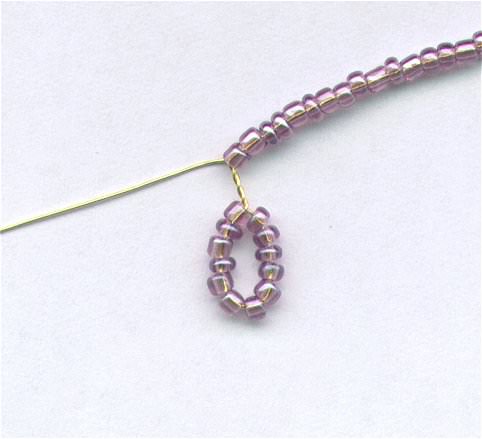
Sprigs of green beads are poured out on a clothgreen, we take our wire and recruited her for a few beads. Depending on what size you some beads and twigs to form the leaves you want to get, will depend on the number dialed beads. Most often gain from 5 to 15 pieces (the smaller the number, the leaf rounder).
We will be doing loops 13 beads each. The distance between the loops will leave about 1 cm, placing the elements so that the workpiece instead of the 5-6 loop. After completing the last loop, back down to 10 cm of free wires and cut off the low. Schematically, it looks like this:
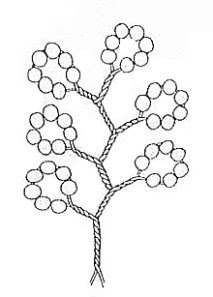
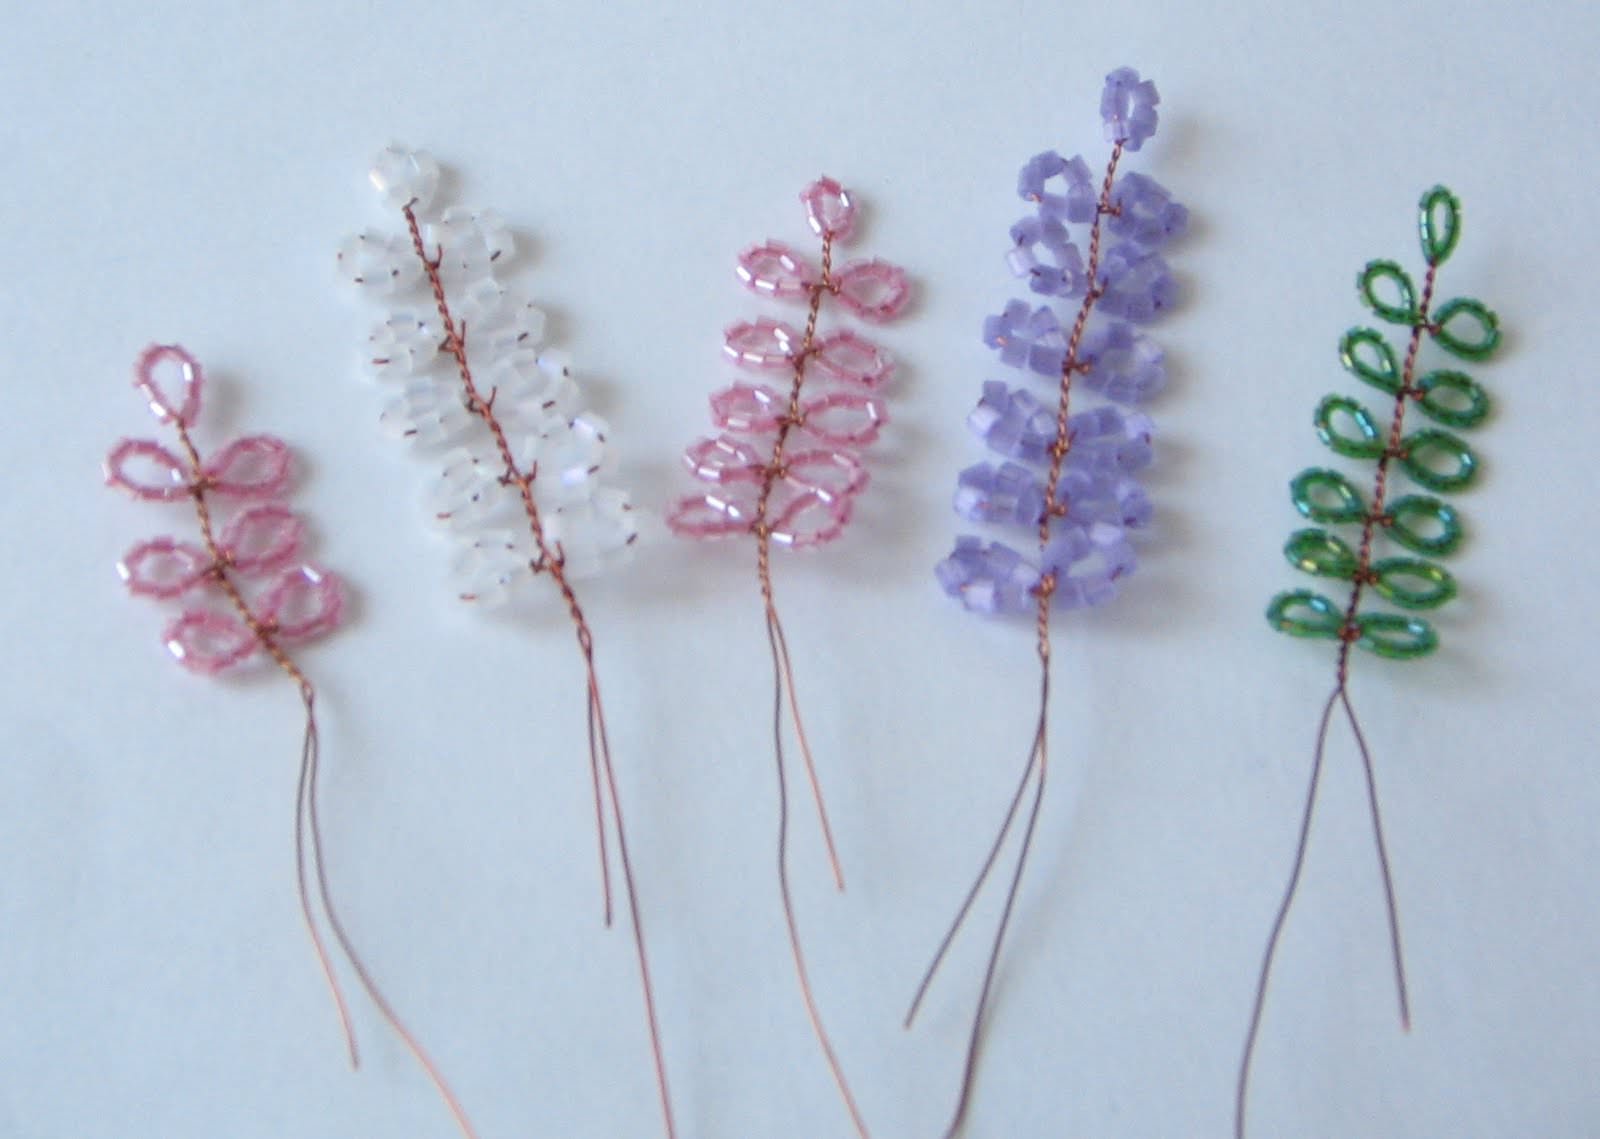
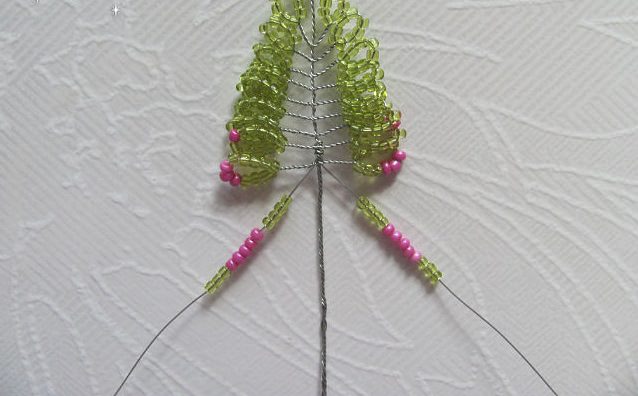
Next, the resulting billet is twisted, since the tabs located at the center, in a twig. To get a sprig of greenery, we must do two blanks.
When all of the desired 3 will be ready, wecombine them into a twig, making one central and two positioning on the sides. The number of branches you can be different. For our composition we made 8 pieces.
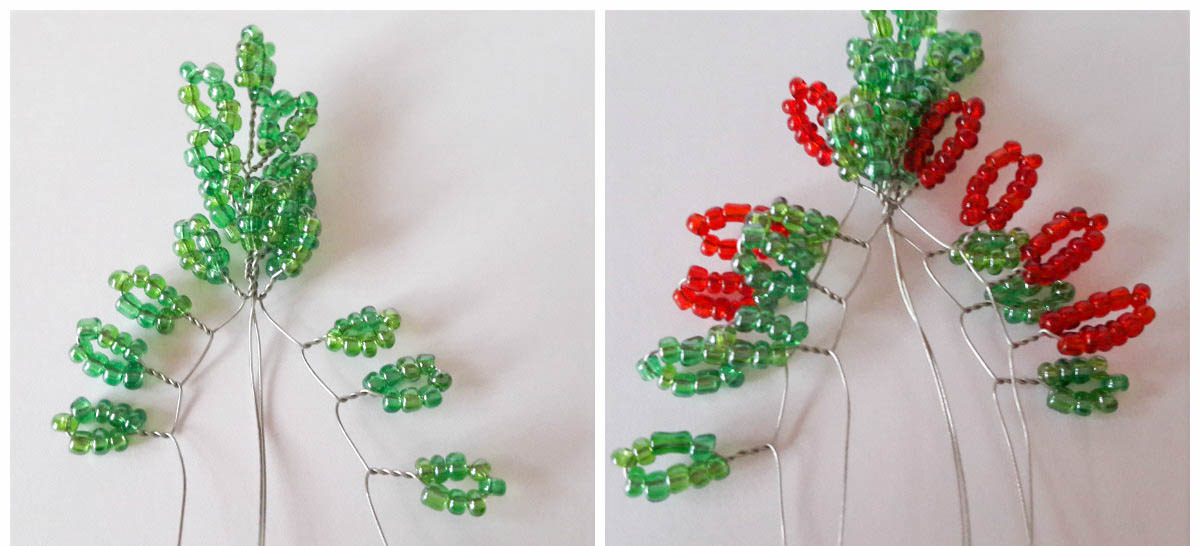
Sprigs candle-The basis of their performance is still the same buttonhole technique that allows to vary the degree of complexity of the work and the way of doing weaving.
Method number 1
This is the most primitive and easy way to quickly make a candle. For him,
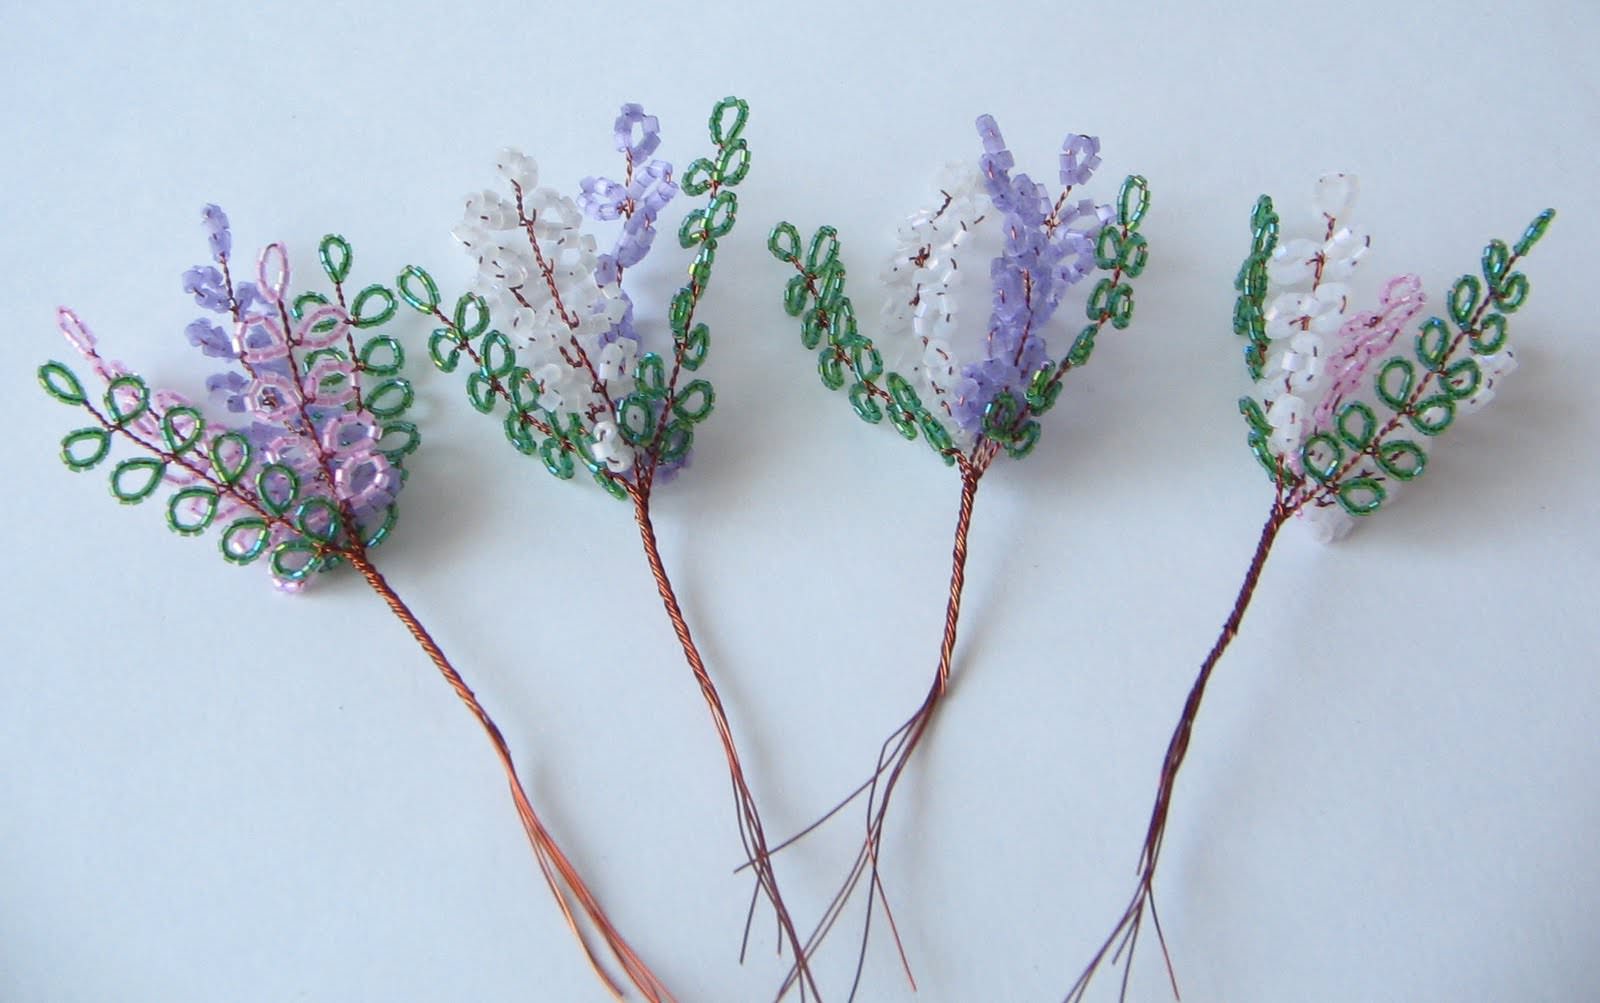
certain colors, such as pink and weavetwig thereof already known to us the method of making fastener tabs 19 and 13 with one central and the rest is placed in parallel to each other in pairs. Next, perform the same actions with a white and purple. Then green beads do 2 sprigs. Now connect, twisting all the pieces together so that we get a pink, purple and white branch located between two green. That's it, the candle is ready.

Method number 2
It assumes a phased implementation of a candle, consisting of a crown, middle and bottom. The crown consists of 7 tabs green beads twisted in a twig, the number of beads in the 1 st 5-6 pieces.

The middle part is somewhat different from the topmore long loops (use beads 9-10) and the number (for the middle part make 10 loops). In addition, it is necessary to do 2 blanks, stringing beads by color randomly. For example, one blank may be completely green, and the second with the addition of red or white beads.
The lower part 6 comprises only 10-11 beads loops each composed of blanks 2-3.
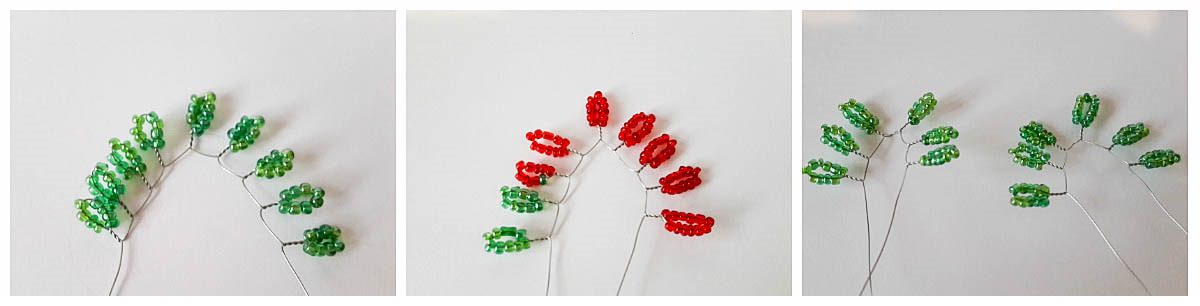
A very important point: the middle and lower part of the loop is not twisted in the twig.
inflorescences assembly starting with the fact that the lasta series of twisted loops put on top of the middle part of the workpiece, gently lifting loops upward curl elements together. When one layer is formed, we add our second preform made in a different color, and continue twisting. The last element added to the bottom of.
Using arbitrary combinations of colors and shades in the middle part maximally natural effect can be achieved.
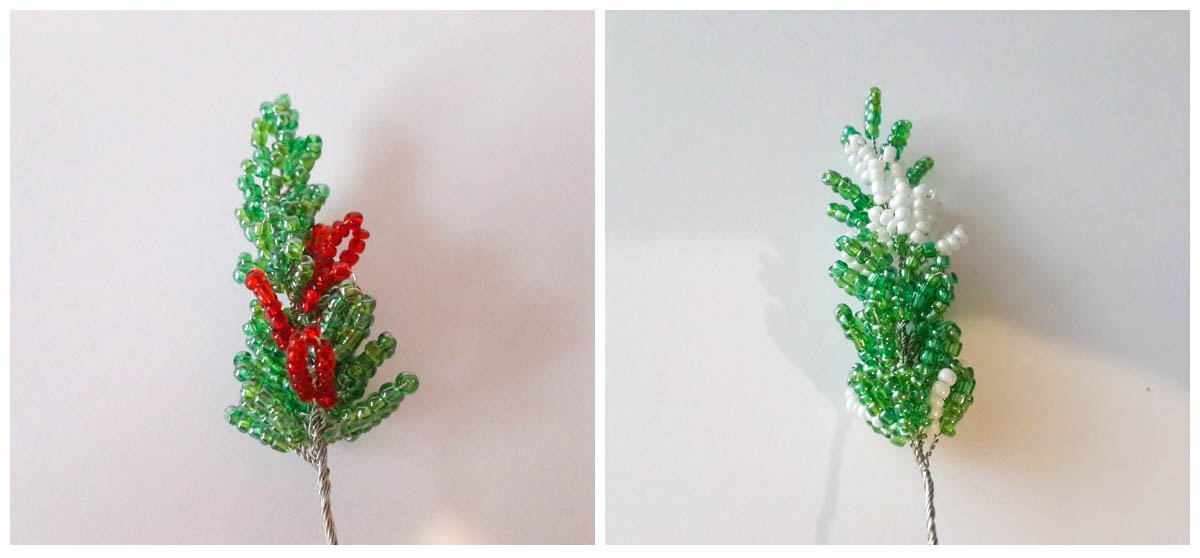
Method number 3
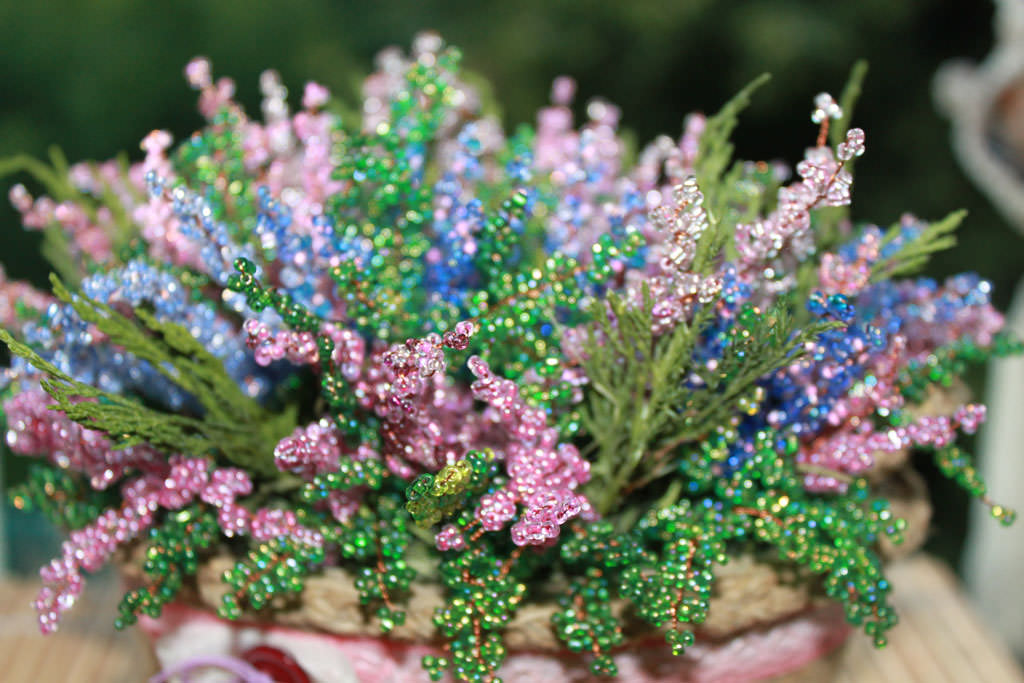
This method is in our opinion is the bestand allow you to accurately convey the subtle transitions of natural colors, due to perform a kind of technology. Due to this heather bead gives a very natural, almost alive.
Essentially technique does not change. As in the previous methods, the foundation of the entire loop. The difference is that in this method all performed on one twig by gradually adding the desired colors.
So, we weave the traditional leaves loops,from green beads. Gradually, during operation, increasing the amount of beads one loop. After our 7 twig formed pair of leaves is green, we start to introduce pink beads. Our loop will now have the following form: 4 green beads, pink 3, 4, and again green. Each subsequent row will be increased by the addition of 1-2 pieces of pink beads, making a smooth transition of colors from green to pink. The last few rows of loops (for us it's 5 pieces) are carried out in pink, which can be diluted with a few beads close shades.
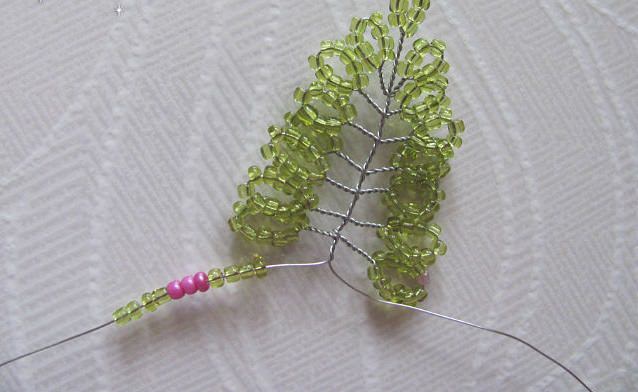
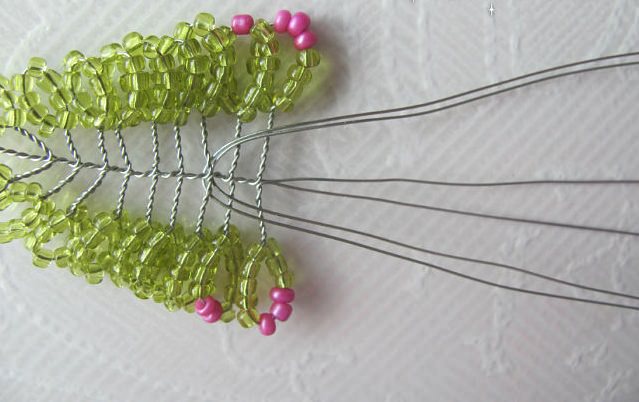

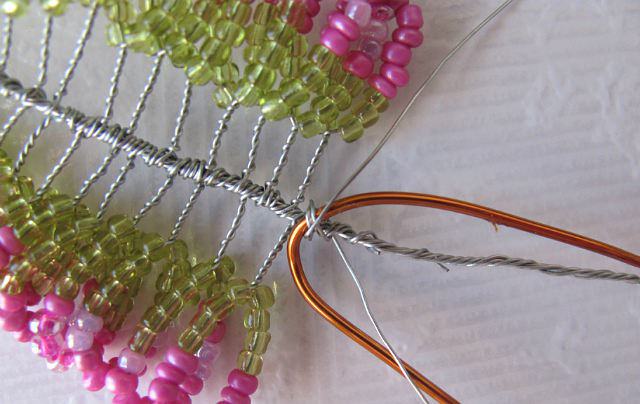
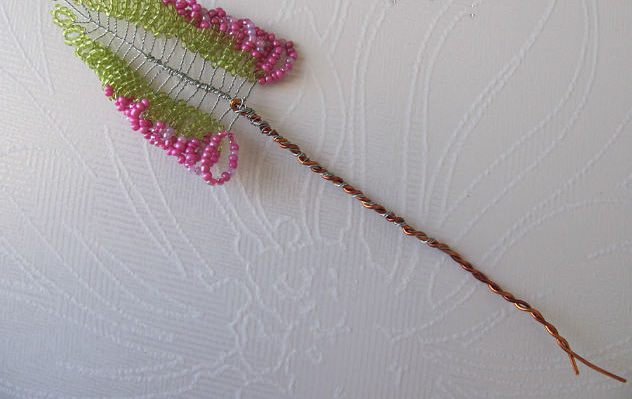
When our branch so ready, fasten withpliers and place coiling tightly twist the free end of the copper wire of our branches with the central stem for which undertook a thicker wire.
Now, when a branch is well secured and will not beand scroll to sag under heavy inflorescence, we are launching our petals around a central stem, thereby forming a three-dimensional shape candle.
When you are ready to continue our weaving.
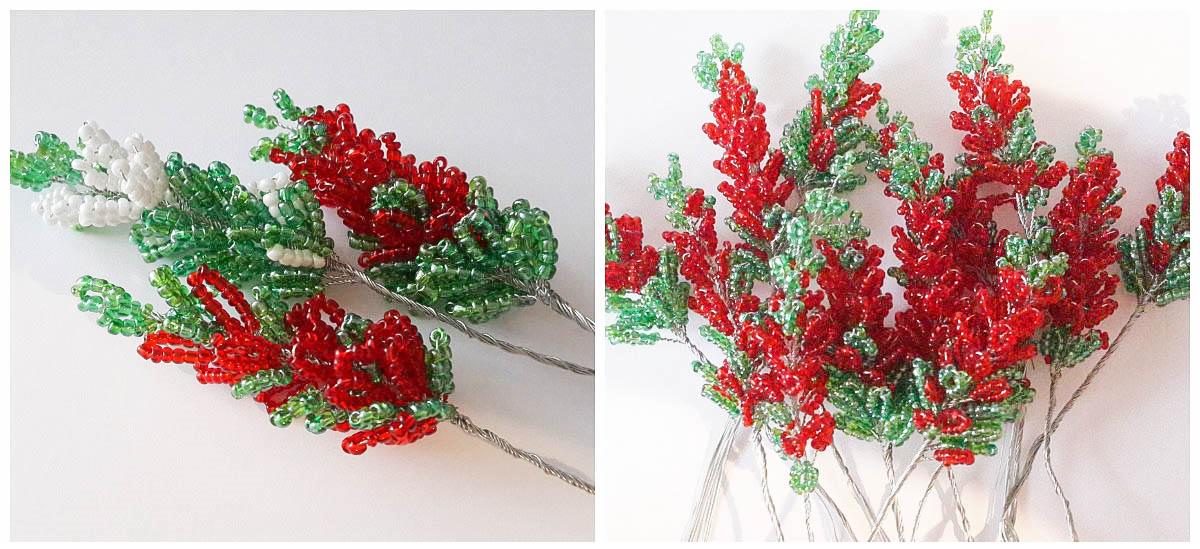
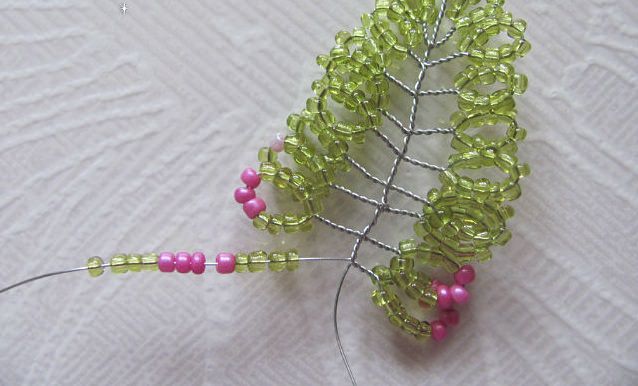
Cut off another 60 cm thin wire usedus to work on, having got it for any of the extreme lower lobes, one end of the wire wrapped around the stem, and the other tabs do next. When the twisted loop is ready, once we do the girth of the stem for better fixation. Further, we do so to the required length. When the inflorescence reaches 7-8 cm in length, again gradually start introducing green, before the gradual full displacement pink.

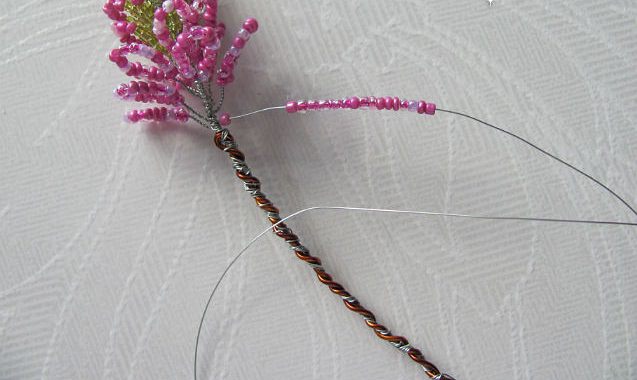
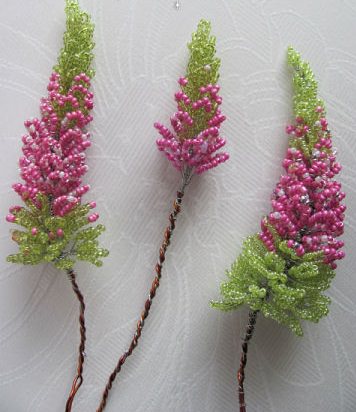
In the color ratio, we get thatgreen crown with rare pink color has to 4.5cm main color of the rest of the 2.5 m -.. It is a green mass of inflorescences. The total length of our largest inflorescence was 10.5 cm.
Candles may be larger or smaller, longer or shorter. It all depends on your individual vision and desire.
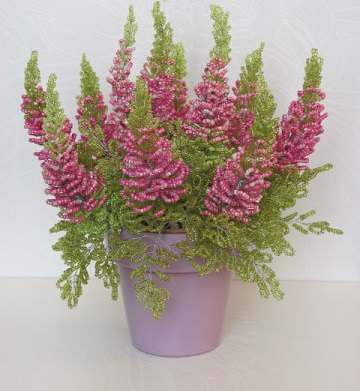
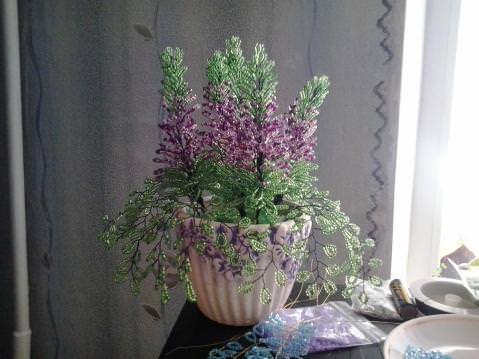
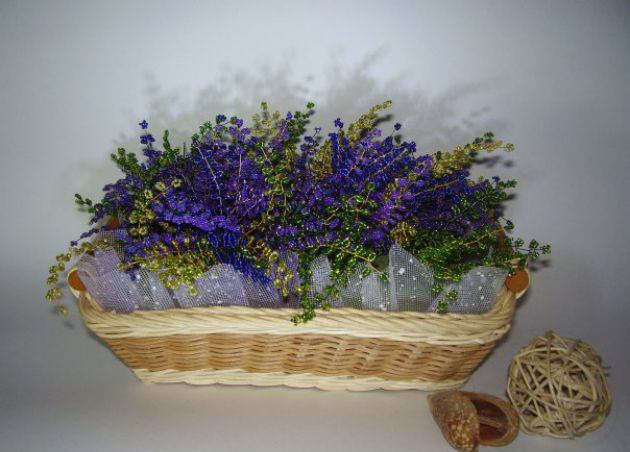
The design and decor of the composition
Our heather Bead ready and now we shouldgive him a worthy setting. For this purpose we have chosen a decorative clay pot. To consolidate the use putty because it is very convenient to use, if necessary, allows for 20-30 minutes to adjust the position of the bush, and that is very important, it does not crack in the pot.
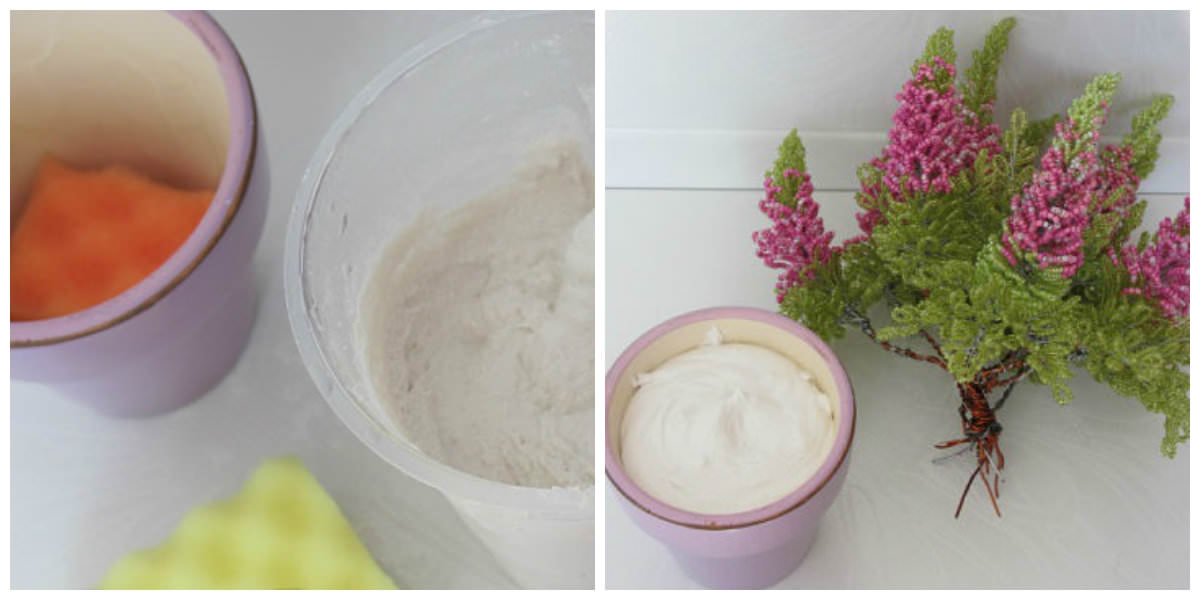
Dilute putty, giving it a mushy state. Now we can go 2 ways:
We will focus on the second option, becausethe color of our lips is very reminiscent of moss, and with the right decor will look very original. If you have a sponge bright acid-lemon color, it is better to put on the bottom.
So, we prune our sponge the diameter of the topof the pot, gently place the stems of heather in our sponge on a pre-planned long and then all very smoothly and gently immerse in spilled on the bottom of the pot filler. Adjust the position of the composition to the desired time and give a solution to freeze.
If you put a sponge on the bottom, then pour the solution directly on top of the stems and putting it into the solution until it stops. They are, one way or another, pierced lip, unless you have made them very short.
Next, decorate the surface of decorative sand and soil in several stones.
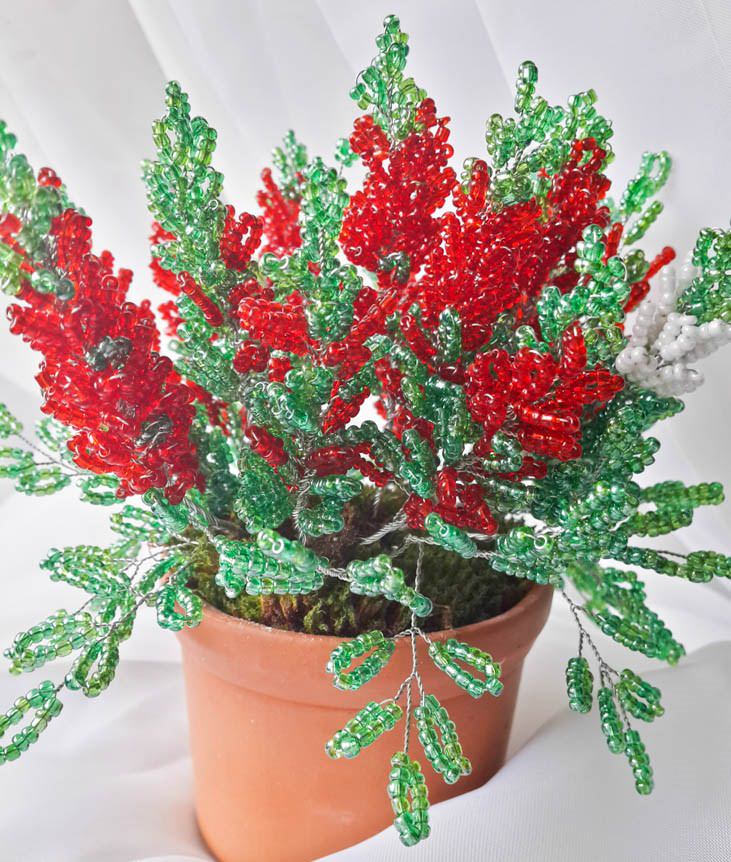
As you can see for yourself, to make the heather ofBeads can be very easily and quickly, because its implementation technique is rather primitive and does not require the use of the scheme, whereas the result exceeds all expectations and looks very impressive.
Create and raduyte themselves and their loved beautiful products.
Video: Lesson on beading heather
Comments
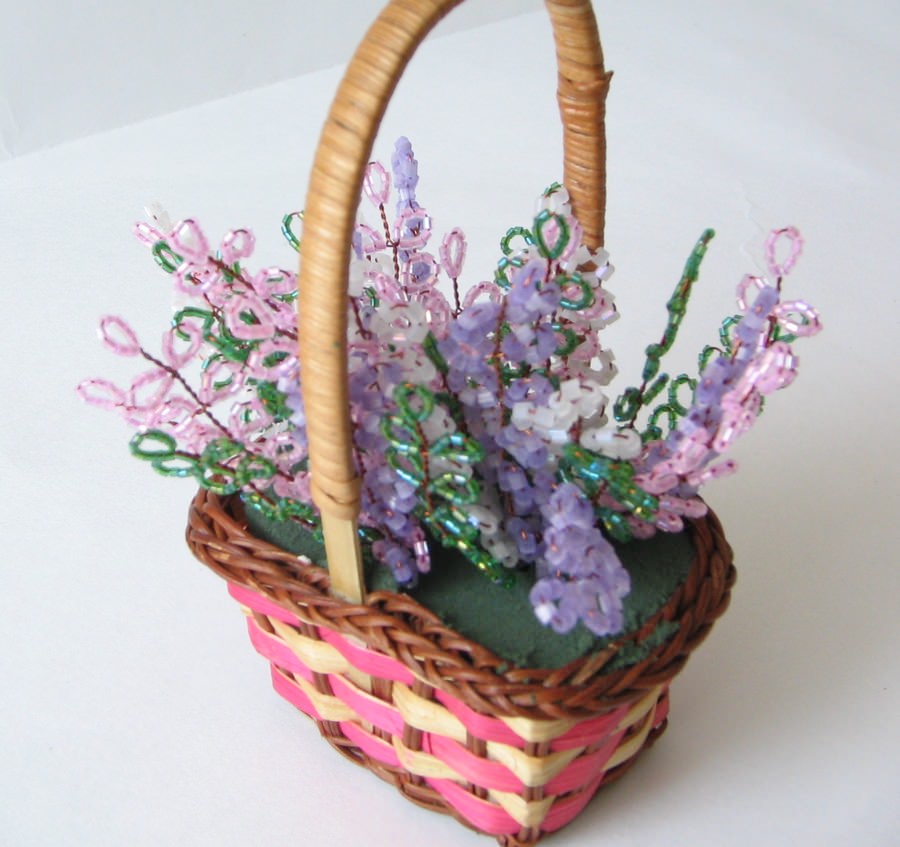
Related posts:
 String of beads with your hands (photo and video)
 Gladiolus Bead: slender flower with his own hands (photo and video)
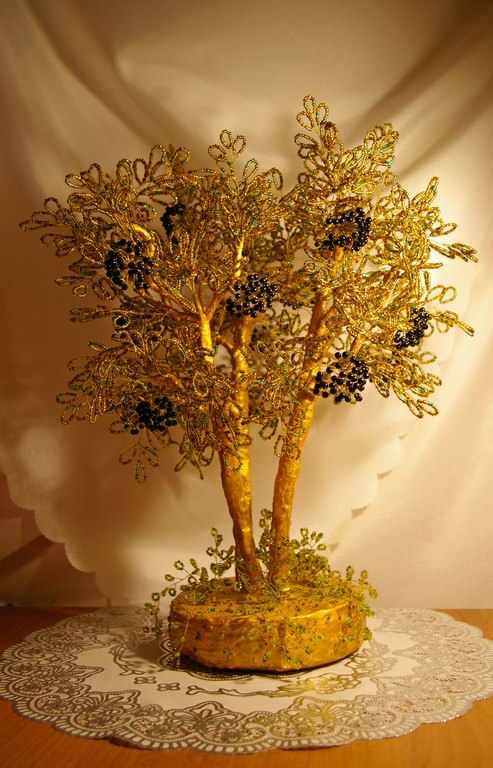 Rowan beads with your hands photos and video tutorial
 Necklace of beads: the lessons of weaving their own hands (photo and video)
 Crocuses beads with your hands in the training lessons (video)